
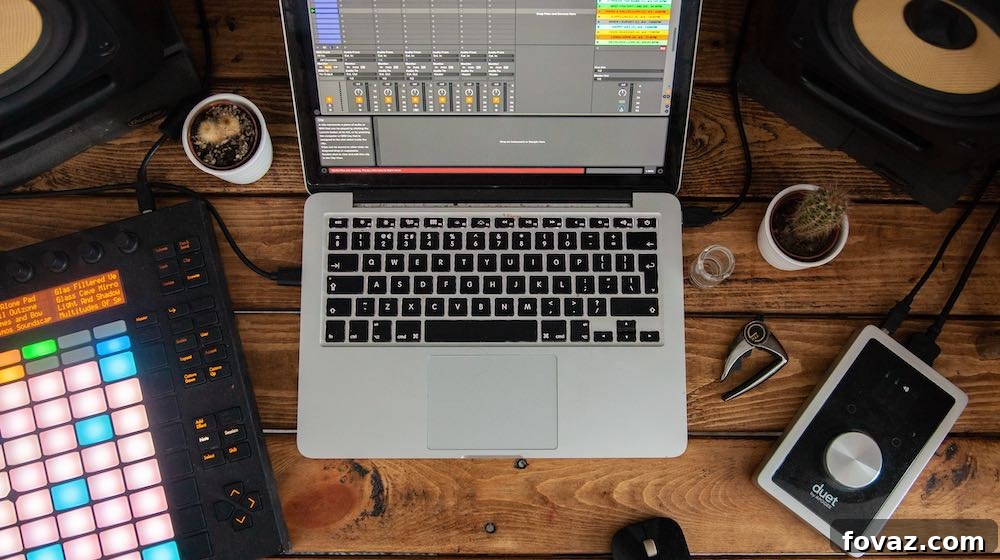
Embarking on the journey of creating your own home recording studio is an exciting endeavor for any musician, podcaster, or voice artist. Whether you’re a seasoned professional or just starting, the dream of capturing your creativity without leaving your bedroom is now more accessible than ever. With the right recording materials in hand, the next crucial step is designing a home studio that not only meets your acoustic needs but also respects your budget and the physical constraints of your bedroom. This guide will walk you through innovative, cost-effective solutions to transform your personal space into a functional recording haven.
Transform Your Bedroom: Budget-Friendly Home Recording Studio Designs
Creating a professional-sounding recording environment doesn’t require breaking the bank or renovating an entire room. With clever strategies and a bit of DIY spirit, you can optimize your bedroom acoustics and setup for crystal-clear audio. Here are some top tips to help you design an effective and affordable home recording studio.
1. Master Bedroom Acoustics with Smart Soundproofing Solutions
Soundproofing and acoustic treatment are perhaps the most critical aspects of any recording studio, especially when working within a bedroom. The goal isn’t just to block external noise, but also to manage internal reflections that can severely degrade sound quality. Unwanted echoes, reverb, and standing waves can muddy your recordings and make mixing a nightmare. Proper insulation ensures that the pure sound from your instrument or voice is captured, and playback is heard accurately.
Tackling Windows and Mirrors: The Reflective Surfaces
Windows and large mirrors are notorious for causing sound waves to bounce back into the microphone, creating harsh reflections and unwanted echo. These hard, flat surfaces act like acoustic mirrors, scattering sound in unpredictable ways. To mitigate this, consider these budget-friendly solutions:
- Thick Drapes and Curtains: Invest in heavy, floor-to-ceiling drapes. Materials like velvet, velour, or even layered blackout curtains are excellent for absorbing mid to high frequencies. Hang them over windows, ensuring they are pleated and extend beyond the window frame to maximize their sound-absorbing surface. For mirrors, simply covering them with thick blankets or moving them to a less critical wall can make a noticeable difference.
- Temporary Window Plugs: For serious sound control, especially if external noise is an issue, consider creating removable window plugs. These can be made from a plywood base covered with acoustic foam or even several layers of thick blankets, cut to fit snugly into your window frame.
Walls and Doors: Containing and Absorbing Sound
The walls of your bedroom, particularly parallel ones, can cause flutter echoes and standing waves. Your door is also a common weak point for sound leakage and reflection.
- DIY Acoustic Panels with Throw Pillows or Blankets: You don’t need expensive studio foam to start. Thick throw pillows, duvets, or even old blankets can be surprisingly effective sound absorbers. Simply lean them against walls, hang them strategically, or even stack them in corners (where bass tends to build up). For a more aesthetic solution, you can create simple fabric-covered frames filled with mineral wool or dense foam to act as DIY acoustic panels. Position these at primary reflection points – imagine where sound from your monitor speakers or vocal source would hit the walls first.
- Door Seal Improvements: The gap around and under your bedroom door is a major culprit for sound leaks. Apply weather stripping around the door frame to seal any cracks. For the gap at the bottom, a door sweep or a rolled-up blanket (often called a “door snake”) can help reduce sound transmission significantly. If your door is hollow, consider adding mass to it by attaching a layer of mass-loaded vinyl or even a thick moving blanket with adhesive hooks.
Remember, the goal is not to achieve complete sound isolation (which is costly and difficult in a bedroom) but to create a ‘drier’ and more controlled acoustic environment suitable for recording. Experiment with different placements and materials to find what works best for your specific room.
2. Transform Your Closet into an Effective Recording Booth
One of the most ingenious and budget-friendly home recording studio designs leverages existing structures within your bedroom: the closet. Far from just a storage space, a closet can be an incredibly effective and surprisingly quiet recording booth for both vocals and instrument amplification.
Why Closets Work Wonders for Sound
The inherent design of a typical closet makes it an acoustic gem. Firstly, it’s a confined space, which helps to isolate the sound source from the rest of the room. Secondly, closets are usually filled with clothes, which are fantastic natural sound insulators and absorbers. The soft fabrics, varying textures, and irregular surfaces of hanging garments effectively absorb sound waves, preventing them from bouncing around and causing unwanted reverb or echo. This results in a “dry” recording – clean audio with minimal room ambience, making it ideal for mixing later.
Optimizing Your Closet for Recording
- Clear Out Clutter: While clothes are good, excessive clutter can introduce unwanted resonances. Organize your closet, ensuring there’s enough space for you (if it’s large enough for a vocal booth) or your microphone and instrument.
- Maximize Absorption: Hang extra blankets or thick towels on the inside walls of the closet, particularly behind where your microphone will be placed. The more soft, absorptive material, the better the sound isolation and dampening.
- Seal the Gaps: Just like your bedroom door, the closet door can leak sound. Use weather stripping around the door frame to create a tighter seal. If you have bi-fold or sliding doors, ensure they close as tightly as possible.
- Microphone Placement: Experiment with microphone placement within the closet. Often, pointing the microphone away from the door and towards the most absorptive part of the closet (e.g., a wall of clothes) yields the best results.
A closet recording booth is particularly excellent for capturing clean vocals, acoustic guitar, or even small guitar amplifiers. The natural dampening provided by the clothes creates an intimate and controlled sound, minimizing the influence of your bedroom’s less-than-perfect acoustics. This simple hack can elevate your recording quality significantly without any substantial investment.
3. Craft a Custom DIY Vocal Booth for Pristine Vocals
While a closet can be a fantastic starting point, some situations or preferences might call for a dedicated vocal booth. Professional vocal booths can be incredibly expensive, but with a creative approach, you can construct highly effective DIY alternatives that deliver excellent results on a shoestring budget.
The Portable “Box” Booth
One popular and effective DIY vocal booth design involves a simple yet ingenious construction using soundproofing foam and a box. This method focuses on creating a very controlled, isolated space directly around your microphone.
- Materials: You’ll need a sturdy cardboard or plastic box large enough to comfortably fit your microphone (and perhaps your head, if it’s a larger design), along with a quantity of acoustic foam panels or even thick egg crate foam.
- Construction: Cut one side of the box to act as an opening for you to sing or speak into. Line the interior of the box completely with acoustic foam. Ensure there are no bare reflective surfaces inside. You can mount your microphone inside the box using a stand, positioning it centrally.
- Usage: When recording, simply position the box so you sing directly into the opening, with the microphone inside. The foam-lined interior will absorb reflections, preventing room ambience from reaching the mic, resulting in a tight, dry vocal track. This design is highly portable and can be placed on a desk.
The “Blanket Fort” Method: Ultimate Budget Isolation
For the absolute most budget-conscious yet surprisingly effective solution, the “blanket fort” is a time-tested technique. This method might look unconventional, but it delivers remarkable acoustic isolation.
- Setup: Gather several thick blankets, duvets, or moving blankets. Drape them over a sturdy frame (like a microphone stand, a clothes rack, or even a couple of chairs) to create a small, enclosed tent-like structure. The goal is to create a space just big enough for you and your microphone.
- Execution: Position your microphone inside this “fort.” Then, get inside yourself, pulling the blankets snugly around you. Sing or speak directly into the microphone.
- Benefits: The thick blankets absorb nearly all reflections, creating an incredibly dead and dry sound. It’s an excellent way to eliminate room reverb and capture raw, clean vocals. It might get a little warm inside, so keep sessions brief if necessary, but the sonic results are often comparable to more expensive setups.
These DIY vocal booths provide a focused, absorption-heavy environment right where the sound is being captured, making them indispensable tools for achieving studio-quality vocals in a home setting.
4. Embrace Digital Alternatives for Loud Instruments

Recording instruments like acoustic drums or loud electric guitar amplifiers in a bedroom can present significant challenges. Not only do they take up a considerable amount of space, but their volume can also be disruptive to neighbors and make achieving a clean recording difficult without extensive soundproofing. Fortunately, the digital age offers fantastic alternatives that provide professional-grade sounds without the volume or space requirements.
Drums and Percussion: Go Digital
- Electronic Drum Kits: Instead of a full acoustic drum kit, consider an electronic drum kit or drum pads. These allow you to play silently with headphones while triggering high-quality drum samples. Many electronic kits offer a vast array of sounds, from classic acoustic kits to modern electronic percussion, all controllable via MIDI.
- MIDI Controllers and DAWs: Maximize the use of a MIDI controller. You can use keyboard controllers, drum pads, or even specialized MIDI guitar controllers to trigger virtual instruments (VSTs) within your Digital Audio Workstation (DAW). Most DAWs come with a rich library of pre-programmed beats, drum samples, and loops that can be easily manipulated and incorporated into your tracks. This approach offers incredible flexibility in sound design and precise control over every aspect of the drum performance.
- Drum Machines and Software: Dedicated drum machines or powerful software drum samplers like Superior Drummer, EZdrummer, or Addictive Drums offer unparalleled realism and customization options for drum sounds, all within the silent confines of your computer.
Electric Guitars: Amp Sims and Re-amping
- Amp Simulation Software (Amp Sims): Forget mic-ing a loud amplifier. Modern amp simulation software (plugins for your DAW) can accurately emulate a vast array of classic and modern amplifiers, cabinets, and effects. Simply plug your guitar directly into your audio interface and run it through an amp sim. This allows for silent practice and recording while delivering incredible tonal versatility. Popular options include Native Instruments Guitar Rig, Positive Grid Bias FX, and Line 6 Helix Native.
- Load Boxes and Attenuators: If you love the sound of your tube amp but need to record silently, a load box or attenuator with a built-in cabinet simulator can be a game-changer. These devices allow you to run your amp at full power while directing its output to your audio interface, bypassing the need for a speaker cabinet and microphone.
- Re-amping: Record a dry, clean guitar signal (DI signal). Later, you can send this signal back out to a real amplifier or through various amp simulation plugins to experiment with different tones without having to re-record the performance.
By embracing these digital alternatives, you can achieve professional-sounding recordings for even the loudest instruments, all from the comfort and quiet of your bedroom studio, without disturbing anyone.
Witness a minimalist home recording studio design in action with this inspiring video from Josh and Katie:
Creating Your Sanctuary: Final Considerations for Your Home Recording Studio
Designing a home recording studio goes beyond just soundproofing and equipment; it’s about creating an inspiring and functional workspace. As you plan your layout, consider the existing furniture in your room. You might need to rearrange items to optimize flow and acoustics. Heavy furniture like bookcases can double as diffusers, breaking up sound waves, while upholstered chairs add to sound absorption. Don’t be afraid to experiment with different configurations. Ask for help if heavy lifting is involved, and think creatively about using every available space – even under your bed for cable management or storing less-frequently used gear.
Beyond the physical setup, remember the importance of workflow and comfort. Ensure your main workstation is ergonomic, with your monitors and input devices easily accessible. Good cable management will prevent clutter and potential hazards. Most importantly, be patient with the process. Building a studio, especially on a budget, is an iterative journey of experimentation and refinement. Every adjustment, from adding another blanket to repositioning your microphone, contributes to a better sound. Your bedroom studio is a testament to your passion, so enjoy the process of bringing your musical or audio projects to life within your personalized creative sanctuary.
We’re eager to hear about your unique approaches! Do you have other innovative home recording studio designs or budget tips in mind? Share them with us in the comments section below!
UP NEXT: Expand Your Home Studio Knowledge
- Essential Recording Tips For Your Home Recording Studio
- 21 Space-Saving Ideas For Your Studio Apartments
- Inspirational Man Cave Ideas For Real Men
Calling all crafting DIYhards, DIY Projects needs YOU! Click here if you want to contribute for us.
Stay connected with the DIY community! Follow us on Facebook, Twitter, and Instagram for more creative projects and inspiration!