
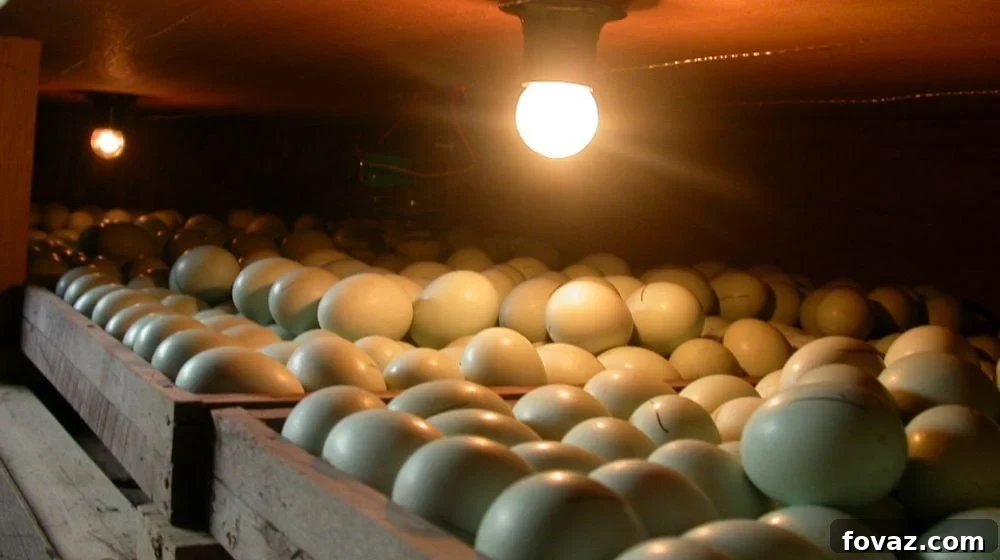
Build Your Own DIY Egg Incubator: A Comprehensive Guide to Successful Hatching
Embarking on the journey of hatching your own eggs can be an incredibly rewarding experience, whether you’re a seasoned homesteader or a curious DIY enthusiast. While commercial incubators offer convenience, they often come with a hefty price tag. The good news is, you don’t need to break the bank to successfully hatch eggs. With a few readily available materials and some simple steps, you can construct a highly effective homemade incubator that yields excellent results, all while saving money and gaining valuable knowledge.
This comprehensive guide will walk you through building your very own DIY egg incubator, transforming basic supplies into a functional hatching machine. Get ready to embrace the satisfaction of nurturing new life from shell to chick!
RELATED: 12 Unique Egg Carton Craft Ideas for Kids
Why Build a Homemade Egg Incubator?
The decision to build a homemade incubator offers numerous advantages beyond just cost savings. It’s an empowering project that connects you more deeply with the natural process of life:
- Cost-Effectiveness: Commercial incubators can range from hundreds to thousands of dollars. A DIY version, utilizing common household or hardware store items, drastically cuts down on expenses, making egg hatching accessible to everyone.
- Educational Value: This project is an excellent learning opportunity for adults and children alike. Understanding the critical factors of temperature, humidity, and ventilation provides invaluable insight into avian biology and the delicate process of development.
- Self-Sufficiency & Sustainability: Building your own tools contributes to a self-sufficient lifestyle. It’s a step towards raising your own poultry, ensuring a fresh supply of eggs or meat, and reducing reliance on external sources.
- Customization: Unlike off-the-shelf models, a homemade incubator can be tailored to your specific needs, whether you’re hatching a small clutch of backyard chicken eggs or experimenting with different types of fowl.
- The Joy of Creation: There’s immense satisfaction in successfully hatching eggs in an incubator you built with your own hands. It’s a testament to your ingenuity and dedication.
The Science Behind Successful Egg Incubation
An incubator’s primary role is to mimic the natural conditions provided by a brooding hen. For successful embryonic development, three key environmental factors must be meticulously controlled:
- Consistent Temperature: This is arguably the most critical factor. Embryos develop optimally within a narrow temperature range, typically between 99.5°F and 102°F (37.5°C to 38.9°C) for most poultry. Fluctuations can lead to deformities, delayed hatching, or even death.
- Appropriate Humidity: Humidity levels are crucial for preventing excessive moisture loss from the egg and facilitating the absorption of nutrients. Too low, and the chick can become “shrink-wrapped”; too high, and it can drown. The required humidity varies throughout the incubation period, usually increasing towards the final days before hatching.
- Adequate Ventilation: Embryos respire, consuming oxygen and releasing carbon dioxide. Proper ventilation ensures a fresh supply of oxygen and removes harmful CO2 buildup. It also helps dissipate excess heat and regulate humidity.
Understanding these principles is key to building and operating an effective homemade incubator.
Build Your Own Homemade Incubator in 8 Simple Steps
What You’ll Need:
Gathering your materials beforehand will make the construction process smooth and efficient. Most of these items are inexpensive and easily found at hardware stores or online:
- Scrap wood (for the internal frame, ensuring structural support for eggs)
- Water cup (to provide essential humidity inside the incubator)
- Scissors or utility knife (for cutting styrofoam, hardware cloth, and tape)
- Hardware cloth or sturdy mesh (for creating a stable, breathable platform for the eggs)
- Stapler (to secure the hardware cloth to the wooden frame)
- Styrofoam box (the primary insulating chamber for your incubator)
- Light bulb socket (to hold your heat source securely)
- Appliance light bulb (your heat source; choose wattage carefully based on box size)
- Hygro-thermometer (an essential tool for accurately monitoring both temperature and humidity)
- Optional but Recommended: Duct tape, clear plastic or plexiglass for a viewing window, a plug-in dimmer switch or thermostat for precise temperature control.
1. Construct a Sturdy Internal Frame for Egg Support
The internal frame serves as the foundation for your eggs, keeping them elevated and allowing air to circulate freely. Using your scrap wood, carefully assemble a rectangular frame that fits comfortably inside your styrofoam box. It should be snug but not so tight that it warps the box. Pay close attention to the height: ensure there’s enough clearance for your water cup to sit underneath the frame without touching it, and sufficient space above the eggs for the heating element and air circulation. A typical height might be 2-3 inches, depending on the size of your water cup and eggs.
When building the frame, consider creating a simple rectangular box shape using four pieces of wood. You can secure these with small nails, screws, or even strong wood glue for a quick assembly. The goal is a stable, level platform.
2. Create a Secure Egg Platform with a Screen
Once your wooden frame is complete, it’s time to create the egg-holding platform. Cut a piece of hardware cloth or a similar sturdy, porous material (like plastic mesh or a strong screen) that is large enough to completely cover the top of your wooden frame. The material needs to be robust enough to support the weight of several eggs without sagging, while also allowing air to pass through freely. Using a stapler, securely attach the hardware cloth to the top edges of the wooden frame. Ensure there are no sharp edges that could damage the eggs. This screen will keep your eggs safely above the water source and allow warm, humid air to reach them evenly.
Tip: If using metal hardware cloth, ensure the cut edges are bent inward or covered with tape to prevent injury to yourself or damage to the eggs.
3. Install the Heating Element
The light bulb is your primary heat source, so its placement is critical for maintaining stable temperatures. Choose one side of your styrofoam box (preferably near the top but with enough clearance from the lid) and carefully cut a circular hole. The size of this hole should be a perfect fit for the base of your light bulb socket, allowing it to be inserted snugly without being loose. Once inserted, ensure the light bulb itself does not touch the lid or the sides of the box, as this could create hot spots or fire hazards. The bulb should hang freely, positioned to distribute heat effectively.
Insert your light bulb socket into the hole and secure it. Then, screw in your appliance light bulb. Appliance bulbs are often preferred due to their compact size and durability.
Tips for Light Bulb Selection:
- An appliance light bulb is an excellent choice due to its compact size and robust filament, designed to withstand vibrations and temperature changes.
- The wattage of your light bulb will depend on the size of your styrofoam box and the ambient room temperature. Typically, a 10-40 watt incandescent bulb is sufficient for most small to medium-sized homemade incubators. Start with a lower wattage and increase if needed during calibration.
- Always prioritize safety: ensure the socket and wiring are in good condition and that the bulb is securely fastened.
4. Make Essential Ventilation Holes
Proper airflow is paramount for healthy embryonic development, providing fresh oxygen and removing carbon dioxide. Gently remove the light bulb (if installed) before cutting any holes to avoid damage. Using scissors or a utility knife, carefully cut four small holes in the lid of your styrofoam box. These will serve as exhaust vents for warm, stale air. Additionally, create two smaller holes on each of the longer sides of the box, ideally near the bottom. These will act as intake vents, drawing in fresh air. The size of these holes can be adjusted during the calibration phase to fine-tune temperature and humidity, but generally, pea-sized to dime-sized holes are a good starting point.
RELATED: 54 Easter Egg Designs and Decorating Ideas Anyone Can Make
5. Assemble and Prepare Your Homemade Incubator’s Interior
With the primary components ready, it’s time to bring everything together. Inside your styrofoam box, first place the water cup. This cup is crucial for generating the necessary humidity. You may need to experiment with its size or surface area later to adjust humidity levels. Next, carefully insert your wooden frame with its hardware cloth screen, positioning it above the water cup. Ensure it sits level and stable. Reinsert the light bulb and its socket, making sure it’s secure. Finally, place your hygro-thermometer (which measures both humidity and temperature) inside the box, ideally on the screen or suspended slightly above it, away from direct heat from the bulb, to get an accurate reading of the air around the eggs.
Before adding any precious eggs, it’s wise to place a few test eggs (even empty ones) on the screen to check its stability and confirm the overall setup.
6. Calibrate Temperature and Humidity for Optimal Hatching
This is the most critical step and requires patience. Hatching eggs require a consistently stable temperature between 99.5-102°F (37.5-38.9°C), typically maintained for 21 days for chicken eggs. Additionally, the humidity must be carefully controlled: aim for approximately 40%-50% for the first 18 days, then increase it to 60%-70% for the final three days (known as “lockdown”).
Running an Empty Test: Before placing any eggs, run your incubator empty for at least 24-48 hours. This allows you to observe temperature and humidity fluctuations and make necessary adjustments. Use your hygro-thermometer to get accurate readings.
Achieving Correct Temperature:
- Plug-in Dimmer Switch: This is a simple and effective method. By connecting your light bulb to a plug-in dimmer, you can precisely adjust the bulb’s brightness, and thus its heat output, until your temperature readings are consistently accurate. Make small adjustments and wait several hours for the incubator to stabilize before making further changes.
- Water Heater Thermostat (or other external thermostat): For a more automated solution, you can wire your light bulb through an external thermostat (like those used for water heaters or reptile enclosures). This device will automatically turn your light bulb on and off to maintain a pre-set temperature, preventing overheating and ensuring stability. This offers greater precision and less manual intervention.
Adjusting Humidity:
- The water cup is your primary tool for humidity. A larger surface area of water will generally increase humidity. You can experiment with different cup sizes or add a sponge to the water to increase evaporation.
- For the higher humidity during lockdown (the last three days), you might need to add a second water cup or increase the surface area of the existing one.
- Adjusting the size or number of ventilation holes can also slightly influence humidity and temperature. Larger holes may reduce both, while smaller holes will increase them.
7. Create a Convenient Viewing Window
To minimize opening the incubator and disrupting the stable environment, it’s highly beneficial to create a viewing window. On the lid of your styrofoam box, carefully cut out a rectangular or square portion that’s large enough for you to comfortably observe the eggs without lifting the lid. Once cut, secure a piece of clear plastic (like from a transparent folder or food container) or thin plexiglass over the opening using strong tape (such as duct tape). Ensure all edges are sealed to prevent heat and humidity loss. This window will allow you to monitor your eggs and the thermometer/hygrometer readings without disturbing the delicate internal conditions.
8. Monitor and Maintain Your Homemade Incubator
After your initial calibration and once you’ve placed your fertile eggs inside, the incubation process begins. For the entire duration (typically 21 days for chickens), constant monitoring is crucial. Observe your incubator diligently for a day or two after adding eggs to ensure the temperature and humidity remain stable. Make micro-adjustments if necessary. Remember that ambient room temperature can affect your incubator’s internal environment, so try to keep the incubator in a stable room.
Beyond the initial setup, consistent daily checks are vital. Ensure the water cup has enough water, check the temperature and humidity readings several times a day, and perform egg turning as required (if not using an automatic turner). With careful attention, your homemade incubator is now ready to foster new life!
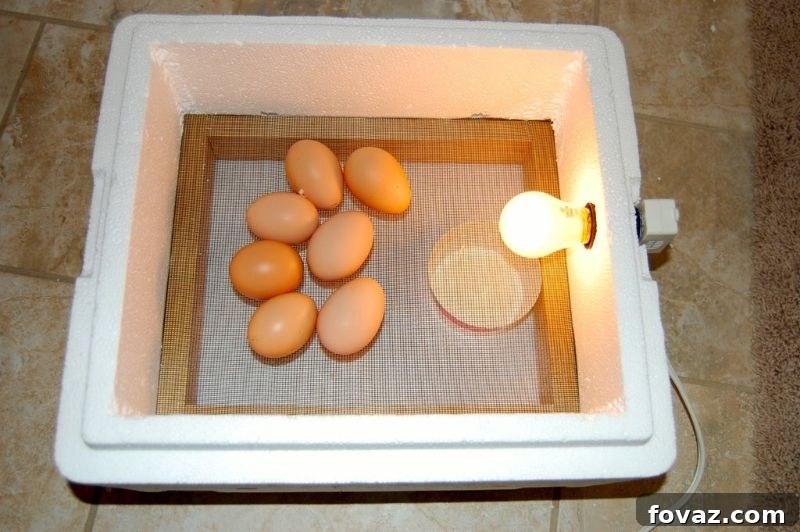
The final product should look like this:
Note: You might find these additional tools helpful for this DIY project: drill (for precise holes), sander (for smoothing wood edges), and a general tool kit (for various small tasks).
Beyond the Build: Ensuring a Successful Hatch
Building the incubator is just the first step. For a truly successful hatch, you also need to consider:
- Egg Selection: Choose fertile eggs from healthy, well-fed birds. Inspect them for cracks, abnormalities, or excessive dirt. Ideally, eggs should be no older than 7-10 days for best hatch rates and stored at around 55-65°F (12-18°C) with moderate humidity if not incubated immediately.
- Egg Turning: In nature, a mother hen constantly turns her eggs. This prevents the embryo from sticking to the shell membrane and ensures even development. If your incubator doesn’t have an automatic turner, you must manually turn the eggs at least 3-5 times a day, ideally an odd number of times, throughout the first 18 days. Mark one side of the egg to keep track of turns.
- Candling: Around day 7-10, you can “candle” your eggs by holding them up to a bright light in a dark room. This allows you to see the developing embryo and remove any infertile or non-viable eggs.
- Lockdown: For the final three days before hatching (typically days 18-21 for chickens), stop turning the eggs and increase the humidity to 60-70%. This period, known as “lockdown,” allows the chicks to get into hatching position and softens the shell, making pipping easier. Avoid opening the incubator during this time unless absolutely necessary.
Troubleshooting Common Homemade Incubator Issues
Even with careful construction, you might encounter minor challenges. Here are some common issues and how to address them:
- Temperature Fluctuations: If the temperature is too high, decrease the light bulb wattage or use your dimmer switch to reduce brightness. If it’s too low, increase the bulb wattage or brightness. Ensure the incubator is not in a drafty area.
- Humidity Too Low: Increase the surface area of water in the cup (e.g., use a larger container or add a sponge). You can also mist the inside walls of the incubator with lukewarm water (avoiding direct contact with eggs or electrical components) for a temporary boost.
- Humidity Too High: Reduce the surface area of water in the cup. You may also need to slightly enlarge some ventilation holes to allow more moisture to escape.
- Inconsistent Readings: Ensure your hygro-thermometer is accurate. Place a second, calibrated thermometer inside to cross-check readings. Make sure the thermometer isn’t directly touching the bulb or the water.
- Power Outage: If power goes out, keep the incubator lid closed as much as possible to retain heat. If the outage is prolonged, you might try placing warm (not hot) water bottles inside, but be very cautious about temperature spikes.
Once your homemade incubator has done a successful hatch, you’ll want to keep your chickens safe and secure. Here’s a tutorial from Silverline Tools on how to build a chicken coop:
Building a homemade incubator is a fulfilling project that empowers you to take control of the egg hatching process. It’s a significantly less expensive alternative to commercial units and, when properly constructed and monitored, can yield equally excellent results. This project can become a fun and educational activity for the whole family, fostering a deeper appreciation for nature and the lifecycle of poultry. Embrace the DIY spirit and enjoy the incredible experience of witnessing new life emerge!
Do you have other innovative ideas on how to make a homemade incubator, or perhaps tips for successful hatching? Share them with us in the comments section below!
Up Next:
- Learn How To Make Fire Starters Out Of Egg Cartons
- 10 Epic Chicken Coops for your Backyard!
- Easy DIY Macrame Shelf To Decorate Your Home
Calling all crafting DIYhards, DIY Projects needs YOU! Click here if you want to write for us.
Don’t forget to stay connected with us on Facebook, Twitter, Pinterest, and Instagram!