
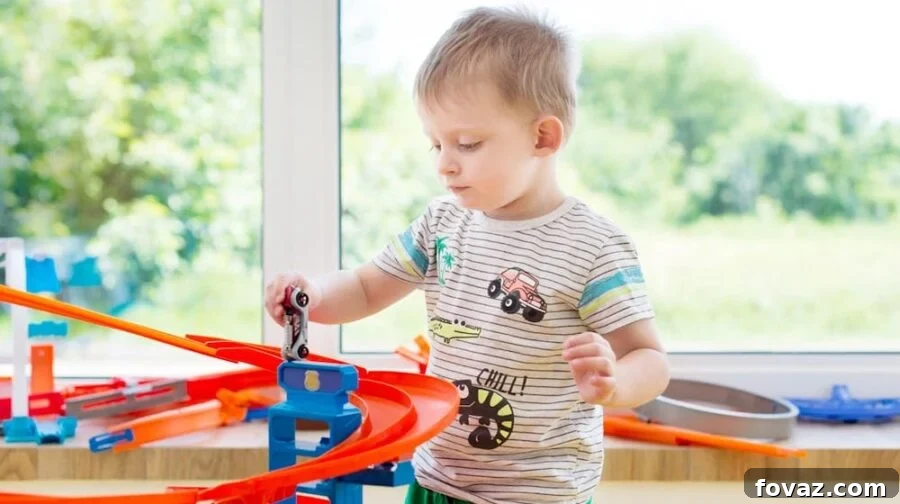
Have you ever considered unleashing your inner engineer and crafting a spectacular Hot Wheels race track right in your own home? This engaging DIY project offers a fantastic opportunity to ignite creativity, engage in sustainable practices, and create lasting memories with your children, all while saving a trip to the toy store and some money. All it takes is a handful of readily available materials, primarily cardboard boxes, some basic adhesive, and a spark of imagination. This simple yet brilliant concept can be customized and expanded, promising hours of thrilling, high-speed fun right at your fingertips.
How to Build an Epic Cardboard Hot Wheels Race Track: A Comprehensive DIY Guide for Kids & Families
Embarking on this DIY Hot Wheels race track adventure is more than just building a toy; it’s a journey into learning and creativity. This project is a wonderful way to introduce children to the world of DIY projects, teaching them valuable lessons about recycling, resourcefulness, and the satisfaction of creating something amazing with their own hands. Beyond the educational benefits, it’s an excellent exercise in fine motor skills, spatial reasoning, and collaborative problem-solving. So, gather your materials and get ready to construct a custom race track that will bring endless joy and excitement to your household.
The Thrill of Creation: Why This DIY Project is a Must-Try
- Fosters Creativity and Imagination: Children can design unique layouts, obstacles, and finish lines, turning simple cardboard into a vibrant world of adventure.
- Teaches Recycling and Sustainability: Repurpose cardboard boxes that would otherwise go to waste, instilling a valuable lesson about environmental responsibility.
- Budget-Friendly Fun: Say goodbye to expensive plastic sets. This project uses affordable, often free, materials found around the house.
- Enhances Problem-Solving Skills: Kids will learn to overcome challenges like making turns, slopes, and loops, developing critical thinking.
- Promotes Family Bonding: Working together on a shared goal strengthens family ties and creates cherished memories. It’s a perfect weekend activity!
- Develops Fine Motor Skills: Cutting, gluing, and assembling components helps improve dexterity and hand-eye coordination.
Essential Supplies for Your Backyard DIY Race Track Adventure:
Before diving into the construction phase, ensure you have all the necessary supplies. Choosing the right materials will make the building process smoother and result in a more durable and exciting race track.
- Sturdy Cardboard Boxes: The backbone of your track! Look for corrugated cardboard from appliance boxes, shipping boxes, or moving boxes. The thicker and longer the pieces, the better for stability and track length.
- Craft Glue or Wood Glue: Provides strong adhesion for the main structure. A reliable all-purpose glue will work wonders.
- Hot Glue Gun and Glue Sticks: Essential for quick, strong bonds, especially when attaching rails and supports. Always ensure adult supervision when using a hot glue gun.
- Sharp Scissors or Craft Knife: For precise cutting of cardboard strips. A craft knife (utility knife) can be very effective for straight lines but requires extreme caution and a cutting mat.
- Bucket or Cylindrical Object (8 to 9.5 inches diameter): Crucial for shaping the iconic loop-de-loop. A standard 5-gallon bucket or a large paint can works perfectly.
- Painter’s Tape or Masking Tape: Useful for temporarily holding pieces in place while glue dries, and for securing the cardboard around the bucket for shaping.
- Ruler or Measuring Tape: For accurate measurements of track width and length, ensuring your Hot Wheels cars run smoothly.
- Pencil or Marker: For marking cut lines and tracing shapes onto the cardboard.
Step-by-Step Guide to Crafting Your Custom Hot Wheels Race Track:
1. Gather and Prepare Your Cardboard Boxes.
The foundation of any great race track starts with quality materials. Begin by collecting a variety of sturdy cardboard boxes. Larger boxes are ideal as they yield longer, continuous pieces, minimizing the number of joints you’ll need to create. Flatten the boxes by carefully cutting along the seams and removing any tape or labels. The goal is to have flat sheets of cardboard ready for marking and cutting. The longer and flatter the pieces, the smoother your track will be, allowing for faster, uninterrupted races.
2. Mark and Cut Cardboard into Track Strips.
Precision is key for a functional race track. Using your ruler and pencil, mark two distinct types of strips on your flattened cardboard.
- Trackbed Strips: These will form the main surface where the cars run. Measure and cut strips that are typically 1.5 inches wide. This width is generally perfect for most standard Hot Wheels cars, allowing them to race freely without falling off.
- Side Rail Strips: These thinner strips will act as protective barriers. Measure and cut strips that are approximately 0.25 inches (1/4 inch) wide. These will be glued along the edges of your trackbed to keep the cars on track, especially around curves and loops.
Carefully cut both sets of strips using sharp scissors or a craft knife (with a cutting mat and extreme caution). Straight, clean cuts will result in a professional-looking and better-performing track.
3. Attach Side Rails to the Trackbed.
With your trackbed and rail strips ready, it’s time to assemble the straight sections of your track. Take one of your 1.5-inch wide trackbed strips. Using a hot glue gun (under adult supervision), apply a thin bead of glue along one long edge of the trackbed. Carefully align a 0.25-inch rail strip along this edge and press it firmly into place. Repeat this process for the other side of the trackbed strip. The side rails are crucial as they prevent cars from veering off course during high-speed action, ensuring a smooth and exciting race. Allow the glue to cool and set completely before moving on.
4. Prepare the Loop Portion of the Track.
The loop-de-loop is often the most thrilling part of any Hot Wheels track! To create this iconic feature, you’ll need a long piece of cardboard for the trackbed, roughly 4 feet long and 1.5 inches wide. This length allows for a decent-sized loop with enough lead-in and lead-out sections. The key to forming a smooth, perfect loop is to use a cylindrical object. A bucket with a diameter of 8.5 to 9.5 inches is ideal, providing the perfect curvature for Hot Wheels cars to successfully complete the loop.
5. Gently Wet and Shape the Loop Trackbed.
To make the cardboard pliable enough to form a tight loop without creasing or breaking, you’ll need to introduce some moisture. Carefully run the 4-foot trackbed strip under running water, ensuring all surfaces are evenly wet but not saturated. Wipe off any excess water so it’s damp, not dripping. This process softens the cardboard fibers, making it much easier to bend. Immediately after wetting, take one end of the damp trackbed and secure it with tape to the outside of your chosen bucket. Gently and carefully wrap the entire trackbed strip around the bucket, keeping it taut. Once fully wrapped, secure the other end with tape to maintain the circular shape. Leave it to dry overnight; this allows the cardboard to “learn” its new curved form as it stiffens.
6. Construct the Loop’s Support Structure.
A magnificent loop needs solid support. Take a fresh piece of sturdy cardboard. Place your bucket (or the cylindrical object used for shaping) on top of it and trace its outer edge with a pencil. This will give you a perfect circle. Now, remove the bucket and, using a compass or by hand, draw a slightly smaller concentric circle inside the first one, about 1 inch inward. Carefully cut out the outer circle, and then cut out the inner circle, creating a sturdy cardboard ring. This ring will act as the support stand for your dried loop track. Once your loop trackbed is completely dry and holds its shape, place this cardboard ring on a flat surface. Position the dried loop track bed onto the support ring, ensuring it sits securely. The loop should enter the support from one side and exit on the other. Use a hot glue gun to firmly attach the loop trackbed to the cardboard support ring.
7. Extend the Loop Exit for Smooth Transitions.
To ensure cars smoothly exit the loop and continue onto the next section of your track, you’ll need to extend the end of the loop trackbed. After the loop descends and flattens out, allow it to extend approximately 6 inches beyond the main loop structure. Glue this extended portion firmly into place on your support or directly onto your playing surface. This extension provides a crucial transition zone, preventing cars from crashing or derailing immediately after completing the loop.
8. Create Side Rails Specifically for the Loop.
Just like the straight sections, your loop also requires side rails to keep those speedy Hot Wheels cars contained. To make these curved rails, take another piece of cardboard. Trace your bucket (or shaping cylinder) once more to get the outer curve. Then, draw a concentric circle approximately 0.25 inches (1/4 inch) inside that outer trace. Cut out both of these curved rail pieces. Carefully attach these curved rails to the sides of your loop trackbed using your hot glue gun. Ensure they start and end cleanly at the bottom of the loop, aligning perfectly with the existing straight track rails for a seamless transition. This will provide maximum security for cars navigating the tight curve.
9. Connect Straight and Loop Trackbeds, and Add the Base.
Now it’s time to bring all the pieces together. Take a small, flat piece of cardboard – this will serve as a connecting plate. Apply a generous amount of glue to this small connector piece. Carefully align and attach the end of a straight trackbed section to one side of the connector, and the beginning of your loop trackbed (or its extended exit) to the other side. This small piece acts as a bridge, creating a smooth and sturdy connection between different track segments. Once the main track is assembled, cut out a larger base piece from cardboard to place underneath the entire loop structure. This base adds stability and prevents the loop from tipping over during intense racing. Glue the loop support and any connecting straight pieces securely to this base.
10. Set Up and Customize Your Race Car Track.
The final and most exciting step: setting up your track for action! For optimal speed and gravity-defying stunts, you’ll want to elevate one end of your track. In this example, the starting end of the track is clamped to a counter, providing an ideal ramp. You can use chairs, books, or any sturdy furniture to create elevation. Experiment with different heights to find the perfect speed. Secure the base of the loop firmly in place, adjusting its position as needed to ensure smooth car flow. Once everything is stable, it’s time for the test run! Get ready to unleash your Hot Wheels and enjoy the thrilling races with your kid. Remember, this track is highly customizable – if you plan to play outdoors, you can add longer straightaways, more loops, jumps, or even incorporate natural terrain.
For a visual guide and to see this ingenious DIY project come to life, watch the full video tutorial from iCreatables:
Tips for an Even Better DIY Race Track Experience:
- Involve the Kids from Start to Finish: Let them help with measuring, cutting (age-appropriately), gluing, and especially designing. Their input will make the track even more special.
- Decorate Your Track: Once the glue is dry, encourage painting, drawing, or adding stickers to personalize the track. Create pit stops, grandstands, or even miniature landscapes.
- Experiment with Different Layouts: Don’t be afraid to connect multiple straight sections, add more loops, create branching paths, or build jumps. The modular nature of cardboard allows for endless modifications.
- Consider Storage: If you build a large, elaborate track, think about how it can be disassembled or stored easily for future play sessions.
- Test as You Go: After each major section (e.g., a straightaway, a loop), do a quick test run with a Hot Wheels car to ensure it functions as intended. This helps catch and fix issues early.
Safety First: Important Considerations for Your DIY Project
- Adult Supervision is Crucial: Especially when using sharp tools like scissors or a craft knife, and a hot glue gun.
- Proper Ventilation: If using strong glues or paints, ensure you are in a well-ventilated area.
- Child-Safe Materials: Ensure all glues and paints are non-toxic, especially if younger children are involved in decorating.
See? It’s not only easy and entertaining but also incredibly rewarding. You might find yourself enjoying the building process as much as the racing! An open space, like your backyard, can transform this project into an expansive adventure, allowing for longer tracks and more elaborate setups. Your child will undoubtedly look forward to countless hours of imaginative play with this custom-built DIY race car track, a testament to your shared creativity and effort.
You’ll Also Love These Inspiring DIY Projects:
4 Short Steps to Transform a Single Log Into A Kids Chair
12 Fun DIY Teepee Ideas for Kids
DIY Projects’s Ingeniously Easy DIY Projects To Entertain Kids