
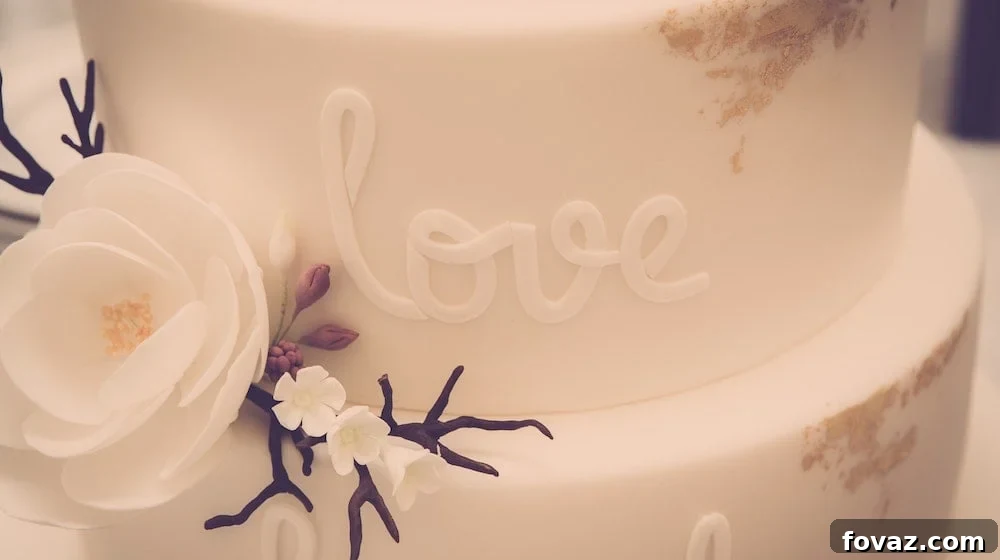
Mastering the Art of Edible Fondant Flowers: A Comprehensive DIY Guide
While the delight of consuming a beautiful cake can be fleeting, the meticulous artistry of cake decoration often requires patience and skill. Among the myriad of techniques, creating edible fondant flowers stands out as a truly enchanting method to elevate any confectionery masterpiece. These delicate, visually stunning components add a touch of elegance and personalization that can transform a simple cake into a work of art. If the idea of intricate floral designs seems daunting, fear not! This guide will introduce you to an incredibly accessible and rewarding method for crafting gorgeous, **fondant-style flowers using fruit leather**, making the process enjoyable even for beginners.
Forget the long, tedious hours often associated with traditional fondant work. We’ve streamlined the cake decorating experience to focus on these charming edible blooms. This step-by-step tutorial will walk you through everything you need to know, from gathering your materials to the final flourish, ensuring your homemade cake embellishments are nothing short of spectacular. Get ready to impress with your very own handcrafted, edible floral arrangements!
Why Choose Fondant Flowers for Your Cakes?
Fondant flowers, whether crafted from traditional fondant or our innovative fruit leather method, offer unparalleled versatility and beauty in cake decoration. Unlike fresh flowers, edible flowers are completely safe for consumption, eliminating concerns about pesticides or non-food-safe elements. They allow for complete customization in color, size, and style, ensuring a perfect match for any theme or celebration, from elegant weddings to vibrant birthday parties. Once dried, these durable decorations can be prepared in advance, saving valuable time on the day of your event, and they hold their shape beautifully, resisting wilting or drooping. Moreover, crafting your own DIY cake flowers can be a cost-effective alternative to purchasing pre-made decorations or hiring a professional decorator, allowing your creativity to shine without breaking the bank.
Essential Tools and Materials for Crafting Edible Flowers
Before diving into the creative process, gathering all your supplies is key to a smooth and enjoyable experience. This list focuses on materials for our unique fruit leather method, but many items are also standard for traditional fondant work. The beauty of using fruit leather is its flexibility and vibrant, pre-colored nature, making it a fantastic medium for stunning edible blooms.
- Fruit Leather Sheets: For this project, store-bought fruit leather is incredibly convenient and comes in a variety of colors. If you need a very specific color or want to experiment with flavors, making your own fruit leather is an option, though it requires more time. Choose quality brands for better pliability.
- Round Cookie Cutters: You’ll need an assortment of sizes to create varied petal shapes and flower dimensions. Sizes ranging from 1/2 inch to 2 inches in diameter are ideal for creating different layers and depths in your flowers, from tiny buds to fuller blooms.
- Small Bowl of Water: This serves as your edible “glue.” A small amount of water helps the fruit leather pieces adhere to each other when they begin to dry out, ensuring your petals stay together.
- Small Paint Brush: A clean, food-safe paint brush is perfect for applying just the right amount of water for adhesion, allowing for precise control and avoiding over-wetting the fruit leather.
- Floral Wire (Food-Grade) or Toothpicks/Bamboo Skewers: These are crucial for propping up and shaping your drying flowers. If using floral wire, ensure it is food-grade or remove it before serving. Toothpicks or short pieces of bamboo skewers are excellent edible-safe alternatives for support.
- Piece of Foam or Styrofoam: A block of foam provides a stable base where you can insert your wires or toothpicks, allowing your flowers to dry in their desired shape without flattening.
- Rolling Pin: Essential for flattening the fruit leather sheets to an even thickness, making them easier to cut and manipulate into delicate petals.
- Optional: Cornstarch or Powdered Sugar: A light dusting can prevent fruit leather from sticking to your work surface or rolling pin, especially in humid conditions.
- Optional: Fondant Mat: A non-stick surface can make rolling out fruit leather (or traditional fondant) much easier.
Step-by-Step Guide to Crafting Stunning Fruit Leather Flowers
Follow these detailed steps to create beautiful, edible flower “puffs” that will add an exquisite touch to any cake. This method focuses on building volume and delicate ruffles, making your flowers look truly lifelike.
Step 1: Preparing Your Canvas – Flattening the Fruit Leather
Begin by unrolling or flattening a sheet of fruit leather on a clean, dry surface. Using your rolling pin, gently roll out the fruit leather until it is consistently thin and smooth. Aim for an even thickness across the entire sheet, similar to a thin sheet of paper, but be careful not to roll it so thin that it tears. This preparation ensures uniform petals and easier manipulation in later steps. If the fruit leather is sticky, a very light dusting of cornstarch or powdered sugar on your surface and rolling pin can help.
Step 2: Cutting the Petal Bases – Precision and Variety
Now, take your round cookie cutters and firmly press them into the flattened fruit leather to cut out several circles. The size of the cutter you choose will directly influence the overall size and “puffiness” of your finished flower. For a diverse and natural-looking bloom, we recommend using a range of cutter sizes, perhaps from 1/2 inch for smaller inner petals to 2 inches for larger outer ones. For a full, voluminous flower, aim to cut at least 6-8 circles per bloom, varying sizes if desired. Re-roll any scraps to minimize waste.
Step 3: Sculpting Individual Petals – The Ruffle Technique
Pick up one of your fruit leather circles. Using your thumbs and forefingers, gently press the opposing sides of the round piece together towards its center. As you press, the edges will naturally ruffle, creating a shape that resembles a soft, ruffled “x” or a loosely folded butterfly. The key is to press towards the very center without completely closing the “x”; maintain open loops on the sides. These open loops are what give each individual petal its distinctive volume and texture, contributing to the airy, full appearance of the final flower. Repeat this delicate process for all your cut fruit leather circles.
Step 4: Assembling Your Flower – Building Volume
To form a beautiful, full flower, we found that using approximately 6 ruffled fruit leather rounds per bloom yields excellent results. However, you can use more or fewer depending on how dense or sparse you wish your flower to be. To begin the assembly, gently take two of your ruffled fruit leather rounds and press them together at their central points. The natural stickiness of the fruit leather should allow them to adhere. This forms the initial base of your flower, setting the stage for subsequent layers.
Step 5: Adhering Petals and Shaping the Bloom
As you continue adding more ruffled pieces, you might find that the fruit leather begins to dry slightly, reducing its natural stickiness. If this happens, use your small paintbrush to apply a tiny amount of water to the central joining points of the pieces. This acts as a food-safe adhesive, allowing the fruit leather pieces to stick firmly together. Continue to add more ruffled rounds, carefully arranging and pressing them around the center, overlapping them slightly to create a layered, organic look. Gently cup and mold the entire cluster with your fingers to achieve the desired voluminous “puff” or bloom shape, ensuring the open loops of each ruffle are maintained for maximum visual impact.
Step 6: Drying and Setting Your Edible Creations
Once your flower is formed, carefully transfer it onto a piece of foam or styrofoam. This is where your floral wires or toothpicks come into play. Insert the wires or toothpicks into the foam, gently propping up the fruit leather flower into its desired final shape. This support is crucial to prevent the delicate petals from drooping or losing their form as they dry. Allow your edible flowers to dry out completely, ideally overnight or for at least 12-24 hours. The drying time can vary depending on the humidity levels in your environment; in more humid conditions, they may require a longer drying period. This step ensures your flowers become firm and hold their shape beautifully on your cake. If you used non-edible floral wires, remember to remove them carefully before placing the flowers on the cake or clearly inform those consuming the cake.
Step 7: The Grand Finale – Attaching Flowers to Your Cake
With your beautiful fruit leather flowers fully dried and set, it’s time for the final touch: attaching them to your finished cake. If you are applying them to a buttercream-frosted cake, small dots of royal icing or even a tiny dab of fresh buttercream can act as an effective adhesive. For cakes covered in fondant, simply brush a small amount of water onto the back of your fruit leather flower and then gently press it onto the desired spot on the fondant-covered cake. The water will reactivate the fruit leather’s stickiness, allowing it to bond securely to the fondant. Arrange your flowers creatively, perhaps in clusters, cascades, or as individual accents, to achieve your desired aesthetic. This final step brings your entire cake decoration to life!
Tips for Perfection and Creative Variations
Elevate your fruit leather flowers even further with these expert tips and ideas for customization:
- Color Blending: Experiment with cutting petals from different colored fruit leathers and assembling them into a single flower for a multi-tonal, realistic effect.
- Varying Flower Types: While this guide focuses on “puff” flowers, you can adapt the technique to create other floral shapes. Try using tear-drop or heart-shaped cutters for more pointed petals, or stack different sized rounds without ruffling for a simpler, layered bloom.
- Adding Detail: For extra realism, consider dusting the edges of your dried petals with edible luster dust or using food-safe edible markers to draw delicate veins.
- Storage: Once completely dry, your fruit leather flowers can be stored in an airtight container at room temperature for several weeks, protected from humidity. This allows you to prepare them well in advance.
- Practice Makes Perfect: Don’t be discouraged if your first few attempts aren’t flawless. Cake decorating is an art, and practice will refine your technique, leading to increasingly stunning results.
Troubleshooting Common Issues
Even experienced decorators encounter challenges. Here are solutions to common problems you might face:
- Tearing Fruit Leather: If your fruit leather tears during rolling or shaping, it might be rolled too thin or be slightly dry. Try working with slightly thicker pieces or re-hydrating very dry fruit leather minimally with a damp paper towel (then re-rolling).
- Petals Not Sticking: If petals aren’t adhering, you might not be using enough water, or the fruit leather could be too dry. Apply a little more water with your brush, ensuring coverage where pieces meet.
- Flowers Drooping During Drying: Insufficient support or high humidity are usually the culprits. Ensure you’ve adequately propped up each petal with wires/toothpicks and allow ample drying time in a dry environment.
Conclusion: Unleash Your Inner Cake Decorator!
Creating edible flowers, especially using the innovative fruit leather method, is a surprisingly simple yet incredibly rewarding way to personalize and beautify any cake. While cake flowers often evoke images of elegant wedding cakes, as we were inspired by the beautiful designs from sources like Wedding Girls, we wholeheartedly encourage you to use them on any cake, regardless of the occasion. From birthdays and anniversaries to baby showers or just a delightful treat, these gorgeous little details add immense charm and sophistication.
There are countless ways to decorate a cake, but the bespoke beauty of handcrafted fruit leather flowers offers a unique touch that store-bought decorations simply cannot replicate. Give this delightful project a try, and prepare to be amazed by your own creative capabilities. We’re confident that once you experience the joy of seeing your handmade blooms adorn a cake, you’ll be eager to explore even more cake decorating adventures!
Explore More Creative Projects:
Delicious Cake Pop Recipe
Homemade Rainbow Cake in a Jar
Fun Jello Shot Recipes