
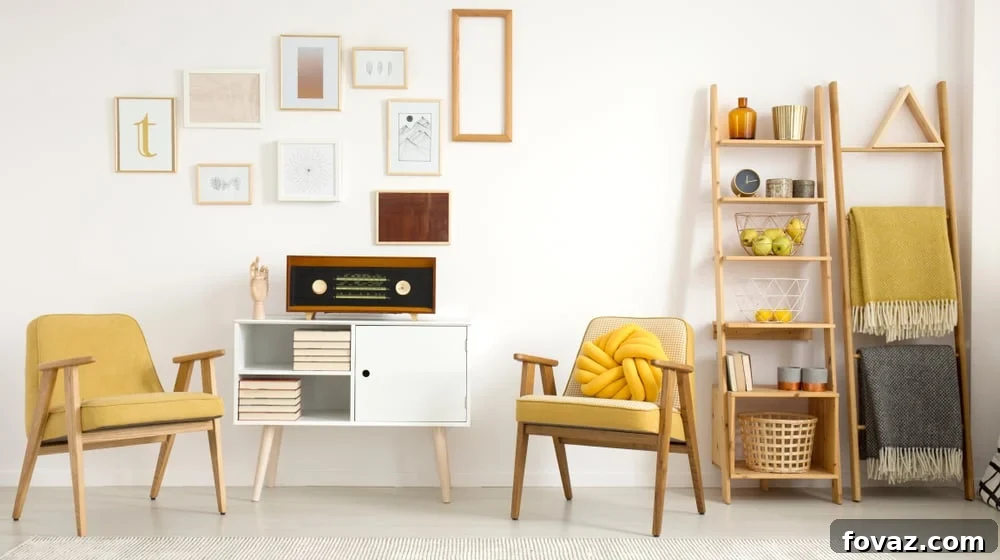
Transforming underutilized spaces into functional, stylish storage is a common goal for homeowners. When faced with tight corners, narrow hallways, or simply a desire for unique shelving, the humble ladder shelf emerges as a brilliantly versatile solution. This guide will walk you through building your own bespoke ladder shelving unit, a project that is surprisingly straightforward and incredibly rewarding. Say goodbye to clutter and hello to beautifully organized living with this ultimate DIY weekend project. It’s time to magically create storage where you thought none existed.
Unlock Your Home’s Potential: Why Build Custom Ladder Shelves?
Ladder shelves are more than just a place to store books or display decor; they are a statement piece that blends seamlessly into various interior styles, from rustic farmhouse to modern minimalist. Their angled design provides a dynamic visual element, drawing the eye upwards and making rooms feel more expansive. This unique shelving unit will not only be an interesting addition to your home but also offer marvelous functionality. It’s all about blending creativity with practical use.
While the distinct angles and leaning structure of ladder shelves might initially suggest a complex DIY project, the reality is far simpler than it appears. With a clear plan, the right tools, and a bit of patience, even novice woodworkers can achieve professional-looking results. The effort invested in building your own ladder shelves is undeniably worth it, considering the significant function and aesthetic appeal they add to any space. Imagine the satisfaction of crafting a custom piece that perfectly fits your needs and style, all while saving money compared to store-bought alternatives. Just like any other successful DIY endeavor, you’ll need your essential tools, high-quality wood, and a dedicated block of time to bring your vision to life.
Essential Tools and Supplies for Your Ladder Shelf Project
Before diving into construction, gather all necessary tools and materials. Having everything at hand will ensure a smooth and efficient building process, allowing you to focus on precision and craftsmanship.
Tools You’ll Need:
- Screwdriver: Essential for fastening screws securely. Consider an electric drill with a screwdriver bit for efficiency.
- Tape Measure: For accurate length and distance measurements, crucial for ensuring all components fit together perfectly.
- Hammer: Useful for tapping components into place or driving nails if required, though screws are primarily used in this project.
- Wood Plane: To smooth edges and surfaces, ensuring a refined, professional finish.
- Level: Indispensable for verifying that your shelves are perfectly horizontal, critical for both aesthetics and stability.
- Drill: For pre-drilling pilot holes and driving screws, preventing wood splitting and easing assembly.
- Combination Square: An invaluable tool for marking straight lines and checking angles, ensuring precise cuts and joints.
- Sliding Bevel: Absolutely key for accurately transferring and setting specific angles, especially for the unique leaning design of ladder shelves.
Supplies You’ll Need:
- Wood: The choice of wood significantly impacts the look and feel of your ladder shelves. While European Waney Edge Oak was used in the original inspiration for its natural, rustic charm, you can select any suitable timber like pine, maple, or even plywood, depending on your desired aesthetic, budget, and woodworking skill level. Ensure your wood is straight, free from major defects, and dimensionally stable. You will need wood for:
- Legs: (e.g., 1″ x 4″ x 80″) – These form the main structural support, so choose sturdy pieces.
- Shelves: (e.g., 1″ x 7″ x 20″, 1″ x 9″ x 20″, 1″ x 11″ x 20″, 1″ x 13″ x 20″) – Varying depths create a visually interesting, graduated look, offering versatility for different items.
- Shelf Supports: (e.g., 1″ x 1″ x 6″, 1″ x 1″ x 8″, 1″ x 1″ x 10″, 1″ x 1″ x 12″) – These provide crucial support for each shelf, ensuring they can bear weight effectively. Note: The original list contained “1″ x 12″ x 20″” for shelf supports which seems like a full shelf dimension; it’s likely a typo and should be a smaller support piece similar to the others, like “1″ x 1″ x 12″”. We’ve adjusted for clarity and practicality.
- Screws: Wood screws of appropriate length and gauge for securely fastening components without piercing through.
- Wood Glue: Provides additional strength to joints, creating a more robust and lasting structure.
- Drill Bits: Various sizes for pilot holes, matching the screws you’ll be using.
- Sandpaper: Assorted grits (from coarse to fine) for smoothing surfaces and preparing the wood for finishing.
- Countersink Bits: Essential for creating recesses for screw heads, allowing them to sit flush or slightly below the wood surface for a cleaner look and to prevent splitting.
Step-by-Step Guide to Building Your Unique Ladder Shelves
Follow these detailed steps to construct your durable and attractive ladder shelving unit. Precision and attention to detail at each stage will ensure a successful and satisfying outcome.
Step 1: Determine the Angle of Your Shelf Unit
The characteristic lean of ladder shelves is crucial for both their aesthetic and stability. To establish this angle, lean one of your chosen leg pieces against the wall where the shelf will ultimately reside. Using your sliding bevel, carefully slide it onto the floor, aligning one arm with the floor and the other with the leaning leg. Lock the bevel in place. This angle will be your consistent reference point for all subsequent cuts and placements, ensuring uniformity across your shelves and stability for the entire unit.
Step 2: Mark and Cut the Legs
Once you have determined the angle, use your measured leg as a template. Transfer the bottom angle mark precisely to your second leg piece. Additionally, ensure both legs are cut to the exact same length. Use a combination square to verify squareness for the top cut and the sliding bevel for the bottom angle cut. Accuracy here is paramount for a balanced and stable structure.
Step 3: Strategically Determine Shelf Placement
With your legs prepared, it’s time to envision where your shelves will sit. You have complete creative freedom with spacing; you might opt for uniform gaps between shelves, or vary the spacing to accommodate items of different heights. For this particular project, we opted for even spacing to create a clean, balanced look. Mark these positions clearly on the inside face of both legs. Consider the typical items you plan to store – larger items might require more vertical clearance, while smaller decorative pieces can be closer together.
Step 4: Calculate the Length of the Shelf Supports
The shelf supports are vital for providing a flat, secure surface for your shelves. To accurately determine their length, temporarily position the legs against the wall, aligning them with the marked shelf positions. Place a shelf support piece underneath one of these marked lines. Measure the horizontal distance from the wall to the front face of the leg. This measurement, transferred precisely to your chosen wood (preferably using inch-by-inch measurements for ultimate accuracy), will give you the length needed for each support. Remember to account for the varying depth of each shelf when calculating the corresponding support length.
Step 5: Secure the Shelf Supports to the Legs
This step requires careful execution to ensure structural integrity and a clean finish. First, using a drill bit slightly smaller than your screws, pre-drill pilot holes through the shelf supports where they will attach to the legs. Then, use countersink bits to enlarge the outer portion of these holes. Countersinking is crucial as it allows the screw heads to sit flush with or slightly below the surface of the wood, preventing splitting and creating a neat appearance. Apply a generous amount of wood glue to the mating surfaces of the support and leg before screwing them firmly into place. The glue provides additional shear strength, making the joint incredibly robust.
Step 6: Determine the Optimal Size of the Shelves
While standard dimensions are provided, customizing shelf sizes adds to the unique character of your unit. In this project, we opted for a slight overhang of approximately 25mm (about 1 inch) beyond the front edge of the legs, creating a visually appealing overlap. To achieve this, measure the depth of your bottom shelf and add the desired overlap. Remember, you can adjust these measurements to perfectly suit your specific design preferences and the available space. Varying shelf depths from bottom to top (e.g., 13″, 11″, 9″, 7″) creates the classic ladder effect and offers flexible display options.
Step 7: Join Two Shelf Pieces to Form the Bottom Shelf (If Needed)
For wider shelves, especially the bottom one, you may need to join two pieces of wood. Begin by carefully planing the edges of both pieces to ensure they are perfectly straight and smooth, creating a seamless joint. Apply wood glue generously along one edge. Then, align the two pieces and use screws to attach two scrap wood pieces across the joint on the surface, acting as temporary clamps. Alternatively, use woodworking clamps directly across the joint to apply firm pressure, bringing the two pieces tightly together. Allow the glue to dry completely according to the manufacturer’s instructions. Once dry, remove the clamps/scraps and sand the joint until it feels and looks seamless. This technique ensures a strong, aesthetically pleasing wider shelf.
Step 8: Install Shelves to the Shelving Unit
With the legs and supports assembled, it’s time to install the shelves. Start by applying wood glue along the top edge of each shelf support. Carefully position each shelf onto its corresponding supports, aligning it precisely. Use your drill to pre-drill pilot holes through the bottom of the shelf into the supports, then drive screws to firmly secure them. As you install each shelf, use your level to check for perfect horizontal alignment. Slight adjustments can be made before the glue fully cures, ensuring your display items won’t slide off.
Step 9: Attach an Angle Bracket for Enhanced Stability
Safety is paramount, especially for leaning furniture. To prevent your ladder shelves from accidentally sliding or tipping, attaching an angle bracket to the wall is highly recommended. First, position your completed ladder shelf unit against the wall in its final desired location. Mark the precise spot on the wall where the top shelf meets it. Move the ladder shelf away, then securely screw the angle bracket to the wall using appropriate wall anchors if necessary (e.g., for drywall). Once the bracket is firmly installed, reposition the ladder shelf against the wall and screw the other arm of the angle bracket to the underside of the top shelf. This creates a secure attachment point, anchoring your shelves safely in place.
Step 10: Your New Ladder Shelf: The Finishing Touch
Congratulations, you now have a beautifully constructed ladder shelf! The final step is to personalize it with a finish that complements your home decor. You can embrace its natural wood grain by leaving it unfinished, or protect and enhance it with a coat of stain for rich color, varnish for a durable shine, or even a vibrant splash of paint for a bold statement. Consider your existing color scheme and the amount of wear and tear the shelf might experience. A protective finish will not only improve its appearance but also extend its lifespan.
You’ve now mastered a unique and highly effective way to install shelves in your house, whether it’s destined for your bedroom, living room, home office, or even a spacious bathroom. This project is a testament to clever space utilization, transforming often-overlooked areas into functional and aesthetic focal points. Remember, the beauty of DIY lies in customization. Feel free to adapt the dimensions for this project, considering the ideal height you envision for your ladder shelves, their overall width, and the specific constraints of your available space. Each custom adjustment makes your creation truly one-of-a-kind.
What are your thoughts on these versatile ladder shelves? Are you inspired to build one for your home this weekend? Share your ideas and questions about this ladder shelf project in the comments section below!
Up Next: DIY Kitchen Storage Ideas – The Sneaky Knife Drawer
Stay connected with us on Facebook, Twitter, Pinterest, and Instagram for more inspiring DIY ideas!
Editor’s Note – This post was originally published in September 2016 and has been updated for quality and relevancy.