
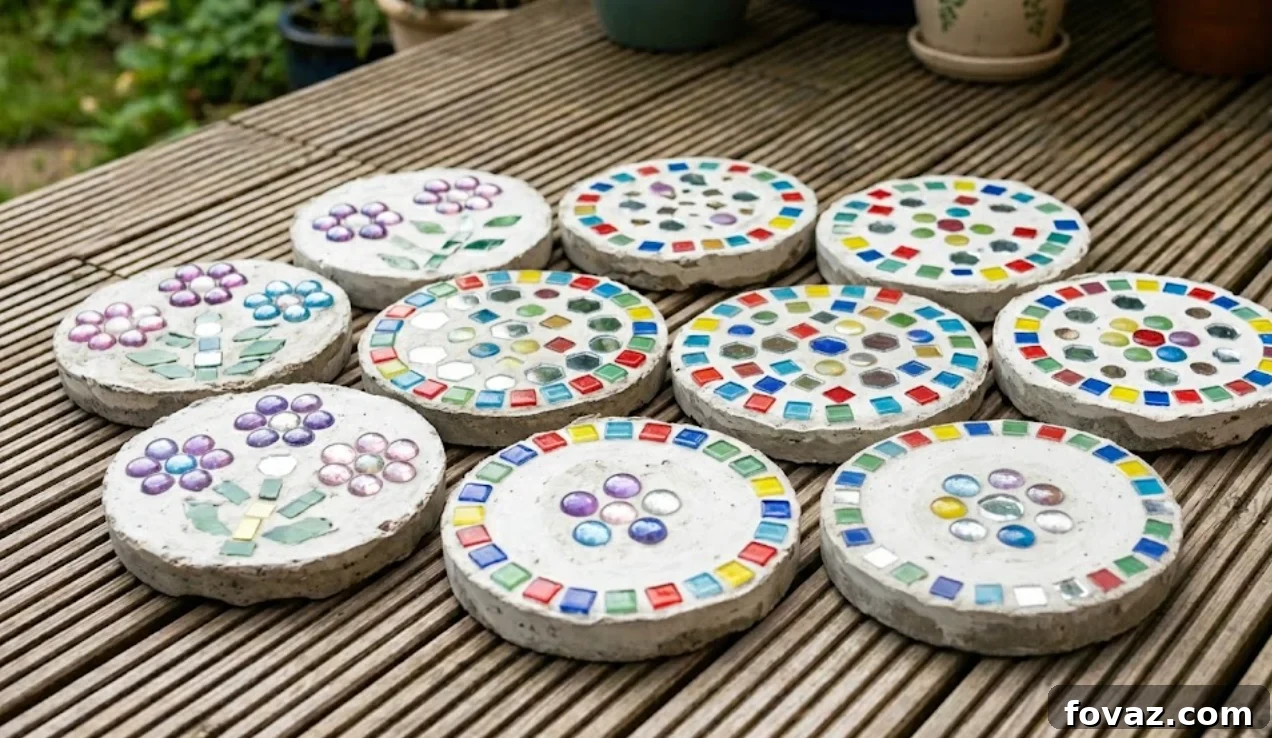
At a Glance: Painted Garden Stepping Stones for Kids
- Total cost: under $20 for one stone, under $40 for a family of four
- Active work time: about 1 hour. Cure time: 48 hours, no shortcuts
- Adult handles the mixing. Kids handle the design, decorating, and naming
Tired of hearing “I’m bored” every weekend? Want a simple, entertaining project that pulls the kids away from screens and gets them excited? Painted garden stepping stones are a perfect solution. This craft is easy to set up, kid-friendly, and produces a lasting garden accent the whole family can be proud of.
Kids get to be hands-on and creative while you supervise the potentially messy parts. With a little planning and patience during curing, you’ll end up with sturdy, weather-ready stones that keep their look for seasons. Follow this guide for a stress-free process that avoids the common pitfalls of working with concrete.
Quick note: concrete demands respect. Mix it correctly, give it the full cure time, and avoid letting sharp or fragile decorations compromise the stone. Do those things and your stepping stones will be durable and beautiful.
STEPS
Safety First (Quick Read)
Dry concrete mix produces fine dust. An adult should handle all mixing. Wear a dust mask and work outdoors in a well-ventilated area. Keep small children away from dry mix and watch little hands around glass gems or other small pieces that could cause cuts or be swallowed.
Materials List (Kid-Safe Edition)
The core mix and tools:
- Stepping stone mix — about 8 lbs for a 12″ stone
- Water — roughly 2 cups, or follow the bag instructions
- A large plastic pail for mixing
- A sturdy stirring stick or dowel
- A putty knife or small trowel for smoothing
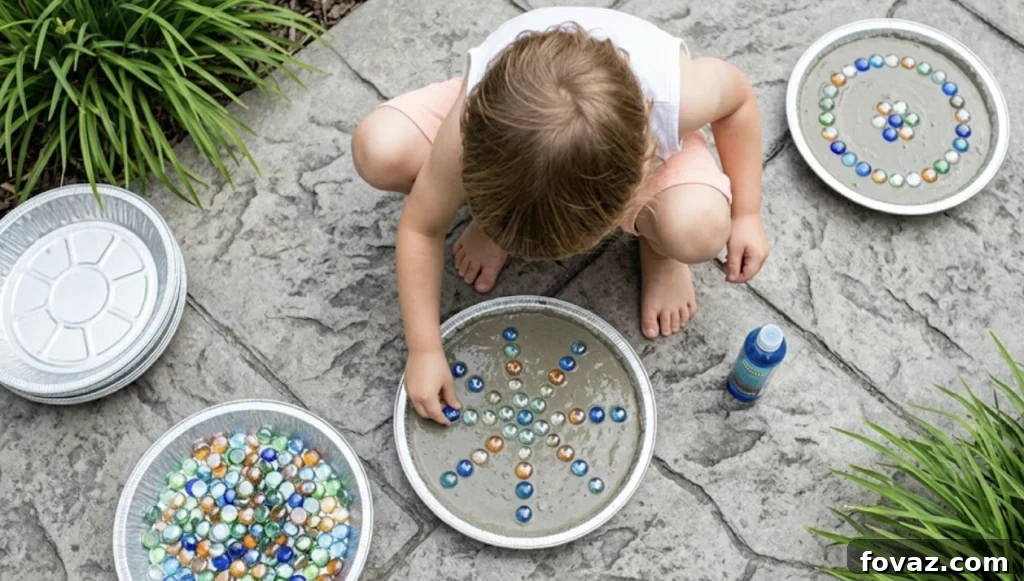
- A mold — a 12″ round plastic stepping stone mold or a heavy-duty round foil cake pan
The kid-safe decor (the fun stuff):
- Smooth glass gems or marbles
- Small plastic toys (mini dinosaurs, plastic bugs, little cars)
- Smooth ceramic or plastic mosaic tiles (no sharp edges)
- Letter and number stamps (optional) for names or dates
Step-by-Step Instructions
Step 1: The Dry Run Design
Before mixing, have the kids plan their design on paper or a flat surface. Trace the bottom of the mold onto cardboard so they can arrange gems and toys within that outline. This makes decorating faster and reduces last-minute changes once the concrete is poured.
Step 2: Mix the Concrete (Adult Step)
Combine the stepping stone mix and water in the pail following the bag’s ratio. Stir vigorously until the mixture resembles thick pancake batter. A spoonful should slowly settle flat but not run. Proper consistency prevents cracking and sinking of decorations.
Step 3: Pour and Level
Pour the mix into the mold or foil pan. Use the putty knife to spread it to the edges and create an even surface. Tap the mold sides or lift and drop it a few inches to release trapped air bubbles—this reduces the chance of holes or weak spots later.
Step 4: Decorate (Kid Step)
Wait about 5 to 10 minutes after pouring so the surface firms slightly. The mix should still be wet but thick enough to hold items without them sinking. Let the kids press their pre-arranged gems, toys, and tiles into the surface. Push each piece down firmly so the top remains visible and securely anchored.
The Kid-Safe Decor Vault
Choose durable, smooth materials that withstand outdoor conditions. Avoid sharp, brittle, or biodegradable items that can rot or break. Good options include:
- Smooth glass and stone: flat marbles, tumbled sea glass, river pebbles
- Plastic figurines: mini dinosaurs, farm animals, small toy cars
- Treasures and hardware: old coins, metal washers, large plastic beads
- Beach finds: thick sturdy seashells (avoid thin or brittle shells)
- Recycled items: colorful plastic bottle caps or pre-tumbled ceramic tiles
Step 5: Stamp and Cure
If using letter or number stamps for names or dates, press them in once the surface is stable. Move the mold to a flat, dry, and undisturbed spot and let it cure for 48 hours. It may appear hard after 24 hours but won’t be fully cured; rushing this step is the most common cause of cracks.
After two full days, remove the mold or peel away the foil pan. If you used a reusable mold, gently flex it to release the stone. Let the stone sit a day or two more before placing it on the path and painting or sealing if desired.
These stones make great weekend projects—stirring concrete, sorting treasures, and deciding where the purple marble should go. More than the finished piece, the experience and memories with your kids are the real reward.
FAQs
1. How long does a painted garden stepping stone take to dry?
Allow a full 48 hours for curing before handling or stepping on the stone. It may look set at 24 hours, but it’s not fully cured and can crack if removed early.
2. What kind of paint should I use on a garden stepping stone?
Use outdoor-rated acrylic or patio paint. Regular craft acrylic fades and flakes faster. After painting, protect the surface with a clear outdoor sealer or polyurethane spray to extend the color and finish.
3. Can kids really help make a painted garden stepping stone?
Yes. Kids can plan the design, place decorations, and do stamping. Adults should handle dry mixing and pouring because of dust and handling wet concrete. Children around age 4 and up can participate safely with supervision.
4. What can I use instead of a stepping stone mold?
A heavy-duty foil cake pan or disposable pie tin works well. An old plastic plant saucer can also be used—coat it lightly with cooking spray or petroleum jelly so the stone releases cleanly.
5. Will the decorations on my painted garden stepping stone stay in place outside?
If decorations are pressed firmly when the mix is still tacky (about 5–10 minutes after pouring), they typically remain secure for years. Glass gems and plastic toys are most durable. Press too lightly or too late and pieces may loosen with frost or heavy rain.