
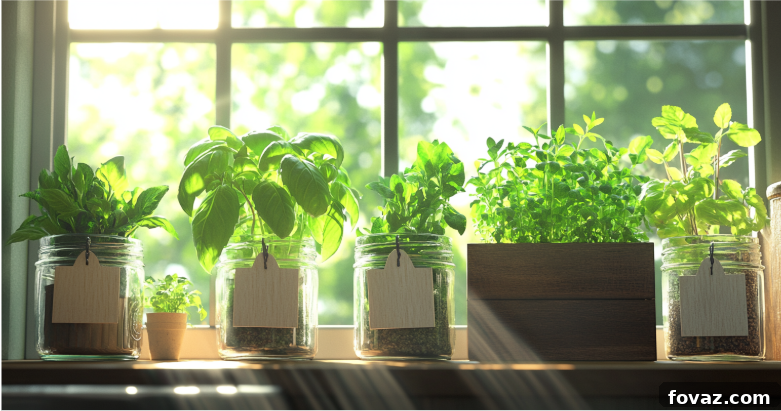
As the chill of winter settles in and outdoor gardens fall dormant under a blanket of snow, the dream of fresh, homegrown produce can seem distant. Yet, your passion for gardening doesn’t have to hibernate! Instead of enduring the cold to tend to a dwindling outdoor patch, why not cultivate a vibrant oasis right inside your home? Creating DIY indoor herb planters is a wonderful way to keep your green thumb active and infuse your living space with life, color, and exquisite natural fragrances. These aren’t just practical additions; they are living decor that elevate your home’s aesthetic while providing a continuous supply of aromatic herbs for your culinary adventures, all season long.
Imagine snipping fresh basil for your pasta, plucking fragrant mint for your tea, or harvesting savory rosemary for your roasts, even when the world outside is frosty. It’s not only possible but also incredibly simple and rewarding. Ready to transform your home into a verdant sanctuary and bring your gardening dreams indoors? Let’s dive into everything you need to know to get started with your very own thriving indoor herb garden.
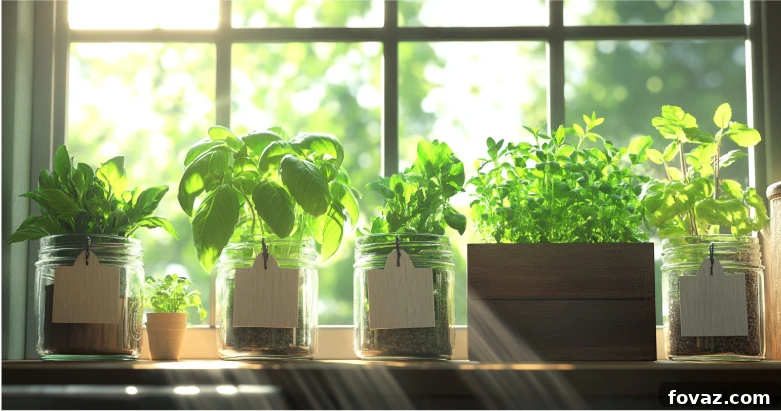
Why Embrace Indoor Herb Gardening This Winter?
Gardening is more than just a hobby; it’s a therapeutic and deeply rewarding activity that connects us to nature. Indoor herb planters offer the incredible benefit of allowing you to enjoy this fulfilling pastime year-round, regardless of the weather outside. Even when blizzards rage and the ground is frozen solid, you can nurture new life and reap a multitude of benefits that extend far beyond just fresh ingredients.
- Uninterrupted Access to Fresh Ingredients: Picture this: no more last-minute dashes to the grocery store for wilted herbs or paying premium prices. With an indoor herb garden, you have a living pantry at your fingertips. Instantly elevate your everyday dishes with the vibrant, unparalleled flavor of freshly snipped basil, the refreshing zest of mint, or the earthy aroma of rosemary. Your meals will taste better, and you’ll love the convenience. From garnishing to main courses, fresh herbs make all the difference.
- Remarkably Budget-Friendly Living: While the initial setup for an indoor herb garden is a small investment, it quickly pays for itself. Consistently purchasing fresh herbs from stores can add up significantly over time, often resulting in unused portions going to waste. Growing your own at home costs a fraction of the price, providing a sustainable and economical source of flavor that reduces food waste and saves you money in the long run.
- A Captivating Decorative Element: Beyond their practical utility, indoor herb planters are a stunning addition to any home decor. The lush, vibrant greenery instantly transforms your living spaces, adding a touch of natural charm, character, and tranquility. Whether clustered on a windowsill, arranged on a kitchen counter, or adorning a bookshelf, they introduce organic textures and lively colors that soften interiors and create a more inviting atmosphere. They are living works of art that evolve and grow with your home.
- A Powerful Wellness & Mood Enhancer: The benefits of surrounding ourselves with plants are well-documented. Plants are natural stress-reducers, offering a calming presence that can lower anxiety and improve mood. Furthermore, many indoor herbs act as natural air purifiers, filtering toxins and improving the overall air quality in your home. The simple act of tending to your indoor herb garden, feeling the soil, and inhaling their fresh scents can be a profoundly meditative and uplifting experience, boosting your mental and physical well-being throughout the dreary winter months.
By bringing your garden indoors, you maintain a vital connection to nature, infusing your home with warmth, life, and an endless supply of fresh flavors, making even the darkest winter days feel brighter and more vibrant.
The Best Herbs for Thriving Indoor Planters
While some herbs might be a bit finicky indoors, many varieties are remarkably resilient and thrive beautifully in an indoor environment, making them perfect candidates for your winter herb garden. For beginners, choosing the right herbs is key to a successful and rewarding experience. Here are some of the most beginner-friendly and popular options, along with tips for their care:
- Basil (Ocimum basilicum): The king of Italian cuisine, basil is a sun-lover that thrives indoors with ample light. It prefers warm temperatures and consistently moist, well-draining soil. To encourage bushy growth and prevent it from flowering too early (which can make the leaves bitter), pinch off the top sets of leaves regularly. Keep it away from cold drafts.
- Parsley (Petroselinum crispum): Both curly and flat-leaf parsley are adaptable and incredibly easy to grow indoors. Parsley prefers bright, indirect light and consistently moist soil. It’s a culinary staple, perfect for garnishes, sauces, and fresh salads. Harvest outer stems first to encourage continuous growth.
- Mint (Mentha spp.): Famous for its hardiness and invigorating aroma, mint grows well even with moderate light, making it very forgiving for indoor growers. It does prefer moist soil. Be aware that mint is a vigorous grower; it’s best planted alone in its own pot to prevent it from outcompeting other herbs. There are many varieties, from peppermint to spearmint, each with unique flavors.
- Thyme (Thymus vulgaris): This compact and wonderfully fragrant herb is perfectly suited for smaller planters and windowsills. Thyme thrives in bright light and prefers well-draining soil that is allowed to dry out slightly between waterings. Its woody stems are resilient, and regular snipping encourages new growth, perfect for seasoning meats and vegetables.
- Rosemary (Salvia rosmarinus): Woody and incredibly resilient, rosemary loves warmth and plenty of direct sunlight. It prefers slightly drier conditions than some other herbs, so ensure its soil drains well and allow it to dry out between waterings to prevent root rot. Its piney fragrance makes it a favorite for roasting and grilling.
- Chives (Allium schoenoprasum): These quick-growing, oniony herbs are excellent for garnishing meals and adding a delicate flavor to a variety of dishes. Chives prefer bright light but can tolerate partial shade. Keep the soil consistently moist. Harvest by snipping the leaves about an inch above the soil line to encourage regrowth.
- Oregano (Origanum vulgare): Another Mediterranean staple, oregano is robust and thrives in sunny spots with well-draining soil. It’s relatively low-maintenance and offers a pungent, savory flavor that’s essential for many cuisines. Like thyme, it tolerates drying out slightly between waterings.
- Cilantro (Coriandrum sativum): While sometimes a bit challenging indoors due to its tendency to “bolt” (go to seed) in warm conditions, cilantro can be grown successfully with cooler temperatures and consistent moisture. It needs bright, indirect light. Harvest the outer leaves frequently to prolong its leafy production.
When selecting your herbs, consider the ones you use most often in your cooking. Then, commit to providing each variety with its specific requirements for light, water, and temperature to ensure they thrive and provide you with a bountiful harvest.
Crafting Beautiful DIY Indoor Herb Planters: A Step-by-Step Guide
Creating your own indoor herb planters is a wonderfully simple, creative, and fulfilling process. It allows you to personalize your garden space and add unique flair to your home. Follow these detailed steps to craft the perfect, flourishing home for your herbs.
Step 1: Thoughtfully Pick Your Planters
This is where your creativity shines! Begin by choosing planters that not only suit your personal style and home decor but also cater to the needs of your herbs. Think outside the box and consider sustainable or upcycled options:
- Mason Jars: These popular clear jars offer a sleek, modern, and minimalist aesthetic. They’re excellent for observing root growth. However, they lack drainage holes, so you’ll need to be extra diligent with the drainage layer and watering to prevent root rot.
- Repurposed Tins: Old coffee tins, cookie tins, or even colorful tea tins can be transformed into charming, rustic planters. Clean them thoroughly and consider drilling small drainage holes in the bottom if they don’t have them. A coat of paint can also refresh their look.
- Teacups or Mugs: For a whimsical, cozy, and personal touch, teacups and mugs are delightful. They are perfect for smaller herbs like thyme or mint. Again, drainage will be a key consideration, so careful layering is essential.
- Wooden Boxes or Crates: Ideal for grouping several complementary herbs together in one shared container, creating a mini garden tableau. Ensure the wood is treated or lined to prevent rot from moisture, and definitely include drainage holes.
- Terracotta Pots: A classic choice, terracotta is porous, allowing air and moisture to pass through, which helps prevent overwatering. They come in various sizes and are great for herbs that prefer drier soil.
- Ceramic Pots: Glazed ceramic pots offer a wide range of colors and designs, making them highly decorative. They retain moisture more than terracotta, so ensure they have drainage holes.
- Self-Watering Planters: These are excellent for busy gardeners, as they have a reservoir that supplies water to the roots as needed, reducing the frequency of watering.
Regardless of your choice, the golden rule for healthy herbs is proper drainage. Ensure your chosen planters either come with drainage holes or can be adapted to include them (e.g., by drilling holes or using a false bottom with a significant drainage layer).
Step 2: Implement Superior Drainage Solutions
Root rot is the silent killer of many indoor plants. Without good drainage, excess water collects at the bottom of the container, suffocating roots and leading to fungal diseases. This step is critical for the longevity of your indoor herb garden:
- Create a Base Layer: Add a substantial layer (1-2 inches for smaller pots, more for larger ones) of small stones, pebbles, gravel, or even broken terracotta pot pieces to the very bottom of your container. This creates a reservoir for excess water to collect, keeping the soil away from standing water.
- Introduce Activated Charcoal (Optional but Recommended): Sprinkle a thin layer of activated charcoal on top of the drainage layer. Activated charcoal is porous and helps absorb odors, filter impurities from the water, and prevent the growth of harmful bacteria and fungi, keeping your soil fresher and healthier for longer. This is particularly useful in planters without drainage holes.
- Add a Mesh Screen (Optional): For pots with drainage holes, you can place a small piece of mesh screen or coffee filter over the hole before adding your drainage layer. This prevents soil from washing out while still allowing water to escape freely.
Step 3: Select Premium Quality Potting Soil
Herbs are living things that depend entirely on their growing medium for nutrients, water, and aeration. A high-quality potting mix is paramount for their success:
- Indoor Plant Potting Mix: Always opt for a potting soil specifically formulated for indoor plants or herbs. These mixes are typically lighter, more porous, and designed for container growth. They often contain a blend of peat moss, coir, vermiculite, and perlite, which provide excellent drainage, aeration, and moisture retention without becoming waterlogged.
- Enhance Drainage (if needed): If your chosen potting mix feels too dense, you can easily improve its drainage by blending in additional materials. Mix about 1 part perlite or coarse sand (like horticultural sand, not play sand) to 3-4 parts potting soil. Perlite is a volcanic glass that helps aerate the soil and prevents compaction.
- Nutrient-Rich Foundation: Some potting mixes come pre-enriched with slow-release fertilizers, which can be helpful. However, avoid heavy garden soil or topsoil, as these are too dense for containers, can compact easily, and may introduce pests or diseases into your indoor environment.
Step 4: Plant Your Herbs with Care
This is the exciting part! Whether you’re transplanting seedlings or planting from seeds, handle your herbs gently:
- Transplanting Seedlings: Carefully remove your herb seedling from its nursery pot. Loosen any tightly bound roots at the bottom to encourage outward growth. Create a small depression in your prepared planter, place the root ball in, and backfill with potting soil, gently firming it around the base of the plant. Ensure the base of the stem is at the same level as it was in its original container. Leave about an inch of space from the soil surface to the rim of the pot for watering.
- Planting Seeds: Follow the specific instructions on your seed packet for planting depth and spacing. Generally, seeds are planted just below the surface of the soil. Lightly cover them with soil and mist gently to settle the soil without disturbing the seeds.
- Watering After Planting: Immediately after planting, give your herbs a good watering until water begins to drain from the bottom (if your pot has holes). This helps settle the soil around the roots and provides essential moisture for the plant to recover from the shock of transplanting.
Step 5: Discover the Perfect Sun-Kissed Spot
Light is perhaps the most critical factor for indoor herb success. Most culinary herbs are sun-loving plants that originate from Mediterranean climates and require ample light:
- Direct Sunlight is Key: Place your planters in a location that receives at least 6-8 hours of direct sunlight daily. South-facing windows are often ideal as they provide the most intense and prolonged light exposure. East-facing windows offer good morning sun, while west-facing windows provide strong afternoon light. North-facing windows typically offer insufficient light for most herbs.
- Signs of Insufficient Light: If your herbs aren’t getting enough light, they may become leggy (stretching towards the light with sparse leaves), their growth may slow significantly, or their leaves may turn pale.
- Supplement with Grow Lights: If natural sunlight is limited (which is common during darker winter months), investing in a good quality grow light is highly recommended. LED grow lights are energy-efficient and effective. Position the grow light a few inches above your plants and keep it on for 10-14 hours a day, mimicking natural daylight. You can use a timer for consistency.
- Consider Temperature and Humidity: Most herbs prefer average room temperatures (65-70°F or 18-21°C) and moderate humidity. Avoid placing them near cold drafts from windows or hot blasts from heaters, which can stress the plants.
Step 6: Diligent Maintenance and Thoughtful Care
Consistent care is the secret to a thriving indoor herb garden. A little attention goes a long way:
- Mindful Watering: The most common mistake is overwatering or underwatering. A good rule of thumb is to water your herbs when the top inch of soil feels dry to the touch. Stick your finger into the soil to check. Water thoroughly until you see water dripping from the drainage holes, then empty any excess water from the saucer to prevent roots from sitting in standing water. Some herbs, like rosemary and thyme, prefer slightly drier conditions, while basil and mint like more consistent moisture. Adjust as needed.
- Regular Pruning for Bushy Growth: Don’t be afraid to snip! Regularly harvesting and pruning your herbs encourages them to grow bushier and produce more leaves, rather than becoming leggy or flowering prematurely. When pruning, pinch off the top sets of leaves or cut just above a leaf node. For most herbs, aim to harvest the top one-third of the plant.
- Vigilant Pest Inspection: Indoor plants can sometimes attract pests. Inspect your herbs weekly for any signs of common culprits like aphids, spider mites, or fungus gnats. Look for tiny insects, sticky residue, or webbing on the leaves. If you spot any issues, address them promptly with organic solutions like neem oil spray or insecticidal soap, or by simply wiping affected leaves with a damp cloth.
- Air Circulation: Ensure your herbs have good air circulation to prevent fungal diseases. Avoid overcrowding plants.
Infuse Your Home Decor with an Indoor Herb Garden
Your indoor herb planters are more than just functional; with a little extra effort and creativity, they can become stunning decorative elements that enhance your home’s aesthetic appeal. Think of them as living art pieces that add natural beauty and fragrance:
- Creative and Charming Labels: Give your herbs personality and make them easy to identify with stylish labels. Try crafting wooden tags, using mini chalkboard labels that you can write on with chalk markers, or creating hand-painted signs. You can use fun fonts, illustrations, or even simple, elegant typography to match your home’s style.
- Dynamic Grouped Displays: Instead of scattering individual pots, arrange your planters in cohesive clusters to create a lush, abundant focal point. Experiment with varying heights and textures. Use tiered plant stands, multi-level shelves, or window boxes to group several herbs together. This creates a visually richer display and mimics the density of an outdoor garden. Consider arranging them by color, size, or even the type of cuisine they’re used in.
- Seasonal Accents and Themes: Integrate your herb planters into your seasonal home decor. During the holidays, tie festive ribbons around the pots or add miniature ornaments. In spring, use pastel-colored fabrics or small faux flowers to brighten them up. For autumn, wrap pots in burlap or add small decorative gourds. This makes your indoor herb garden a dynamic part of your home’s changing decor.
- Vertical Gardening Solutions: If space is limited, consider vertical planters or wall-mounted systems. These can turn an unused wall into a stunning green feature, allowing you to grow more herbs in a smaller footprint while adding a modern design element.
- Integrating with Existing Decor: Choose planters that complement your existing color scheme and furniture. For a rustic look, use terracotta and distressed wood. For modern homes, opt for sleek ceramic or metal containers. Placing plants in decorative baskets can also add texture and hide simpler pots.
For even more inspiration on blending functionality with style in your indoor garden, visit trusted resources like Gardening Know How, which offers a wealth of creative ideas and practical advice.
Expert Tips for Thriving, Abundant Herbs
Beyond the basic steps, these expert tips will help you cultivate the healthiest, most productive herbs, ensuring they flourish and provide you with delicious harvests for months to come:
- Consistent Fertilization for Nourishment: Indoor herbs, being in confined pots, eventually deplete the nutrients in their potting soil. To keep them robust, fertilize monthly during their active growing season (typically spring through fall). Use a gentle liquid fertilizer specifically formulated for herbs or houseplants, diluted to half strength to avoid over-fertilization, which can burn roots. Look for organic options or slow-release granular fertilizers. Signs of nutrient deficiency include yellowing leaves or stunted growth.
- Strategic Pruning for Health and Flavor: Regular pruning is not just about aesthetics; it’s vital for encouraging fuller, healthier growth and enhancing flavor. For most herbs, pinch off the top 2-3 inches of growth just above a set of leaves (a node). This stimulates the plant to branch out, resulting in a bushier, more productive plant. When harvesting, always take leaves from the top and sides, rather than just the bottom. Avoid removing more than one-third of the plant at once. Pruning also delays flowering, which can make some herbs (like basil and cilantro) taste bitter.
- Vigilant Pest Prevention and Treatment: Indoor environments can be a haven for pests if not monitored. Inspect your herbs closely every week, paying attention to the undersides of leaves and new growth. Common pests include aphids (small, soft-bodied insects), spider mites (tiny mites that create fine webbing), and fungus gnats (small flies that hover around the soil, usually a sign of overwatering). If you find pests, isolate the affected plant immediately. Treat with organic solutions like neem oil spray (an organic insecticide), insecticidal soap, or by simply wiping off pests with a damp cloth or cotton swab dipped in rubbing alcohol for spot treatments. Prevention is key: ensure good air circulation and avoid overwatering.
- Rotate Your Plants: To ensure even growth and light exposure, rotate your herb planters every few days, especially if they are near a window. This prevents them from growing lopsided as they reach for the light.
- Monitor Humidity: Many herbs prefer moderate humidity. If your home air is very dry (common in winter with heating systems), consider misting your herbs occasionally or placing their pots on a pebble tray filled with water (ensure the pot is not sitting directly in the water).
- Repot When Necessary: As your herbs grow, they may become root-bound, meaning their roots have filled the entire pot. Signs include water draining very quickly, stunted growth, or roots emerging from drainage holes. When this happens, repot your herb into a slightly larger container (only 1-2 inches wider) with fresh potting mix.
For more in-depth guidance and a comprehensive library of plant care articles, don’t hesitate to check out resources like The Spruce, which offers a wealth of practical tips from gardening experts.
Bring Your Winter Garden to Life and Savor the Rewards!
Creating your own DIY indoor herb planters is a truly enjoyable and enriching way to extend the pleasures of gardening throughout the winter months. These vibrant, living additions do so much more than just provide fresh flavors for your culinary creations; they actively purify your indoor air, infuse your home with delightful natural fragrances, and brighten your living space with a touch of vital green life during the dormant season.
With just a little upfront effort and consistent, mindful care, you can effortlessly transform any corner of your home into a cozy, aromatic retreat teeming with thriving herbs. There’s an immense satisfaction that comes from growing your own food, and a daily joy in simply being surrounded by nature’s beauty, even when it’s cold outside. Gather your chosen planters, your quality potting mix, and your favorite herb seedlings, and embark on this rewarding journey today! You’ll be amazed by the sense of accomplishment, the burst of flavor, and the undeniable beauty and tranquility they bring to your winter days.
Share Your Indoor Gardening Story!
Have you embarked on the delightful journey of growing herbs indoors? What are your go-to varieties that thrive in your home, and what clever tips or hard-earned lessons can you share with fellow green thumbs? We believe in growing together and learning from each other’s experiences! Leave a comment below—we’d absolutely love to hear your unique story and cultivate this wonderful community!
Frequently Asked Questions About Indoor Herb Gardens
Curious about specific aspects of indoor herb cultivation? Here are answers to some of the most common questions beginners have:
Q: How much light do indoor herbs truly need to flourish?
A: Most culinary herbs are sun-loving plants that require a significant amount of light to thrive. Aim for at least 6 to 8 hours of direct sunlight daily. A south-facing window is often ideal. If natural light is limited, especially during the shorter, darker winter days, supplementing with a dedicated LED grow light for 10-14 hours a day can make a dramatic difference in ensuring healthy, robust growth.
Q: Can I successfully grow herbs indoors starting from seeds, or is it better to buy established plants?
A: Yes, you absolutely can grow herbs from seeds indoors, and many gardeners find this process incredibly rewarding! It offers a wider variety of choices and is often more cost-effective. However, it does require a bit more patience and consistent attention to moisture and light during the germination and seedling stages. For beginners, starting with small established plants (seedlings) can offer a quicker path to success and provide immediate gratification.
Q: What are the best strategies to prevent common pests on my indoor herbs?
A: Prevention is always the best defense! Regularly inspect your plants (at least weekly) for any early signs of pests, paying close attention to the undersides of leaves and new growth. Good air circulation and avoiding overwatering (which can attract fungus gnats) are crucial. If you do find pests, isolate the affected plant immediately. Treat with organic solutions like neem oil spray or insecticidal soap, or simply wipe leaves with a damp cloth or a cotton swab dipped in diluted rubbing alcohol to physically remove pests. Maintaining plant health through proper watering and light also makes them more resistant to infestations.
Q: Is it possible to move my indoor herbs outdoors when spring arrives?
A: Absolutely! Many indoor herbs can transition beautifully to an outdoor garden or patio once the weather warms up and all danger of frost has passed. However, it’s crucial to “harden off” your herbs gradually. This means slowly acclimating them to outdoor conditions (brighter sun, wind, temperature fluctuations) over a period of 7-14 days. Start by placing them outside for an hour or two in a shaded spot, progressively increasing their time outdoors and exposure to direct sunlight each day before permanently planting them outside.
Q: What are the key elements for keeping my indoor herbs consistently healthy and vibrant?
A: The recipe for healthy indoor herbs involves a few essential ingredients:
- Adequate Sunlight: Provide 6-8 hours of bright, direct light, supplementing with grow lights if necessary.
- Consistent Watering: Water when the top inch of soil feels dry, but avoid overwatering. Ensure good drainage.
- Regular Fertilization: Use a gentle liquid fertilizer monthly during the growing season.
- Pruning and Harvesting: Regularly snip off leaves to encourage bushy growth and prevent flowering.
- Pest Monitoring: Inspect frequently and treat any pest issues promptly with organic methods.
- Good Air Circulation: Avoid overcrowding plants.
By consistently providing these conditions, your herbs will flourish!
Have more questions about nurturing your indoor herb garden or want to share your own insights? Don’t hesitate to share them below, and let’s keep the conversation growing! 🌿