
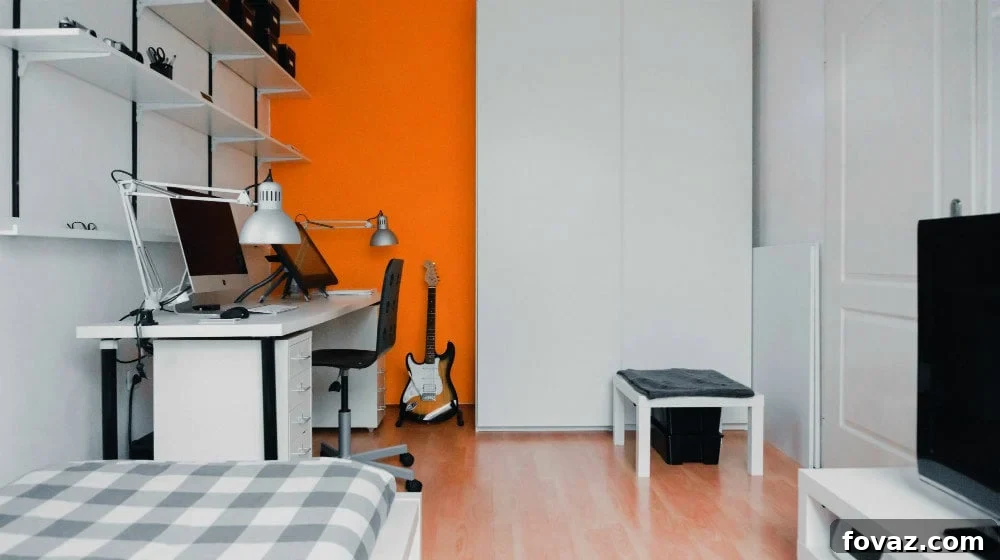
Are you dreaming of a home transformation but worried about the high cost of new flooring? You’re in luck! We’ve gathered an incredible selection of budget-friendly DIY flooring ideas that promise to refresh your space, add personal flair, and boost your home’s value—all without draining your wallet.
Transform Your Home: 5+ Affordable DIY Flooring Ideas for a Stunning Upgrade
— This post is courtesy of livingroomideas.com and shared with permission —
Redoing your flooring is often considered a significant and costly undertaking. The mere thought of it can make any homeowner hesitant, envisioning weeks of disruption and a hefty bill. However, what if we told you that achieving a luxurious and updated look for your floors doesn’t have to be an expensive ordeal or a professional-only job? With the right DIY approach, you can dramatically enhance the aesthetic appeal and functionality of your home’s floors on a budget.
When most people think about simple ways to refresh their home’s atmosphere or change the look and feel of their homes, flooring rarely comes to mind as a DIY project. Yet, the world of DIY has evolved, offering creative, accessible, and surprisingly simple solutions for every skill level. Forget the conventional, pricey installations; these innovative DIY flooring ideas are designed to be affordable, easy to implement, and incredibly impactful, turning your floors into true statement pieces that allow you to try something new with your home’s aesthetic. If you’ve had the same tile and wood floors for a while, a change might be just what you need to revitalize your living space.
Why Choose DIY Flooring? The Benefits Are More Than Skin Deep
Opting for DIY flooring isn’t just about saving money; it’s about empowerment, customization, and unleashing your creativity. Here are some compelling reasons to consider tackling your flooring project yourself:
- Significant Cost Savings: Professional flooring installation can be incredibly expensive, often doubling the material cost. By doing it yourself, you save on labor, allowing you to invest in higher-quality materials or allocate your budget to other home improvement projects.
- Personalized Design: DIY projects offer unparalleled opportunities for personalization. You’re not limited to standard options; instead, you can choose unique colors, patterns, and materials that truly reflect your style and vision for your home.
- Sense of Accomplishment: There’s immense satisfaction in stepping back and admiring a project you’ve completed with your own hands. Your floors will become a source of pride and a conversation starter.
- Control Over the Process: From material selection to the pace of work, you have complete control. This ensures that every detail aligns with your expectations and that the project is completed to your satisfaction.
- Learning New Skills: Each DIY project is an opportunity to expand your skillset, gaining valuable knowledge that can be applied to future home improvements.
Whether you’re looking to refresh an outdated room, add a touch of modern elegance, or infuse bohemian charm, these DIY flooring solutions provide a pathway to a beautiful and unique home. Let’s dive into some of the most inspiring and achievable DIY flooring ideas that will have your guests wondering if you hired an expensive interior designer.
Top DIY Flooring Ideas for Every Style and Budget
1. Dazzling Metallic Epoxy Flooring: Modern Sophistication for Any Space
Move over, traditional concrete! Metallic epoxy flooring is rapidly gaining popularity, and for good reason. What was once primarily seen in commercial spaces or high-end garages is now making its way into modern homes, offering a sleek, durable, and truly show-stopping finish. Imagine floors that shimmer with depth and dimension, resembling molten metal or polished stone. This isn’t just a floor; it’s a work of art.
This innovative flooring solution involves applying a metallic pigment to epoxy resin, creating a multi-dimensional, often marbled or swirled effect. The beauty of metallic floors lies in its uniqueness – no two floors will ever look exactly alike, giving your home a bespoke touch. While it requires careful application, it’s a project that many DIY enthusiasts can successfully undertake with proper preparation and attention to detail.
Ideal Applications & Aesthetic Appeal:
- Garages: As the original inspiration, metallic epoxy transforms a mundane garage into a functional yet stylish extension of your home. It’s incredibly tough, resistant to oil, chemicals, and tire marks, making it ideal for high-traffic, utilitarian areas.
- Basements: Give your basement a sophisticated upgrade. The reflective quality of metallic epoxy can help brighten darker spaces, making them feel larger and more inviting.
- Modern Living Rooms & Kitchens: For those who embrace a contemporary or industrial aesthetic, metallic epoxy floors can be a bold statement. They pair beautifully with minimalist decor, exposed brick, and clean lines, creating an ultra-modern, luxurious feel.
- Bathrooms: A metallic epoxy floor can add an unexpected touch of luxury and spa-like ambiance to a modern bathroom. Its seamless, waterproof nature is also a significant advantage.
DIY Considerations & Tips:
- Surface Preparation is Key: The concrete or subfloor must be clean, dry, and free of any contaminants. Grinding or acid etching is often necessary to ensure proper adhesion.
- Temperature and Humidity: Epoxy products are sensitive to environmental conditions. Ensure your workspace is within the recommended temperature and humidity range for the specific product you’re using.
- Working Time: Epoxy has a limited “pot life” once mixed, so it’s crucial to work efficiently and have all your tools and materials ready.
- Layering: Typically involves a primer, the metallic epoxy coat, and often a clear topcoat for added durability and shine.
- Ventilation: Work in a well-ventilated area and wear appropriate personal protective equipment (PPE), including gloves and a respirator.
While the initial material cost might be slightly higher than some other DIY options, the durability, unique appearance, and professional-grade finish make metallic epoxy a worthwhile investment that dramatically enhances the perceived value of your space.
2. Geometric Wood DIY Flooring: Crafting Unique Patterns on a Budget
Hardwood floors are undeniably beautiful, but they often come with a hefty price tag, especially when opting for intricate patterns like herringbone or parquet. Enter geometric wood DIY flooring – a brilliant and surprisingly achievable way to introduce bespoke, artistic wood designs into your home without the premium cost. This method typically involves using smaller, more affordable cuts of wood, such as plywood, reclaimed wood scraps, or even thin wood veneer, and arranging them into captivating geometric patterns.
The beauty of this geometric DIY flooring lies in its versatility and the creative freedom it offers. You can opt for simple squares, elegant triangles, mesmerizing hexagons, or complex interwoven designs. The process, while requiring precision and patience, is less about advanced carpentry skills and more about careful planning, accurate cutting, and methodical installation.
Design Possibilities & Aesthetic Impact:
- Modern and Scandinavian: Clean, angular geometric patterns can perfectly complement minimalist or Scandinavian interior designs, adding warmth and texture without overwhelming the space.
- Bohemian & Eclectic: Irregular or mixed-wood patterns can contribute to a free-spirited, eclectic vibe, especially when stained or painted in varying shades.
- Mid-Century Modern: Specific patterns like herringbone or chevron evoke classic mid-century aesthetics, bringing timeless elegance to your rooms.
- Statement Areas: Geometric wood floors are excellent for creating accent areas, such as a dining nook, an entryway, or even a feature wall, drawing the eye and adding architectural interest.
DIY Process & Creative Tips:
- Material Choice: Plywood is a popular choice for its affordability and ease of cutting. You can also explore reclaimed wood for a rustic, eco-friendly approach. Cutting these into uniform shapes (squares, rectangles, triangles) is the first step.
- Design Planning: Before you cut, sketch out your desired pattern. Consider the size of your pieces and how they will fit together. You can even let your creative juices flow and arrange the geometric pieces in different patterns, or create a small mock-up to visualize the final look.
- Adhesion: Wood pieces are typically glued directly to a prepared subfloor using a strong wood adhesive. Ensure the subfloor is clean, level, and dry.
- Finishing Touches: Once laid and dried, the floor will need sanding, staining (if desired), and sealing with a durable topcoat to protect the wood and enhance its longevity.
- Mix and Match: Don’t be afraid to experiment with different wood tones or even incorporate painted pieces into your geometric design for added visual interest.
While it may look intricate, the process is akin to assembling a large puzzle. The result is a truly unique floor that serves as a focal point and reflects your personal style, often at a fraction of the cost of professionally installed custom wood flooring.
3. Creative Floorcloths: Flexible Style and Cozy Comfort
If you’re looking for a non-permanent, versatile, and incredibly charming flooring solution, floorcloths are an absolute gem. Historically used for centuries as durable and decorative floor coverings, modern DIY floorcloths offer a fantastic way to introduce color, pattern, and warmth to any room without the commitment or expense of a full floor renovation. They’re essentially hand-painted canvas rugs that are sealed for durability, providing a unique blend of art and practicality.
Floorcloths are perfect for those who love to redecorate frequently or live in rental properties where permanent changes aren’t an option. They also provide an excellent opportunity to experiment with bold designs or intricate patterns that you might hesitate to commit to on a permanent floor. Because they’re made of cloth, they also give your room a warm and cozy feel.
Benefits & Ideal Spaces:
- Versatile & Removable: Easily change your room’s look by simply rolling up one floorcloth and replacing it with another. Ideal for seasonal decor changes or temporary design whims.
- Budget-Friendly: Made from readily available and affordable materials like canvas, paint, and sealant.
- Customizable: The design possibilities are endless! Paint any pattern, color, or motif that sparks your imagination. Match your existing decor or create a striking contrast.
- Adds Warmth & Texture: Unlike traditional hard floors, floorcloths introduce a soft, cozy element to a room, dampening sound and adding a comfortable feel underfoot.
- Easy to Clean: Once sealed, floorcloths are surprisingly durable and easy to wipe clean, making them practical for high-traffic areas or under dining tables.
DIY Steps & Artistic Freedom:
- Materials: Heavy-duty canvas (duck cloth is excellent), acrylic paints (house paint can also work), clear acrylic sealant, gesso or primer.
- Preparation: Cut the canvas to your desired size, hem the edges (or use fabric glue to create a clean edge), and prime it with gesso or a primer to prepare the surface for painting.
- Design & Paint: This is where your creativity shines! You can hand-paint freehand designs, use stencils for intricate patterns, create stripes, checkerboards, or abstract art. Let each layer of paint dry thoroughly.
- Sealing: Apply multiple coats of a durable clear acrylic sealant (such as a water-based polyurethane) to protect the paint and make the floorcloth resistant to wear and moisture. Sand lightly between coats for a smooth finish.
- Backing: Optionally, apply a non-slip rug pad underneath for added stability and cushioning.
Floorcloths are not just functional; they are pieces of art for your floor, adding character and warmth to kitchens, living rooms, bedrooms, or even entryways. They are a true testament to how much impact a simple, creative DIY project can have.
4. Beautifully Painted Floors: Instant Transformation with Color
If you have existing wood, concrete, or even old tile floors that are structurally sound but aesthetically unappealing, painting them is arguably one of the quickest, most affordable, and most transformative DIY flooring solutions available. A fresh coat of paint can instantly brighten a room, hide imperfections, and completely change its character, taking it from drab to fabulous in a single weekend. You could even acid stain a concrete floor for a unique effect.
Painted floors offer an unparalleled level of customization. You’re not limited to a single color; you can introduce stripes, checkerboard patterns, stencils, faux rugs, or even intricate murals. This allows you to integrate your floors seamlessly into your home’s decor or make them a bold, artistic focal point.
Versatility & Impact:
- Wood Floors: Mask worn-out finishes, cover mismatched wood types, or simply refresh an old floor with a modern color. White or light gray can brighten dark rooms, while bold colors add personality.
- Concrete Floors: Transform cold, industrial concrete into a stylish, finished surface. Acid stains can also create a mottled, stone-like effect for a more rustic look.
- Tile Floors: While more challenging, painting over old, ugly tiles can give them a new lease on life without the mess and expense of removal and re-tiling. Specialized tile paints and primers are essential here.
- Design Flexibility: From solid, elegant hues to playful patterns, painted floors adapt to any style—farmhouse chic, contemporary, coastal, or vintage.
DIY Steps for Success:
- Preparation is Paramount: This cannot be stressed enough. Clean the floor thoroughly, ensuring it’s free of dirt, grease, and debris. Fill any holes or cracks, and sand rough surfaces to create a smooth canvas for the paint.
- Priming: Apply a high-quality primer specifically designed for floors or the material you’re painting (wood, concrete, or tile). This ensures adhesion and a long-lasting finish.
- Choosing the Right Paint: Use durable floor paint designed for high-traffic areas, such as porch and patio paint or epoxy-based floor paints. These are formulated to withstand wear and tear.
- Application: Apply paint in thin, even coats, allowing each coat to dry completely before applying the next. For patterns, measure and tape carefully.
- Sealing: Once the paint is fully cured (which can take several days), apply multiple coats of a clear, water-based polyurethane or floor sealer for maximum durability and protection against scratches and moisture.
With careful execution, painted floors can last for years, offering an affordable and highly personal way to give your home an instant, dramatic update.
5. Peel-and-Stick Wonders: Quick, Easy, and Stylish
For the ultimate in ease and speed, peel-and-stick flooring options are a game-changer for DIY enthusiasts. These innovative tiles and planks come with an adhesive backing, allowing you to simply peel off the paper and stick them directly onto a prepared subfloor. They are incredibly user-friendly, require minimal tools, and can transform a room in just a few hours or a weekend, making them perfect for renters, first-time DIYers, or anyone looking for a temporary or super-quick update.
Available in a vast array of styles, colors, and textures, peel-and-stick products convincingly mimic more expensive materials like hardwood, ceramic tile, and natural stone. The advancements in manufacturing mean these are no longer the flimsy options of the past; modern peel-and-stick floors are surprisingly durable and attractive. These are excellent DIY flooring projects.
Best For & Benefits:
- Renters: A fantastic way to personalize a rental property without violating lease agreements, as they can often be removed without damaging the original floor (test a small area first).
- Small Spaces & Low-Traffic Areas: Ideal for bathrooms, laundry rooms, entryways, closets, or even accent walls.
- Temporary Updates: Great for staging a home for sale, a quick room makeover, or guest rooms.
- Variety of Looks: Choose from realistic wood grains, elegant marble, contemporary geometrics, or classic tile patterns.
- Super Affordable: Often the least expensive option per square foot for a finished look.
- Easy Installation: Requires basic tools like a utility knife, tape measure, and straightedge. No messy glues or extensive drying times.
Installation Tips for a Professional Finish:
- Flawless Subfloor: The key to a smooth, lasting finish is a clean, level, and dry subfloor. Any bumps or debris will show through. Repair any damage and sweep thoroughly.
- Acclimation: Allow the tiles/planks to acclimate to your room’s temperature for at least 48 hours before installation.
- Start Smart: Begin your installation from the center of the room or along a prominent wall to ensure symmetry and minimize cuts in visible areas.
- Press Firmly: After placing each tile/plank, press it down firmly, possibly using a J-roller, to ensure maximum adhesion.
- Precision Cutting: Use a sharp utility knife and a straightedge for clean, accurate cuts, especially around edges and obstacles.
- Edge Finishing: Consider quarter-round molding or caulk along the edges for a polished, finished look.
While not a permanent, heavy-duty solution for every room, peel-and-stick flooring provides an incredibly convenient and stylish way to achieve an instant floor makeover on a shoestring budget.
Before You Begin Your DIY Flooring Adventure
Embarking on a DIY flooring project is exciting, but a little preparation goes a long way in ensuring success and satisfaction. Consider these essential points:
- Assess Your Current Floor: Is your existing subfloor stable, level, and dry? Most DIY flooring solutions require a solid base. Address any structural issues or moisture problems first.
- Skill Level & Time Commitment: Be realistic about your DIY skills and the time you have available. Some projects are simpler than others.
- Budget Wisely: Factor in not just the main materials, but also primers, sealants, tools (cutters, rollers, safety gear), and potential repair materials for your subfloor.
- Research Thoroughly: Watch tutorials, read product reviews, and understand the specific requirements for your chosen material.
- Test a Small Area: If possible, especially with paint or stains, test your chosen product in an inconspicuous area to ensure you like the color and finish.
- Safety First: Always wear appropriate protective gear, including gloves, eye protection, and respirators when working with chemicals or dust. Ensure adequate ventilation.
Ready to Redefine Your Home’s Foundation?
As you can see, redoing your flooring doesn’t have to be a daunting, bank-breaking ordeal. These five incredible DIY flooring ideas demonstrate that with creativity, a bit of effort, and smart material choices, you can achieve stunning, high-impact results that reflect your unique style. From the industrial chic of metallic epoxy to the artistic charm of floorcloths, and the vibrant possibilities of painted floors and convenient peel-and-stick options, there’s a perfect project waiting for you.
Which of these inspiring DIY flooring projects will you tackle first? We’d love to hear your plans and see your transformations! Share your thoughts and questions in the comments section below!
And once your floors are looking fabulous, why not give your walls a similar DIY treatment? Explore these DIY monogram wall art ideas to complete your home’s personalized makeover!
Stay connected with us on Facebook, Twitter, Pinterest and Instagram!