
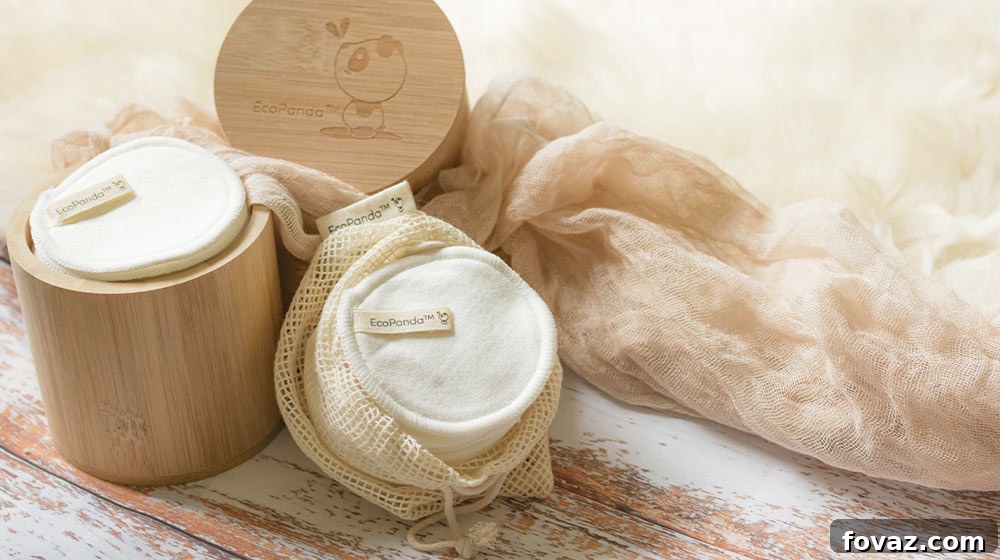
DIY Reusable Cotton Rounds: A Comprehensive Guide to Eco-Friendly Beauty
Are you looking for a simple yet impactful way to embrace sustainability in your daily routine? Do you have an abundance of scrap fabric just waiting for a purpose? Look no further! This comprehensive guide will walk you through the incredibly simple process of creating your own reusable cotton rounds. Not only are these DIY beauties a fantastic way to reduce waste, reuse materials, and recycle fabric scraps, but they also offer a cost-effective and personalized addition to your skincare regimen.
In a world increasingly aware of its environmental footprint, choosing reusable alternatives has become more important than ever. Disposable cotton rounds contribute significantly to landfill waste, often after just a single use. By dedicating a small amount of time to this rewarding craft, you can make a tangible difference, one cotton round at a time. This project is perfect for beginners and seasoned crafters alike, promising both practicality and a sense of accomplishment.
Why Choose DIY Reusable Cotton Rounds?
Beyond the sheer satisfaction of creating something with your own hands, making reusable cotton rounds offers a multitude of benefits:
- Environmental Impact: Significantly reduce your contribution to landfill waste. By opting for reusable options, you decrease the demand for single-use products, conserving resources and minimizing pollution associated with manufacturing and disposal.
- Cost Savings: Once you’ve made your initial investment in materials (or simply used existing scraps!), you’ll no longer need to purchase disposable cotton rounds. This adds up to substantial savings over time.
- Customization: Choose your favorite patterns, colors, and textures to create cotton rounds that perfectly match your personal style or bathroom decor. You can also customize the size and thickness to suit various applications.
- Gentle on Skin: Many commercial cotton rounds contain synthetic fibers or are treated with chemicals. By making your own from natural fabrics like 100% cotton and soft jersey, you ensure that only gentle, breathable materials touch your skin, making them ideal for sensitive complexions.
- Versatility: These reusable rounds are perfect for applying toner, removing makeup, gently cleansing, or even for first aid.
- Skill Development: This project is an excellent way to practice basic sewing skills, whether you’re using a machine or hand-stitching. It’s a low-pressure way to build confidence for more complex textile crafts.
RELATED: How To Make A Tie Blanket From Fleece Fabric
How to Sew Reusable Cotton Rounds: A Step-by-Step Guide
This project is designed to be straightforward and enjoyable. Gather your materials, clear a workspace, and let’s transform those fabric scraps into something truly useful and sustainable!
Materials You’ll Need:
- 100% Cotton Fabric: This will form the outer layer of your cotton rounds. Opt for tightly woven cotton for durability and a smooth finish. Old cotton shirts, pillowcases, or quilting scraps work wonderfully.
- T-shirt/Jersey Fabric: Ideal for the inner layer, providing softness and absorbency. An old, clean cotton t-shirt is perfect for this! Look for fabrics with a slight stretch for comfort and ease of use.
- Fabric Scissors: Sharp scissors are crucial for clean, precise cuts.
- Pen or Pencil: For tracing your circles onto the fabric. A fabric marker or chalk pencil can also be used.
- A Round Object: A drinking glass, mug, jar lid, or a compass will serve as your template for perfectly circular pads. Choose a size that suits your preferred use (e.g., smaller for toner, larger for makeup removal).
- Sewing Machine or Hand Sewing Supplies: Depending on your preference and skill level. If hand sewing, you’ll need a needle and suitable thread.
- Sewing Pins: To hold your fabric layers securely in place during stitching.
- Optional: Overcast foot for your sewing machine (for neat edges), small embroidery scissors for trimming threads.
Step 1. Trace and Precisely Cut Your Circles
The foundation of a perfect reusable cotton round lies in accurately traced and cut circles. Begin by selecting your round template – a drinking glass, a cookie cutter, or even a compass for custom sizes. Place your chosen fabric (you can layer a couple of pieces to cut more at once, but be mindful of accuracy) flat on your work surface.
Using your pen or pencil, carefully trace around the edge of your template. Repeat this process until you have a sufficient number of circles for your desired set of cotton rounds. For best results, leave a small gap between each traced circle to allow for easy cutting without distorting adjacent shapes. Remember, each reusable cotton round will require two fabric circles (one outer, one inner, or two outer if preferred).
Once all your circles are traced, take your fabric scissors and carefully cut along the traced lines. Precision here will contribute to a neater final product. If cutting multiple layers, ensure your scissors are sharp enough to glide through the fabric without tugging or fraying the edges.
Step 2. Create Your Fabric Sandwich and Secure
Now it’s time to assemble your cotton rounds. For each round, you will need two circular fabric pieces. Typically, this involves one piece of your chosen 100% cotton fabric for the decorative or outer side, and one piece of soft t-shirt or jersey fabric for the absorbent inner side. If you prefer a double-sided aesthetic, you can use two pieces of your outer cotton fabric.
Carefully layer your two fabric circles directly on top of each other. The goal is to create a neat “sandwich” where the edges align perfectly. If using patterned fabric for the outer layers, ensure that the “right” or patterned sides of both fabrics are facing outwards on their respective sides of the pair. This means that when the round is complete, the pretty pattern will be visible on both sides.
Once you’ve aligned your fabric circles, use sewing pins to secure them together. Place pins strategically around the circumference of the circle, ensuring they hold both layers firmly without distorting the fabric. This will prevent shifting while you sew and help maintain the round’s shape.
Step 3. Sew the Fabric Layers Together
With your fabric circles pinned, it’s time for the crucial step of stitching them together. You have the flexibility to choose between machine sewing for speed and consistency, or hand sewing for a more personal touch and portability. Both methods yield excellent results.
Sewing Machine Method:
- Stitch Choice: A simple straight stitch close to the edge (about 1/8 to 1/4 inch seam allowance) is sufficient. For a more professional and durable finish that prevents fraying, consider using a zigzag stitch or an overcast stitch.
- Overcast Foot: If your sewing machine has an overcast foot, this is an excellent tool for creating neat, serged-like edges that encapsulate the fabric, giving a clean, polished look and preventing fraying.
- Zigzag Stitch: If you don’t have an overcast foot, a zigzag stitch set to a medium width and short length can mimic a similar effect, securing the raw edges of the fabric.
- Running Stitch: A basic running stitch is also an option, though it might be less secure for preventing fraying over time compared to a zigzag or overcast stitch. For simple seams, you can find a guide on how to use a running stitch effectively.
- Technique: Start your stitch with a backstitch to secure the thread. Sew slowly and steadily around the circumference of the circle, removing pins as you approach them. Finish with another backstitch to lock the seam.
Hand-Sewing Method:
- Running Stitch: This is a simple and quick stitch, ideal for beginners. It involves creating a series of small, even stitches that run through both layers of fabric around the edge of the circle. While functional, it may not offer the most durable edge against fraying.
- Blanket Stitch: For a more decorative, robust, and anti-fray edge, the blanket stitch is an excellent choice. It creates a neat, looped edge that is visually appealing and highly durable. This stitch is particularly recommended if you want your reusable rounds to withstand numerous washes and maintain their integrity. You can find detailed instructions on how to sew a blanket stitch to guide you.
- Technique: Regardless of the stitch, ensure your stitches are even and relatively close together to secure the layers firmly. Begin and end your stitching with a secure knot hidden between the fabric layers or on the less visible side.
RELATED: 30 Easy And Fun Summer Crafts | DIY Projects
Step 4. Finish Off Your Reusable Cotton Rounds!
Congratulations, you’re almost done! Once you’ve sewn all the way around your fabric circle and secured your stitch, it’s time to trim any excess threads. Carefully snip off any loose threads close to the seam for a clean and professional appearance.
And just like that, your brand-new reusable cotton round is complete! You can begin using them immediately for your skincare routine, makeup removal, or any other beauty application where you’d typically use disposable pads. Consider making a set of 5-10 rounds to ensure you always have fresh ones on hand while others are in the laundry.
These handmade rounds also make thoughtful and personalized gifts for friends and family who are passionate about sustainable living or simply appreciate handmade items. Bundle a few together with a nice ribbon, and you’ve got a charming, eco-conscious present.
Care and Maintenance for Longevity
To ensure your reusable cotton rounds last a long time and remain hygienic, proper care is essential. The good news is, washing them is incredibly simple!
- Washing Temperature: You can place these cotton rounds in the wash at 30-40 degrees Celsius (86-104 degrees Fahrenheit) along with your other clothes. This temperature is usually sufficient to clean them effectively without causing shrinkage or damage.
- Laundry Bag is Key: To ensure that they don’t get lost in the tumble of your washing machine or dryer, always use a small mesh laundry bag. This will keep them contained and prevent them from disappearing into socks or other larger items.
- Detergent: Use your regular laundry detergent. Avoid harsh bleaches unless absolutely necessary, as they can degrade fabric fibers over time.
- Drying: You can air-dry your cotton rounds by laying them flat or hanging them. They dry relatively quickly due to their small size. Alternatively, you can tumble dry them on a low setting, still within their laundry bag, to prevent them from getting lost or damaged.
- Stain Removal: For stubborn makeup stains, a pre-treatment with a gentle stain remover or a dab of mild soap before washing can be effective.
No-Sew Reusable Cotton Rounds: An Alternative Method
Perhaps you’re not keen on sewing, or you simply don’t have a sewing machine readily available. No problem! There’s an equally effective way to make reusable cotton rounds without touching any needle or thread. This method typically involves using fabric adhesive or a heat-activated fusing web.
The general concept involves cutting two identical circles of fabric and then using a strong, washable fabric glue (designed for textiles) to adhere the edges together. You apply a thin bead of glue along the perimeter of one fabric circle, then carefully press the second circle on top, aligning the edges. Allow ample time for the glue to dry completely according to the manufacturer’s instructions before using or washing.
Another popular no-sew technique utilizes fusing web, which is a thin, web-like adhesive material that melts when heat is applied. You would sandwich the fusing web between your two fabric circles and then press with an iron, carefully following the product’s instructions to bond the fabrics together. This creates a durable, fused edge without any stitching.
For a visual demonstration of a no-sew technique, Lily Rose shows you another way to make reusable cotton rounds without touching any needle or thread in the video below:
Embrace a Greener Beauty Routine
Not only are reusable cotton rounds your best beauty companion when you prefer not to touch your face directly with your hands, but they are also a powerful tool in your journey towards a more sustainable and zero-waste lifestyle. This simple DIY project offers an opportunity to reduce your environmental impact, save money, and learn a new skill along the way. The satisfaction of using something you’ve created yourself, knowing it’s contributing to a healthier planet, is truly invaluable.
We hope you enjoyed this detailed tutorial and feel inspired to start crafting your own set of reusable cotton rounds. Stay tuned for more engaging DIY projects that help you live creatively and sustainably!
How do you use up your scrap fabric? Share your creative tips and ideas in the comments section below! Your insights could inspire others!
Explore More DIY Projects:
- 20 Simple Sewing Projects That Any Beginner Can Make
- Easy Decorative Fabric Baskets To Sew Today
- 9 Rental Decorating Hacks That Won’t Cost You Your Deposit
Calling all crafting DIYhards, DIY Projects needs YOU! Click here if you want to write for us.
Don’t forget to stay connected with us on Facebook, Twitter, and Instagram!