
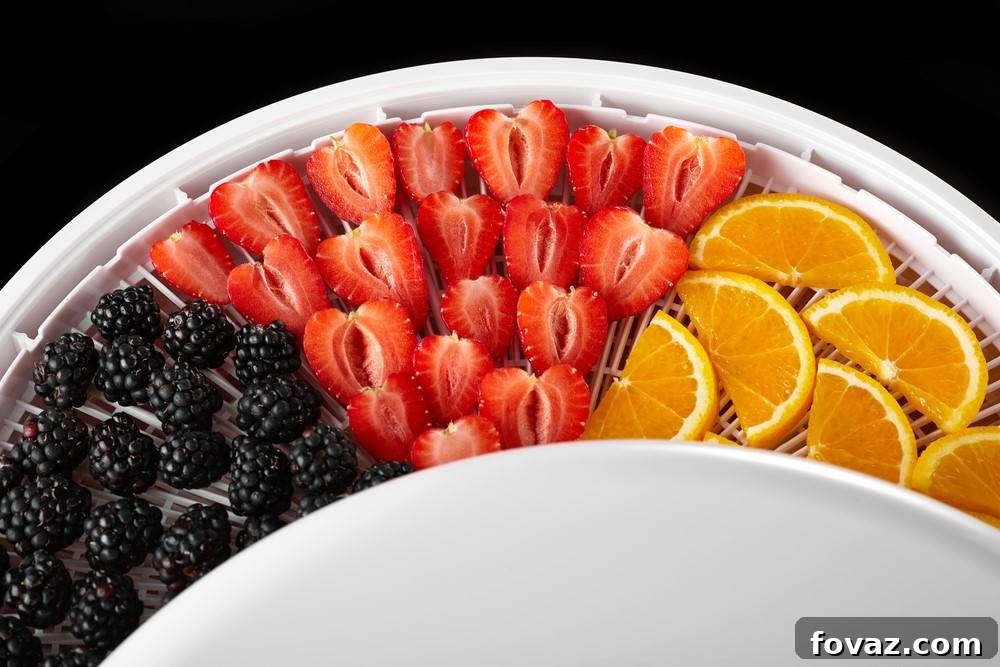
In a world increasingly focused on self-sufficiency and sustainable living, the art of food preservation has taken center stage. Among the most effective methods for extending the shelf life of your harvest, freeze-drying stands out. This remarkable process preserves not only the taste and texture of your food items but also their vital nutritional value for extended periods, making them ideal for long-term storage, emergency preparedness, and everyday convenience.
While commercial freeze dryers can be a significant investment, creating your own DIY freeze dryer is a surprisingly accessible project. With a little ingenuity and readily available materials, you can build a system at home that delivers comparable results for a fraction of the cost. This comprehensive guide will walk you through two distinct methods for constructing your homemade freeze dryer, empowering you to unlock the benefits of this advanced preservation technique and transform the way you store food.
RELATED: Wise Food Storage – Vacuum Sealing Food
Build Your Own DIY Freeze Dryer at Home: Two Powerful and Practical Methods for Long-Term Food Preservation
Embark on your journey to superior food preservation with these detailed instructions for constructing a homemade freeze dryer. Whether you opt for the more robust vacuum chamber approach or the simpler styrofoam cooler method, you’ll soon be enjoying delicious, nutrient-rich foods that last for years.
Method 1: Crafting a High-Performance DIY Freeze Dryer with Vacuum Chambers and a Pump
This method offers a more controlled and efficient freeze-drying process, closely mimicking the functions of a commercial unit. It involves two primary components: a dedicated drying chamber where the food is placed, and a water trap designed to capture moisture removed from your edibles, preventing it from damaging your vacuum pump.
Essential Materials for Your Vacuum Chamber Freeze Dryer:
- Styrofoam Sheets: Crucial for insulating your pot, these sheets will help maintain the precise and consistently low temperatures needed for effective sublimation and freeze-drying.
- Two-Gallon Pot: This will serve as the housing for your water trap chamber, providing ample space for the dry ice and alcohol mixture to create a super-cold environment for vapor condensation.
- Glue or Spray Adhesive: Used to securely bond the styrofoam sheets together, forming a robust and air-tight insulating layer around your pot.
- Drying Chamber: A vacuum-rated container (preferably stainless steel or thick-walled acrylic) where your pre-frozen food items will be placed for dehydration.
- Water Trap Chamber: Another vacuum-rated container, typically larger than the drying chamber, specifically designed to collect and freeze the sublimated ice vapor.
- Digital Vacuum Gauge: An indispensable tool for accurately monitoring the vacuum pressure within your system. Precise pressure readings are essential for confirming optimal conditions for the sublimation process.
- Teflon Tape (PTFE Thread Seal Tape): Absolutely critical for creating airtight seals on all threaded connections, effectively preventing any vacuum leaks that could compromise the entire freeze-drying operation.
- Epoxy: A strong, durable adhesive used to permanently secure the barbed splice to the water trap chamber, ensuring a leak-proof and high-vacuum connection.
- Hose Clamps: Essential for firmly securing all tubing connections, preventing accidental disconnections or leaks that might occur under vacuum pressure.
- Dry Ice: The primary refrigerant. It’s used to pre-freeze food items and to create the extreme cold necessary for the water trap to condense moisture. Handle with extreme caution.
- 1/4 Inch Union: A specific fitting used to connect your precise digital vacuum gauge to the drying chamber, ensuring an accurate pressure reading.
- 5/8 Inch Barbed Splice: A fitting designed for securely connecting the reinforced tubing to your water trap chamber.
- 5/8 Inch Braid-Reinforced Tubing: This durable tubing is crucial. It must be capable of withstanding significant vacuum pressure, forming the vital connection between the water trap and the vacuum pump.
- Two-Stage Rotary Vacuum Pump: The powerful engine of your system. This pump creates and maintains the low-pressure environment absolutely required for the sublimation process to occur efficiently.
Step 1: Insulate Your Pot for Optimal Cold Retention and Efficiency
Effective insulation is paramount for any successful freeze-drying setup, as it plays a critical role in maintaining the extremely low temperatures necessary for the process to occur. Begin by placing your two-gallon pot on a styrofoam sheet and carefully trace its outline with a marker. Using a sharp utility knife, cut the sheet precisely according to this measurement and shape. Repeat this process for several additional styrofoam sheets, creating multiple identical layers until you have enough to completely encompass your pot from bottom to top. The goal is to build a thick, insulating barrier around the pot. As you stack them, apply a generous amount of glue or spray adhesive between each sheet, ensuring a strong, permanent bond and minimizing any potential air gaps that could compromise insulation. Wrap your pot as completely as possible – a well-insulated pot will dramatically improve the efficiency of your freeze dryer by keeping your food items and the water trap consistently cold, reducing dry ice consumption. Furthermore, trace the diameters of both the water trap chamber and your pot onto another styrofoam sheet to fashion a snug-fitting lid for your insulated pot, further sealing in the cold. You may also consider wrapping your drying chamber with styrofoam or other insulating material to further enhance its cold retention capabilities, reducing the thermal load on your cooling agents.
Step 2: Enhance the Vacuum Monitoring of Your Drying Chamber for Precision Control
For precision control and consistently reliable results, selecting the right vacuum chambers is absolutely critical. Opt for high-quality, robust stainless steel or thick acrylic vacuum chambers, as these materials are specifically designed to withstand significant pressure differences and allow for easy visual monitoring of contents (especially with acrylic). A common and efficient configuration is to use a smaller chamber (e.g., one-fourth gallon or 1-liter capacity) for the drying chamber itself, where your food will reside, and a larger one (e.g., one gallon or 4-liter capacity) for your water trap, which will accumulate the sublimated moisture. Many entry-level drying chambers come with basic gauges that can quickly max out or provide inaccurate readings under the deep vacuum required for freeze-drying. To truly verify and control the crucial low-pressure environment, it is imperative to replace or augment the standard gauge with a high-accuracy digital vacuum gauge. This specialized instrument provides precise, real-time pressure readings, which are essential for knowing when the sublimation process is occurring efficiently. Securely attach this digital gauge to your drying chamber using a quarter-inch union. The integrity of your vacuum seal is non-negotiable; therefore, lavishly apply multiple layers of quality Teflon tape (PTFE thread seal tape) to all threaded connections. This meticulous sealing prevents insidious air leaks that could compromise the vacuum, leading to a failed freeze-drying batch, wasted materials, and potential damage to your equipment.
Step 3: Precisely Assemble Your Water Trap Chamber to Protect Your Pump
The water trap is a critical component that effectively catches the water vapor sublimated from your food, preventing it from entering and potentially damaging your sensitive vacuum pump. Begin by carefully detaching any pre-installed gauge that may have come with your water trap chamber, as you will be repurposing this port. Next, using an appropriate drill bit, carefully drill a hole on your water trap chamber at a suitable location to accommodate your barbed splicer. This hole needs to be precise for a secure, tight fit. Once drilled, clean the area thoroughly and apply a generous amount of strong, two-part epoxy adhesive to your barbed splicer. This step is crucial for creating a permanent, airtight, and vacuum-resistant seal. Insert the splicer firmly into the drilled hole, twisting it slightly to ensure even epoxy distribution, and allow the epoxy ample time to cure completely according to the manufacturer’s instructions. While waiting for the epoxy to dry, place your water trap chamber inside your insulated two-gallon pot. Once the epoxy is fully dry and hardened, securely attach the braid-reinforced tubing to the barbed splicer using robust hose clamps. These clamps ensure that the tubing will not detach under vacuum. Then, connect the other end of this tubing to the intake port of your two-stage rotary vacuum pump, again securing it firmly with additional hose clamps. Double-check all connections to ensure they are exceptionally tight and leak-proof; any breach in the vacuum system will severely hinder or entirely prevent the freeze-drying process.
Step 4: Conduct a Trial Run and Initiate the Freeze-Drying Process
Before committing a large batch of your precious food, it’s highly recommended to perform a test run with a small quantity. Prepare some small, thinly sliced food items suitable for freeze-drying – berries, apple slices, or small pieces of cooked chicken work exceptionally well. Place these items inside a durable plastic bag or on a non-stick tray, then sandwich them firmly between two layers of dry ice. Allow the food to freeze solid for at least one to two hours; thorough and rapid pre-freezing is absolutely essential for successful sublimation and to maintain cellular integrity. While your food freezes, prepare your water trap. Fill your insulated two-gallon pot with a mixture of alcohol (such as isopropyl or denatured alcohol, often used in cryo-baths) and dry ice. The alcohol acts as a thermal conductor, ensuring even and intense cooling of the water trap chamber, which must be kept extremely cold (well below freezing, ideally -70°C or colder) to efficiently condense and trap water vapor. You can also place a large block of dry ice directly underneath your pot to further maintain consistently low temperatures for an extended period, reducing the need for frequent checks. Once your food items are rock-solid frozen, carefully transfer them into your drying chamber, arranging them in a single, non-overlapping layer if possible for maximum surface exposure. Securely cover both your drying chamber and your water trap chamber to prevent any outside air from entering the system. Now, slowly turn the valve that connects the drying chamber to the water trap chamber. This allows for unrestricted gas flow between the two. Finally, activate your powerful two-stage rotary vacuum pump. As the pump operates, it will draw a deep vacuum, causing the frozen water in your food to sublimate directly from ice to vapor, which will then be rapidly captured and frozen solid by your super-cold water trap. Remember, safety is paramount: Always wear thick, insulated gloves and eye protection when handling dry ice and cryo fluid, as direct contact can cause severe frostbite. Furthermore, working with vacuum apparatus carries an inherent risk of implosion if components are not rated for vacuum or are improperly assembled. Always take proper safety precautions and ensure all components are secure and appropriate for the task.
Step 5: Monitor Your Digital Gauge and Effectively Troubleshoot as Needed
Consistent and vigilant monitoring of your digital vacuum gauge is unequivocally crucial throughout the entire freeze-drying process. This sophisticated gauge provides real-time feedback on the internal pressure of your drying chamber. An ideal vacuum pressure for efficient sublimation is typically very low, often below 100 millitorr (0.1 Torr or 13 Pascals). If you observe that your digital gauge isn’t displaying a reading, or if the pressure remains unexpectedly high (e.g., consistently above 500-1000 millitorr), it’s a strong indication of an underlying issue that needs immediate attention. High pressure could mean one of two primary things: either your vacuum pump isn’t powerful enough or adequately connected, or, far more commonly, there’s a leak somewhere in your meticulously assembled system. This leak could be in either your drying chamber, the water trap chamber, or any of the numerous connectors, such as the tubing, unions, or sealed ports. To effectively troubleshoot a suspected leak, you can perform a simple yet effective “soap test”: brush soapy water (or a specialized leak detection solution) over all connections, seams, and potential weak points while the vacuum pump is running. If bubbles appear, congratulations – you’ve found your leak! Tighten loose connections, reapply Teflon tape to threaded fittings, or reseal with additional epoxy as necessary. A consistent, deep vacuum is absolutely essential for efficient and complete freeze-drying, as it facilitates the sublimation process. Do not overlook this critical monitoring and troubleshooting step; patience and precision here will ensure successful preservation.
RELATED: 17 Small Kitchen Ideas for Renters: How to Organize Efficiently This Holiday
Method 2: Building a Basic DIY Freeze Dryer Using a Simple Styrofoam Cooler
For those seeking a more straightforward, less equipment-intensive, and highly budget-friendly approach, the styrofoam cooler method provides a surprisingly effective way to freeze-dry smaller batches of food. While this method won’t achieve the deep, controlled vacuum of the first method, the extreme cold of dry ice combined with a contained environment still effectively facilitates the sublimation process, making it an excellent entry point into homemade freeze-drying for beginners or those with limited resources.
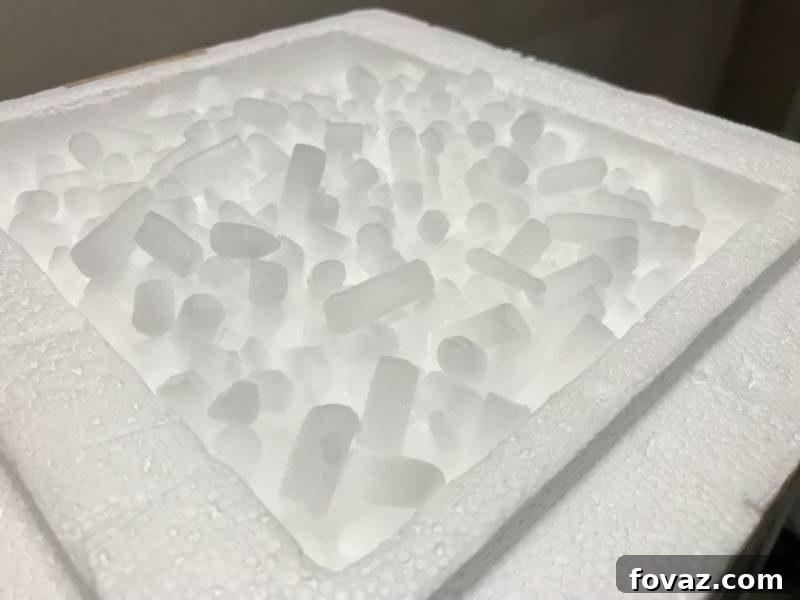
This incredibly cost-efficient option leverages the excellent insulating properties of a standard styrofoam cooler to create an ultra-cold zone perfectly suitable for basic freeze-drying. It’s an ideal solution for preserving camping meals, small batches of freshly picked fruit, or simply testing the waters of advanced food preservation without significant upfront investment.
What You’ll Need for Your Styrofoam Cooler Setup:
- Styrofoam Cooler: A high-quality, well-insulated cooler is absolutely key to maintaining the ultra-low temperatures required for effective sublimation.
- Dry Ice: Your primary freezing and sublimating agent. Ensure you purchase an adequate supply, as its effectiveness diminishes over time.
Step 1: Prepare Your Styrofoam Cooler for Optimal Efficiency and Cold Retention
The success of this simpler freeze-drying method hinges entirely on maintaining a consistently and intensely cold environment within your cooler. Therefore, selecting the correct size of styrofoam cooler is paramount. Choose a cooler whose dimensions are appropriately matched to the quantity of food you intend to freeze-dry. Avoid using an excessively large cooler for a small amount of food, as this creates too much empty air space that needs to be cooled, leading to wasted dry ice and reduced efficiency. Conversely, do not attempt to overpack a small cooler, as this will prevent proper cold distribution. The ideal scenario is a cooler that is just large enough to comfortably accommodate your food items in single, unstacked layers with sufficient space for the dry ice. A snug but not overcrowded fit helps concentrate the cold and promotes faster, more effective sublimation. Ensure the cooler’s lid fits tightly to minimize heat exchange.
Step 2: Ready Your Layers of Dry Ice to Establish the Cold Environment
Before introducing your food items, prepare the base of your cooler to create an ultra-cold foundation. Carefully lay down a single, even layer of dry ice across the entire bottom surface of your styrofoam cooler. This initial layer establishes the extremely cold environment, well below freezing, that is absolutely necessary for the freeze-drying process to begin. Crucially, only add this layer of dry ice when you are fully prepared to place your food inside and commence the freeze-drying process. Dry ice sublimates (transforms directly from a solid to a gas) continuously, and delaying the food placement will result in unnecessary depletion of your vital cooling agent. As always, remember to wear heavy-duty insulated gloves when handling dry ice to prevent severe frostbite and use eye protection.
Step 3: Strategically Arrange Your Food Items for Even Freeze-Drying
Once the base layer of dry ice is securely in place, it’s time to meticulously arrange your pre-frozen food items. Lay them directly on top of the dry ice in a single, unstacked layer. This is an absolutely vital step for efficient and even freeze-drying; stacking food prevents uniform exposure to the intense cold of the dry ice, leading to inconsistent results and potentially incomplete drying. Ensure there is some air circulation around each individual piece, or at the very least, direct contact with the dry ice, to facilitate the sublimation process effectively. For the absolute best results, it is highly recommended to pre-freeze your food items in a conventional freezer first until they are rock solid. This pre-freezing step helps to set their structure, prevents them from sticking excessively to the dry ice, and jumpstarts the cold process. Thinly slice fruits and vegetables to reduce the overall drying time significantly and ensure more thorough moisture removal.
Step 4: Create Alternating Layers of Food and Dry Ice, Then Seal Securely
After carefully arranging your first layer of food, add another generous layer of dry ice directly on top of these food items. This strategic layering creates a powerful cold sandwich effect, where the food is enveloped by the extreme cold from both above and below. You can then place additional pre-frozen food items on top of this new layer of dry ice. Continue this alternating pattern of food and dry ice until your cooler is almost full, leaving a small amount of space at the very top for the final layer of dry ice. Always ensure that the topmost surface in your cooler is a final, robust layer of dry ice. Once all food and dry ice are meticulously layered, place the lid securely on your cooler. It is crucial to ensure the lid fits as tightly as possible to contain the intense cold and the sublimated water vapor, creating a micro-environment conducive to freeze-drying. Allow the cooler to sit undisturbed for a minimum of 30 minutes, or ideally several hours, depending on the specific food type, thickness, and initial moisture content. The longer it stays at this extreme cold, the more effective and complete the sublimation process will be.
Step 5: Inspect Your Food Items for Freeze-Dried Readiness and Brittleness
After the initial waiting period, carefully and quickly open your cooler to inspect your food items. The ultimate goal is for them to be “rock solid,” brittle, and extremely lightweight, indicating that almost all moisture has been effectively removed through the process of sublimation. They should feel remarkably light, almost like paper, and have a characteristic crispy or crunchy texture. If the food still feels cold but pliable, or if you detect any lingering moisture (even a slight softness), securely cover your DIY freeze dryer again and allow more time. Re-inspect your food items every five to ten minutes thereafter until they fully meet the “rock solid” and brittle criterion. Patience is absolutely key here; rushing this step can lead to incomplete drying, which significantly compromises the extended shelf life and quality of your preserved food. Remember that this method primarily creates a “cold vacuum” effect, and while surprisingly effective, it might not remove 100% of moisture as rapidly or as thoroughly as a dedicated vacuum pump system. Generally, the smaller and thinner the food pieces, the faster and more completely they will dry.
Step 6: Proper Storage for Your Newly Freeze-Dried Delights to Ensure Longevity
Once your freeze-dried food items are thoroughly dry, rock solid, and exhibit the desired brittle texture, carefully remove them from your cooler. For most freeze-dried foods, storing them correctly is absolutely crucial for maximizing their extended shelf life, which can be decades. Transfer them immediately into airtight containers such as canning jars (with appropriate oxygen absorbers) or heavy-duty Mylar bags specifically designed for long-term food storage. If you do not have vacuum packaging or oxygen absorbers readily available, it is highly recommended to store your freeze-dried foods inside a conventional freezer. While freeze-drying significantly reduces moisture, the freezer provides an additional layer of protection against any residual moisture and degradation from oxidation or temperature fluctuations. However, if your food items are properly sealed in high-quality vacuum packaging (using an oxygen absorber inside is strongly recommended for optimal results), you don’t necessarily need to store them in a freezer for preservation. Instead, keep them in a cool, dark, and dry place, such as your food closet, pantry, or a dedicated long-term food storage area. The powerful combination of freeze-drying, vacuum sealing, and oxygen absorbers can extend shelf life for 20-30 years or even longer, making your homemade freeze dryer a powerful and invaluable tool for achieving true long-term food security and preparedness.
Why Choose DIY Freeze Drying? Unlocking a World of Benefits for Your Home
The decision to build your own freeze dryer, rather than investing in a costly commercial unit, offers a compelling array of advantages that extend far beyond mere cost savings. Financially, it’s a no-brainer – the economic benefits can be substantial, allowing you to preserve food for a fraction of the price. Beyond economics, DIY freeze drying empowers you with complete control over the preservation process, allowing you to tailor it to your specific needs, dietary preferences, and the unique types of food you wish to store. It’s an excellent way to prepare for emergencies, ensuring a reliable supply of nutrient-dense food that takes up minimal storage space and lasts for years, even decades. Imagine having fresh-tasting fruits, vibrant vegetables, savory meats, and even entire gourmet meals ready to rehydrate and enjoy, regardless of the season or external circumstances. This level of self-sufficiency provides immense peace of mind, significantly reduces household food waste, and connects you more deeply with your food supply chain.
The Undeniable Advantages of Freeze-Dried Food for Modern Living
Freeze-drying is often considered the undisputed gold standard of food preservation for a multitude of compelling reasons that set it apart from other methods:
- Unprecedented Extended Shelf Life: By removing an astonishing 98% to 99% of the water content, freeze-dried foods can last for an incredible 20-30 years or even longer when stored correctly, far surpassing the longevity offered by other methods like dehydration, canning, or freezing.
- Superior Nutritional Retention: Unlike traditional high-heat drying methods that can significantly degrade delicate vitamins, minerals, and antioxidants, freeze-drying preserves nearly all of the food’s original nutritional value, vibrant color, and authentic flavor profile.
- Incredibly Lightweight and Compact: The dramatic removal of water drastically reduces both the weight and volume of food, making it incredibly lightweight and exceptionally easy to store, pack for camping trips, hiking expeditions, backpacking adventures, or integrate into emergency preparedness kits.
- Exceptional Flavor and Texture Preservation: Freeze-dried foods retain their original cellular structure, meaning they rehydrate remarkably quickly and offer a taste and texture remarkably similar to fresh food. This is a stark contrast to the often chewy, leathery, or altered texture of many dehydrated items.
- Unmatched Versatility: Almost any type of food can be successfully freeze-dried, from a wide array of fruits and vegetables to various meats, dairy products, and even complex, complete meals, offering unparalleled flexibility in food storage.
Safety First: Essential Precautions for Your DIY Freeze-Drying Projects
Working with extremely cold dry ice and powerful vacuum systems requires careful attention to safety. Always prioritize your well-being and adhere to these crucial precautions:
- Dry Ice Handling: Dry ice (solid carbon dioxide) is intensely cold (-109.3°F or -78.5°C) and can cause severe frostbite upon direct, unprotected contact. Always wear thick, insulated cryogenic gloves and use sturdy tongs or a scoop when handling dry ice. Never touch it with bare skin.
- Adequate Ventilation: As dry ice sublimates, it releases significant amounts of carbon dioxide gas. In enclosed or poorly ventilated spaces, this gas can displace oxygen, leading to an oxygen-deficient atmosphere and potentially suffocation. Always work in a well-ventilated area, and never store or use large quantities of dry ice in airtight containers or small, unventilated rooms.
- Vacuum Implosion Risk: Vacuum chambers are under significant external atmospheric pressure. Ensure that all components of your vacuum system are specifically rated for full vacuum use and are entirely free of any cracks, chips, or pre-existing damage. Improperly rated or damaged equipment can implode violently and unexpectedly, posing a serious risk of injury. Always assemble, inspect, and test your system carefully before operating.
- Eye Protection: When drilling, cutting materials (like styrofoam), or working with potential splintering debris, always wear certified safety glasses or goggles to protect your eyes.
- Alcohol Handling (for cryo-bath): If you are using alcohol (such as isopropyl or denatured alcohol) in conjunction with dry ice for a cryo-bath, ensure that you have excellent ventilation. Alcohol fumes are flammable and should not be allowed to accumulate in confined spaces.
Tips for Maximizing Your DIY Freeze-Drying Success and Yield
Achieving consistently excellent results with your homemade freeze dryer requires attention to detail. Here are some invaluable tips to maximize your success:
- Thorough Pre-Freezing is Key: Always pre-freeze your food to a rock-solid state in a regular freezer before transferring it to the drying chamber. This critical step ensures that the ice crystals are small and prevents thawing and refreezing, which can severely damage the food’s cell structure and compromise quality.
- Slice Uniformly for Even Drying: Cut your food items into small, uniform pieces. Thicker or irregularly shaped pieces will take significantly longer to dry and may result in uneven moisture removal. Aim for consistent thickness across all items in a batch.
- Avoid Overloading Your Chambers: Do not overcrowd your drying chamber or styrofoam cooler. Leave adequate space for air (or vacuum) circulation around each individual item. Overloading restricts air/vapor flow and extends drying times.
- Monitor Closely and Patiently: Especially with the vacuum chamber method, regularly check your digital vacuum gauge and visually inspect food for dryness. With the cooler method, check for the characteristic brittle texture. Patience is a virtue in freeze-drying.
- Maintain Pristine Cleanliness: Ensure all chambers, tubing, and food contact surfaces are scrupulously clean before use to prevent any contamination of your preserved food.
- Experiment and Learn: Different foods behave differently during freeze-drying. Start with easy-to-dry items like berries, thinly sliced apples, or cooked peas, then gradually move on to more complex foods like meats or sauces as you gain experience and confidence.
What Foods Can You Freeze Dry? A Culinary Exploration of Possibilities
The beauty and versatility of freeze-drying lie in its ability to preserve an astonishingly vast array of foods, significantly expanding your pantry options and culinary horizons:
- Fruits: Nearly all fruits can be freeze-dried successfully. Think whole berries (strawberries, raspberries, blueberries), thinly sliced apples, bananas, grapes, peaches, pineapple chunks, and melon.
- Vegetables: A wide variety of vegetables are excellent candidates, including corn kernels, peas, diced carrots, broccoli florets, green beans, spinach, mushrooms, and bell peppers.
- Meats: Cooked meats work wonderfully. This includes diced cooked chicken breast, ground beef (fully cooked and crumbled), sliced cooked steak, and even shrimp. Raw meats are generally not recommended for home freeze-drying due to safety concerns.
- Dairy: Some dairy products can be freeze-dried, though they require very fast processing and precise conditions. Examples include certain cheeses, yogurt (can become very crumbly), and even ice cream (though this is more of a novelty).
- Full Meals and Soups: Cooked stews, chilis, pasta dishes, rice dishes, and even hearty soups can be freeze-dried. Ensure they are cooked completely and cooled before freezing. Pureed soups can also work.
- Herbs and Spices: Fresh herbs like basil, oregano, cilantro, dill, and parsley retain their vibrant color, potent flavor, and aromatic oils much better through freeze-drying than traditional air drying methods.
- Things to Approach with Caution or Avoid:
- High-Fat Foods: Foods with very high fat content (like some cheeses or oily meats) can sometimes go rancid faster due even when freeze-dried, as fats can still oxidize.
- Very Sugary Items: Foods with extremely high sugar content might become sticky or not dry completely, making them difficult to store.
- Extremely Dense Foods: Foods that are exceptionally dense or have very high water content in a compact form (like whole potatoes) may not dry evenly or quickly enough without proper slicing.
Storing Your Precious Freeze-Dried Harvest: Maximizing Shelf Life
Once your food is perfectly freeze-dried, proper storage is paramount to ensure its longevity and maintain its quality for years, or even decades. The primary enemies of freeze-dried food are moisture, oxygen, light, and heat.
- Airtight Containers: The first line of defense. Use rigid, truly airtight containers such as canning jars (Mason jars) with two-piece lids, or specialized airtight plastic containers. Ensure the seal is robust.
- Oxygen Absorbers: These are highly recommended and are crucial for truly long-term storage, especially when using Mylar bags or any container where some residual oxygen might remain. Oxygen absorbers remove the remaining oxygen that can degrade food over time, even in sealed environments.
- Vacuum Sealing: For the ultimate protection and extended shelf life, vacuum seal your freeze-dried food in heavy-duty Mylar bags. This process removes most of the air and creates an impenetrable barrier against oxygen and moisture. Combine with oxygen absorbers for best results.
- Cool, Dark, Dry Place: Regardless of the container, always store your sealed freeze-dried foods in a location that is consistently cool (ideally below 75°F/24°C), completely dark, and absolutely dry. Basements, cool pantries, or dedicated food storage rooms are often ideal environments for maximizing shelf life. Avoid areas with fluctuating temperatures or direct sunlight.
You can store your camping meals, emergency rations, and healthy snacks indefinitely with a DIY freeze dryer. To explore the wide variety of foods suitable for freeze-drying and gain more insights, watch this informative video from Harvest Right:
As you can see, the path to superior food preservation doesn’t always require a hefty investment in commercial equipment. By embracing these innovative DIY freeze dryer methods, you can effectively extend the shelf life of your food, retain its nutritional integrity, and enjoy fresh-tasting meals anytime, anywhere. Experiment with different foods, refine your techniques, and revel in the profound satisfaction of self-sufficiency and preparedness that comes with a well-stocked pantry of homemade freeze-dried goods.
Do you have other innovative ideas, unique tips, or personal experiences on how to create a DIY freeze dryer that you’d love to share with our community? We encourage you to share your thoughts, insights, and questions in the comments section below! Your contributions help inspire fellow DIY enthusiasts.
Up Next:
- 10 Ingenious DIY Kitchen Methods That Will Impress Your Friends
- 51 Terrific Ways To A DIY Kitchen Upgrade | DIY Projects
- Craft Your Own Fire Starter At Home | 11 Creative DIY Fire Starter Ideas
Calling all crafting DIYhards, DIY Projects needs YOU! Click here if you want to write for us.
Don’t forget to stay connected with us on Facebook, Twitter, Pinterest, and Instagram!