
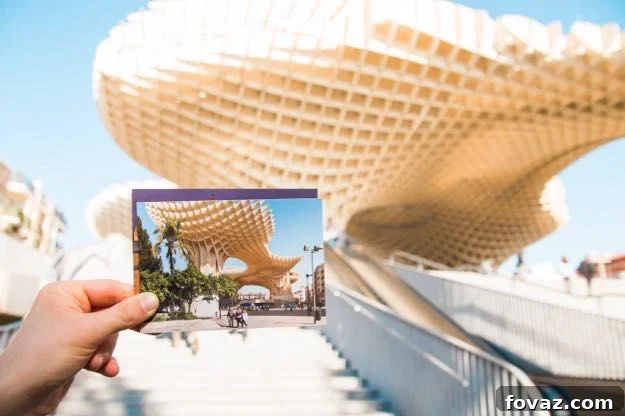
In an age saturated with digital images, where countless photos reside on our devices and social media feeds, few moments ever make it off-screen and onto our walls. Imagine transforming those cherished memories into tangible works of art that not only adorn your living space but also tell your unique story. This comprehensive guide will show you how to effortlessly bring your favorite printed photos to life on canvas, creating stunning, personalized home decor. Dive into the rewarding world of DIY canvas prints and learn to preserve your most unforgettable moments with a lasting, artistic touch.
DIY Photo to Canvas: Transform Memories into Masterpieces
There’s a special kind of joy in holding a physical photograph, a warmth that digital files can’t quite replicate. Whether it’s a candid shot from a family gathering, a breathtaking landscape from a memorable trip, or a simple portrait of a loved one, these images hold profound emotional value. While social media offers instant sharing, it often leaves our most treasured photos trapped in the digital realm. This project offers a beautiful solution: a DIY method to transfer your beloved printed photos onto canvas, turning them into unique, gallery-worthy art pieces for your home.
Why Choose DIY Photo to Canvas?
Opting for a DIY photo-to-canvas project offers numerous advantages over purchasing pre-made canvas prints or relying solely on digital displays:
- Personalization Beyond Compare: Every step of this process allows for creative input, from choosing the perfect photo and canvas size to the final protective coat. This ensures your finished piece is truly one-of-a-kind and deeply meaningful.
- Cost-Effective Art: Professional canvas prints can be expensive, especially for larger sizes. This DIY method significantly reduces costs, making it an accessible way to decorate your home with custom art without breaking the bank.
- A Sense of Accomplishment: There’s immense satisfaction in creating something beautiful with your own hands. Completing a photo-to-canvas transfer not only results in stunning decor but also a proud feeling of craftsmanship.
- Unique Aesthetic: The transfer process, particularly when using techniques like Mod Podge, often results in a slightly distressed or vintage look. This adds character and charm that can’t be replicated by standard printing methods, giving your photos an artistic, tactile quality.
- Thoughtful Gifting: Hand-crafted photo canvases make incredibly heartfelt gifts for birthdays, anniversaries, holidays, or housewarmings. They demonstrate care, effort, and a personal touch that store-bought items simply can’t match.
Preparation: Setting the Foundation for Success
Choosing Your Perfect Photo
The success of your canvas transfer project begins with selecting the right photograph. Not all images are equally suited for this technique. Here are key considerations for choosing a photo that will translate beautifully onto canvas:
- High Resolution is Key: While the transfer process itself isn’t dependent on digital resolution, a high-quality original image will ensure sharper details and better overall clarity in your print.
- Good Lighting and Contrast: Photos with clear subjects, good lighting, and decent contrast tend to yield the best results. Overly dark or washed-out images may lose definition during transfer.
- Simplicity Can Be Effective: Sometimes, less is more. A portrait with a clean background or a straightforward landscape can be incredibly impactful. However, don’t shy away from complex scenes if they are well-composed.
- Consider the Subject: Faces and intricate details transfer well, but be prepared for a slightly softer, almost painterly effect. If transferring text, remember the mirror image requirement (discussed later).
- Emotional Resonance: Ultimately, choose a photo that holds significant meaning to you. This project is about celebrating memories, so pick an image that evokes joy, nostalgia, or inspiration.
Enhancing Your Image: Basic Editing Tips
Even if you’re not a professional photographer, a little pre-transfer editing can dramatically improve your canvas print. You don’t need expensive software like Adobe Photoshop; many free and user-friendly alternatives are available:
- Crop and Straighten: Ensure your photo is perfectly framed and level. Crop out any distracting elements to keep the focus on your main subject.
- Adjust Brightness and Contrast: Slightly increasing brightness and contrast can make your image pop and improve detail, especially important for the transfer process where some luminosity might be lost.
- Color Correction: If your photo has an unnatural color cast, use basic color balance tools to correct it. Ensure skin tones look natural and colors are vibrant but not oversaturated.
- Sharpening (Subtly): A gentle sharpening can enhance edges and details, but avoid over-sharpening, which can introduce artifacts.
- Free Editing Tools: Explore options like GIMP (a powerful open-source alternative to Photoshop), Canva (great for beginners with templates), PicMonkey, or even the built-in editing features on your smartphone or computer’s photo viewer. The goal is to make your photo as clear and vibrant as possible.
Printing Your Photo for Transfer
This is a critical step. For successful photo transfer with Mod Podge or similar glues, you *must* use a print from a laser printer. Inkjet prints will not work because the ink will bleed and smear. The toner from a laser printer is essential as it’s what adheres to the canvas during the transfer. Print your chosen and edited image on regular, thin printer paper – the thinner the paper, the easier it will be to remove later. Ensure the printout matches the size of your chosen canvas.
Essential Materials You’ll Need
Gathering your supplies beforehand will make the transfer process smooth and enjoyable. Here’s a detailed list:
- Canvas: Choose a stretched canvas that is the exact size of your printed photograph. Ensure it’s clean and free of dust.
- Mod Podge or Photo-Transfer Medium: Mod Podge (matte or gloss, depending on your desired finish) is a popular choice due to its adhesive and sealant properties. Alternatively, a dedicated photo-transfer gel or glue will work.
- Fine-Grit Sandpaper: For lightly preparing the canvas surface.
- Sponge Paint Brush or Foam Roller: For applying an even layer of Mod Podge.
- Spray Bottle with Water: Essential for wetting the photo print and the paper later.
- Clean Hand Towel or Cloth: To protect your work surface and aid in the wetting process.
- Credit Card or Brayer (Optional): Useful for smoothing out bubbles and creases.
Looking for more creative Mod Podge ideas? Check out these fantastic crafts!
These are the cutest #DIY Mod Podge crafts around! #18 is PERFECT for summer. http://t.co/vfQecgSmuC
— DIY Projects (@DIY Projects) June 4, 2014
Step-by-Step Guide: Transferring Your Photo to Canvas
With your photo selected, edited, and laser-printed, and all your materials ready, you’re set to begin the exciting transfer process. Follow these steps carefully for the best results:
Step 1: Prepare Your Canvas Surface
Take your fine-grit sandpaper and gently sand the entire surface of your canvas. This step helps to remove any small imperfections, bumps, or dust, creating a smoother, more receptive surface for the Mod Podge and photo to adhere to. Wipe off any sanding dust with a dry cloth after this step.
Step 2: Apply the Transfer Medium Liberally
Using your sponge paint brush or foam roller, apply a generous and even layer of Mod Podge or photo-transfer glue directly onto the sanded canvas. Ensure the entire surface where the photo will sit is thoroughly covered, reaching all edges. Avoid applying it too thinly, as this can hinder adhesion, but also avoid excessive globs which can cause uneven drying.
Step 3: Wet Your Photo Print Thoroughly
Place your laser-printed photo face-down on a clean hand towel. Using your spray bottle, thoroughly wet the *back* of the photo paper. The paper should become dark and fully saturated with water. This process helps to soften the paper fibers, making it easier to remove them later, leaving only the toner image behind.
Step 4: Position and Apply the Wetted Photo
Carefully pick up the wetted photo print. Align it precisely over the glue-covered canvas. Gently lay the photo *face down* onto the Mod Podge, ensuring it is centered and straight. You generally get only one chance to position it correctly, so take your time with alignment.
Step 5: Smooth Out Bubbles and Creases
Starting from the center of the photo and working outwards to the edges, delicately smooth out any air bubbles or creases. You can use your fingers, a credit card, or a brayer for this. Apply gentle but firm pressure to ensure maximum contact between the toner side of the photo and the Mod Podge. Pay extra attention to pressing down on the most important parts of your image, such as faces or fine details.
Step 6: Allow for Complete Drying Time
This is where patience is key. Leave the canvas to sit undisturbed and dry completely. While a few hours might suffice in warm, dry conditions, letting it sit overnight (12-24 hours) often yields significantly better results. Rushing this step can lead to incomplete transfer or difficulty in removing the paper.
Step 7: Re-Wet the Paper Surface
Once the canvas is completely dry, take your spray bottle and lightly spray the paper layer on the canvas with water again. The goal is to re-wet the paper just enough to soften its fibers without saturating the transferred image beneath. This prepares the paper for removal.
Step 8: Gently Rub Away the Paper to Reveal the Image
This is the most delicate and rewarding step. Very lightly, using your fingertips, begin rubbing the wet paper away from the canvas. You’ll see tiny bits of paper peeling off, revealing the transferred photo underneath. This process needs to be done with extreme gentleness; rubbing too hard or aggressively can easily lift or damage the transferred image. It will be a slow, meticulous process, and your goal is to remove as much of the paper residue as possible to reveal a clear image. Embrace the process, and if a little paper remains, it often contributes to a charming, distressed, or “vintage” look.
Step 9: Seal and Protect Your Finished Artwork
After you’ve removed as much paper as you can and the canvas is dry again, apply another even coat of Mod Podge or clear sealant over the entire surface of the transferred photo. This step serves two purposes: it protects the transferred image from moisture and wear, and it provides a beautiful, consistent finish (matte or glossy, depending on your Mod Podge choice). This final coat can also help to smooth out and minimize any minor traces of paper residue that might have been left behind.
Important Considerations and Pro Tips
- Mirror Image for Text: As mentioned, the image will transfer in reverse. This is usually not an issue for photographs, but if your print includes text, you *must* print it as a mirror image (horizontally flipped) so it reads correctly after transfer. Most printer settings offer this option.
- Experiment with “Distressed” Looks: Your first few attempts might not be perfectly smooth, and that’s part of the charm! Embrace the distressed or “vintage” look that often results from the paper-rubbing process. It adds character and uniqueness to your art.
- Quality of Laser Print: The richer the toner on your laser print, the better the transfer. Ensure your printer toner is fresh and your prints are vibrant.
- Patience is a Virtue: The drying times are crucial. Rushing any step, especially the initial drying, can compromise the transfer.
- Workspace and Ventilation: Work in a well-ventilated area, especially when using glues and sealants. Protect your work surface with old newspapers or a drop cloth.
- Alternative Transfers: While Mod Podge is excellent, other mediums exist, such as gel medium or dedicated photo transfer solutions. Research and experiment to find what works best for you.
Your DIY photo-to-canvas project is now complete! You’ve transformed a simple print into a personalized piece of art, ready to be displayed and admired. Enjoy the lasting beauty of your memories!
Want to see a visual demonstration of how to transfer photos with Mod Podge? Then check out this helpful video from Plaid Crafts:
Thank you for exploring our comprehensive guide on the DIY Photo to Canvas project! Are you inspired to give this creative endeavor a try this weekend? Share your thoughts and experiences in the comments section below.
Don’t forget to stay connected with us on Facebook, Twitter, Pinterest and Instagram for more inspiring DIY projects and tips!
You’ll Also Love These Related DIY Projects!
20 DIY Photo Booth Ideas11 Hand Warmers to Make YourselfDIY Beaded Bracelets You Bead Crafts Lovers Should Be Making