
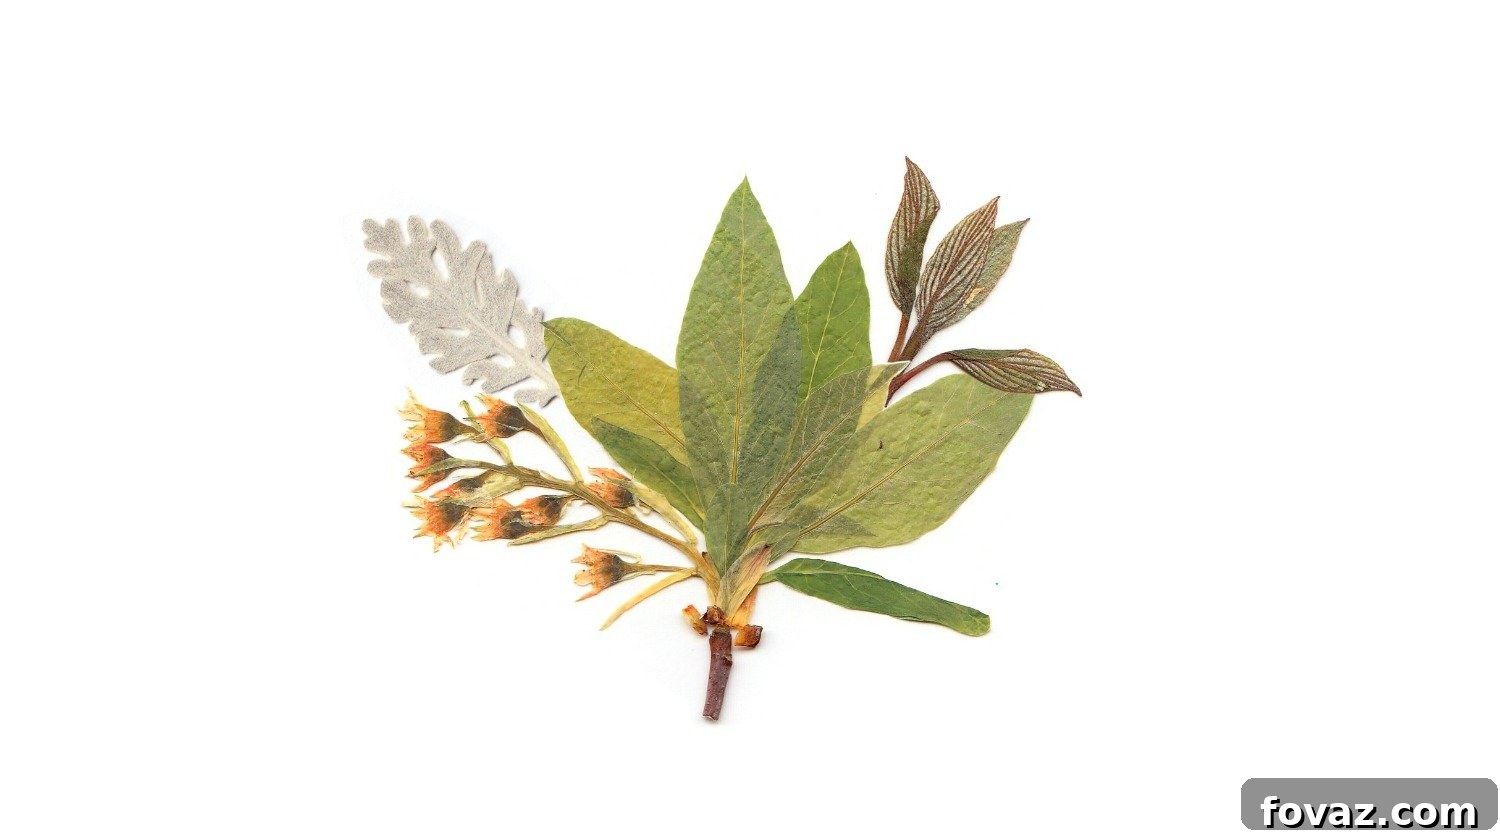
Unlock the enchanting world of flower pressing, transform your DIY projects with natural beauty, and cultivate a relaxing hobby that connects you with nature. Say goodbye to store-bought pressed flowers and hello to an endless supply of exquisite botanical treasures from your own garden!
RELATED: How To Preserve Flowers: A Comprehensive Guide
In this comprehensive guide, you will discover:
- Embark on Your Flower Pressing Journey Today
- Expert Tips and Tricks for Perfectly Pressing Flowers and Leaves
- How to Press Flowers Using an Iron for Quick Results
- Mastering Flower Pressing with a Traditional Flower Press
- The Wax Paper Method for Unique Translucent Blooms
- Inspiring Creative Uses for Your Pressed Botanical Art
- Storing and Preserving Your Pressed Flower Treasures
Embrace the Art of Flower Pressing: Your New Relaxing Hobby
If you’re looking for a delightful and rewarding craft to engage in, flower pressing offers a serene escape and endless creative possibilities. The late summer and early autumn seasons present the ideal opportunity to begin this charming hobby. As the vibrant blooms of summer gradually begin to fade, now is the perfect moment to capture and immortalize their delicate beauty and rich colors, transforming them into lasting works of art.
Imagine the joy of having a vast collection of unique, hand-pressed botanicals at your fingertips come winter. These preserved natural elements can elevate your personal projects, adding a touch of rustic elegance to handmade greeting cards, bespoke gifts for friends and family during the holiday seasons, or even intricate wall art. There’s an undeniable, timeless charm in pressed leaves and petals that captivates hearts and evokes a sense of nostalgia for nature’s fleeting beauty. Best of all, pressing flowers is surprisingly simple and accessible, requiring minimal specialized equipment. With our expert tips and methods, you’ll be able to achieve stunning results right from your very first attempt, saving you time and ensuring no precious blossoms go to waste.
Why Start Pressing Flowers? More Than Just a Hobby
Flower pressing isn’t just about preserving flowers; it’s about preserving memories, creating art, and connecting with the natural world in a meaningful way. For centuries, people have pressed flowers for their beauty, their symbolism, and their use in decorative arts. It’s a therapeutic activity that encourages mindfulness and patience, offering a calming counterbalance to the hustle and bustle of modern life. Each pressed petal holds a story, a memory of a specific season, a special occasion, or a moment of tranquility in a garden.
Beyond its calming benefits, flower pressing is incredibly versatile. It provides an eco-friendly and sustainable way to decorate your home, personalize gifts, and embark on a wide range of DIY crafts. Whether you’re an experienced crafter or a complete beginner, the satisfaction of transforming fresh blooms into delicate, flattened masterpieces is immense. Plus, by growing your own flowers for pressing, you can further enhance your connection to nature and ensure a continuous supply of beautiful materials.
Expert Tips and Tricks for Perfectly Pressing Flowers and Leaves
While the concept of pressing flowers is straightforward, achieving consistently beautiful results requires a bit of finesse and adherence to a few key principles. To help you avoid common pitfalls and ensure your pressed botanicals are picture-perfect every time, we’ve compiled a list of essential tips and tricks:
- Select the Right Specimens: For optimal results, prioritize naturally flat varieties. Flowers with single layers of petals or delicate structures tend to press beautifully. Excellent choices include hydrangeas, daisies, pansies, violas, cosmos, ferns, and thinner chrysanthemums. While visually stunning, bulky blooms like roses, carnations, or thick-centered sunflowers are much harder to get completely paper-flat without significant effort and often require disassembly or a specialized pressing technique. Opt for smaller, more delicate individual petals if pressing larger, thicker flowers.
- Choose Flawless Flowers: The quality of your pressed flower starts with the quality of the fresh flower. Always select florets and leaves that are vibrant, fresh, and free from any blemishes, holes, discoloration, or signs of wilting or disease. We want to preserve the peak beauty, not imperfections.
- Harvesting at the Right Time: The best time to pick flowers for pressing is on a dry, sunny day, ideally in the late morning after any dew has evaporated but before the intense midday sun causes them to wilt. Flowers that are too wet will often turn brown or mold during the pressing process.
- Handle with Extreme Care: Pressed flowers and leaves are incredibly delicate and fragile once dried. Always handle them gently, preferably with tweezers, to prevent tearing, crumbling, or damaging their intricate structures.
- Absorb Excess Moisture: Before pressing, gently blot your flowers and leaves with a paper towel to remove any surface moisture. For thicker or more moisture-rich specimens, you can also use makeup oil blotting paper or even a thin piece of tissue paper between the flower and the absorbent material in your press to help draw out additional water, ensuring faster and more effective drying.
- Protect Your Materials: Always insert a clean, absorbent sheet (like blotting paper, acid-free cardstock, or even a coffee filter) directly on top of and beneath your botanical specimens before pressing. This protective layer helps to wick away moisture, prevent sticking, and maintain the integrity of the flowers’ color and shape.
- Allow Ample Space: When arranging your specimens in the press, ensure they are not overlapping each other. Each flower and leaf needs its own space to flatten evenly and dry properly. Overlapping can lead to uneven pressing, moisture traps, and often results in a messy “glob” of petals rather than distinct, beautifully pressed forms.
- Trim and Prepare: For thicker stems or backs of flowers, gently trim away excess material to reduce bulk. For complex flowers, you might carefully separate layers or even press individual petals to create unique compositions later.
How to Press Flowers with an Iron for Quick Results
Need beautifully pressed flowers in a flash for an immediate craft project? The iron pressing method is your go-to solution! In just a few minutes, you can transform fresh blooms into perfectly flattened, craft-ready botanicals, making it an excellent technique for instant gratification and impromptu crafting sessions.
Supplies Needed:
- An iron (preferably a dry iron or one with the steam function turned off and water removed)
- An ironing board or a hard, flat, heat-resistant surface
- Several sheets of absorbent paper (e.g., parchment paper, thick printer paper, or blotting paper)
- Fresh flowers and leaves
- A heavy hardcover book (optional, for initial flattening)
Instructions:
Step 1. Prepare Your Pressing Area
Begin by setting up your ironing station. Lay a clean, dry sheet of absorbent paper directly onto your ironing board or chosen heat-resistant surface. Carefully arrange your fresh flowers and leaves on top of this paper, ensuring they are not overlapping and have sufficient space between them. Once arranged, cover your specimens with another sheet of absorbent paper. For an even flatter start, you can gently place a heavy hardcover book on top of this “flower sandwich” for 2-3 minutes, applying a bit of pressure to remove initial moisture and start the flattening process. Make sure the book is stable and won’t slide, which could damage the delicate flowers.
Step 2. Set Your Iron Correctly
Remove the book (if used), leaving the flower specimens carefully sandwiched between the paper sheets. Prepare your iron: if it’s a steam iron, ensure all water is removed from the reservoir and the steam function is turned completely off. Set your iron to the lowest heat setting available, or to the “dry” setting if your iron has one. High heat can scorch the flowers or cause them to turn brown. Patience and a low, consistent heat are key to preserving their color and structure.
Step 3. The Pressing Process
Now, it’s time to press! Place the warm iron directly onto the top sheet of paper, over your arranged flowers. Apply gentle, even pressure and hold the iron in place for approximately 10 to 15 seconds. Lift the iron completely and allow the flowers to cool for a few seconds – this helps to release trapped moisture and prevent scorching. Repeat this pressing and lifting process across the entire sheet, moving the iron to different sections. Do NOT drag the iron across the paper as you would with clothing; this can tear the delicate flowers and potentially damage both your specimens and the paper. After several repetitions (typically 3-5 cycles), carefully lift the top sheet of paper to check on your flowers. They should appear flattened and dry to the touch, with a papery texture. Once pressed, slowly and carefully remove the pressed flowers to prevent tearing and set them aside on another clean, dry sheet of paper to cool completely before use.
RELATED: Craft Stunning Homemade Resin Jewelry Made from Pressed Flowers
Mastering Flower Pressing with a Traditional Flower Press
For those who wish to elevate their flower pressing endeavors and achieve professional-quality, perfectly flat materials, investing a little more time in a traditional flower press is highly recommended. While it takes longer than the iron method, the results are often superior in terms of flatness, color retention, and overall integrity of the pressed botanicals. Building your own flower press is a rewarding DIY project in itself, and using it becomes a meditative art form. With this method, flowers are typically ready for use after a few days to a week, depending on their moisture content and the tightness of the press.
Supplies for Building Your Own DIY Flower Press:
- Two sturdy 7” x 7” wood squares (plywood or similar)
- Sheets of scrap cardboard (corrugated is best for absorption and ventilation)
- Plenty of sheets of absorbent paper (blotting paper, thick watercolor paper, or coffee filters work well)
- Fresh flowers and leaves
- Power drill
- 5/32” drill bits (or appropriate size for your screws/bolts)
- 4 screws or carriage bolts (about 2-3 inches long)
- 4 washers (to distribute pressure)
- 4 wingnuts (for easy tightening and loosening)
Instructions:
Step 1. Construct Your DIY Flower Press
First, obtain or cut two identical pieces of wood squares. Using a pencil, measure approximately 1 inch in from each edge of your wood corners. These marks will indicate where you’ll drill the holes for your bolts. Carefully drill through both boards at these pencil marks, ensuring the holes align perfectly when the boards are stacked. Next, insert your carriage bolts (or screws) up through the bottom board from below. Place a washer onto each bolt on the top side of the bottom board, then slide the second wood square over the bolts. Finally, attach the wingnuts onto the top of the bolts. The wingnuts are crucial as they allow you to easily tighten and loosen the press, applying controlled, even pressure to your flowers.
Step 2. Assemble and Set Up Your Press
Gather several pieces of scrap cardboard that are roughly the same size as your wood squares. To ensure they fit neatly within the press and don’t interfere with the bolts, trim off the corners of these cardboard sheets. This creates channels for the bolts, allowing the cardboard layers to sit flat. The cardboard layers serve a dual purpose: they provide structure and also absorb moisture from the flowers.
Step 3. The Art of Pressing Flowers
Now, prepare your botanical specimens. Arrange your fresh flowers and leaves carefully on a sheet of plain, absorbent paper, ensuring they are laid out exactly as you wish them to appear when pressed and that they are not overlapping. Create a “sandwich” within your press: start with a layer of cardboard, then a sheet of absorbent paper, then your arranged flowers, followed by another sheet of absorbent paper, and finally another layer of cardboard. Repeat this layering process for multiple batches of flowers if desired, ensuring each layer is separated by cardboard and absorbent paper. Once all your specimens are carefully layered, place the top wood square onto the bolts and begin to tighten the wingnuts. Tighten them gradually and evenly, applying firm but not excessive pressure initially. Over the next few days, tighten the wingnuts a little more each day to ensure continuous pressure as the flowers dry and shrink. Depending on the size and moisture content of your flowers, they will be perfectly pressed and dried within 3-7 days. Open the press carefully to reveal your beautifully preserved botanical treasures!
The Wax Paper Method for Unique Translucent Blooms
This innovative method of pressing flowers is particularly well-suited for lightweight, delicate blooms and single petals. Once completed, you’ll be left with a beautiful sheet of translucent, sealed flowers, creating a unique and rustic dimension that can be incorporated into a wide variety of craft projects, offering a different aesthetic from traditionally pressed flowers.
Supplies:
- An iron (dry setting, no steam)
- An ironing board or a hard, flat, heat-resistant surface
- Wax paper sheets
- Paper towels or a thin cloth
- Small, fresh flowers and leaves (small daisies, violas, pansy petals, or delicate orchid petals work wonderfully)
Instructions:
Step 1. Initial Setup Similar to Iron Pressing
The initial setup for the wax paper method closely mirrors the basic steps of pressing flowers with an iron. However, instead of using regular paper, you will be creating a “sandwich” using two sheets of wax paper. Lay one sheet of wax paper flat on your ironing board. Carefully arrange your small, fresh flowers and leaves on this sheet, ensuring they are not overlapping. Once you are satisfied with your arrangement, gently place a second sheet of wax paper directly on top of your flowers, creating a sealed enclosure.
Step 2. Sealing with Wax Paper
To begin the sealing process, place a layer of paper towels or a thin, clean cloth on top of your wax paper sandwich. This acts as a protective barrier and helps to absorb any excess wax. Set your iron to a low to medium-low, dry heat setting. Place the iron firmly but gently onto the paper towel layer, directly over your flowers. Hold the iron in place for about 10 to 15 seconds. The heat from the iron will melt the wax on the paper, effectively sealing the flowers between the two sheets. Lift the iron and move to a different section, repeating this pressing motion until the entire area around your flowers is sealed. You should see the wax paper become slightly transparent and the flowers become encased. In just a few minutes, you will have a unique, translucent sheet filled with beautifully sealed flowers, ready to be cut and used in your creative projects!
This video from Sheri Vegas on how to cast pressed flowers in resin will inspire your next craft project:
Inspiring Creative Uses for Your Pressed Botanical Art
Once you’ve mastered the art of pressing flowers, a world of creative possibilities opens up. These delicate botanical elements can add a touch of natural elegance and personalized charm to almost any craft project. Here are just a few ideas to get your imagination blooming:
- Handmade Greeting Cards and Bookmarks: Adorn homemade cards for any occasion or create unique bookmarks that make reading even more delightful.
- Resin Art and Jewelry: Encapsulate your pressed flowers in clear resin to create stunning pendants, earrings, coasters, or decorative blocks, as demonstrated in the video above.
- Framed Wall Art: Arrange a collection of pressed flowers and leaves on acid-free paper and frame them for elegant, timeless wall decor. Create intricate mandalas or abstract compositions.
- Journaling and Scrapbooking: Embellish your journals, planners, and scrapbooks with pressed flowers to add a personal, natural touch to your memories.
- Candle and Soap Embellishments: Gently adhere pressed flowers to the exterior of candles or embed them into handmade soaps (ensure they are completely dry and sealed appropriately).
- Gift Wrapping and Tags: Use small pressed flowers to decorate gift tags or as a beautiful accent on wrapped presents.
- Home Decor Accents: Press flowers into clear contact paper to create suncatchers, or laminate them to make unique placemats or decorative trays.
- DIY Invitations and Stationery: Add a sophisticated, personal touch to wedding invitations, birth announcements, or other special event stationery.
Storing and Preserving Your Pressed Flower Treasures
Proper storage is crucial to ensure your beautifully pressed flowers maintain their vibrant colors and delicate forms for years to come. Pressed flowers are susceptible to moisture, light, and physical damage, so a little care goes a long way:
- Keep Them Dry: The enemy of pressed flowers is moisture. Store them in a dry environment, away from humidity. Silica gel packets can be added to storage containers for extra protection.
- Protect from Light: Direct sunlight will quickly fade the colors of your pressed flowers. Store them in opaque containers, dark boxes, or within the pages of a book to shield them from light.
- Acid-Free Materials: When storing or displaying pressed flowers, always use acid-free paper, cardstock, and adhesives. Acidic materials can cause discoloration and deterioration over time.
- Flat Storage: Keep your pressed flowers flat to prevent bending or crumpling. An excellent way to store them is between sheets of acid-free tissue paper or blotting paper, placed within a heavy book or a sturdy box. Archival photo albums with clear, protective sleeves designed for flat items also work well.
- Avoid Overcrowding: Give each flower space to breathe, even in storage. Overcrowding can lead to damage.
Make your downtime more productive and creatively fulfilling with these relaxing arts and crafts projects. Now that you’re equipped with various methods for pressing flowers, I’m confident your winter months will be filled with the warmth and beauty of summer memories, beautifully preserved in your exquisite botanical creations.
Do you have any unique flower pressing tips or creative project ideas we might have missed? Share your insights and experiences in the comments section below!
Up Next:
- Essential Back to School Organization Tips and a DIY Tutorial on How to Organize Your Locker
- 10 Creative Construction Paper Flowers | Easy DIY Flower Craft Ideas
- Step-by-Step Guide: How To Make Beautiful Tissue Paper Flowers
Stay connected with our vibrant crafting community on Facebook, Twitter, Pinterest, and Instagram for daily inspiration and the latest DIY projects!Editor’s Note: This post was originally published on June 30, 2014, and has been updated for quality, relevancy, and comprehensiveness.