
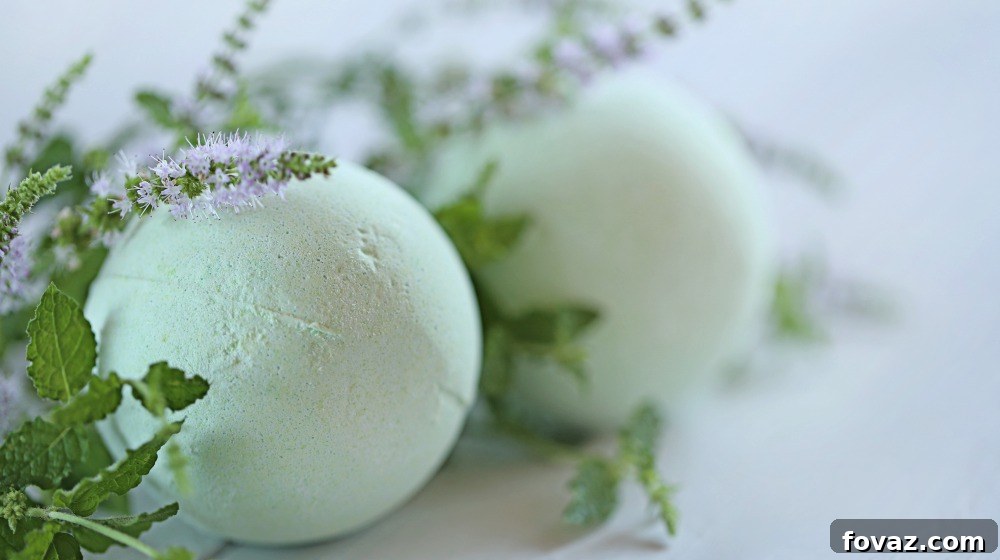
As the vibrant energy of St. Patrick’s Day festivities begins to wind down, wouldn’t it be wonderful to extend that joyous spirit into a moment of serene self-care? Say goodbye to the post-celebration slump and embrace ultimate relaxation with our delightful DIY Shamrock Shake bath bomb and homemade soap recipes. Infuse your bath with the iconic minty freshness and charming green hues inspired by this seasonal treat, transforming your ordinary soak into a luxurious St. Patrick’s Day-themed spa experience.
Imagine sinking into a bath filled with effervescent fizz and a comforting aroma, reminiscent of your favorite holiday indulgence. These easy-to-follow projects allow you to craft personalized, all-natural bath products, perfect for unwinding or gifting to loved ones. Get ready to awaken your senses and rejuvenate your body with these festive, soothing creations!
RELATED: 17 DIY Bath Bombs & Homemade Bath Bomb Recipes
In this comprehensive guide, we’ll dive into:
- Understanding the Shamrock Shake Phenomenon
- Crafting Your Own DIY Shamrock Shake Bath Bomb
- Creating Luxurious DIY Shamrock Shake Bath Soap
How to Create the Ultimate Shamrock Shake Bath Bomb and Soap for St. Patrick’s Day Relaxation
Understanding the Shamrock Shake Phenomenon
The Shamrock Shake is more than just a seasonal dessert; it’s an annual sensation, eagerly anticipated by fans worldwide. This iconic mint-flavored milkshake, exclusively sold at McDonald’s restaurants, heralds the arrival of March and the festive spirit of St. Patrick’s Day. Its distinctive creamy texture and refreshing peppermint notes make it a beloved symbol of springtime and celebration. From its vibrant green color to its classic whipped topping, the Shamrock Shake captures the essence of Irish cheer in a cup.
While this delightful treat is a fleeting pleasure, available only for a limited time each year, its festive good vibes don’t have to be. What if you could capture that invigorating minty freshness and celebratory essence, and enjoy it all year round? Our DIY projects offer a unique way to replicate the refreshing fizziness and soothing aroma of the Shamrock Shake, not in a drink, but in a truly indulgent self-care experience. Transform your bath into a personal sanctuary where the festive spirit of St. Patrick’s Day can linger, long after the last shake has been enjoyed.
Imagine the joy of dissolving a beautifully crafted, mint-scented bath bomb or lathering up with a vibrant green soap that embodies the very essence of the season. These homemade creations allow you to extend the celebration, offering a personalized touch to your relaxation routine while embracing the playful charm of this beloved holiday icon. It’s an innovative way to keep the spirit alive and infuse your daily life with a little extra magic.
Crafting Your Own DIY Shamrock Shake Bath Bomb
Unleash your inner alchemist and create an enchanting Shamrock Shake bath bomb that promises a refreshing and fizzy escape. This DIY project is not only fun but also incredibly rewarding, allowing you to customize your self-care products with natural ingredients. Follow these steps carefully to ensure a perfectly vibrant and fragrant bath bomb, ready to dissolve away your stresses.
Step 1: Gather All Essential Materials
Before embarking on your bath bomb creation journey, it’s crucial to prepare and organize all the necessary materials. This proactive approach ensures a seamless and uninterrupted crafting process, allowing you to fully immerse yourself in the creative flow without scrambling for forgotten items. Having everything within reach will make the experience much more enjoyable and efficient.
The ingredients you need for your refreshing Shamrock Shake bath bomb are as follows:
- 20 drops of vibrant green gel food coloring (for that signature Shamrock Shake hue)
- 1 tsp pure vanilla extract (to add a touch of sweetness and depth to the mint)
- ¼ tsp invigorating peppermint essential oil (the core of our minty freshness)
- ¼ tsp fractionated coconut oil (a nourishing binder for skin hydration)
- ½ cup baking soda (the base for our delightful fizz)
- ¼ cup Epsom salt (known for its relaxing and muscle-soothing properties)
- ¼ cup corn starch (helps to create a harder bath bomb and a silky feel in the water)
- Candy Shamrock sprinkles (optional, but highly recommended for a festive visual appeal)
- Sugar sprinkles (optional, for an extra touch of sparkle)
- ¼ cup citric acid (the key reactive ingredient that creates the effervescent fizz with baking soda)
You also need a few basic supplies to assist with the crafting process:
- A sturdy whisk (for thorough mixing of dry ingredients)
- A large mixing bowl (to comfortably combine all your ingredients)
- A bath bomb mold (a round mold, approximately 3 inches in diameter, is ideal for a good-sized bath bomb)
Step 2: Expertly Combine the Ingredients
Achieving the perfect consistency and fizz factor for your Shamrock Shake bath bomb relies heavily on how well you combine your ingredients. Proper mixing ensures that all components are evenly distributed, leading to a visually appealing and highly effective bath bomb. Start with the dry ingredients to prevent premature reactions and gradually introduce the liquids.
In your large mixing bowl, begin by thoroughly whisking together all the dry ingredients: baking soda, Epsom salt, and corn starch. This step is vital for breaking up any clumps and ensuring an even blend. Once the dry mixture is uniform, gradually add the liquid ingredients: green gel food coloring, vanilla extract, peppermint essential oil, and fractionated coconut oil. Continue mixing continuously as you add the liquids. Pay close attention when incorporating the vanilla extract, as its water content can cause a slight fizzing reaction if not whisked in quickly and completely. The goal is a mixture that feels like damp sand—it should hold its shape when squeezed but still be crumbly enough to work with.
Step 3: Artfully Position the Sprinkles (Optional but Recommended)
If you’re opting to include sprinkles, this step is where you add that extra dash of festive charm and visual appeal to your Shamrock Shake bath bomb. Strategic placement ensures that the sprinkles are beautifully integrated into the final product, rather than simply mixed throughout.
Carefully place your chosen candy Shamrock and sugar sprinkles on one side of your bath bomb mold. A single teaspoon of sprinkles is typically sufficient to create a lovely, eye-catching design without overwhelming the bomb. Press them gently into the mold cavity so they adhere slightly, ensuring they remain in place as you add the bath bomb mixture. This technique creates a beautiful, decorative outer layer that will be revealed once the bath bomb is released from its mold.
Step 4: Precisely Mold Your Bath Bomb Mixture
The molding process is crucial for shaping your Shamrock Shake bath bomb and ensuring it holds together beautifully. Proper packing is key to preventing crumbling and achieving a solid, long-lasting bath bomb that performs optimally in your bath. Take your time with this step for the best results.
Divide your bath bomb mixture into two equal halves. Firmly press one half into each side of your round bath bomb mold, ensuring you pack the mixture down tightly. Overfill each side slightly, creating a small mound above the rim. This slight overfill helps to create a strong bond when the two halves are pressed together. Carefully bring both sides of the mold together, aligning them perfectly, and press them firmly and quickly. Hold the mold together with gentle pressure for a minute or two to allow the mixture to compact.
Once molded, gently unmold the bath bomb by carefully twisting and separating the mold halves. Place your freshly molded Shamrock Shake bath bomb on a clean, dry surface, such as parchment paper or a drying rack. Allow it to rest and harden for at least 12-24 hours, or even longer in humid conditions, to ensure it is completely dry and solid. Once fully cured, your enchanting Shamrock Shake bath bomb is ready to use or to be lovingly gifted!
RELATED: DIY Snow Globe Soap
Creating Luxurious DIY Shamrock Shake Bath Soap
Elevate your hand-washing or shower routine with a touch of St. Patrick’s Day magic by crafting your own Shamrock Shake-inspired bath soap. What’s truly fantastic about this homemade bath soap recipe is the versatility it offers: you can opt for a soft, creamy mint-green version or go for a richer, deep green hue, both infused with delightful peppermint and vanilla aromas. These melt-and-pour soaps are beginner-friendly and yield beautiful, functional results.
Step 1: Secure All Necessary Soap Ingredients
As with any crafting project, thorough preparation is key to a smooth and enjoyable experience. Since you have the creative freedom to make either a creamy or deep green version of the Shamrock Shake soap – or even both – ensure you gather all the specific ingredients for your chosen design before you begin. This attention to detail will prevent any interruptions and allow you to proceed with confidence.
For the creamy version of your Shamrock Shake bath soap, you will need:
- ¼ non-toxic green crayon (for a subtle, soft green tint)
- ¼ non-toxic yellow-green crayon (to achieve a warmer, creamier green)
- 3 oz of pour and melt goat’s milk soap base (renowned for its moisturizing properties, creating a rich, creamy lather)
For the deep green version, which offers a more vibrant shade, you will require:
- ¼-½ non-toxic green crayon (adjust quantity to achieve desired depth of color)
- 3 oz of pour and melt glycerin soap base (known for its clarity and good lather)
Regardless of the version you choose, you will need these essential aromatic additions:
- A silicone clover soap mold (perfect for the St. Patrick’s Day theme, but any mold shape works!)
- 10 drops of invigorating peppermint essential oil (for that signature minty freshness)
- 15 drops of sweet vanilla essential oil (to balance the mint with a warm, comforting aroma)
Step 2: Combine and Melt the Soap Base and Colorants
The successful blending of your soap base and colorant is vital for achieving the desired color and consistency for both versions of your Shamrock Shake bath soap. This step involves carefully melting the ingredients to create a smooth, homogenous mixture, ready for the next additions.
Combining broken crayons GIF via GIPHY
Begin by carefully chopping your chosen soap base into small, uniform cubes. If you’re using crayons for color, break or shave them into small pieces. Place the soap base and crayon pieces into a microwave-safe dish. Heat the ingredients in the microwave oven for short intervals of 30-45 seconds, stirring well after each interval, until the mixture is completely melted and smooth. Be cautious not to overheat the soap, as this can affect its quality. Continue stirring until the crayon completely dissolves and the color is evenly distributed throughout the melted soap base, creating a perfectly blended, lump-free solution.
Step 3: Infuse with Aromatic Essential Oils
Adding essential oils to your melted soap mixture is the magical step that imbues your Shamrock Shake soap with its wonderful, signature aroma. This crucial stage transforms a simple colored soap into an invigorating and delightful sensory experience, truly capturing the essence of the minty treat.
Once your soap base and colorant are fully melted and thoroughly mixed, remove the dish from the microwave. Allow it to cool slightly for a minute or two to prevent the heat from evaporating the delicate essential oil aromas. Then, add the specified drops of peppermint essential oil and vanilla essential oil directly into the dish. Stir the mixture gently but thoroughly for at least 30 seconds to ensure the essential oils are evenly dispersed throughout the liquid soap. This guarantees that every use of your homemade soap will release a consistent, captivating blend of mint and vanilla, creating a truly luxurious and aromatic experience.
Step 4: Mold and Harden Your Shamrock Shake Soap
The final step in crafting your Shamrock Shake soap involves pouring the aromatic mixture into molds and allowing it to solidify. While the original recipe suggests a clover shape, feel free to use any mold that appeals to you, ensuring it’s a shape that is both easy and comfortable to hold and use in a shower or bath. The key is to create a functional and aesthetically pleasing soap bar.
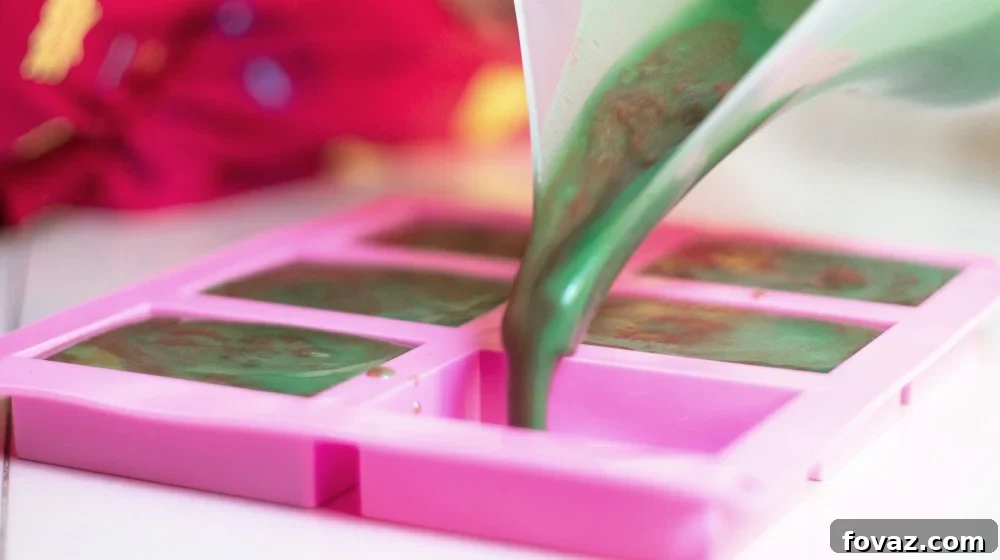
Once your scented soap mixture is ready, carefully pour it into your chosen silicone soap mold(s). For a 3 oz recipe, ensure your mold can accommodate this volume. Fill the cavities evenly, avoiding overfilling. After pouring, gently tap the mold on your countertop a few times to release any trapped air bubbles, which helps create a smooth, flawless surface. Set the mold aside in a cool, undisturbed place to allow the soap to cool and harden naturally for several hours. To expedite the hardening process and ensure a firm bar, you can place the mold in the refrigerator for a few hours. Once completely solid, carefully demold your beautiful Shamrock Shake soaps. They are now ready to be enjoyed or shared as thoughtful, handmade gifts, offering a refreshing and festive touch to any bathroom.
These delightful Shamrock Shake bath bomb and soap recipes will undoubtedly transform your St. Patrick’s Day into an unforgettable feast for the senses, providing a unique blend of relaxation and celebration. After a long day of merrymaking, parades, and festivities, there’s no need to completely let go of the joyous spirit of St. Patty’s Day just yet. Instead, you can extend the fun and relaxation right into your self-care routine, immersing yourself in the invigorating minty aromas and charming green hues that define the holiday.
Start making these creative DIY projects now and share the joy with your loved ones. These handmade bath and body treats make for thoughtful, personalized gifts, perfect for spreading fresh St. Patrick’s Day cheer beyond the holiday itself. Indulge yourself or treat someone special to a truly unique, custom-made experience that combines festive spirit with luxurious self-care.
Which of these enchanting Shamrock Shake recipes – the effervescent bath bomb or the luxurious bath soap – would you be most excited to try first? Share your thoughts and crafting plans in the comments section below!
UP NEXT:
- 17 DIY Bath Salts | Bath Salt Recipe
- How to Repurpose Your Glass Bottle Into a Soap Dispenser
- Bathroom Decorating Ideas On A Budget