
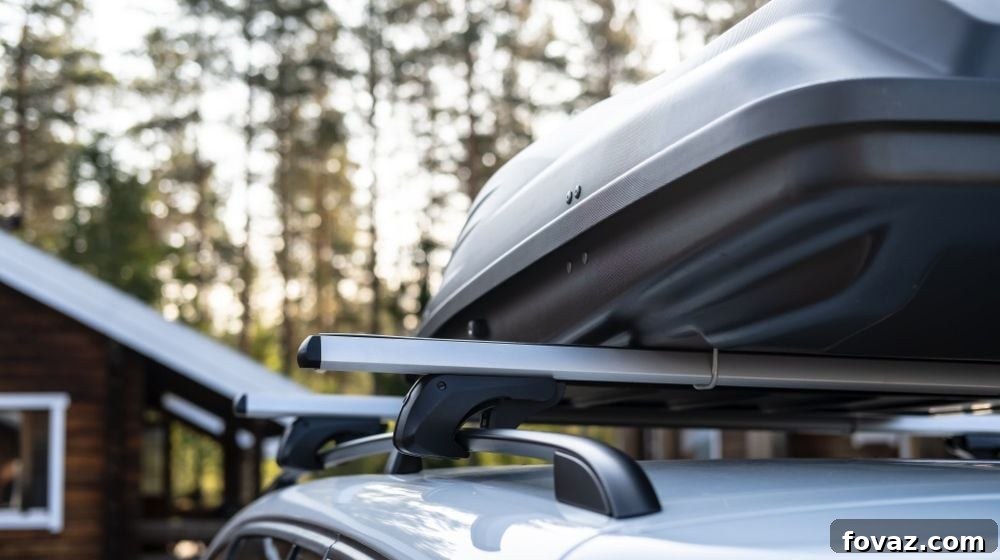
Transform your vehicle’s carrying capacity and embark on new adventures with a robust, custom-built DIY roof rack. This essential upgrade provides a significant increase in cargo space, allowing you to transport anything from camping gear and sports equipment to construction materials and oversized luggage with ease. Far from being a complex undertaking, constructing your own roof rack requires only a selection of basic hand tools and readily available materials from your local hardware store. Not only is it a cost-effective alternative to pre-made commercial options, but it also offers the satisfaction of a truly custom solution tailored precisely to your vehicle and needs.
This comprehensive guide will walk you through every step of the process, ensuring you can confidently build a durable and functional roof rack that stands the test of time and the rigors of the road.
Ultimate Guide: Build Your Own Custom DIY Roof Rack for Enhanced Vehicle Storage
Whether you’re an avid overlander, a weekend warrior, or simply need more space for daily tasks, a custom DIY roof rack is an invaluable addition to any vehicle. It opens up a world of possibilities for transporting bulky items that wouldn’t otherwise fit inside your car, truck, or SUV. Beyond just practicality, a well-built roof rack can also enhance the aesthetic appeal of your vehicle, giving it a more rugged and adventurous look.
This project is designed to be accessible for DIY enthusiasts with a moderate skill level. We’ll focus on using durable aluminum components, which offer an excellent strength-to-weight ratio and resistance to corrosion, ensuring your rack will last for years to come. By following our detailed instructions, you’ll gain the knowledge and confidence to create a high-quality, professional-looking roof rack that meets all your cargo needs.
Essential Tools You’ll Need:
Before you begin gathering materials, ensure you have the following basic hand tools at your disposal. These will be crucial for accurate measurements, precise cuts, secure fastenings, and a professional finish:
- Measuring Tape (for precise measurements)
- Marker or Scribe (for marking cut lines and drill points)
- Drill with Various Metal Drill Bits (suitable for aluminum)
- Tap and Die Set (for threading holes)
- Metal Saw or Angle Grinder with Cutting Disc (for aluminum profiles)
- Clamps (C-clamps or bar clamps for securing materials)
- Hex Keys / Wrenches (for assembling bolts)
- Safety Glasses and Gloves (essential personal protective equipment)
- Ear Protection (when using power tools)
- Sandpaper or Deburring Tool (for smoothing cut edges)
- Painters Tape (for masking if necessary)
- Drop Cloth or Tarps (for painting area)
Materials Required for Your DIY Roof Rack:
The strength and longevity of your roof rack depend heavily on the quality of materials used. We recommend aluminum for its lightweight properties, excellent strength, and natural resistance to rust. Here’s a detailed list of what you’ll need, along with helpful links to common sources:
- 2 in. x 0.25 in. aluminum tubes (These will form the robust side rails of your rack, providing structural integrity.)
- 3 in. x 3 in. x 0.25 in. aluminum angle, cut into 3 in. sections (These sturdy pieces will serve as the crucial feet, securely mounting your rack to your vehicle’s roof.)
- 1 in. x 2 in. extruded aluminum (These versatile profiles will make up your crossbars, providing the primary support for your cargo.)
- Aluminum spacers (Essential for achieving proper alignment and preventing direct contact between metal parts on your roof mounts.)
- Black truck Bedliner spray (This specialized coating offers excellent durability, scratch resistance, and a professional, textured finish.)
- Threaded rubber bumpers (These small but vital components will provide crucial cushioning and stability, preventing sway and protecting your vehicle’s paintwork.)
Recommended Materials (Amazon Links):
2″ Aluminum Square Tube 1/4″ Wall x 36″ Long 6061-T6 Mill Finish
Ideal for creating the strong side rails of your DIY roof rack. This 6061-T6 aluminum offers excellent strength and corrosion resistance.
Buy on Amazon
Industrial Metal Sales – 6061 T6511 Extruded Aluminum Angle 3″ x 4″ x 12′-Long x 1/4″ Thick
Perfect for fabricating the robust mounting feet for your roof rack. This unpolished, mill finish, extruded aluminum is highly durable. Price: $35.93
Buy on Amazon
8020, 1020, 10 Series 1 Inch x 2 Inch T-Slotted Aluminum Extrusion DIY Extruded Linear Slot Bar Rail
Use these T-slotted aluminum extrusions for the crossbars. Their modular design allows for versatile attachment of accessories. Features high-strength 6063-T6 aluminum with a clear anodized finish. Price: $27.71
Buy on Amazon
Small Parts 310410RSA Round Spacer, Aluminum, Plain Finish, #10 Screw Size, 5/16″ OD, 0.192″ ID, 1/4″ Length (Pack of 10)
These aluminum spacers are crucial for ensuring proper clearance and preventing metal-on-metal contact at roof mount holes. Price: $3.98
Buy on Amazon
Custom Shop Sprayable Bedliner for Truck Beds & Touch-Ups – 14.4oz Aerosol Can, Black Textured Coating
Achieve a durable, professional-grade finish with this sprayable bedliner. It protects against corrosion and abrasion, giving your rack a rugged, non-skid texture. Price: $24.99
Buy on Amazon
OCS Parts 3/8″ Set of 4 Adjustable Rubber Bumper Feet, Levelers, 8-32 Thread Size
These premium rubber bumper feet provide vital support, reduce vibrations, and prevent side-to-side sway, ensuring a stable rack. Price: $7.99
Buy on Amazon
Step 1: Get Precise Measurements for a Perfect Fit
Accuracy is paramount in this initial stage, as your roof rack’s stability and appearance depend entirely on correct measurements. Do not rush this step. Grab a reliable tape measure, a notepad, and a pencil. These measurements will dictate the length of your side rails, the placement of your crossbars, and the overall fit of your custom rack.
- Distance Between Existing Roof Rack Mounts: Carefully measure the distance between the two front mounting points on your roof and, separately, the distance between the two rear mounting points. If your vehicle lacks dedicated mounting points, you’ll need to research alternative mounting solutions, such as gutter mounts or drilling into the roof (though the latter requires professional advice to ensure structural integrity and prevent leaks).
- Angle of the Top of the Windshield: This measurement is critical for ensuring your front crossbar or fairing doesn’t interfere with your view and that the rack follows the vehicle’s natural lines for better aerodynamics. Use an angle finder for best results.
- Length from Windshield to Rear (with Liftgate Open): Measure from the top edge of your windshield, over the roof, all the way to the back of your vehicle with the liftgate (or trunk) fully opened. This ensures that the rack won’t obstruct the opening of your liftgate, especially when carrying longer items.
- Dimensions of Your Sunroof (If Applicable): If your vehicle has a sunroof, measure its length and width. You’ll want to design your rack with a clear opening above the sunroof to avoid interference and allow for its full functionality.
Consider any future accessories you might want to mount, such as a rooftop tent, light bar, or recovery gear, as these may influence your design and required load capacity.
Step 2: Plan Out Your Roof Rack’s Design with Precision
With all your measurements meticulously recorded, it’s time to translate those numbers into a functional and aesthetically pleasing design. This planning phase is where your custom rack truly takes shape. You can sketch your design on paper, use CAD software, or even create a full-scale template using cardboard or tape on your garage floor. The goal is to visualize the final product and address any potential issues before you start cutting metal.
When laying out the design, pay close attention to:
- Crossbar Placement: Determine the number and spacing of your crossbars. More crossbars generally mean better support for heavier or longer loads. Ensure even distribution of weight.
- Sunroof Clearance: As noted in Step 1, if your vehicle has a sunroof, design your crossbar placement to leave a sufficient gap directly above it. This prevents obstruction and allows for easy operation.
- Side Rail Overhang: Allow for a slight allowance or overhang on the sides of your vehicle. This can provide additional tie-down points and a more integrated look, but ensure it doesn’t extend beyond legal limits or interfere with other vehicle components.
- Load Distribution: Think about how weight will be distributed. Your design should aim for a balanced load across the entire rack structure.
- Aesthetics: While functionality is key, a good design also considers how the rack will look on your vehicle. Aim for clean lines and a proportionate appearance.
Thorough planning in this stage will save you time, materials, and frustration later on, leading to a much more satisfying final product.
Step 3: Tap the Extruded Aluminum for Secure Fastening
The extruded aluminum pieces you’ve acquired for your crossbars will likely need to be tapped if they aren’t pre-threaded. Tapping is a crucial process that creates internal screw threads within a hole, allowing you to securely fasten bolts and components. This step ensures that your crossbars can be rigidly connected to the side rails.
What is Tapping? Tapping is the process of cutting a screw thread into the inside surface of a pre-drilled hole using a specialized tool called a tap. This creates a female thread that matches the male thread of a bolt or screw, enabling a strong, removable connection.
To tap your aluminum extrusions:
- Choose the Right Tap: Select a tap that matches the thread size of the bolts you intend to use for assembly.
- Secure the Aluminum: Clamp the extruded aluminum securely in a vise to prevent it from moving during the tapping process.
- Drill Pilot Holes: Ensure you have pre-drilled pilot holes of the correct size for your chosen tap. The tap manufacturer’s guide will specify the appropriate drill bit diameter.
- Apply Cutting Fluid: Use a suitable cutting fluid or lubricant to ease the tapping process, reduce friction, and prevent the tap from binding or breaking.
- Tap Carefully: Insert the tap into the pilot hole and turn it clockwise, applying even downward pressure. After every half-turn, back the tap out a quarter-turn to break off chips and clear the threads. Repeat this process until the desired thread depth is achieved.
Careful tapping ensures strong, clean threads that will hold your rack components together reliably.
Step 4: Precisely Drill the Side Pieces for Crossbar Mounting
With your crossbars prepared, the next step involves drilling the corresponding mounting holes into your side rail aluminum tubes. This step is critical for aligning your crossbars and providing flexibility for future cargo configurations. Precision here will ensure your crossbars are level and evenly spaced.
Since your side pieces are 2 inches tall and your crossbars are 1 inch tall, you have the opportunity to create versatile mounting options. For each intended crossbar location, drill four distinct holes. This strategic approach gives you the flexibility to:
- Mount Crossbars on Top: Ideal for attaching a rooftop tent or other large, flat items, providing maximum clearance above your vehicle’s roof.
- Mount Crossbars at the Bottom: Perfect for general storage, keeping your cargo lower for better aerodynamics and easier loading.
Tips for drilling:
- Measure and Mark: Use your design plan from Step 2 to accurately measure and mark all drilling points on both side pieces. Use a center punch before drilling to prevent the drill bit from wandering.
- Use a Drill Press: If possible, use a drill press for perfectly perpendicular holes, which is essential for proper alignment. If using a hand drill, be extra careful to keep it straight.
- Select the Correct Bit: Use drill bits specifically designed for metal, and ensure they match the diameter required for your crossbar mounting bolts.
- Lubrication: Apply cutting fluid or oil to the drill bit and workpiece to reduce heat, improve cutting efficiency, and extend bit life.
- Deburr Holes: After drilling, use a deburring tool or sandpaper to smooth out any sharp edges around the holes.
Having multiple mounting options greatly enhances the versatility of your DIY roof rack, adapting to different loads and adventures.
RELATED: 11 Awesome Garage Storage Ideas To Keep Your Tools Organized
Step 5: Cut the Side Rails to Length and Test Fit All Pieces
Now that your side pieces have been drilled, it’s time to cut them to the precise length determined during your initial measurements and design phase. Accuracy in cutting is crucial for a symmetrical and well-fitting roof rack. Use a metal saw or an angle grinder with a cutting disc, always wearing appropriate safety gear including safety glasses, gloves, and ear protection.
Once the side rails are cut, it’s time for a critical test fitting. This step is indispensable for identifying any measurement errors, alignment issues, or design flaws before you commit to painting and final assembly. Recruit a helper for this stage, as positioning the rack on your vehicle’s roof safely requires an extra set of hands.
- Assemble Loosely: Temporarily assemble the side rails and crossbars (without fully tightening bolts) to form the basic frame of your rack.
- Position on Vehicle: Carefully lift the assembled frame onto your vehicle’s roof.
- Center and Level: Use a tape measure to ensure the rack is perfectly centered on your roof. Utilize a few wood blocks or temporary spacers to set the rack at the desired height and ensure it sits level. This simulates the final installed position and helps confirm clearances.
- Check for Clearance: Verify that there’s adequate clearance around your sunroof, antenna, and any other roof-mounted accessories. Ensure the rack doesn’t rub against any part of your vehicle’s paintwork.
- Mark for Feet: This is also an opportune moment to finalize the exact placement of your roof rack feet, which you’ll prepare in the next step. Mark their positions precisely.
Making adjustments now is far easier than after the paint has dried, so take your time and be thorough.
Step 6: Prepare and Mount the Roof Rack Feet Securely
The roof rack feet are the critical connection points between your custom rack and your vehicle, providing the necessary stability and load-bearing capacity. This step involves fabricating and precisely positioning these feet to align with your vehicle’s existing roof mounts (or chosen mounting points).
Using the 3-inch sections of aluminum angle, you will create these mounting feet:
- Clamp to Rack: Carefully clamp each aluminum angle section to the underside of your side pieces, positioning them to align with your vehicle’s roof mounting holes. Ensure they are perfectly perpendicular to the side rails and flat against the roof’s mounting surface.
- Mark Drill Points: With the aluminum angle clamped firmly in place on the rack, use a marker to accurately transfer the locations of your vehicle’s roof mount holes onto the aluminum angle. These marks will guide your drilling.
- Drill Mounting Holes: Remove the aluminum angle pieces from the rack. Secure each piece in a vise and precisely drill holes at the marked locations. Ensure the drill bit size matches the bolts you will use to attach the feet to your vehicle.
- Drill Rack Attachment Holes: Additionally, drill holes through the top of each aluminum angle foot and into the side rail tubing. These holes will be used to permanently attach the feet to your rack frame. Again, ensure correct drill bit sizing for your chosen fasteners.
The strength and safety of your roof rack heavily rely on these feet. Double-check all measurements and drill points to ensure a snug and secure fit. Consider using stainless steel hardware for superior corrosion resistance where the feet attach to the vehicle.
Step 7: Paint for Durability and Assemble Your Custom Rack

With all drilling and cutting complete, it’s time for painting, which provides both aesthetic appeal and crucial protection against the elements. A high-quality bedliner spray offers exceptional durability and a rugged finish, perfect for a roof rack.
- Preparation is Key: Thoroughly clean all aluminum pieces to remove any grease, dirt, or metal shavings. Use a degreaser or automotive prep cleaner. Lightly sand the surfaces with fine-grit sandpaper to create a better adhesion surface for the paint.
- Masking: Use painter’s tape to mask off any areas you don’t want painted, such as threaded holes.
- Apply Bedliner Spray: In a well-ventilated area (ideally outdoors or in a garage with open doors) and wearing a respirator mask, apply multiple light, even coats of black truck bedliner spray. Follow the manufacturer’s instructions for drying times between coats. Multiple thin coats are always better than one thick coat to prevent runs and ensure even coverage.
- Allow for Full Cure: Allow the paint to fully cure, which may take 24-48 hours or more, depending on temperature and humidity. Rushing this step can lead to a less durable finish.
Once the paint has completely dried and cured, proceed with the final assembly. Bolt all the pieces of your roof rack together according to your design, ensuring all fasteners are tightened securely. Then, carefully mount the completed rack onto your vehicle’s roof, bolting the feet to the designated mounting points. Double-check all connections and ensure the rack is stable and secure before proceeding.
Step 8: Create and Adjust Rubber Bumpers for Added Support and Stability
To finalize your DIY roof rack and provide an extra layer of support, stability, and vibration dampening, you’ll install threaded rubber bumpers. These small components play a significant role in preventing lateral sway and protecting your vehicle’s roof from direct contact with the rack, especially during braking, acceleration, or turns.
Here’s how to effectively create and adjust these bumpers:
- Install T-nut Stud: Locate the desired position for your bumpers, typically near the front of your roof rack. This is often in line with the first extruded aluminum crossbar. Insert a T-nut stud into the bottom slot of the extruded aluminum.
- Screw in Spacer: Screw an aluminum spacer onto the T-nut stud. Tighten it firmly, ensuring it’s securely in place and providing the necessary initial standoff.
- Add Jam Nut to Bumper: Thread a jam nut onto the threaded shaft of your rubber bumper. This nut will be used to lock the bumper’s height adjustment once set.
- Attach and Adjust Bumper: Screw the rubber bumper assembly (with the jam nut) into the T-nut stud/spacer combination. Slowly adjust the height of the rubber bumper by rotating it. The goal is to create a slight amount of pressure or “snugness” between the top of the rubber bumper and your vehicle’s roof. This gentle contact will absorb minor movements and prevent the rack from shifting.
- Lock the Adjustment: Once the desired height and pressure are achieved, tighten the jam nut against the base of the rubber bumper to lock its position, preventing it from loosening over time due to vibrations.
Properly adjusted rubber bumpers significantly enhance the overall stability and safety of your DIY roof rack, ensuring a quiet ride and protecting your vehicle’s finish.
This is how it should look like and how this roof rack is made:
The satisfaction of building your own heavy-duty, custom roof rack is immense, and the possibilities for expanded cargo are truly limitless. From weekend camping trips to cross-country expeditions, your vehicle is now equipped to handle more. We trust this detailed tutorial has provided you with the confidence and know-how to successfully complete this rewarding DIY project. Stay tuned for more innovative guides and ideas to enhance your DIY skills.
Safety Considerations and Maintenance Tips for Your New Roof Rack
Building and using a roof rack comes with responsibilities, primarily ensuring safety for yourself, your passengers, and other road users. Always wear appropriate personal protective equipment (PPE) like safety glasses, gloves, and ear protection during construction. When loading your rack, be mindful of your vehicle’s roof load capacity, which can typically be found in your owner’s manual. Overloading can compromise your vehicle’s handling, braking, and stability. Distribute weight evenly, and always secure cargo with high-quality tie-downs and straps, checking them regularly during long journeys.
For maintenance, periodically inspect all bolts and fasteners for tightness, especially after the first few trips, as vibrations can cause them to loosen. Check the condition of your bedliner paint for any chips or rust spots (though aluminum doesn’t rust, exposed steel fasteners might). Clean your rack regularly to prevent dirt and grime buildup. With proper care, your DIY roof rack will serve you reliably for many years.
Have you already put together a roof rack for your car? Let us know in the comments section below! Share your experiences, tips, and photos with our DIY community!
Up Next: Discover More DIY Vehicle & Home Enhancement Projects!
- 20 Clever Car Hacks To Help Keep Your Car Clean
- Interesting Ways To Use Your Airbrush Kit For DIY Projects
- 9 Easy-To-Build DIY Dresser Plans For Your Room