
Unleash Your Inner Handyman: 5 Transformative DIY Home Improvement Projects
In today’s fast-paced world, the idea of undertaking home improvement projects can feel daunting. Many of us might not possess the traditional “fix-it” skills our grandparents took for granted, leading to a reliance on expensive professionals for even minor updates. However, the truth is that empowering yourself with DIY knowledge is more accessible and rewarding than ever before. Embracing do-it-yourself projects not only offers substantial cost savings but also provides immense personal satisfaction, a sense of accomplishment, and the joy of creating a living space that truly reflects your style. Whether you’re a complete novice or have a few projects under your belt, these five transformative DIY ideas are designed to be tackled by anyone eager to enhance their home’s beauty and functionality. Get ready to save money, potentially earn some valuable reward points, and revel in the incredible feeling of self-reliance as you upgrade your home.
SEE ALSO: 3 Most & Least Regretted DIY Home Improvement Projects
1. Revitalize Your Floors with a Fresh Coat of Paint

Tired of looking down at drab, worn-out floors? Whether your beautiful hardwood has lost its luster, your linoleum is stuck in a past decade, or your concrete screams utility instead of style, the desire to upgrade your flooring is a common homeowner’s lament. Traditional floor replacement can be a significant investment of both time and money, leaving many feeling trapped with their current, uninspiring surfaces. But what if there was a remarkably simple, cost-effective, and impactful solution?
Painting your floors is a surprisingly durable and aesthetically pleasing DIY project that can dramatically alter the ambiance of any room. This isn’t just a temporary fix; with the right preparation and materials, painted floors can withstand daily wear and tear for years.
The Process: A Step-by-Step Guide to Painted Floors
- Thorough Cleaning: Begin by deep cleaning your floors. Remove all dirt, grime, and grease. For heavily soiled areas, a degreaser might be necessary. Ensure the floor is completely dry before moving on.
- Light Sanding: A light sanding, using a fine-grit sandpaper (around 150-220 grit), is crucial for adhesion. This scuffs the surface, allowing the paint to bond effectively. After sanding, vacuum thoroughly and wipe with a damp cloth to remove all dust particles. For damaged areas, fill in any cracks or holes with wood filler or appropriate patching compound, then sand smooth.
- Masking and Protecting: Use high-quality painter’s tape to protect your baseboards, walls, and any adjacent flooring. Press the tape firmly to prevent paint bleed.
- Priming (Optional but Recommended): For optimal adhesion and durability, especially on high-traffic floors or those with existing stains, apply a high-quality primer. Allow it to dry completely according to manufacturer instructions.
- Selecting the Right Paint: This is key! Do not use standard wall paint. Opt for paints specifically designed for floors, such as porch and floor enamel, epoxy paint (for concrete or high-traffic areas), or heavy-duty latex enamel. These paints are formulated to resist scuffs, abrasions, and moisture. Consider a satin or semi-gloss finish for easier cleaning and enhanced durability.
- Application: Use a high-quality roller for even coverage and a brush for cutting in along the edges. Apply multiple thin coats rather than one thick coat. This ensures better adhesion and a smoother, more durable finish. Allow each coat to dry completely before applying the next, typically 4-6 hours, but always check your paint’s instructions.
Design Freedom: Get Creative with Your Floors
This project is where your creativity can truly shine. While a crisp, bright white can instantly brighten a room and make it feel larger, consider a bold solid color to make a statement. For those feeling adventurous, use painter’s tape to create geometric patterns, stripes, a checkerboard effect, or even a faux rug design. A two- or three-tone approach can add sophisticated visual interest. Remember, if you don’t absolutely love the result, paint is forgiving – you can always repaint it! This low-risk, high-reward project is a fantastic way to refresh your home without breaking the bank.
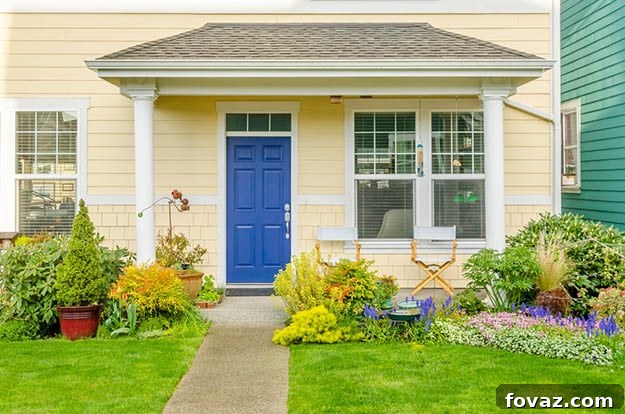
2. Boost Curb Appeal: A Dashing New Look for Your Front Door
Your front door is more than just an entry point; it’s the welcoming handshake of your home, setting the tone for visitors and significantly impacting your property’s curb appeal. A tired, faded, or uninspired front door can detract from even the most beautiful exterior. Fortunately, transforming this crucial feature is one of the most effective and affordable DIY projects you can undertake, requiring minimal time and a modest budget.
Step 1: The Power of Paint
A fresh coat of paint in a vibrant, inviting color can work wonders. This simple update can instantly modernize your home, reflect your personal style, and even increase its perceived value.
- Preparation is Key: Begin by thoroughly cleaning the door surface to remove dirt, grease, and peeling paint. Sand any rough spots or imperfections to create a smooth canvas. For glossy surfaces, a liquid deglosser can help ensure proper paint adhesion. Remove all hardware (handles, locks, kick plates) if possible, or tape them off meticulously.
- Choosing the Right Paint: Select a high-quality exterior paint designed for doors. Look for durable, weather-resistant formulas that can withstand UV rays and temperature fluctuations. Consider a semi-gloss or gloss finish, which are easier to clean and offer better protection. As for color, don’t be afraid to go bold! A deep navy, an energetic red, a calming sage green, or a classic black can all make a stunning statement.
- Application Techniques: For best results, apply multiple thin coats, allowing each to dry completely. If you can remove the door from its hinges, lay it flat for easier painting and to avoid drips. Otherwise, paint it in place on a dry, non-windy day.
Step 2: Upgrade Your Hardware for a Touch of Elegance
Once your door has a dazzling new coat of paint, consider elevating its look further by upgrading the hardware. This small detail can make a monumental difference, adding a touch of sophistication and luxury.
- Selecting New Hardware: Explore options from classic brass and vintage-inspired bronze to sleek brushed nickel, stainless steel, or modern matte black. Consider a matching set for your handle, lock, and deadbolt for a cohesive look.
- Installation: Most door hardware replacements are surprisingly straightforward. You’ll typically need screwdrivers and possibly a chisel for older mortise locks. Many modern kits are designed for easy installation into existing boreholes. If you’re new to this, a quick online tutorial can guide you through the process.
Beyond Paint and Hardware: The Finishing Touches
For those with a bit more time and budget, consider these additional upgrades:
- Add a Door Knocker or Kick Plate: These elements provide both function and aesthetic appeal.
- Install a Peephole or Smart Lock: Enhance security and convenience.
- Replace Weatherstripping: Improve energy efficiency and comfort by sealing drafts.
Each time you step through your beautifully updated front door, you’ll feel an immediate sense of pride and accomplishment, knowing you’ve made a significant impact on your home’s character.
3. Upgrade Your Workflow: Modernize Your Home by Switching Out Faucets
Faucets are workhorses in every home, constantly in use in kitchens, bathrooms, and utility rooms for washing, cooking, and maintaining hygiene. Over time, these essential fixtures can succumb to wear and tear, developing leaks, exhibiting low water pressure, or simply looking outdated, dragging down the aesthetic of an entire room. Replacing old or inefficient faucets is a straightforward DIY project that yields immediate and tangible benefits, enhancing both functionality and style.
Choosing the Perfect Replacement Faucet
Before you begin, carefully select new faucets that not only complement your home’s decor but also fit your existing sink and countertop configuration.
- Compatibility: Count the number of holes in your sink or countertop. Faucets come in single-hole, widespread (three holes with separate handles), and centerset (three holes on a single base plate) configurations. Ensure your new faucet matches the existing setup to avoid complex modifications.
- Style and Finish: Consider the overall design of your room. Modern, traditional, industrial, or minimalist — there’s a faucet style for every taste. Finishes like polished chrome, brushed nickel, oil-rubbed bronze, or matte black can dramatically alter the look and feel.
- Features: Think about functionality. In the kitchen, pull-down or pull-out sprayers are highly convenient. In bathrooms, water-saving aerators can reduce water consumption. Touchless or motion-sensor faucets add a touch of modern luxury and hygiene.
Gather Your Tools and Prepare for Installation
You won’t need an extensive toolkit for this project. Here are the common tools you’ll find useful:
- Adjustable wrench or basin wrench (a basin wrench is highly recommended for tight spaces under the sink)
- Screwdriver set
- Plumber’s putty or silicone sealant (check your faucet’s instructions for what’s needed)
- Teflon tape (for threaded connections)
- Bucket and towels (for catching drips)
- Flashlight or headlamp
- Safety glasses
Step-by-Step Faucet Replacement
With a free afternoon and a helpful online tutorial (a quick search on YouTube for “how to replace [your type of] faucet” will provide excellent visual guidance like this one), you can confidently tackle this upgrade.
- Turn Off the Water Supply: Locate the shut-off valves under the sink (usually two, one for hot and one for cold) and turn them clockwise until tight. Turn on the old faucet briefly to relieve any remaining pressure in the lines.
- Clear the Cabinet: Remove everything from under the sink to give yourself ample working space. Place a bucket and towels underneath to catch any residual water.
- Disconnect the Old Faucet: Using your wrench, disconnect the hot and cold water supply lines from the old faucet. Then, loosen and remove the mounting nuts that secure the faucet to the sink or countertop. Carefully lift out the old faucet.
- Clean the Area: Take this opportunity to thoroughly clean the sink surface where the old faucet sat. Remove any old plumber’s putty or sealant.
- Install the New Faucet: Follow the manufacturer’s instructions for your new faucet. Typically, you’ll apply plumber’s putty or a silicone bead around the base of the new faucet (if it doesn’t have a built-in gasket) before seating it into the sink holes. Secure it from underneath with the provided mounting hardware.
- Connect Supply Lines: Attach the new water supply lines to the faucet, then connect them to the hot and cold water shut-off valves. Use Teflon tape on threaded connections for a watertight seal. Hand-tighten, then give them a quarter-turn with a wrench – avoid overtightening.
- Test for Leaks: Slowly turn the water supply valves back on. Check all connections for leaks. Run the faucet for a few minutes, checking hot and cold, and inspect again for any drips.
Replacing a faucet is a highly satisfying project that instantly elevates the look and feel of your kitchen or bathroom, providing both aesthetic appeal and improved functionality.
4. Illuminate Your Space: Simple Upgrades for Light Fixtures
Lighting plays a pivotal role in setting the mood and functionality of any room. Old, dated, or inefficient light fixtures can make an entire space feel dim and uninviting. While complex electrical wiring should always be handled by a certified professional, swapping out existing light fixtures for new, stylish alternatives is a remarkably accessible DIY project that can dramatically refresh your home’s interior. The key to tackling this project safely and successfully is a clear understanding of basic electrical precautions.
Safety First: Prioritizing Your Well-being
Before touching any electrical fixture, remember these golden rules:
- Turn Off the Power: ALWAYS start by locating the circuit breaker for the room or fixture you’ll be working on and flipping it to the “OFF” position. It’s good practice to turn off the main breaker if you’re unsure or prefer maximum safety.
- Test for Power: Use a non-contact voltage tester to ensure no electricity is flowing to the fixture’s wires before you begin any work. This crucial step prevents accidental shocks.
- Work with a Partner: Having someone nearby can be helpful for holding the new fixture or in case of an emergency.
Choosing Your New Light Fixtures
The variety of light fixtures available is immense, allowing for endless possibilities to match your home’s aesthetic:
- Pendant Lights: Perfect for dining rooms, kitchens islands, or entryways, a stylish pendant can become a focal point. You can easily replace an old, simple pendant with something more elaborate, like a mini chandelier to transform your dining room’s ambiance.
- Ceiling Fixtures: Flush mount (sits directly against the ceiling) and semi-flush mount (hangs a few inches from the ceiling) fixtures are common in bedrooms, hallways, and bathrooms. Explore vintage pieces from flea markets, unique finds from antique shops, or clearance gems from department stores to add character.
- Sconces: Wall-mounted sconces can add accent lighting to hallways, bathrooms, or living areas, creating a softer, more layered lighting scheme.
Consider the size and scale of the room, the amount of light needed, and whether you prefer warm or cool light temperatures. Opting for LED-compatible fixtures or integrated LED designs can also lead to significant energy savings and a longer lifespan.
The Installation Process: A Step-by-Step Approach
Once the power is off and tested, the process is relatively straightforward:
- Remove the Old Fixture: Unscrew any decorative caps or nuts holding the old fixture in place. Carefully lower it to expose the wiring. Disconnect the wires by twisting off wire nuts and separating the connections (typically black to black, white to white, and bare copper or green to ground).
- Prepare the New Fixture: Attach the new mounting bracket to the electrical box in the ceiling or wall, if required by your new fixture.
- Connect the Wires: Following the instructions provided with your new fixture, connect the wires: typically, black (hot) to black, white (neutral) to white, and the ground wire (bare copper or green) to the green or bare copper ground wire in the electrical box. Use new wire nuts and ensure connections are secure.
- Mount the New Fixture: Carefully tuck the wires into the electrical box and secure the new fixture to its mounting bracket according to its specific design.
- Install Bulbs: Screw in the appropriate light bulbs.
- Restore Power: Once everything is securely installed, return to your circuit breaker panel and flip the breaker back to the “ON” position.
Walk from room to room, switching on your gloriously updated lights. You’ll be amazed at how this seemingly small change can dramatically transform the entire atmosphere of your home, making it feel brighter, more modern, and uniquely yours.
5. Maximize Your Home’s First Impression: Elevating Curb Appeal
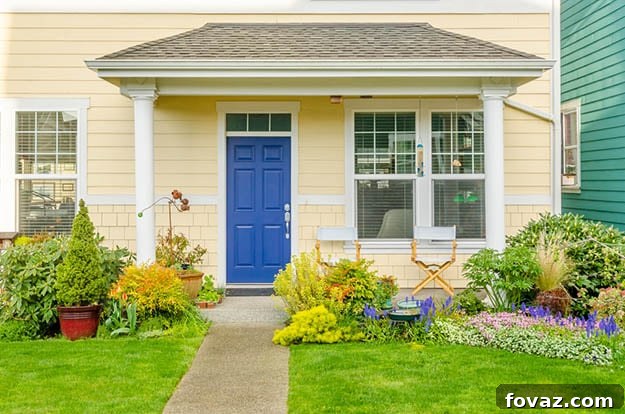
Curb appeal is more than just a real estate buzzword; it’s the immediate visual attractiveness of your home as seen from the street. It significantly influences first impressions, reflects your pride in homeownership, and can even add substantial value to your property. Investing a weekend or even just a few focused hours into enhancing your home’s exterior can yield incredible returns in terms of beauty and enjoyment. This multifaceted DIY project involves a combination of cleaning, landscaping, and minor repairs.
Start with a Critical Assessment
To effectively boost your curb appeal, step across the street and look at your home with fresh eyes, as if you’re seeing it for the first time.
- The Lawn and Landscaping: Is your lawn manicured, or does it resemble an overgrown wilderness? Are flower beds tidy or overrun with weeds and dead plants?
- Exterior Surfaces: Does your siding look clean or dingy? Are windows sparkling or streaky?
- Architectural Details: Are shutters hanging askew, paint peeling on trim, or your mailbox looking neglected?
- Clutter: Are there stray toys, tools, garbage bins, or other items that distract from your home’s inherent charm?
Identify every element that detracts from your home’s overall appearance – no detail is too small.
Actionable Steps to Transform Your Exterior
Once you’ve made your list, break it down into manageable DIY tasks:
1. Tidy Up and Declutter: The Instant Improvement
- Clean: Power wash your siding, driveway, and walkways to remove dirt, mold, and mildew. Clean windows until they sparkle. Clear out gutters and downspouts.
- Declutter: Stow away garden tools, toys, and sports equipment. Conceal garbage bins and recycling containers. Remove any dead plants, leaves, or debris from porches, patios, and garden beds. A clear, organized exterior immediately feels more inviting.
2. Landscaping Love: Green Thumbs for Green Spaces
- Lawn Care: Mow your lawn regularly and keep the edges sharp with an edger along sidewalks, driveways, and flower beds. Consider applying fertilizer and addressing any bare patches.
- Planting: Introduce fresh, colorful flowers in beds or vibrant potted plants near your entrance. Select shrubs and plants that are appropriate for your climate and require minimal maintenance.
- Mulching: Apply fresh mulch to flower beds. This not only suppresses weeds and retains moisture but also creates a clean, uniform look that highlights your plants.
- Pruning: Trim overgrown bushes, hedges, and tree branches that obscure your home’s features or block pathways.
3. Minor Repairs and Enhancements: Attention to Detail
- Paint and Repair: Address any peeling paint on window frames, door frames, or trim. Repair or replace broken or missing shutters. Give your mailbox a fresh coat of paint or consider replacing an old, dented one.
- Hardware Refresh: Just like your front door, consider new house numbers that are easy to read and complement your home’s style. Update exterior light fixtures for a modern touch.
- Pathways and Steps: Ensure pathways are clear and steps are in good repair. Repair any cracks or uneven surfaces for safety and aesthetics.
- Welcome Mat: A new, inviting welcome mat can add a personal touch.
The beauty of focusing on curb appeal is that many improvements are simple, require basic tools, and offer a tremendous visual impact for minimal investment. Commit to regular maintenance, and your home will consistently project an image of calm tidiness and pride. Upgrading your home’s exterior is a wonderfully rewarding way to enhance its overall appeal, proving that significant improvements don’t always demand the skills of a master landscaper or carpenter.
Embracing these DIY home improvement projects empowers you to take control of your living space, infusing it with personal touches and enhancing its value, all while staying within budget. From revitalizing weary floors to creating an inviting first impression, each project offers a tangible sense of accomplishment and builds confidence in your own abilities. You don’t need to be a master craftsman or have years of experience to make a significant, noticeable difference in your home. Start small, learn as you go, and enjoy the incredible journey of transforming your house into the home of your dreams.
Explore More DIY Inspiration:
How to Lay Tile in Bathroom | DIY Home Improvement Projects
Which Home Improvement Show Celebrity Are You? [QUIZ]
How to Grout Tile | DIY Home Improvement
Stay connected and discover even more inspiring DIY home improvement ideas by following us on social media!
Find us on Facebook, Twitter, Pinterest and Instagram!
Article by Cher Zavala