
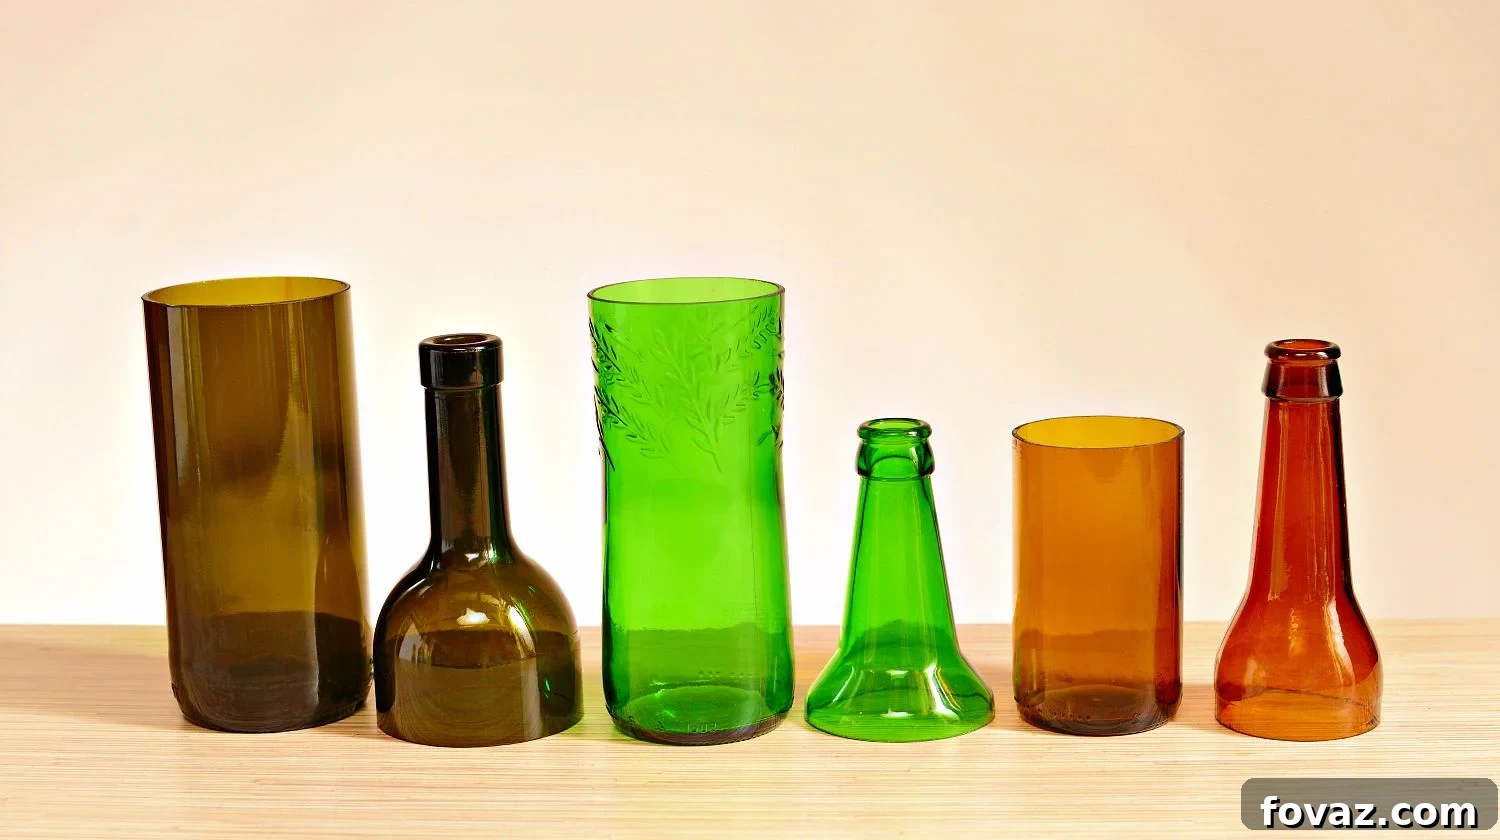
Unlock your creativity and embrace sustainability by transforming ordinary glass bottles into extraordinary DIY projects. From elegant vases to practical drinking glasses and innovative self-watering planters, the possibilities are endless once you master the simple art of cutting glass bottles. This comprehensive guide will walk you through various cutting techniques, focusing on the popular string method, and then inspire you with five fantastic projects to kickstart your crafting journey. Get ready to add a unique, handmade touch to your home decor while contributing to a greener planet!
RELATED: 19 Super Cool Wine Bottle Crafts and Ideas To DIY
In this article:
- Mastering Glass Bottle Cutting: String Method & More
- Crafting a Chic Vase from a Jameson Bottle
- Transforming Beer Bottles into Unique Drinking Glasses
- Creating Stunning DIY Hanging Wine Bottle Pendant Lights
- Designing Your Own Elegant DIY Candle Holder
- Building a Functional Self-Watering Planter
Repurpose and Innovate: Exciting Projects with Cut Glass Bottles
Mastering Glass Bottle Cutting: String Method & More
Cutting glass bottles might seem like a daunting task reserved for professionals, but with the right tools and techniques, it’s surprisingly accessible for any DIY enthusiast. This skill opens up a world of creative possibilities, allowing you to repurpose glass containers into beautiful and functional items for your home. While there are several methods for cutting glass bottles, we’ll start with the widely popular and relatively simple string method, and then explore a couple of other effective approaches.
Repurposing glass bottles is not only a fun and unique way to redecorate your home, but it’s also an eco-friendly practice that reduces waste. Imagine transforming empty wine bottles, beer bottles, or even vintage milk containers into bespoke glassware, charming home decor accents, stylish lamps, or efficient planters. All you need are a few essential supplies, safety precautions, and a willingness to experiment.
Before diving into specific projects, understanding how to safely and effectively cut a glass bottle is paramount. Let’s explore the methods:
Method 1: The String and Fire Technique (Heat Shock Method)
This is a classic DIY method that utilizes controlled thermal shock to create a clean break in the glass. It’s inexpensive and uses readily available materials.
What You’ll Need:
- Thick cotton string or butcher’s twine
- Acetone (nail polish remover works) or rubbing alcohol
- Matches or a lighter
- A pot or bucket of ice-cold water (with ice)
- Safety gloves and eye protection
- Sandpaper (various grits, 80-grit to 220-grit, and fine-grit for polishing)
- The glass bottle you wish to cut (wine, beer, liquor bottles work best)
Instructions:
- Prepare Your Workspace & Safety Gear: Work in a well-ventilated area, preferably outdoors. Wear safety glasses and thick gloves to protect your hands and eyes from potential glass shards.
- Mark Your Cut Line: Decide where you want to cut the bottle. You can use a marker or a piece of tape to guide you. For a straight cut, try to make your mark as even as possible around the bottle.
- Prepare the String: Cut a length of cotton string long enough to wrap around the bottle four or five times at your desired cut line.
- Saturate the String: Soak the entire length of the string in acetone or rubbing alcohol. Ensure it is thoroughly saturated for a sustained burn.
- Wrap the Bottle: Tightly wrap the saturated string around the bottle exactly where you want the cut to be. Wrap it snugly for 2-4 layers, ensuring it’s a straight line. Tie the ends securely and trim any excess string.
- Ignite the String: Holding the bottle horizontally, carefully light the string with a match or lighter. The acetone will ignite, causing the glass underneath to heat rapidly.
- Rotate Evenly: As the string burns, slowly and continuously rotate the bottle on its side to ensure the heat is distributed evenly around the intended cut line. This is crucial for a clean break. Continue rotating for about 10-20 seconds, or until the flame is nearly out.
- The Thermal Shock: Immediately after the flame dies down (or just before), swiftly plunge the heated section of the bottle into the ice-cold water. You should hear a distinct “pop” or crack as the glass cleanly separates along the heated line due to the sudden temperature change.
- Check the Break: Carefully remove the bottle from the water. The top half should now be separated from the bottom half. If it doesn’t break on the first try, don’t despair! Thicker bottles may require repeating steps 4-8. Ensure the string is fully saturated, the heat is even, and the cold water is genuinely icy.
Method 2: The Glass Scoring Tool Method
This method involves scoring a line around the bottle with a specialized tool, then applying heat and cold to create a break.
What You’ll Need:
- Glass bottle cutter tool (a hand-held scoring tool with a carbide wheel)
- Boiling water
- Ice-cold water
- Safety gloves and eye protection
- Sandpaper (as above)
Instructions:
- Score the Bottle: Secure the bottle on a stable surface or in a jig if your cutter has one. Apply steady, even pressure with the scoring tool to create a continuous, single score line all the way around the bottle. Do not score over the line multiple times, as this can weaken the glass unevenly.
- Apply Heat: Pour boiling water directly over the score line. The glass will expand rapidly at this point.
- Apply Cold: Immediately after pouring the boiling water, pour ice-cold water over the same score line. The rapid contraction of the glass should cause it to break cleanly along the scored line. You might hear a “ping” or “crack.”
- Repeat if Necessary: If the bottle doesn’t separate, repeat the hot and cold water treatment a few times until it breaks.
Method 3: Dremel or Rotary Tool with Diamond Cutting Wheel
For more precision and control, a Dremel or similar rotary tool with a diamond cutting wheel can be used. This method requires a steady hand and extra caution.
What You’ll Need:
- Dremel or rotary tool with a diamond cutting wheel attachment
- Safety goggles, heavy-duty gloves, and a dust mask/respirator
- Water spray bottle (to keep glass cool and minimize dust)
- Stable surface or vise to hold the bottle
- Sandpaper (as above)
Instructions:
- Secure the Bottle: Firmly secure the glass bottle in a vise or clamp to prevent it from moving during the cut.
- Safety First: Put on your safety goggles, heavy-duty gloves, and dust mask. Glass dust is harmful if inhaled.
- Start Cutting: With the Dremel set to a medium speed, carefully begin cutting along your marked line. Apply light, consistent pressure.
- Keep it Cool: Periodically spray water on the cutting area to keep the glass cool and to suppress glass dust. This also extends the life of your diamond wheel.
- Complete the Cut: Continue slowly and steadily around the bottle until the cut is complete.
Finishing Touches: Sanding for Safety and Smoothness
No matter which method you use, the edges of freshly cut glass will be very sharp and dangerous. Sanding is a crucial step to make your creations safe to handle and use.
What You’ll Need:
- Assortment of wet/dry sandpaper (e.g., 80-grit, 120-grit, 220-grit, 400-grit, 600-grit, and optionally 1000-grit for polishing)
- Water
- Safety gloves
Instructions:
- Start with Coarse Grit: Wearing gloves, begin sanding the sharp edge under running water or with wet sandpaper. Start with a coarser grit (like 80 or 120) to quickly remove major irregularities and bevel the edge. Use circular motions or sand back and forth, rotating the bottle.
- Progress to Finer Grits: Gradually move to finer grits (220, then 400). This will smooth out the scratches from the previous grit and create a smoother finish. Keep the sandpaper and glass wet to prevent dust and achieve a better finish.
- Polish (Optional): For a truly smooth, polished finish suitable for drinking glasses, finish with very fine grits (600, 1000, or even 2000) or use a polishing compound with a buffing wheel. The goal is to make the edge feel completely smooth to the touch, like the rim of a store-bought glass.
- Clean Thoroughly: Once sanded, wash the bottle thoroughly to remove any glass dust.
With these techniques, you’ll be able to create stunning pieces for your home. Now, let’s explore some exciting projects!
Crafting a Chic Vase from a Jameson Bottle
Transforming an iconic Jameson bottle into a stylish vase is a fantastic way to repurpose glass and add a touch of rustic elegance or modern chic to your home decor. The distinct shape and green hue of many liquor bottles make them ideal candidates for unique floral displays.
What You’ll Need:
- An empty Jameson bottle (or any liquor bottle of your choice)
- Materials for the glass cutting method of your choice (e.g., string, acetone, matches, ice-cold water for the string method)
- Safety gloves and eye protection
- Wet/dry sandpaper (various grits)
- Optional: Decorative elements like paint, twine, fabric, or etching cream
Instructions:
- Prepare the Bottle: Ensure your Jameson bottle is thoroughly clean and dry. Remove any labels if desired.
- Mark and Cut: Using your preferred glass cutting method (the string and fire technique is excellent for this), carefully cut the bottle at your desired height. For a vase, you typically want to cut off the neck or just below the shoulder, leaving a substantial body for flowers. Refer to the detailed “Mastering Glass Bottle Cutting” section above for step-by-step instructions on your chosen method.
- Sand the Edges: This is a critical step for safety. Once the bottle is successfully cut, immediately and meticulously sand down all sharp edges. Start with a coarser grit and gradually move to finer grits until the rim is completely smooth and safe to handle. Take your time and wear gloves.
- Clean and Dry: Wash the newly cut vase thoroughly to remove any glass dust and dry it completely.
- Decorate (Optional): Now comes the fun part – personalization!
- Minimalist: Leave it as is for a clean, industrial look.
- Twine Wrap: Wrap twine or jute string around the neck or base of the vase for a rustic feel.
- Paint: Use glass paint, spray paint, or even chalk paint to give your vase a new color and texture.
- Etching: Apply etching cream for an elegant frosted design.
- Decoupage: Adhere fabric, paper, or dried flowers to the surface.
- Display Your Vase: Fill your beautiful, upcycled Jameson vase with fresh flowers, dried botanicals, or even artificial greenery. It makes a stunning centerpiece or an accent piece on a shelf or mantel.
There you have it – a chic, recycled vase perfect for any setting!
Transforming Beer Bottles into Unique Drinking Glasses
Why buy new drinking glasses when you can craft custom ones from your favorite beer bottles? This project is not only incredibly satisfying but also allows you to enjoy your beverages in uniquely designed glassware that tells a story. Imagine sipping a cold drink from a glass made from the bottle of your favorite craft brew!
What You’ll Need:
- Empty beer bottles (ensure they are thoroughly cleaned and labels removed)
- Materials for your chosen glass cutting method (e.g., string, acetone, ice-cold water)
- Safety gloves and eye protection
- An extensive range of wet/dry sandpaper (essential for smooth, drinking-safe edges: 80-grit to 1000-grit or higher)
Instructions:
- Prepare Your Bottles: Collect and thoroughly clean your empty beer bottles. Soak them in warm, soapy water to easily remove labels. Ensure no residue remains.
- Mark Your Cut: Decide on the height of your drinking glasses. Typically, you’ll cut just above where the bottle starts to taper into the neck. Use a marker or tape to create a precise line around each bottle. Consistency is key for a matching set.
- Cut the Glass: Follow the detailed instructions from the “Mastering Glass Bottle Cutting” section (Method 1 or 2 is usually preferred for multiple pieces) to cut each beer bottle along your marked line. Remember to work safely and carefully.
- Intensive Sanding for Drinking Safety: This is the most crucial step for drinking glasses.
- Begin with a coarse grit (e.g., 80-grit) to quickly remove the sharpest edges and bevel the rim.
- Progress through medium grits (120, 220) to smooth out initial scratches.
- Continue with finer grits (400, 600, 1000) to achieve a smooth, almost polished finish. The edge should feel completely smooth to your lips, with no rough spots or sharp points. This might take some time and patience, but it’s essential for safety and comfort.
- Always sand under running water or with wet sandpaper to reduce glass dust and achieve a better finish.
- Final Cleaning: Once all glasses are perfectly sanded, wash them thoroughly with soap and water to remove any lingering glass particles. Dry them and they are ready for use.
For a visual guide, you can also check out this tutorial to turn empty beer bottles into drinking glasses.
Creating Stunning DIY Hanging Wine Bottle Pendant Lights
Add an atmospheric and rustic touch to your kitchen, bar, or patio with custom-made hanging pendant lights fashioned from recycled wine bottles. This project combines glass cutting with basic electrical work (which requires careful attention to safety), resulting in a truly unique lighting fixture that’s sure to be a conversation starter.
What You’ll Need:
- Empty wine bottles (choose various colors and shapes for an eclectic look)
- Materials for your chosen glass cutting method (e.g., string, acetone, ice-cold water)
- Safety gloves and eye protection
- Wet/dry sandpaper (various grits)
- Pendant light kits (sockets, cords, bulbs – readily available at hardware stores or online)
- Drill with a diamond-tipped glass drill bit (optional, if you need to create a hole for wiring elsewhere)
- Small screwdriver and wire strippers (for electrical connections)
- Optional: Ceiling canopy, dimmer switch
Instructions:
- Prepare and Cut the Bottles:
- Thoroughly clean your wine bottles and remove all labels.
- Using your chosen glass cutting method, carefully cut the bottom off each wine bottle. For pendant lights, you generally want to remove the entire base to allow the light to shine through freely. Refer to the “Mastering Glass Bottle Cutting” section for detailed instructions.
- As always, meticulously sand the cut edges until they are smooth and safe to handle.
- Prepare the Electrical Components:
- For most pendant light kits, the bulb socket and cord will fit up into the neck of the bottle. You’ll thread the cord through the bottle opening.
- If your design requires the cord to exit through a drilled hole in the side of the bottle, you will need to carefully drill a hole using a diamond-tipped glass drill bit, keeping the glass cool with water during drilling. This is an advanced step.
- Assemble the Lights:
- Carefully thread the electrical cord of your pendant light kit through the opening of your cut wine bottle, guiding the bulb socket up into the bottle’s neck. The bottle will act as the lampshade.
- Follow the specific instructions that come with your pendant light kit for wiring the socket and attaching the bulb. Ensure all connections are secure and properly insulated. If you are unsure about electrical wiring, consult a qualified electrician or seek detailed instructions from reliable sources. Incorrect wiring can be dangerous.
- Install and Hang:
- Once assembled, carefully install the pendant lights. If you’re creating a cluster, a multi-port ceiling canopy will be useful.
- Ensure the light fixtures are securely mounted and properly wired to your home’s electrical system.
- Screw in your desired bulbs (LED bulbs are often recommended for energy efficiency and lower heat output).
Safety Note: Working with electricity can be hazardous. Always ensure the power is off at the circuit breaker before making any electrical connections. If you are uncomfortable with wiring, please hire a professional electrician.
You might also be interested in making this hanging light fixture made from mason jars for another unique lighting project.
RELATED: Uses For Beer Bottles | 24 Creative Projects And Cool DIY Ideas
Designing Your Own Elegant DIY Candle Holder
Create a warm and inviting ambiance with custom candle holders made from cut glass bottles. This project is simple, beautiful, and allows for endless creativity in design. Whether you prefer votives, tea lights, or pillar candles, a repurposed bottle can become a stunning receptacle.
What You’ll Need:
- An empty glass bottle (wine bottles, liquor bottles, or even thicker soda bottles work well)
- Materials for your chosen glass cutting method
- Safety gloves and eye protection
- Wet/dry sandpaper (various grits)
- Tea light, votive, or pillar candle
- Optional: Decorative paints, stencils, glitter, or sand
Instructions:
- Prepare and Cut the Bottle:
- Clean your chosen glass bottle thoroughly and remove any labels.
- Decide on the height of your candle holder. For a standard tea light or votive, cutting the bottle in half or slightly above the base often works well. If you plan to insert a taller pillar candle, you might only need to cut off the very top of the bottle.
- Follow the steps in the “Mastering Glass Bottle Cutting” section to carefully cut the bottle.
- Sand the Edges: Once the bottle is cut, carefully sand all sharp edges until they are smooth and safe to handle. This is important even if you’re not touching the edges frequently, as it prevents accidental cuts during handling.
- Clean and Dry: Wash the cut glass piece to remove any glass dust and dry it completely.
- Add Your Candle:
- For a simple tea light or votive holder, just place the candle inside the bottom half of your cut bottle.
- You can also create a more elaborate design by pouring your own wax into the bottom half of the bottle and inserting a wick. This requires a specific type of cut:
- Angled Cut: To create a unique candle holder where the top half of the bottle rests inside the bottom half (inverted) as a “snuffer” or decorative element, you might want to try cutting the glass at an angle. This is more challenging with the string method and might be easier with a specialized glass cutting kit that allows for angled cuts or precise scoring.
- Decorate (Optional): Enhance your candle holder with decorations. You can paint the exterior, add stenciled designs, fill the base with decorative sand, or wrap it with twine for a rustic look.
Tip: If you’re interested in making your own candles within the bottle, ensure the bottle can withstand the heat. A wider cut base will also offer more stability for larger candles. For safety, always place your candle holder on a heat-resistant surface and never leave a burning candle unattended.
Building a Functional Self-Watering Planter
A self-watering planter made from a recycled glass bottle is an ingenious and low-maintenance way to keep your plants hydrated. This system works by allowing the plant to draw water from a reservoir as needed, making it perfect for herbs, small flowers, or forgetful gardeners!
What You’ll Need:
- An empty wine bottle (its elongated neck is ideal for this project)
- Materials for your chosen glass cutting method
- Safety gloves and eye protection
- Wet/dry sandpaper (various grits)
- Oil lantern wick or a strip of absorbent fabric (e.g., old T-shirt material)
- Potting soil
- Small plant or seeds
- Water
Instructions:
- Prepare and Cut the Bottle:
- Clean your wine bottle thoroughly and remove any labels.
- Mark a cut line approximately half to two-thirds of the way down from the top, depending on how large you want your water reservoir and soil section to be.
- Follow the steps in the “Mastering Glass Bottle Cutting” section to carefully cut the bottle.
- Sand the Edges: Meticulously sand all sharp edges of both cut pieces until they are smooth and safe to handle.
- Prepare the Wick: Cut a length of oil lantern wick or absorbent fabric. It needs to be long enough to reach from the bottom of the inverted top half of the bottle down into the water reservoir in the bottom half.
- Assemble the Planter:
- Invert the top, necked half of the bottle and place it into the bottom, base half of the bottle. The neck of the inverted top half should rest within the opening of the bottom half, creating two distinct sections.
- Thread one end of your wick through the bottleneck of the inverted top section, allowing it to hang down into the bottom reservoir. The other end of the wick should protrude into the wider opening of the inverted top section where the soil will go.
- Fill and Plant:
- Fill the base of your planter (the bottom half of the bottle) with water.
- Carefully add potting soil to the inverted top section, ensuring the wick is positioned to draw moisture into the soil.
- Plant your chosen seeds or small plant in the soil.
- Enjoy Your Self-Watering Planter: The wick will draw water up from the reservoir into the soil, keeping your plant consistently moist. This method helps prevent over or under-watering.
Note: A wine bottle is highly recommended for this project due to its ideal shape and neck diameter for threading the wick. You can also follow a step-by-step tutorial to make a self-watering planter from cut glass bottles here.
Watch this video from Shake The Future for a DIY lamp tutorial made from two cut glass bottles:
If you’re a DIY enthusiast who finds it hard to throw things away, your collection of empty beer and wine bottles is about to get a serious upgrade. These fantastic crafts using cut glass bottles provide not only practical items but also beautiful, personalized touches for your home.
Now that you’re equipped with the knowledge of how to cut glass bottles using various methods, including the string technique, and without the need for expensive glass cutters, a world of creative possibilities awaits. So, happy crafting, DIY buddies, and remember to always prioritize safety!
Which of these DIY cut glass bottle projects are you going to try today? Let us know below in the comments section!
Up Next:
- Wine Bottle Crafts | How To Make Wine Bottle Planters
- 13 Cool Recycling Projects With Glass Bottles | DIY Projects
- DIY Home Decor: Turn Empty Wine Bottles into Gorgeous Accent Lights
Stay connected with us on Facebook, Twitter, Pinterest, and Instagram!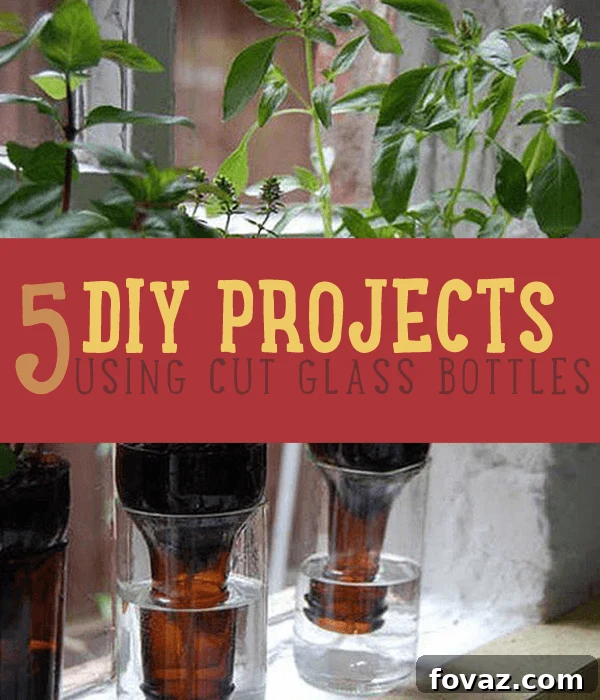 Editor’s Note: This post was originally published on April 10, 2014, and has been updated for quality and relevancy.