

Craft Your Own Stunning Wooden Lantern Centerpiece: A Comprehensive DIY Guide
Creating beautiful centerpieces for any occasion doesn’t have to be complicated or expensive. While some elaborate designs might appear daunting, many can be easily replicated with a dash of creativity and a few simple instructions. Imagine a rustic yet elegant wooden lantern gracing your table – a piece that looks like it came from a high-end home decor store, yet you crafted it yourself. This guide will show you how to build a gorgeous wooden lantern centerpiece that rivals store-bought options, bringing a touch of personalized charm to your home or next special event.
Illuminate Your Events with a Handmade Wooden Lantern
This versatile wooden lantern centerpiece is a true chameleon, adapting seamlessly to a multitude of settings. Picture it adorning tables at a charming baby shower, adding warmth to a festive birthday dinner, or even lending a rustic elegance to a sophisticated wedding reception. Once you’ve mastered the construction of one, you’ll find yourself inspired to create an entire collection, tailored to the specific needs and aesthetic of any gathering. Beyond its structural beauty, this project offers boundless opportunities for personalization. Envision adding metallic accents in silver or gold, incorporating delicate trinkets, or even painting it in a vibrant hue to match your event’s theme. The possibilities for customization are limited only by your imagination, ensuring each lantern is a unique expression of your style.
Why Choose a DIY Wooden Lantern Centerpiece?
In an age of mass-produced goods, a handmade centerpiece stands out. Opting for a DIY wooden lantern offers numerous advantages:
- Personal Touch: Each lantern becomes a reflection of your unique style and effort, making your event truly special.
- Cost-Effective: Building your own allows for significant savings compared to purchasing similar quality items from retailers.
- Customization: From wood finish to decorative embellishments, you have complete control over the design to perfectly match your decor.
- Sense of Accomplishment: There’s immense satisfaction in creating something beautiful and functional with your own hands.
- Versatility: As mentioned, these lanterns can be adapted for any season, holiday, or personal preference, making them a long-lasting decor staple.
Essential Materials for Your Wooden Lantern Project
Gathering your materials is the first exciting step in bringing your wooden lantern vision to life. For a single lantern, you’ll need just a few key components. These items are readily available at most hardware stores or lumber yards, ensuring a smooth start to your DIY adventure. Selecting good quality wood will not only make the building process easier but also ensure the durability and aesthetic appeal of your finished lantern.
- (1) 1 x 10 pine board @ 9 ½ in.: This piece will serve as the sturdy base of your lantern. Pine is an excellent choice for beginners due to its affordability, ease of cutting, and workability. Its light color also makes it ideal for staining or painting.
- (3) 1 in. square dowels @ 36 in.: These dowels will form the vertical supports and cross-sections of your lantern’s frame. Square dowels provide a clean, modern aesthetic and are sturdy enough to support the structure. You’ll cut these into smaller pieces, so having a longer length ensures you have enough material.
Tools You’ll Need for Construction
Having the right tools is crucial for any woodworking project, ensuring accuracy, safety, and a professional finish. While some tools might seem specialized, many are common household items or beginner-friendly power tools that can be rented or purchased affordably for future projects. Always prioritize safety by wearing appropriate eye protection and following manufacturer guidelines for all tools.
- Miter saw: Essential for making precise, straight, and angled cuts on your wood pieces. A miter saw ensures that your lantern components fit together snugly, contributing to a professional look.
- Measuring tape: Crucial for accurate measurements. “Measure twice, cut once” is a golden rule in woodworking, and a reliable tape measure is your best friend.
- Pencil: For marking your cut lines and assembly points on the wood. A carpenter’s pencil offers a thicker, more visible line.
- Drill & drill bits: Needed for pre-drilling pilot holes, especially when working near edges, to prevent wood splitting. It’s also vital for attaching the base with screws.
- Nail gun: Great for quickly and securely attaching the frame pieces. A finish nailer is ideal for leaving small, less noticeable holes.
- 2 in. finish nails: Used with the nail gun to join the wooden frame components. These nails offer strong holding power while being relatively discreet.
- Wood glue: An indispensable adhesive for creating strong, lasting joints. Apply a thin, even coat to all mating surfaces before nailing or screwing for maximum stability.
- 1 ¼ in. wood screws: Specifically for attaching the base of the lantern, providing a robust connection that withstands use.
- Sander: An orbital or detail sander will help you achieve a smooth, splinter-free finish, preparing the wood perfectly for staining or painting. You can also use sandpaper blocks for hand sanding.
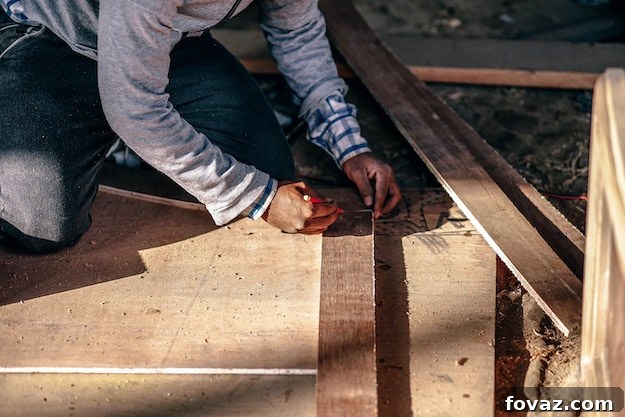
Step-by-Step Guide to Building Your Wooden Lantern
With your materials and tools at the ready, it’s time to embark on the construction process. This guide breaks down the creation of your wooden lantern into manageable steps, ensuring a smooth and enjoyable building experience. Take your time with each stage, focusing on precision for the best results.
Step 1: Prepare the Side Panels
The side panels form the upright structure of your lantern. Using your 1-inch square dowels, you’ll need to cut four identical vertical pieces and four identical horizontal pieces for the top and bottom cross supports of each side. For instance, if you want a lantern that is approximately 12 inches tall and 6 inches wide, you would cut four 12-inch pieces for the vertical posts and four 6-inch pieces for the horizontal top and bottom of each side panel. Ensure all cuts are perfectly square using your miter saw to guarantee a stable and aesthetically pleasing frame. Labeling your pieces can be helpful to keep track as you go.
Step 2: Assemble the First Two Side Panels
Now that your pieces are cut, it’s time for assembly. Take two of your vertical dowel pieces and two of your horizontal dowel pieces. Apply a small amount of wood glue to the ends of the horizontal pieces, then carefully position them between the vertical pieces to form a rectangular frame. The horizontal pieces should be flush with the top and bottom ends of the vertical pieces. Use your nail gun with 2-inch finish nails to secure the joints. Drive at least two nails through the vertical dowel into each end of the horizontal dowel for a strong connection. Repeat this process to create a second identical side panel.
Step 3: Attach Cross Supports to Form the Box
With two side panels complete, you’ll now connect them to form the three-dimensional structure of your lantern. Cut four additional horizontal cross supports (these will be the ones that span between your already assembled side panels). Their length will depend on the desired depth of your lantern. For example, if your side panels are 6 inches wide, your cross supports will also be 6 inches long. Apply wood glue to the ends of these new cross supports and position them between your two assembled side panels, at the top and bottom, aligning them with the existing horizontal pieces. Secure these connections with your nail gun and 2-inch finish nails, driving nails through the existing vertical dowels into the ends of the new cross supports. This step creates a three-sided box.
Step 4: Attach the Final Side Panel
Carefully take your remaining assembled side panel. Apply wood glue to all four exposed ends of the connecting dowels on your three-sided box. Position the final side panel onto these ends, ensuring everything aligns perfectly. Use your nail gun and 2-inch finish nails to secure all four joints, completing the full square or rectangular frame of your lantern. At this point, you should have a sturdy, open-bottomed wooden box.
Step 5: Secure the Base
Finally, it’s time to attach the base. Take your 1 x 10 pine board (already cut to 9 ½ in. or adjusted to fit your specific lantern dimensions). Position the assembled wooden frame evenly on top of the base piece. Ensure the base extends slightly beyond the frame if you desire a decorative edge, or keep it flush for a minimalist look. Using your drill, pre-drill pilot holes through the base and into the bottom dowels of your lantern frame to prevent the wood from splitting. Then, use 1 ¼ inch wood screws to securely fasten the frame to the base. Drive at least one screw into each of the four bottom corner dowels, and more if needed for larger lanterns, to ensure maximum stability.
Step 6: Sand and Finish
Once your lantern is fully assembled, it’s time for sanding. Use your sander (or sandpaper) to smooth all surfaces, edges, and corners. Pay special attention to any rough spots or splinters. Start with a medium-grit sandpaper (e.g., 100-120 grit) to shape and smooth, then move to a finer grit (e.g., 180-220 grit) for a silky-smooth finish. After sanding, wipe down the lantern with a damp cloth to remove all dust. Now, your lantern is ready for finishing! You can apply wood stain to enhance the natural grain, paint it in any color, or simply seal it with a clear coat of polyurethane for a natural look and added protection.
Design and Customization Ideas for Your Wooden Lanterns
The true beauty of DIY lies in the ability to personalize. Your wooden lantern is a blank canvas, ready to be transformed to suit any style or occasion.
- Varying Heights and Widths: For a dynamic display, especially when creating multiple lanterns for a large event like a wedding, consider building lanterns of different heights and even slightly different widths. As Jamie Costiglio demonstrated by creating 48 lanterns for a wedding, varying dimensions adds visual interest and allows for creative arrangements. A cluster of lanterns with varying heights creates a more sophisticated and engaging tableau than a uniform line.
- Paint and Stain Options:
- Rustic Charm: A dark wood stain brings out the natural beauty of the wood, perfect for a farmhouse or rustic theme.
- Modern Elegance: Paint your lanterns in a crisp white, charcoal gray, or matte black for a contemporary look.
- Pop of Color: For a child’s birthday or a vibrant party, use bold colors that match your theme.
- Distressed Finish: Apply a base coat, then a top coat, and lightly sand areas to create a shabby chic or aged appearance.
- Decorative Embellishments:
- Ribbons and Bows: Tie burlap, satin, or lace ribbons around the top for an instant decorative touch.
- Floral Accents: Attach small faux flowers, greenery, or sprigs of lavender for a natural, elegant feel.
- Metal Corners or Hardware: Add decorative metal corner brackets or small handles for an industrial or vintage appeal.
- Etching or Decals: Personalize with monograms, dates, or small quotes using stencils, vinyl decals, or wood burning tools.
- Internal Lighting:
- LED Pillar Candles: The safest and most popular choice, offering a warm glow without the fire hazard.
- Fairy Lights: String tiny LED fairy lights inside for a magical, ethereal effect.
- Small Battery-Operated Lanterns: Place miniature lanterns inside for a layered lighting effect.
- Seasonal Decor: Easily adapt your lanterns for different seasons. Add pinecones and faux berries for winter, small pumpkins for fall, fresh flowers for spring, or seashells for summer.
Tips for Success and Event Planning
Whether you’re making one lantern or dozens, a few tips can help ensure your project goes smoothly and your final display is spectacular.
- Safety First: Always wear safety glasses when using power tools. Ensure your workspace is clean and well-lit.
- Measure Twice, Cut Once: This woodworking adage is crucial. Precise measurements lead to well-fitting joints and a professional-looking lantern.
- Use Clamps: When gluing and nailing, clamps can hold your pieces steady, ensuring square joints and freeing your hands.
- Batch Production: If making multiple lanterns for an event, cut all similar pieces at once. Then, assemble in stages (e.g., all side panels first, then all connections) to streamline the process.
- Consider Table Types: As highlighted by Jamie Costiglio’s large wedding project, the type of tables at your event will influence your display. Long rectangular tables are perfect for arranging multiple lanterns in a row, especially if they are all the same height. However, for round tables or trestle tables, varying heights become essential for creating an engaging centerpiece that doesn’t feel monotonous. A cluster of varied-height lanterns at the center of a round table creates a much more appealing focal point than a single, tall lantern or a straight line of identical ones.
- Test Your Design: Before finalizing all 48 lanterns (or even just your first one), do a mock-up of your desired arrangement. Place candles or decorative elements inside to see how they look.
Inspiration from Jamie Costiglio’s Collaboration
For large-scale projects, seeking inspiration from experienced DIYers is invaluable. Jamie Costiglio, known for her creative projects, notably teamed up with Home Depot to create an impressive 48 wooden lanterns for a wedding. Her experience is a testament to the scalability and impact of this DIY project. You can check out her complete step-by-step plan for this large project on the Home Depot blog, which provides valuable insights into efficient production for multiple lanterns. Additionally, Jamie offers a quick video tutorial on her own website, giving you a visual guide to the construction process.
For the wedding project, Jamie cleverly utilized both 3/4″ and 1″ wood dowels, skillfully varying the height and width of the lanterns. This variation was key to achieving a stunning visual effect, allowing for interesting groupings and dimensions. If you’re planning to make just one lantern, you have the freedom to decide on a particular size that best suits your space. However, if your goal is to arrange them in a captivating cluster in the middle of a table, much like Jamie did for the wedding, you will undoubtedly want to incorporate varying heights. This not only adds depth and visual interest but also accommodates different table shapes and sizes.
Imagine a scenario where you create all your lanterns at a uniform height. While this might work adequately for long rectangular tables if you wish to place them in a neat row, it simply won’t achieve the same captivating effect on smaller round tables or elegant trestle tables. On such tables, a singular height can appear blocky or too dominant. Instead, a collection of lanterns with staggered heights creates a dynamic, layered look that draws the eye and enhances the overall ambiance of your event.
Maintaining Your Wooden Lanterns
Once your beautiful wooden lanterns are complete, a little care will ensure they last for years to come. If stained or painted, occasional dusting is usually sufficient. For outdoor use, ensure you’ve applied a weather-resistant sealant to protect the wood from moisture and UV rays. Store them in a dry place when not in use to prevent warping or damage. With proper maintenance, these handcrafted pieces will bring joy and style to many future occasions.
Conclusion: Your Next DIY Success Story
Creating your own wooden lantern centerpiece is a deeply rewarding project, offering a blend of craftsmanship, personalization, and practicality. It’s an opportunity to save money, unleash your creativity, and produce a truly unique decor item for your home or next big event. From a simple dinner party to an elaborate wedding, these lanterns promise to add a warm, inviting glow and a touch of handmade elegance. So, gather your materials, fire up your miter saw, and get ready to illuminate your space with a centerpiece that tells a story – your story.
Were you able to follow this creative wooden lantern tutorial? Share your feedback with us in the comment section below! We love to see your DIY successes.
More Inspiring DIY Projects:
- 11 DIY Coffee Table Ideas
- 21 Bright DIY Outdoor Lantern Ideas For A Cool Garden Design