
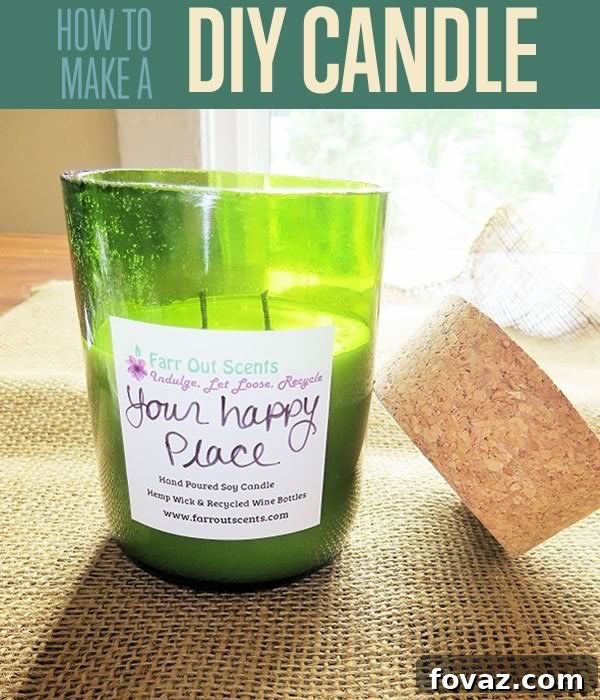
Candle Making Basics: Craft Your Own Scented Soy Candles at Home
Have you been captivated by the idea of creating beautiful, aromatic candles but found the process daunting after sifting through countless online guides? Look no further! This comprehensive tutorial demystifies the art of candle making, offering clear, step-by-step instructions and invaluable tips to help you produce exquisite homemade soy candles. Imagine filling your home with custom scents or crafting thoughtful, personalized gifts for loved ones. Candle making is a wonderfully rewarding hobby that combines creativity with a touch of science, and while it requires a modest initial investment in supplies, the satisfaction and endless possibilities make it truly worthwhile. Dive into our secrets and discover the joyful simplicity of crafting your very own candles this season!
Explore a fantastic selection of handcrafted scents at farrroutscents.
Why Embrace the Art of Homemade Candle Making?
Beyond the simple pleasure of a flickering flame and a delightful aroma, making your own candles offers a wealth of benefits. It’s a creative outlet that allows for complete personalization – from choosing your favorite scents and colors to designing unique containers. You gain full control over the ingredients, ensuring your candles are free from undesirable chemicals often found in mass-produced alternatives. For instance, using natural soy wax and carefully selected fragrance oils can result in a cleaner, longer-lasting burn. Furthermore, crafting candles can be a meditative and relaxing process, providing a perfect escape from daily stresses. The handmade touch makes them ideal gifts, conveying thoughtfulness and effort that store-bought items simply can’t match. Economically, once you have your basic supplies, making candles in batches can be more cost-effective than continually purchasing high-quality retail candles.
Essential Supplies for Your Candle Making Journey
Embarking on your candle making adventure requires a few key tools and ingredients. Investing in quality supplies from the outset will ensure a smoother process and superior finished products. Below is a detailed list, broken down by candle type and general use, along with tips on where to find them.
For Pillar Candles & Wax Tarts:
- Aluminum Molds: These durable molds are essential for creating freestanding pillar candles and various wax tarts. They come in an array of shapes and sizes, allowing for diverse designs. You can purchase a wide selection of these at specialized candle making supply stores online, such as here.
- Molding Clay: Used to seal the bottom of pillar candle molds, preventing wax leaks. A small amount goes a long way. This can typically be found at craft stores like Jo-Ann Fabric.
For Container/Jar Candles:
- Containers/Jars: The vessel for your container candles. While you might be tempted to use recycled wine bottles, this requires specific tools and skills to cut safely and properly, which can be researched on platforms like YouTube. For beginners, it’s highly recommended to start with readily available, heat-safe options such as old salsa jars, mason jars, or purpose-built candle jars. Mason jars are widely available at major retailers like Target or craft stores such as Jo-Ann Fabric. Ensure any container you choose is clean, dry, and free of cracks.
- Wick Bars: These metal bars are designed to hold your wick perfectly centered at the top of your container while the wax cools. They are incredibly useful for maintaining wick alignment. Find them online at suppliers like candlesandsupplies.net. As an alternative, you can improvise by wrapping the wick around a pencil or pen and resting it across the container’s rim.
- Wick Tabs: Small metal discs that secure the bottom of your wick to the base of the container. These are crucial for proper wick placement and can be found at most craft supply stores, including Jo-Ann Fabric.
- Hot Glue Gun: Used to quickly and securely attach the wick tab to the center bottom of your candle container. A standard craft hot glue gun from any Jo-Ann Fabric or similar store will suffice.
Universal Supplies for All Candle Types:
- Digital Kitchen Scale: Precision is paramount in candle making. A reliable kitchen scale is essential for accurately weighing both your soy wax and fragrance oil to achieve consistent results and optimal scent throw.
- Small Pan: This pan is used in conjunction with your aluminum pour pot to create a double boiler setup, a safe and controlled method for melting wax.
- Thermometer: A vital tool for monitoring wax temperature. An accurate thermometer ensures your wax reaches the correct melting point and cools to the ideal temperature before adding fragrance and pouring, preventing issues like frosting or poor scent adhesion. Look for one at Target or any supermarket.
- Aluminum Pour Pot: This specialized pot, often with a pouring spout, is where you will melt your wax in the double boiler and mix your fragrance. Its design makes pouring wax into containers much easier and safer. Available at craft stores like Jo-Ann Fabric.
- Soy Wax: The heart of your candle. Soy wax is a natural, renewable resource that offers a clean, long-lasting burn. For high-quality, all-natural options, consider brands like EcoSoya CB-Excel for container candles and EcoSoya Pillar Soy Wax for pillar candles, often available online at specialty suppliers like here. Alternatively, good quality soy wax can also be found at local craft stores such as Jo-Ann’s Fabric or Michaels.
- Fragrance Oil: This is where your candle gets its signature scent. There’s a common debate between fragrance oils and essential oils for candle making. In our experience, fragrance oils specifically designed for candles (such as those from reputable suppliers like Nature’s Garden Candles) are formulated for safety and optimal performance in wax. Essential oils, while natural, can have varying flash points, may not perform consistently in wax, and sometimes contain components that can cause issues like headaches when burned in high concentrations. Always opt for fragrance oils tested and certified safe for candle use.
- Duct Tape: Useful for securing wicks or covering mold openings, providing extra stability during the cooling process.
- Wicks: The right wick is crucial for an even, clean burn. There are many types of wicks available, but our preferred choice at Farr Out Scents is hemp wick dipped in beeswax. This type is known for its sustainability and clean-burning properties. You can often find high-quality hemp wicks from artisanal suppliers on platforms like Etsy, for example, from shops like HempUniverse. Always choose a wick size appropriate for your container diameter and wax type to prevent tunneling or excessive smoking.
If gathering individual supplies seems daunting, a pre-assembled candle making kit can be an excellent starting point! We highly recommend the basic votive soy candle making kit from our friends at GrowandMake.com. It includes everything you need to successfully create basic votive soy candles, making it perfect for beginners. Check it out here to simplify your initial setup!
Step-by-Step Guide to Crafting Your Scented Soy Candles
Follow these detailed steps carefully to ensure a successful and enjoyable candle making experience. Precision and patience are your best allies in this craft!
Step 1: Precisely Weigh Your Soy Wax
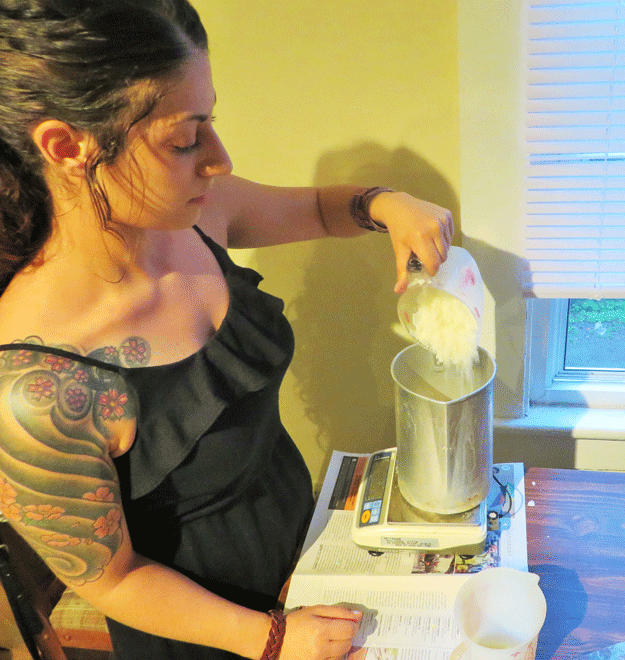
Begin by placing your aluminum pour pot on your digital kitchen scale. Zero out the scale to account for the pot’s weight. Then, carefully pour your chosen soy wax flakes into the pot until you reach the desired weight. For accurate measurements, remember the conversion: 1 ounce (oz) equals approximately 28 grams (g). This initial precision is vital for consistent candle performance and proper scent ratios.
Step 2: Accurately Measure Your Fragrance Oil
Using your kitchen scale, measure out your fragrance oil. The amount of fragrance oil you use will directly impact the “scent throw” – how strongly the candle smells when burning. For a robust, noticeable aroma, aim for 12% of your total wax amount. If you prefer a milder, more subtle scent, reduce this to 9%. Always calculate this percentage based on the weight of your wax, not its volume, to ensure accuracy.

Step 3: Master the Double Boiler Method for Melting Wax
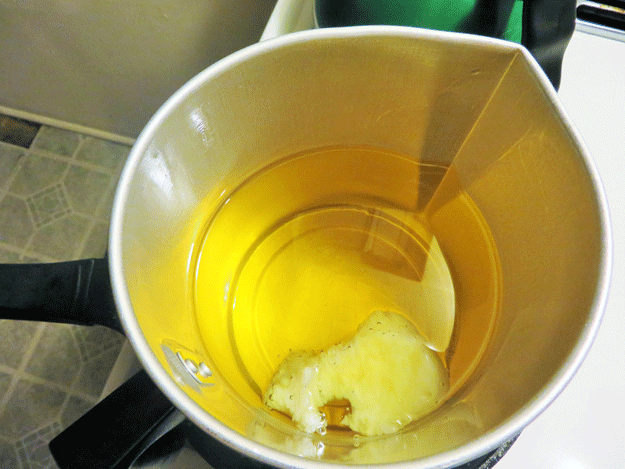
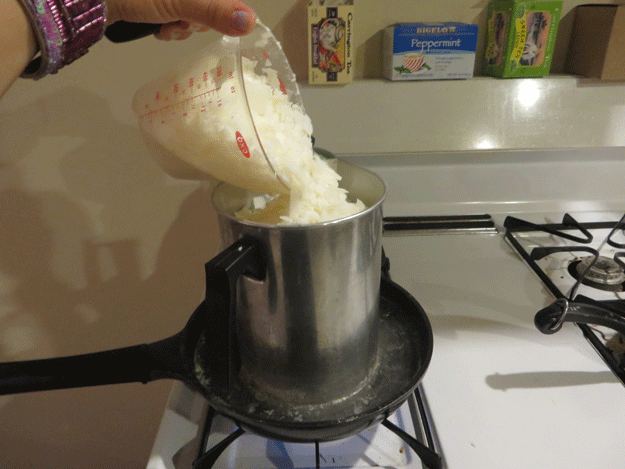
Set up your double boiler: place your aluminum pour pot (containing the weighed wax) into a larger pot filled with a few inches of water. Heat the water over medium heat. This gentle, indirect heat is crucial for melting soy wax safely and evenly, preventing it from burning or reaching excessively high temperatures. Melt your soy wax until it reaches precisely 180 degrees Fahrenheit (approximately 82 degrees Celsius). As soon as it hits this temperature, remove it from the heat source. This initiates the crucial cooling process before the fragrance oil is added.
Step 4: Incorporate Your Chosen Fragrance
Allow the melted soy wax to cool slightly for about 60 seconds after removing it from the heat. This brief cooling period helps the wax reach an optimal temperature for fragrance binding. At this precise moment, pour in your accurately weighed fragrance oil. Adding fragrance at the right temperature (often between 180-185°F for soy wax, but specific to wax type) is crucial for preventing the scent from burning off or separating.
Step 5: Ensure Even Scent Distribution
Immediately after adding the fragrance oil, stir the wax mixture thoroughly and continuously for a full two minutes using a metal spoon. This step is critically important. Evenly dispersing the fragrance oil throughout the melted wax ensures a consistent scent throw when the candle burns. If the oil isn’t adequately mixed, it can separate or pool at the top of your candle as it cools, leading to an uneven fragrance release and potential issues during burning.
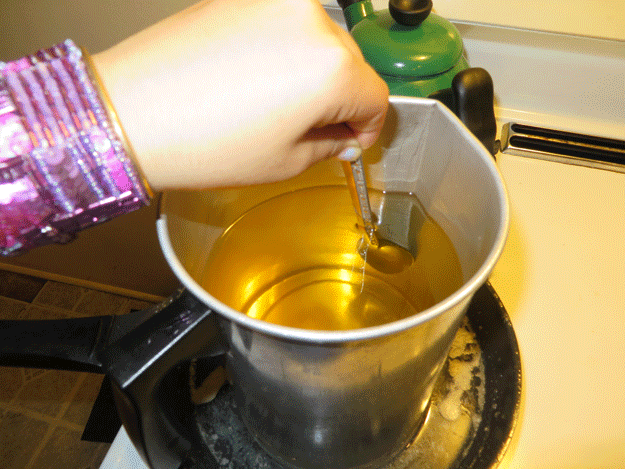
Step 6: Prepare Your Containers for Pouring
While your wax is cooling, preheat your clean glass containers or metal molds. Turn your oven to a low temperature, around 200 degrees Fahrenheit (approximately 93 degrees Celsius), and place your containers inside for a few minutes. (In the accompanying image, we used carefully recycled wine bottles that have been cut and sanded). Preheating your containers helps to minimize temperature shock when the warm wax is poured in, significantly reducing the likelihood of frosting, wet spots, or uneven surfaces on your finished candle. The goal is to have the container and wax temperatures as close as possible for a smooth, professional finish.
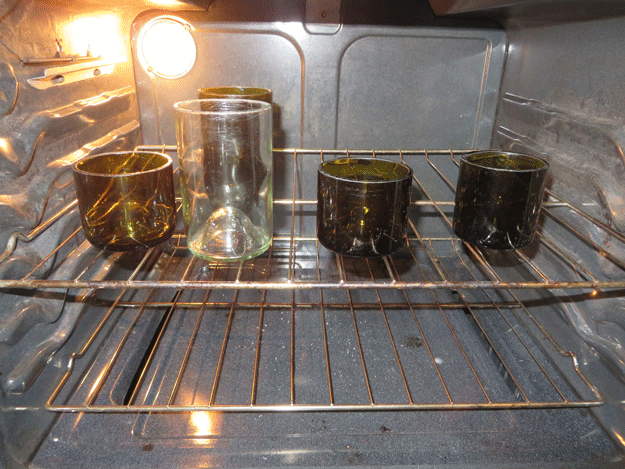
Step 7: Securely Position Your Wicks
Once your wax has cooled to a pouring temperature of 110-135 degrees Fahrenheit (43-57 degrees Celsius), take each preheated container out of the oven individually. Thread your chosen wick (e.g., hemp wick) through a wick tab. Use a dab of hot glue from your glue gun to securely attach the wick tab to the exact center of the container’s bottom. Then, use a wick bar or wrap the excess wick around a pencil or pen and rest it across the container’s rim to hold the wick taut and centered at the top. For extra security, apply a piece of duct tape to further stabilize the wick holder. Achieving a perfectly centered wick is essential for an even burn; a wooden ruler can be a helpful tool for precise placement.
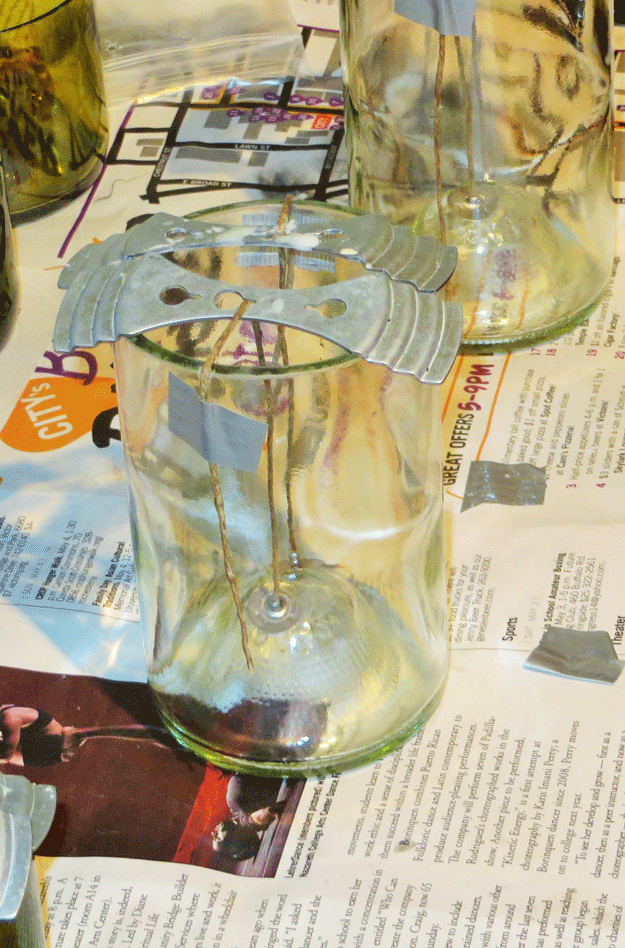
Step 8: The Art of Pouring and Curing
It’s time for the final pour! Carefully and slowly pour the wax into each prepared container. Pouring slowly minimizes air bubbles and helps prevent the formation of sinkholes or “caved-in” tops, which can detract from your candle’s aesthetic. Leave about an inch of space at the top of the container for future burning. After pouring, resist the urge to move or disturb the candles. They need to cool and set undisturbed for at least two days (48 hours) – this crucial period is known as “curing.” Curing allows the wax and fragrance oil to bind completely, resulting in a stronger scent throw and a more efficient, even burn. Once fully cured, you can personalize your candles with custom labels using your printer and sticker paper, ready for burning or gifting!
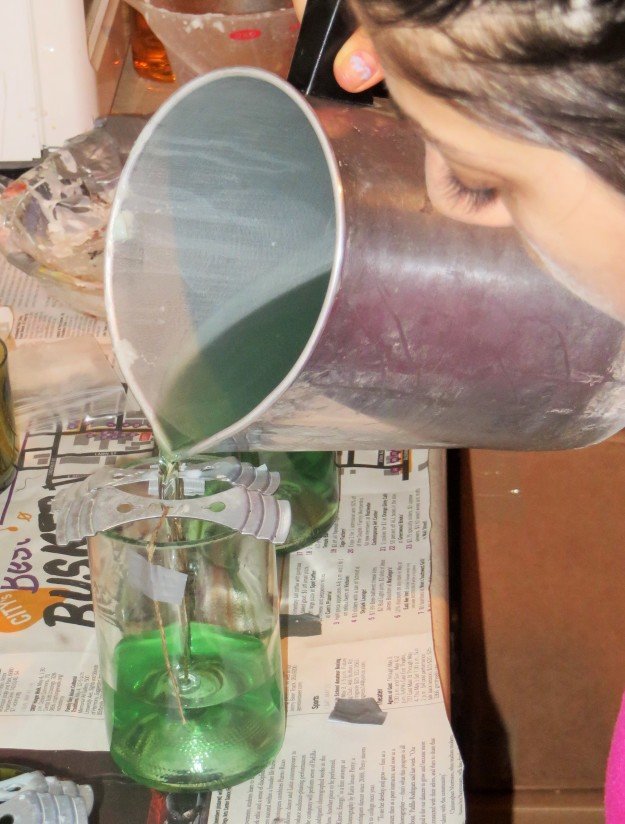
You can find the finished product from our efforts on my sustainable online candles shop, farroutscents.com.
Pro Tips for Perfect Candles
To elevate your candle making skills and achieve professional results, consider these additional tips:
- Optimal Curing Time: While 48 hours is the minimum, allowing your soy candles to cure for 1-2 weeks can significantly improve their scent throw. The longer the cure, the better the fragrance oil integrates with the wax.
- Troubleshooting Sinkholes: If you notice a small crater or sinkhole forming around your wick after the initial pour, don’t worry! This is common. Simply reheat any leftover wax and perform a small “re-pour” over the affected area to create a smooth, even surface.
- Candle Care for Extended Enjoyment: To maximize the life and performance of your homemade candles, always trim the wick to ¼ inch before each burn. Allow the candle to burn long enough for the melted wax pool to reach the edges of the container during the first burn (known as a “memory burn”). This prevents tunneling and ensures an even melt pool for subsequent burns.
Safety First: Important Precautions
Working with hot wax and heat sources requires adherence to safety guidelines. Always keep a fire extinguisher nearby and never leave melting wax unattended. Use heat-resistant gloves when handling hot pour pots or containers. Ensure your work area is well-ventilated to avoid inhaling concentrated fragrance fumes. Keep children and pets away from your workspace during the candle making process. Proper handling of hot materials will ensure a safe and enjoyable crafting experience.
Ignite Your Passion: Conclusion and Next Steps
Congratulations, you’ve now mastered the basics of crafting your very own beautiful, scented soy candles! This rewarding hobby offers endless opportunities for creativity and personalization. We hope this tutorial has sparked your passion for DIY projects. Don’t hesitate to experiment with different waxes, scents, and containers as you become more confident in your skills. The satisfaction of lighting a candle you’ve made yourself is truly unparalleled.
We’re always eager to hear about your creative endeavors and welcome your feedback! Do you have more craft projects you’d like us to tackle, or perhaps some advanced techniques you’d like to share? Leave your comments and suggestions in the section below. We appreciate your insights and strive to bring you the best in DIY inspiration.
Can’t find a project you’re looking for? Suggest a fun new DIY idea, and our team will work quickly to bring it to life! We love connecting with our subscribers and building a vibrant creative community.
Don’t miss out on the latest and greatest DIY tips, tutorials, and inspiration. Be sure to sign up for our mailing list to receive exclusive content directly in your inbox.
Connect with Us
Stay connected and get a daily dose of DIY inspiration!
Like Us on Facebook for Daily DIY Inspiration!
Explore More DIY Projects
Expand your crafting horizons with these related DIY guides:
- 3 Ways to Cut Glass Bottles: Essential DIY Instructions
- Jump Ring Mandrel: Your Guide to DIY Jewelry Making Supplies