
Welcome, fellow DIY enthusiasts! Whether you’re just starting your journey into the world of crafting and building, or you’re a seasoned expert whose current workspace is showing the wear and tear of countless projects, this tutorial is designed for you. The truth is, a sturdy, reliable, and comfortable workbench isn’t just a piece of furniture; it’s the very cornerstone of every successful project you’ll tackle. It provides the stability, support, and dedicated space necessary to bring your creative visions to life. Imagine having a dedicated area where you can cut, assemble, and finish your creations without compromise. This DIY project offers a simple, incredibly affordable, and surprisingly quick solution to building your ultimate workspace. We’re here to guide you through the process of constructing an essential piece of equipment for any home workshop, ensuring you have the solid foundation you need for all future endeavors, right here on DIYProjects.
Build a Simple, Sturdy, and Affordable DIY Workbench in Just 60 Minutes
For any dedicated DIYer, having the right setup is paramount to executing projects perfectly. A stable workbench isn’t merely a luxury; it’s a fundamental necessity that dramatically impacts your efficiency, precision, and overall enjoyment of your craft. It makes all the difference when you’re working on intricate details, assembling heavy components, or simply needing a reliable surface for cutting and sanding. This comprehensive guide will show you how to construct a simple, robust, and incredibly budget-friendly workbench that won’t break the bank or consume your entire weekend. Our design focuses on minimal materials and straightforward steps, making it a perfect less cost, less time, and less hassle project. Get ready to transform your workspace in about an hour! Discover the essential supplies and tools you’ll need, followed by our step-by-step instructions below.
Why Build This 60-Minute Workbench? The Benefits for Every DIYer
The idea of building a functional workbench in just 60 minutes might sound ambitious, but it’s entirely achievable with our streamlined approach. This project is specifically designed to minimize complexity without compromising on the core qualities of a great workbench: stability, durability, and a usable work surface. Here’s why this particular DIY workbench stands out and why it’s an excellent project for both novice and experienced builders:
- Unbeatable Affordability: By utilizing common, readily available lumber and basic hardware, you can construct this workbench for a fraction of the cost of a pre-made alternative. We focus on efficiency in material use to keep expenses to a minimum.
- Rapid Construction Time: The innovative design and clear, concise steps mean you can have a fully functional workbench ready for use in roughly an hour. This is perfect for those who need a workspace quickly or have limited time for DIY projects.
- Exceptional Sturdiness: Despite its quick build time and simplicity, this workbench is engineered for strength. The robust frame and well-secured components ensure it can withstand the rigors of various DIY tasks, from woodworking to intricate craft projects.
- Perfect for Beginners: If you’re new to woodworking or tool usage, this project is an ideal starting point. It teaches fundamental skills like measuring, cutting, drilling, and assembly in a manageable context, building your confidence for future endeavors.
- Versatile and Adaptable: While basic in its initial form, this workbench serves as an excellent foundation. You can easily customize it later with additions like shelves, drawers, vises, or even casters for mobility, tailoring it to your evolving needs.
- Enhanced Productivity: A dedicated, comfortable workbench provides an organized space, reducing clutter and improving your workflow. This means less time searching for tools and materials and more time actually building and creating.
- Sense of Accomplishment: There’s immense satisfaction in building something useful with your own hands. Completing this project in just 60 minutes will leave you feeling proud and ready to tackle your next big idea.
Say goodbye to improvising on the floor or a rickety table. With this quick and easy DIY workbench, you’ll have a professional-grade setup that supports all your creative projects.
Supplies You’ll Need for Your Workbench:
Gathering all your materials beforehand is crucial for completing this project efficiently. Here’s a detailed list of what you’ll need, along with some considerations:
- 1 X Bench Top (1200mm X 600mm): This will be the main work surface. You can use plywood, MDF, or even a solid wood slab. Plywood (like 3/4-inch or 18mm thick) is a popular, durable, and affordable choice. Ensure it’s flat and free of major defects.
- 2 X 1200mm (Bench Frame – Long Sides): These pieces will form the two longer sides of your workbench’s base frame. They are critical for the structural integrity of the top support.
- 2 X 540mm (Bench Frame Ends – Short Sides): These pieces will connect the long sides, completing the rectangular frame for the bench top. Together, these four pieces create a sturdy perimeter.
- 4 X 980mm (Legs): These are the vertical supports for your workbench. The suggested length of 980mm (approximately 38.5 inches) will result in a standard working height when combined with your bench top thickness. However, you have the flexibility to adjust this measurement based on your personal preference and ergonomic needs. For example, if you’re taller, you might want longer legs to avoid stooping.
- 2 X 600mm (Leg Supports / Stretchers): These pieces run horizontally between the legs, significantly increasing the workbench’s stability and preventing wobbling. They act as cross-braces, making the entire structure much more rigid.
Note on Lumber: For the frame and legs, common dimensional lumber like 2x4s (approx. 38mm x 89mm actual size) or 2x6s (approx. 38mm x 140mm actual size) works perfectly. Opt for straight, knot-free pieces for maximum strength and ease of assembly.
Tools You’ll Need to Get Started:
Having the right tools at hand will make this 60-minute build smooth and hassle-free. Here’s what you’ll need:
- Saw: A hand saw is sufficient, but a circular saw or miter saw will make precise cuts much faster and easier. Always ensure your blade is sharp for clean cuts.
- Measuring Tape: Accuracy is key! A reliable measuring tape is essential for marking your lumber precisely.
- Drill: An electric drill (corded or cordless) is needed for drilling pilot holes and driving screws.
- Screws: Wood screws (e.g., 2.5-inch or 3-inch deck screws) are ideal for fastening the frame and legs. Choose screws appropriate for the thickness of your lumber to ensure a strong connection without going through the other side.
- Clamps: Corner clamps or C-clamps are incredibly helpful for holding pieces together securely while you drill and fasten. They ensure your joints are tight and square.
- Square (Carpenter’s Square or Speed Square): Absolutely vital for ensuring all your cuts and assemblies are at perfect 90-degree angles. A square ensures your workbench stands true and stable.
- Safety Glasses: Always protect your eyes when cutting, drilling, or sanding.
- Hearing Protection: Recommended when using power tools like circular saws.
- Pencil/Marker: For marking your measurements on the wood.
- Sandpaper or File: For cleaning up rough edges after cutting, ensuring a smooth finish and preventing splinters.
Step-by-Step Guide: Building Your DIY Workbench in 60 Minutes
Follow these steps carefully, and you’ll have a fully functional workbench in no time. Precision and safety are your best friends during this project.
1. Mark the Lengths for Your Frame
Begin by laying out your lumber. Take two of the 1200mm lengths that will form the long sides of your bench frame. Using your measuring tape and pencil, carefully mark out two additional pieces at 540mm each from your remaining stock. For accuracy, double-check your measurements and then use your square to draw a perfectly straight and perpendicular line across the lumber at each mark. This ensures that your cuts will be perfectly square, which is critical for a stable and true workbench frame.
2. Cut to Length and Prepare Edges
With your lines clearly marked, proceed to cut each piece of lumber to its designated length using your saw. Whether you’re using a hand saw, circular saw, or miter saw, always prioritize safety by securing your workpiece with clamps and wearing appropriate personal protective equipment (safety glasses, hearing protection). After making all your cuts, take a moment to inspect the ends. Any rough edges or splinters should be cleaned up with a file or a piece of sandpaper. Smooth edges not only look better but also reduce the risk of splinters during assembly and future use.
3. Test Fit and Verify Measurements
Before you start drilling and fastening, it’s a good practice to perform a dry run. Lay out all the frame pieces (the two 1200mm lengths and the two 540mm lengths) on a flat surface in the configuration of your workbench base. Gently fit them together without screws. This allows you to visually check if all the pieces meet flush and if the overall dimensions look correct. Use your square to ensure that all corners are truly 90 degrees. This step is invaluable for catching any measurement errors or miscuts before they become permanent problems.
4. Assemble the Workbench Base Frame
Now it’s time to bring the base frame together. Start by positioning two frame pieces (one long, one short) at a right angle. Utilize a corner clamp or a pair of C-clamps to hold them firmly and squarely in place. With the pieces secured, use your drill to create pilot holes. Pilot holes are crucial as they prevent the wood from splitting when you drive in the screws and ensure the screws go in straight. Once the pilot holes are drilled, drive in two screws at each corner joint. Repeat this process for all four corners, ensuring each joint is perfectly square before fastening. For enhanced durability and strength, consider applying a good quality wood glue to the joint surfaces before screwing them together. This creates a bond that is often stronger than the wood itself, making your base incredibly robust.
5. Measure, Cut, and Attach the Legs and Leg Supports
With your base frame complete, it’s time to add the legs. First, determine the desired height of your workbench. A common comfortable height is around 900-950mm (35-37 inches) for standing work, but this can vary based on your personal height and the tasks you’ll perform. Subtract the thickness of your bench top from your desired total height; this will be the precise length you need for your four legs. Cut your four leg pieces to this determined length. Next, position each leg vertically at the inside corners of your assembled frame. Use your square to ensure each leg is perfectly plumb (straight up and down) and square to the frame. Drill pilot holes through the frame into the top of each leg and drive in screws to secure them. Use at least two screws per leg for a strong connection. To significantly increase the stability and prevent lateral movement, you’ll add leg supports. Measure approximately 300mm (about 12 inches) up from the bottom of each leg. Cut two additional pieces of lumber, each 600mm long. These will act as stretchers. Attach these 600mm pieces horizontally between the legs on the longer sides of the workbench, at the 300mm mark you just measured. Drill pilot holes and secure with screws. These leg supports will make your workbench incredibly rigid and stable.
6. Assemble and Secure the Bench Top
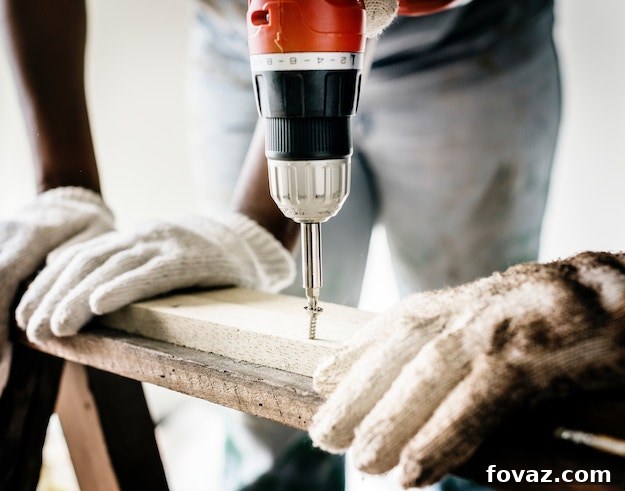
Now for the final crucial step: attaching your workbench top. Place your pre-cut bench top (1200mm x 600mm) squarely onto the assembled frame. Ensure it is centered and flush with the edges of the frame. Use clamps to hold the bench top firmly in position against the frame, preventing any movement while you fasten it. Once clamped, drill pilot holes through the bench top and into the underlying frame at several points (e.g., every 300mm along the edges and a few in the center). Then, drive appropriate wood screws to secure the top firmly to the frame. Make sure the screw heads are flush or slightly countersunk to provide a smooth work surface. Finally, give your new workbench a quick once-over with sandpaper, especially focusing on the top surface and any exposed edges, to achieve a smooth, splinter-free finish. This not only makes the workbench safer but also more pleasant to work on.
Voila! Your Sturdy and Affordable Workbench is Complete!
Congratulations! In approximately 60 minutes, you’ve successfully constructed a functional, sturdy, and reliable workbench that’s ready to support all your future DIY projects. This simple yet effective design provides an excellent foundation for any home workshop. Now, you have a dedicated space where you can confidently tackle everything from intricate repairs to ambitious construction tasks, knowing you have a solid surface beneath you.
For a visual walkthrough and additional tips, be sure to watch the full project video here. It offers real-time guidance and can help clarify any steps, ensuring you build your very own simple and strong workbench with ease:
The Transformative Power of Your New DIY Workbench
Finding the perfect workbench in the market can often be a daunting and expensive endeavor. Many pre-made options either lack the specific features you need, don’t fit your space, or come with a hefty price tag. By building one yourself, you unlock a multitude of benefits that extend far beyond simple cost savings. You save money, certainly, but you also save valuable time that would otherwise be spent searching for the ideal solution. More importantly, you gain the ability to infuse personal touches and specific functionalities that a mass-produced item simply cannot offer.
This DIY project is not just about building a piece of furniture; it’s about investing in your passion, enhancing your productivity, and creating a dedicated space where creativity can truly flourish. The process itself is empowering, demonstrating that significant improvements to your workshop don’t require immense time or financial commitment. Completing this essential project in as little as 60 minutes is incredibly rewarding and leaves you with a tangible asset that will serve you for years to come. What more could a dedicated DIYer ask for?
Enhance Your Workspace: Maintenance and Future Upgrades for Your Workbench
Even though your workbench is sturdy and ready for action, a little ongoing care can significantly extend its lifespan and utility. Regularly check all screws and tighten them as needed to maintain stability. Keep the bench top clean from sawdust, paint, and glues to preserve its surface. Consider applying a protective finish, like a polyurethane or linseed oil, to the wood surfaces to guard against spills and wear.
As your DIY skills grow and your project needs evolve, you might find yourself wanting to customize your workbench further. Here are some ideas for future upgrades:
- Add Storage: Build shelves underneath the bench top or attach small drawers to keep tools and materials organized and within reach.
- Install a Vise: A woodworking or metalworking vise is an invaluable addition for holding workpieces securely while you cut, sand, or shape them.
- Incorporate Power: Attach a power strip to one of the legs or the side of the bench to easily plug in your power tools without needing long extension cords.
- Make it Mobile: Install locking swivel casters on the legs. This will allow you to move your workbench around your garage or workshop with ease, then lock it in place for stability.
- Tool Holders: Mount pegboard or magnetic strips on the wall behind the workbench for easy access to frequently used hand tools.
A simple and sturdy workbench will undeniably be a great support for all your creative and practical projects. Knowing you built it yourself in such a short period of time adds an extra layer of satisfaction. Now that your primary workspace is ready, dive into new adventures! Click here for more exciting DIY inspirations and ideas to fuel your next project.