
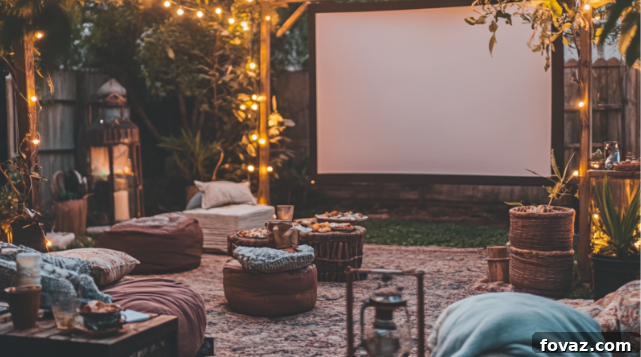
Imagine transforming your own backyard into a magical, immersive cinema experience. Forget the crowded theaters, expensive tickets, and rigid showtimes. With a DIY outdoor movie screen, you can enjoy popular films, sports events, or even video games under the stars, creating unforgettable memories with family and friends. This creative and budget-friendly project offers a unique way to enjoy outdoor entertainment, making every movie night a special occasion. If you’re ready to embark on a fun and rewarding adventure to build your ultimate backyard cinema, let’s explore the simple steps to bring your vision to life!
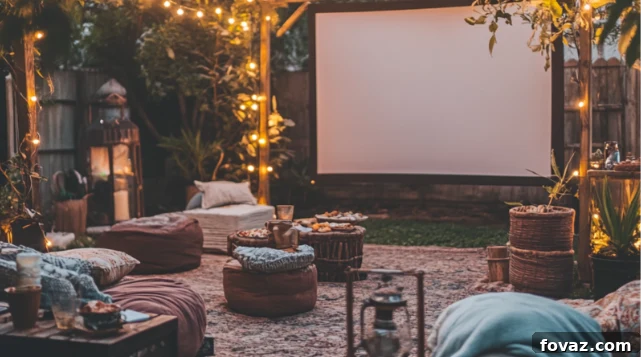
Picture a serene backyard at twilight, illuminated by the warm glow of string lights. At its heart stands a beautifully crafted DIY outdoor movie screen, beaming a classic film into the evening air. Cozy blankets and plush pillows are artfully arranged on comfortable seating, inviting guests to settle in. Nearby, a charming small table laden with an assortment of gourmet snacks and refreshing beverages completes the idyllic scene, promising an evening of pure relaxation and cinematic delight under the open sky.
Essential Materials for Your DIY Outdoor Movie Screen Project
Embarking on your DIY outdoor movie screen construction is an exciting endeavor that begins with gathering the right tools and materials. Selecting suitable components ensures durability, stability, and optimal viewing quality for your backyard cinema setup. Here’s a comprehensive list of what you’ll need:
- PVC Pipes (1-inch diameter recommended): These will form the sturdy frame of your screen. The 1-inch diameter provides a good balance of strength and manageability, preventing excessive flexing while keeping the frame lightweight enough to move if needed. Consider purchasing longer sections (e.g., 10-foot lengths) to minimize cuts and joints.
- PVC Connectors: A variety of connectors will be essential for assembling the frame. You’ll primarily need 90-degree elbow connectors for the corners and tee connectors for any cross-supports or base stability. End caps are also useful for a clean finish and to prevent dirt from entering the pipes.
- White Fabric or Blackout Curtain: This is the canvas for your projections. A high-quality blackout curtain is often preferred due to its thickness, wrinkle resistance, and light-blocking properties, which enhance image contrast and brightness. Alternatively, a tightly woven white canvas or even a dedicated projection screen fabric can be used. Ensure it’s large enough to cover your frame with extra material for attachment.
- Duct Tape or Heavy-Duty Fabric Fasteners: For securing the screen fabric to the PVC frame. Duct tape offers a quick and easy solution, but heavy-duty fabric fasteners like Velcro straps, bungee cords, or clips provide a more professional and adjustable attachment, allowing for tensioning and easy removal for cleaning or storage.
- Ground Stakes (optional but highly recommended): These provide crucial stability, especially in windy conditions. Rebar stakes or tent stakes can be used, inserted through the base of the PVC frame into the ground.
- Measuring Tape: Essential for accurate cutting of PVC pipes and fabric to ensure a perfectly rectangular screen.
- PVC Cutter or Saw: For making clean, precise cuts on your PVC pipes. A PVC cutter is quick and produces smooth edges, while a hacksaw can also be used but may require deburring.
- Rubber Mallet: Useful for gently tapping PVC pipes into connectors, ensuring a snug and secure fit without damaging the material.
- Drill and Drill Bits (optional): Needed if you plan to anchor the frame with ground stakes or want to add grommets to your screen fabric for bungee cord attachment.
- Velcro Straps or Clips: Excellent for keeping the screen fabric taut and wrinkle-free around the frame. Bungee cords with ball toggles are another versatile option for a secure yet flexible attachment.
Having all these items ready before you start will streamline the construction process, ensuring your DIY outdoor movie screen project is both enjoyable and successful.
Step-by-Step Guide: Building Your Own Outdoor Movie Screen
Crafting your DIY outdoor movie screen is a rewarding project that elevates your backyard into the ultimate entertainment hub. This guide will walk you through each stage of construction, from cutting the first pipe to adding the final touches, ensuring your screen is sturdy, professional, and ready for countless family movie nights under the stars.
1. Measure and Cut the PVC Pipes with Precision
The foundation of a great outdoor movie screen lies in its frame. Begin by meticulously measuring and cutting your PVC pipes to the desired dimensions. For an optimal viewing experience, a 16:9 aspect ratio (widescreen) is typically recommended, though a 4:3 ratio can also work depending on your projector and content. A common and manageable size for a backyard cinema is a 10-foot wide by 7-foot tall frame. This means you’ll need two 10-foot horizontal pieces for the top and bottom, and two 7-foot vertical pieces for the sides. Using a measuring tape, mark your desired lengths clearly on the PVC pipes. When cutting, employ a PVC cutter for clean, straight cuts, or a hacksaw if a cutter isn’t available. Precision at this stage is paramount, as accurate cuts will ensure the frame assembles squarely and maintains its structural integrity.
2. Assemble the Frame for Optimal Stability
With your pipes cut, it’s time to assemble the skeleton of your outdoor screen. Start by connecting the vertical and horizontal pieces using the PVC elbow connectors at each of the four corners. These 90-degree elbows will form the essential right angles of your rectangular frame. For larger screens, or if you anticipate windy conditions, consider adding a horizontal cross-support in the middle of the frame using two tee connectors and an additional PVC pipe section. This central support significantly enhances stability and prevents the frame from sagging. As you join the pieces, ensure each connection is firm and secure. A rubber mallet can be incredibly useful here; gently tap the pipes into the connectors until they are fully seated, creating a tight and robust frame. A well-assembled frame is the backbone of a stable and durable outdoor projector screen.
3. Secure the Frame for Wind Resistance and Durability
Once your PVC frame is assembled, securing it is a critical step, especially if you plan for semi-permanent placement or live in an area prone to wind. There are several effective methods for anchoring your screen. The most common involves drilling holes into the bottom PVC pipes, specifically at the points where they will contact the ground. Through these holes, you can insert robust ground stakes (such as rebar or heavy-duty tent stakes) deep into the earth. This method provides excellent resistance against tipping or shifting. Alternatively, for a less permanent solution, consider using sandbags or water weights placed over the frame’s base. For added security, particularly with taller screens, guy ropes extending from the top corners of the frame to anchor points in the ground (like tent pegs) can provide extra tension and support, preventing sway. Taking these precautions ensures your backyard movie screen remains stable and safe, regardless of weather conditions, allowing for uninterrupted enjoyment.
4. Prepare the Screen Fabric for Superior Projection Quality
Choosing and preparing the right screen fabric is crucial for achieving excellent image quality on your DIY outdoor movie screen. Blackout curtains are highly recommended for this project. Their dense, opaque material effectively blocks ambient light from behind, significantly boosting contrast and ensuring projected images appear vibrant and clear, even in dim twilight. Unlike thinner fabrics, blackout curtains are also less prone to wrinkles, which can distort the projection. Measure your chosen fabric carefully to match the dimensions of your PVC frame, adding an extra 4-6 inches on each side. This additional material is vital for wrapping around the frame and securing the fabric without stretching it too tightly, which could lead to creases. If you have basic sewing skills, hemming the edges of the fabric can prevent fraying and provide a more polished, durable finish. This preparation ensures your screen is not only functional but also contributes to a professional-looking outdoor home theater setup.
5. Attach the Fabric to the Frame with Even Tension
With the frame assembled and the fabric prepared, it’s time to bring them together. Lay your screen fabric flat on a clean surface, then carefully position the PVC frame on top, centering it over the fabric. The goal here is to achieve a smooth, taut, and wrinkle-free projection surface. Start by attaching the fabric to the top edge of the frame. You can use heavy-duty Velcro straps, strong clips, or bungee cords looped through grommets (if you’ve added them to your fabric). Work your way down the sides, pulling the fabric gently but firmly to remove any slack. Finish by securing the bottom edge. It’s important to apply even tension across the entire surface; avoid pulling one section too tightly, as this can create ripples or unevenness elsewhere. Take your time with this step, stepping back frequently to inspect the screen for any wrinkles or sagging. A perfectly taut screen is essential for a sharp, undistorted projected image, maximizing your outdoor movie experience.
6. Add Finishing Touches for a Professional Aesthetic
The final step in constructing your DIY outdoor movie screen involves adding thoughtful finishing touches that significantly enhance its appearance and performance. A crucial element is creating a black border around the perimeter of your projection surface. This can be achieved easily and effectively using black duct tape, applied neatly to the edges of the screen fabric where it meets the frame. This black border, similar to those found on professional movie screens, serves a dual purpose: it optically frames the projected image, making it appear sharper and more defined, and it enhances the perceived contrast by providing a visual boundary. Additionally, consider tidying up any excess fabric on the back of the frame, perhaps by securing it with additional clips or tape, to prevent flapping in the wind. These small but impactful details contribute to a polished, professional look for your DIY movie screen, elevating it from a simple project to a sophisticated centerpiece for your backyard entertainment.
Elevating Your DIY Outdoor Movie Screen Experience
Building the screen is just the first exciting step! To truly transform your backyard into an unparalleled cinematic haven, focus on enhancing every aspect of the setup. Creating the perfect atmosphere, ensuring comfort, and optimizing sound and visuals will make your backyard cinema setup a destination for memorable gatherings. Here’s how to take your outdoor movie nights to the next level:
Seating and Comfort: Creating an Inviting Viewing Area
Comfort is paramount for an enjoyable movie marathon. Don’t underestimate the power of thoughtful seating arrangements. Start by laying down outdoor rugs to define the viewing area and add a touch of warmth. Then, layer with an abundance of cozy blankets and plush cushions or pillows, inviting guests to sink in and relax. Consider a variety of seating options: classic outdoor chairs, comfortable bean bags, inflatable loungers, or even air mattresses for a truly luxurious,躺-down experience. Arranging these options strategically ensures everyone has a comfortable spot tailored to their preference, encouraging longer enjoyment and a truly relaxed atmosphere for your outdoor movie night.
Ambiance and Lighting: Setting the Perfect Mood
Beyond the screen, the surrounding ambiance plays a huge role in the magic of an outdoor cinema. String lights, often called fairy lights or bistro lights, are essential for creating a warm, festive, and enchanting atmosphere. Drape them elegantly around your viewing area, weave them through nearby trees, or hang them in patterns above. Complement these with lanterns and LED candles placed strategically around seating areas for a soft, inviting glow without distracting from the screen. For a touch of rustic charm, consider solar-powered pathway lights or even tiki torches (placed safely away from flammable materials). Remember to keep ambient lighting subtle enough not to interfere with the projector’s display but bright enough to allow safe navigation. Thoughtful lighting truly transforms your space into a captivating backyard entertainment zone.
Sound and Projection: Immersive Audio-Visual Excellence
A stunning visual requires equally impressive audio. Investing in a quality portable projector is fundamental. Research models based on lumens (brightness), resolution (HD or 4K), and throw distance to ensure it suits your screen size and viewing environment. For sound, portable Bluetooth speakers are an excellent choice, offering wireless convenience and powerful audio output without cumbersome cables. Strategically place multiple speakers around the seating area for a more immersive surround-sound experience. Alternatively, consider a portable soundbar for clear dialogue and robust bass. Explore reputable retailers like Outdoor Speaker Depot for top-notch wireless outdoor speakers designed for durability and superior sound quality in open-air environments. Ensuring high-quality sound and projection will captivate your audience and make every movie unforgettable.
Snacks and Refreshments: The Essential Cinematic Indulgence
No movie night, indoors or out, is truly complete without a delightful array of snacks and refreshments. Elevate your concession stand experience by setting up a dedicated station. A rolling cart or a small, charming table can serve as the perfect hub for your treats. Popcorn is a classic, so consider renting or purchasing a vintage popcorn machine for that authentic theater aroma and experience. Beyond popcorn, offer a variety of candies, chips, and perhaps some gourmet snacks like artisanal cheese and crackers or mini pizzas. For beverages, provide a cooler stocked with sodas, juices, and sparkling water. For adult gatherings, a themed cocktail or mocktail can add a special touch. Presenting these treats attractively not only adds to the festive atmosphere but also provides an interactive and enjoyable element for your guests, catering to diverse tastes and enhancing the overall outdoor movie night ideas.
Ready to transform your movie nights from ordinary to extraordinary? Dive deeper into creative ideas and expert tips that will make your outdoor cinema experience truly unforgettable and unique for every guest!
Weather Considerations: Planning for Every Forecast
When planning your DIY outdoor movie night, the weather is an undeniable factor that requires careful consideration. Always check the forecast leading up to your event. If there’s a chance of light rain or excessive dew, having a pop-up tent, gazebo, or a large tarp on standby can offer crucial protection for your projector, speakers, and guests. For cooler evenings, ensure everyone stays comfortable by providing a generous supply of blankets and throws. Portable outdoor heaters or a safely managed fire pit can also create a cozy warmth, extending the enjoyable outdoor season. In warmer months, consider setting up fans or providing personal misting bottles to combat the heat. It’s also wise to have a backup plan, such as moving the party indoors, in case of severe weather. Being prepared for varying weather conditions ensures your outdoor movie screen setup remains a resilient source of entertainment, allowing you to host memorable events year-round.
Special Touches: Crafting Unforgettable Themed Evenings
To truly differentiate your outdoor movie nights and make them uniquely memorable, infuse them with special touches and creative themes. A themed movie night can transform a simple screening into an immersive event. For example, a “Tropical Paradise” theme could involve Hawaiian leis, vibrant decorations, tropical drinks, and a surf-centric film. A “Retro Drive-In” theme might include classic cars (or blankets set up to mimic them), vintage snacks, and a black-and-white classic. For family-friendly gatherings, consider a “Superhero Headquarters” theme with costume encouragement and action-packed movies, or a “Magical Forest” theme featuring fantasy films, glow sticks, and whimsical decor. Beyond themes, think about pre-movie activities like lawn games, a DIY photo booth with props, or even a mini scavenger hunt. These personalized elements enhance the atmosphere, encourage interaction, and create deeper, more cherished memories for all your guests, solidifying your backyard cinema as a truly special venue.
Craft Your Ultimate Outdoor Cinema Experience
Creating a DIY outdoor movie screen is more than just a home improvement project; it’s an investment in countless unforgettable moments. With accessible materials and straightforward steps, you can transform your backyard into a dynamic entertainment hub where laughter echoes, friendships strengthen, and cinematic dreams come alive under a canopy of stars. Whether it’s a thrilling summer blockbuster, a cherished holiday classic, or a nostalgic family favorite, the experience of watching a film in your own personalized outdoor cinema is truly magical. It’s an opportunity to create a unique gathering space that fosters connection and joy, making every viewing party a treasured memory for years to come.
P.S. We’re eager to see the incredible outdoor movie setups you create! Share your DIY outdoor movie screen masterpieces with us and inspire fellow enthusiasts to build their own enchanting backyard cinemas!