
Elevate Your Feast: Last-Minute DIY Thanksgiving Decorations for a Memorable Gathering
Thanksgiving is a time for gratitude, family, and, of course, a bountiful feast. But what if you’re feeling a little short on time and your home isn’t quite ready for the festive occasion? Fear not! Crafting beautiful, homemade Thanksgiving decorations doesn’t have to be a multi-day affair. With just a few hours and some readily available materials, you can transform your space into a warm, inviting haven that reflects the spirit of the season. Forget about last-minute shopping for expensive home decor; instead, embrace the charm of DIY. This guide will show you how to create stunning, budget-friendly decorations that look like they took days, not hours, to prepare, proving that even eleventh-hour efforts can yield spectacular results. Get ready to impress your guests with your creativity and a touch of personal flair!
Why Embrace DIY for Your Thanksgiving Decor?
There’s an undeniable magic in homemade decorations, especially during a holiday as heartfelt as Thanksgiving. Beyond the satisfaction of creating something with your own hands, DIY decor offers a unique opportunity to infuse your personality and love into every detail of your celebration. It’s often more cost-effective than store-bought items, allowing you to allocate your budget towards other festive elements. Furthermore, crafting can be a wonderful family activity, creating cherished memories even before the guests arrive. Opting for DIY also opens up possibilities for recycling and repurposing materials you already have at home, making your celebration more sustainable and unique. These projects are designed not just to decorate your space, but to enrich your entire Thanksgiving experience, making it truly personal and unforgettable.
Quick & Easy Last-Minute Thanksgiving DIYs
When the clock is ticking and you’re dreaming of a beautifully adorned home for Thanksgiving, these three stunning projects are your secret weapon. Designed for simplicity and speed, they require minimal materials and offer maximum impact. Each project comes with clear costs, a detailed list of materials, step-by-step instructions, and important safety notes, ensuring you can jump in and create festive seasonal décor even on the tightest schedule. Transform your table, entryway, or mantelpiece with these elegant, handcrafted additions that perfectly capture the essence of autumn and gratitude.
- Craft three elegant, fast decorations that can be completed just hours before your Thanksgiving gathering, using materials easily found at home or your local craft store.
- Discover how Mason jar candle holders, rustic wood slice placemats, and shimmering gold leaf pumpkins can instantly elevate your dining table or entryway with a touch of seasonal charm.
- Benefit from clear cost breakdowns, straightforward instructions, and essential safety tips that make every project manageable and enjoyable, even when time is of the essence.
Mason Jar Candle Holders: Illuminating Your Thanksgiving Table
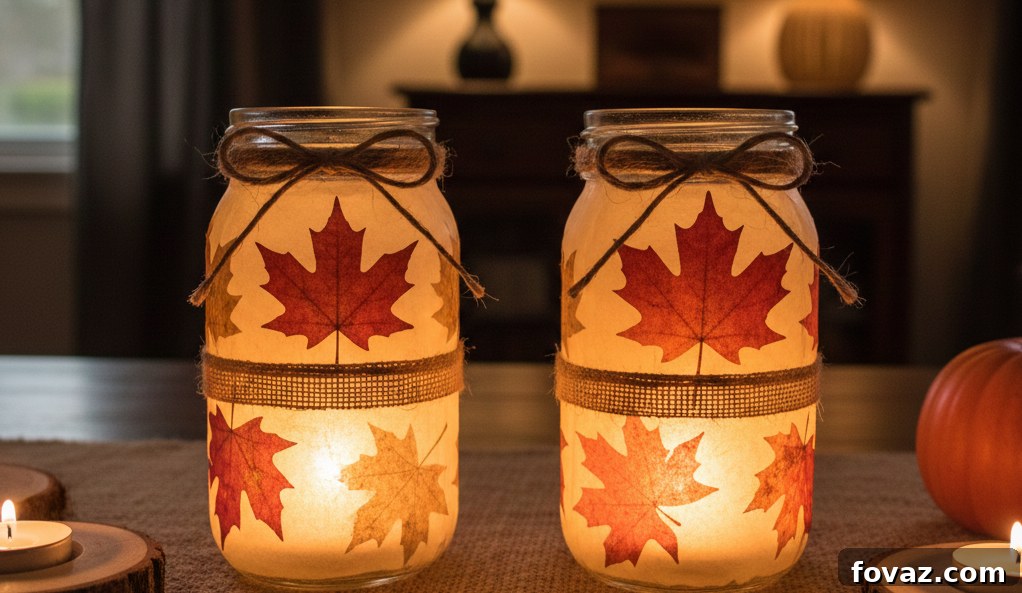
These elegant Mason jar candle holders are a simple yet sophisticated way to add a warm, inviting glow to your Thanksgiving celebration. Perfect for a cozy centerpiece or scattered throughout your home, they combine rustic charm with a touch of metallic glam. The patterned gold finish allows candlelight to softly filter through, creating an enchanting ambiance that will make your guests feel right at home. They are incredibly versatile and can be customized to match any decor style, making them a go-to for any last-minute decorator.
Cost
- Approximately $5–$12 per candle holder, depending on whether you already have jars and paint.
Materials
- Clean, empty Mason jars (various sizes can add visual interest).
- Gold spray paint or gold acrylic paint (spray paint offers a quicker, more even finish).
- Painter’s tape, adhesive stickers, or leaf stencils for creating patterns.
- Twine, burlap ribbon, or velvet ribbon for a decorative touch around the rim.
- LED tealights or small pillar candles (LEDs are safer and kid-friendly).
- Rubbing alcohol and paper towels for cleaning jars.
Steps
- Begin by thoroughly cleaning each Mason jar with warm soap and water. For best paint adhesion, wipe the exterior of each jar with rubbing alcohol and a paper towel, then allow the containers to dry completely.
- Carefully apply painter’s tape, adhesive stickers, or small stencils onto the outside surface of each jar to form your desired design. Consider stripes, polka dots, or geometric patterns. Ensure the tape is pressed down firmly to prevent paint bleeding.
- In a well-ventilated area, cover the jar exterior with gold spray paint or use a brush to apply gold acrylic paint. Apply thin, even coats, allowing brief drying times between coats if using spray paint, to avoid drips and ensure full coverage on all taped areas.
- Allow the painted jars to dry fully and cure according to the paint manufacturer’s instructions, typically for at least 30 minutes to an hour before handling. This step is crucial for a clean finish.
- Once completely dry, carefully and slowly peel off the painter’s tape or stickers to reveal the clear, unpainted patterned sections underneath. Take your time to avoid chipping the paint.
- To finish the decoration, tie twine, burlap, or a festive ribbon around the neck or rim of each jar, securing it with a knot or bow. You can also add small autumn-themed charms or faux leaves.
- Finally, place one LED tealight or a small candle inside each completed jar. If using real candles, ensure they are stable and consider using a layer of sand or small pebbles at the bottom for added stability.
Styling Tips & Variations
These candle holders are incredibly versatile. Arrange them in clusters of varying heights as a stunning Thanksgiving centerpiece on your dining table. Place them on windowsills, mantels, or shelves to cast a warm glow throughout your home. For a different look, experiment with copper or silver paint, or use fall-themed stencils like leaves or acorns. You can also fill the bottom of the jars with cranberries, small pinecones, or dried corn kernels before adding your LED tealight for an extra touch of seasonal charm. Consider wrapping them with burlap or lace for a more rustic feel.
Safety Notes
- Always use spray paint in a well-ventilated outdoor or open-air workspace to prevent inhalation of fumes. Wear a mask if necessary.
- If using real candles, keep open flames away from all flammable decor, curtains, and linens. Never leave burning candles unattended and extinguish them before leaving the room or going to bed.
- For homes with children or pets, or for decorations placed in high-traffic areas, opt for LED tealights or battery-operated candles for a safe, worry-free setup.
DIY Wood Slice Placemats: Rustic Elegance for Your Table
Add a touch of natural, rustic elegance to your Thanksgiving table with these DIY wood slice placemats. Each placemat becomes a unique foundation for your dinner plates, bringing an organic texture and warmth that perfectly complements an autumn harvest theme. The subtle gold detailing elevates them from simple wood slices to sophisticated pieces of dining decor, creating a memorable and inviting place setting for each of your guests. These placemats are not only beautiful but also durable, serving as a lasting keepsake from your special gathering.
Cost
- Expected cost is $3–$6 per pre-cut wood slice, not including paint and sealer.
Materials
- Pre-cut wood slices, ideally 10-12 inches in diameter for placemats.
- Sandpaper (120–220 grit) for smoothing the surfaces.
- Clean cloth or tack cloth for dust removal.
- Gold acrylic paint or a gold leaf paint pen for decorative edging.
- Optional: Stencils for adding designs, monograms, or festive words.
- Clear wood sealer (e.g., polycrylic, polyurethane, or a food-safe finish if food will directly touch it).
- Small brush for applying paint and sealer.
Steps
- Carefully sand the top and bottom surfaces of each wood slice using 120-grit sandpaper first to remove any rough edges or splinters, followed by 220-grit sandpaper for a smoother finish. Ensure all surfaces are soft to the touch.
- After sanding, wipe each wood slice thoroughly with a clean, slightly damp cloth or a tack cloth to remove all sanding dust and debris. Allow them to dry completely before proceeding to the next step.
- Apply gold acrylic paint with a small brush or use a gold leaf paint pen directly to the outer rim or bark edge of each wood slice. This creates a beautiful, shimmering decorative edge that highlights the natural shape.
- If you wish to add a personalized design or monogram, position your chosen stencil at the center of each slice. Secure it with painter’s tape, then apply paint carefully with a sponge or brush, ensuring clean lines. Remove the stencil while the paint is still wet.
- Once all paint is dry, brush a thin, even layer of clear wood sealer over the entire top surface of each wood slice. This step is crucial for protecting the wood from moisture, spills, and wear. Apply according to product instructions.
- Allow every placemat to dry and cure completely in a well-ventilated area before placing dishes, cutlery, or any décor on the surface. Depending on the sealer, this could take several hours or even overnight.
Styling Tips & Variations
These wood slice placemats are perfect for a rustic, farmhouse, or bohemian Thanksgiving theme. Layer them under simple white plates for a striking contrast, or pair them with earthy-toned ceramics. You can personalize them further by adding guest names with a paint pen, transforming them into unique place cards. For a centerpiece, arrange several smaller wood slices in the middle of the table, topped with candles, small pumpkins, or a vase of autumn flowers. Consider adding a felt backing to protect your table surfaces. You can also experiment with different paint colors for the rim, such as copper or a deep cranberry, to match your specific color scheme.
Safety Notes
- Always wear a dust mask and eye protection during sanding to prevent inhalation of fine wood dust and to protect your eyes from particles.
- When using wood sealer, work in a well-ventilated area, preferably outdoors, to avoid exposure to fumes. Read and follow the product’s safety instructions carefully.
- Ensure wood slices are stable on a flat, non-slip surface during sanding and painting to prevent them from moving unexpectedly and causing injury.
Gold Leaf Pumpkins: A Touch of Gilded Glamour
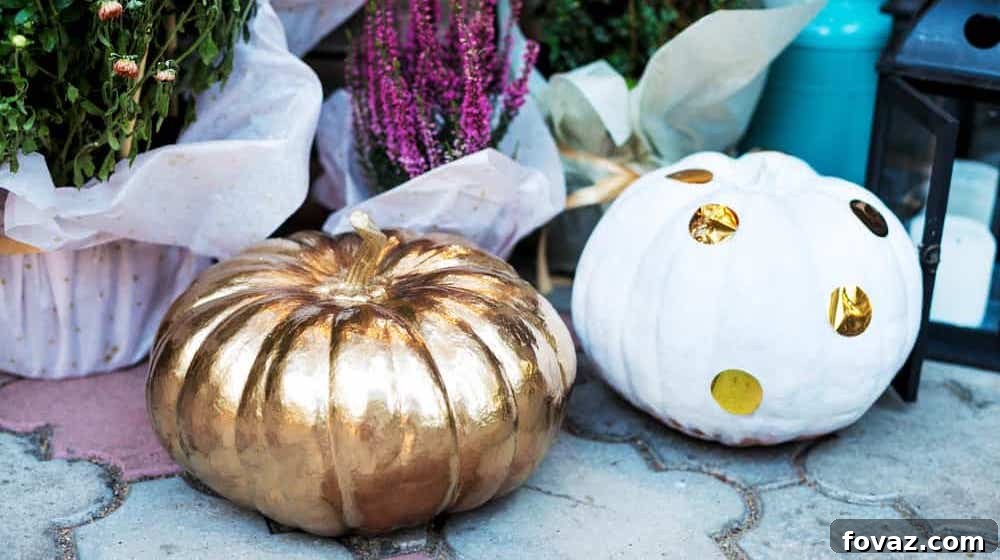
Elevate the classic autumn pumpkin with a dazzling touch of gold leaf. These shimmering pumpkins are the epitome of elegant Thanksgiving decor, adding a luxurious sparkle to any setting. Whether you choose mini pumpkins for a subtle accent or larger ones for a grand statement, the delicate gold leaf catches the light beautifully, creating a sophisticated and festive atmosphere. This project allows for endless creativity, enabling you to design unique patterns or cover entire pumpkins in a radiant metallic finish, perfect for a refined holiday display.
Cost
- An affordable project ranging from $1–$4 per pumpkin, depending on the size of the pumpkin and the type of gold leaf used.
Materials
- Mini pumpkins (real or craft foam pumpkins for reusability).
- Gold leaf sheets or flakes (sheets offer a more uniform look, flakes for an organic, distressed effect).
- Gold leaf adhesive (also known as sizing glue), specifically designed for gold leaf application.
- A soft application brush or sponge for pressing the leaf and a dry, soft brush for dusting off excess.
- Optional: Acrylic base-coat paint (white, black, or a deep jewel tone can make the gold pop).
- Damp cloth for cleaning.
- Protective clear coat sealer (optional, for added durability, especially on real pumpkins).
Steps
- Gently clean the exterior of each pumpkin with a damp cloth to remove any dust or dirt, especially important for real pumpkins. Allow the surface to dry thoroughly before proceeding.
- If desired, apply a thin, even coat of acrylic paint to each pumpkin as a base color. A white base will make the gold brighter, while a black or dark base can create a more dramatic, antiqued effect. Allow the paint to dry completely.
- Using a small brush, carefully apply gold leaf adhesive (sizing glue) onto the specific pumpkin areas you have selected for gilding. This could be the top, bottom, stem, random patches, or a specific design.
- Allow the adhesive to reach a tacky state, as indicated by the product instructions (usually 10-20 minutes). It should be sticky to the touch but not wet. This is crucial for successful gold leaf transfer.
- Once the adhesive is tacky, carefully press gold leaf sheets or flakes onto the adhesive sections. For sheets, gently lay them over the tacky area and pat down with a soft brush or your fingers. For flakes, sprinkle them on and press gently.
- Using a clean, soft, dry brush (such as a large makeup brush or a soft paintbrush), gently press the leaf into the curves and crevices of the pumpkin. Then, lightly brush away any loose excess gold leaf to reveal a clean gilded area.
- For extra durability and to protect the gold leaf from tarnishing or wear, consider applying a light protective clear coat sealer designed for gold leaf or craft projects over the gilded areas. Ensure it is applied evenly and allow to dry fully.
Styling Tips & Variations
These gilded pumpkins can be displayed individually or in groupings. Arrange them on your Thanksgiving mantelpiece alongside fall foliage, berries, and candles for a rich, opulent display. Incorporate them into your dining table centerpiece, mixing them with different sized pumpkins, gourds, and other autumn elements. For a modern twist, use white foam pumpkins and cover them entirely in gold leaf. You can also mix gold leaf with metallic spray paint for a multi-textured look, or use gold paint markers to add intricate patterns or lettering on the un-gilded sections. These also make elegant party favors for guests.
Safety Notes
- Keep gold leaf flakes, gold leaf adhesive, and any sealing products away from young children and pets, as they are not safe for consumption.
- Protect your work surfaces with newspaper, old tablecloths, or plastic sheeting, as adhesive can be very sticky and difficult to clean.
- Always wash your hands thoroughly after handling adhesives, paints, or sealing products to avoid skin irritation or accidental ingestion.
Integrating Your DIY Creations: Crafting a Cohesive Thanksgiving Aesthetic
Once your beautiful DIY Thanksgiving decorations are complete, the next step is to seamlessly integrate them into your home to create a cohesive and inviting atmosphere. Think about the overall theme you want to achieve – be it rustic farmhouse, elegant modern, or traditional autumn. Use varying heights and textures when arranging your Mason jar candle holders and gold leaf pumpkins to add visual interest. Group items in odd numbers for a more natural and pleasing look. Your wood slice placemats naturally anchor your place settings, but consider adding smaller wood slices as coasters or decorative bases for your candle holders. Remember to balance your DIY pieces with existing decor and natural elements like fresh flowers, pinecones, or colorful leaves to achieve a truly harmonious and celebratory Thanksgiving spread. The goal is to create a flow that feels effortlessly festive and deeply personal.
Final Thoughts: Embrace the Joy of Homemade
It’s never too late to infuse your Thanksgiving space with warmth, charm, and a deeply personal touch. These last-minute homemade Thanksgiving decorations prove that a little creativity and effort can go a long way in transforming your home into a festive haven. Whether you choose to craft one project or embrace all three, these DIYs are designed to beautify your table, entryway, and overall home environment. The true value lies not just in the finished product, but in the joy of creating something meaningful for your loved ones. May these ornaments add a special glow to your home and bring immense joy to everyone gathered around your table, making this Thanksgiving truly unforgettable.
Have your own favorite homemade Thanksgiving decorations or holiday projects you’d love to share? We invite you to inspire our community! Let us know your brilliant ideas in the comments section below – your creativity helps us all.