
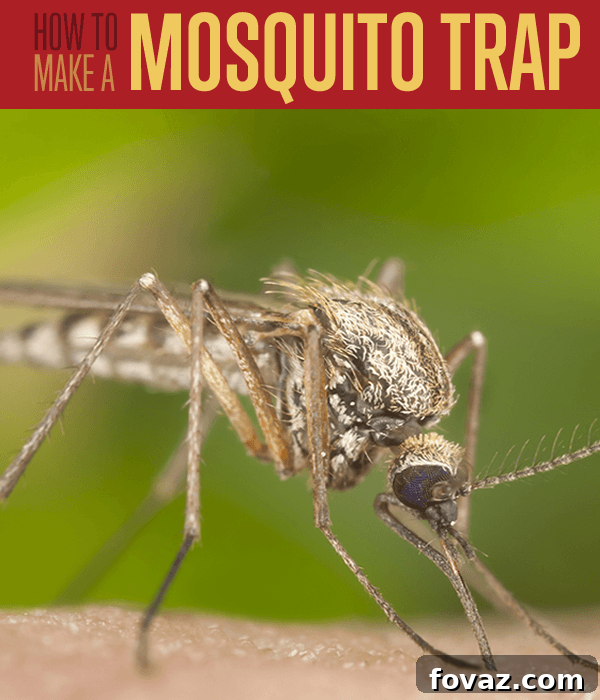
Summer is a season of joy, outdoor activities, and long, warm evenings. However, for many, the arrival of summer also heralds the unwelcome return of a notorious pest: the mosquito. These tiny bloodsuckers can quickly turn a pleasant evening into an itchy nightmare, capable of transmitting diseases like West Nile virus, Zika, and dengue fever. If you’re tired of constantly swatting away mosquitoes, dousing yourself in chemical repellents, or investing in expensive commercial solutions, you’ve come to the right place. We’re here to share a remarkably simple, cost-effective, and surprisingly effective way to create your very own homemade mosquito trap.
This ingenious DIY mosquito trap harnesses the mosquitoes’ own biology against them, luring them in and preventing their escape, all with common household items. Say goodbye to the endless buzzing and irritating bites, and reclaim your outdoor space with this eco-friendly solution.
Why Choose a DIY Mosquito Trap?
Before we dive into the creation process, let’s explore the compelling reasons why this homemade mosquito killer stands out among other mosquito control methods:
- Cost-Effective: You likely already have most of the necessary ingredients in your pantry. This trap offers a powerful solution without breaking the bank, unlike many commercial products.
- Eco-Friendly: By reusing plastic bottles, you’re giving waste a second life. Furthermore, it operates without harmful pesticides or chemicals, making it safe for your family, pets, and the environment.
- Safe & Non-Toxic: Unlike chemical sprays that can pose risks to children and pets, this trap uses natural ingredients (sugar and yeast) that are completely safe.
- Simple to Make: No specialized tools or complicated procedures are required. Anyone can assemble this trap with minimal effort.
- Proven Effectiveness: The trap works by mimicking the CO2 emitted by humans and animals, which is a primary attractant for mosquitoes. Once inside, their escape is significantly hampered.
The Science Behind the Trap: How It Works
The efficacy of this DIY mosquito trap lies in its understanding of mosquito biology. Mosquitoes are highly attuned to detecting carbon dioxide (CO2), which mammals (including humans) exhale. It’s their primary cue for locating a blood meal.
Our homemade trap brilliantly leverages this natural attraction:
- CO2 Production: The combination of warm water, brown sugar, and yeast creates a fermentation process. This process metabolizes the sugar and releases a steady stream of carbon dioxide gas.
- Irresistible Lure: As the CO2 is released from the bottle, it mimics the exhalation of a potential host, drawing nearby mosquitoes towards the trap. The warm, moist environment inside the bottle also adds to its appeal.
- One-Way Entrance: The inverted top of the plastic bottle acts as a funnel. Mosquitoes, attracted by the CO2, easily fly down into the bottle. However, once inside, navigating back up through the narrow opening to escape proves incredibly difficult for them. They become trapped, eventually succumbing to the lack of escape or drowning in the mixture.
This ingenious design creates a passive yet powerful mechanism to significantly reduce mosquito populations in your immediate outdoor vicinity.
Gathering Your Essential Materials
One of the best aspects of this homemade mosquito trap is that it requires only a handful of readily available items. Here’s what you’ll need to get started:
- 1 Plastic Soda Bottle (1.5L or 2L): A standard plastic soda or water bottle works perfectly. Ensure it’s clean and dry before you begin. The larger size provides ample space for the mixture and trap mechanism.
- 1 Bag of Brown Sugar: Brown sugar is crucial because its molasses content ferments more effectively with yeast, producing a richer CO2 output than white sugar.
- 1 Jar of Active Dry Yeast: Active dry yeast is what kickstarts the fermentation process, generating the CO2 that attracts the mosquitoes. You won’t need much for each trap.
- 1 Sharp Knife or Utility Cutter: For safely cutting the plastic bottle. Always exercise extreme caution when handling sharp objects. A box cutter or strong scissors can also work.
- 1 Measuring Cup and/or Measuring Spoons: For accurate measurement of water and sugar, ensuring the right concentration for optimal CO2 production.
- Hot Water: Essential for dissolving the brown sugar and creating the ideal environment for the yeast to activate.
- Optional: Duct Tape or Electrical Tape: To create a tighter seal between the two bottle halves and to make the trap more durable.
- Optional: Dark Paper or Cloth: To wrap around the outside of the bottle. Mosquitoes are often drawn to dark, shady areas, making the trap more appealing.
Step-by-Step Guide: Crafting Your Mosquito Eliminator
Now, let’s get down to business! Follow these detailed instructions to construct your effective mosquito trap:
Step 1: Prepare the Plastic Bottle
- Cut the plastic bottle in half. Carefully use your sharp knife or utility cutter to cut the bottle. Aim to cut it approximately one-third of the way down from the top. A clean, even cut will ensure the two halves fit together snugly later. You’ll need both the bottom section and the top section (which includes the bottle’s neck and cap area). Remember to take safety precautions when using a sharp knife.
- Remove the bottle cap. Ensure the cap is removed from the top section of the bottle; it will not be needed for the trap.
Your bottle should now consist of two main parts: a larger bottom cup and a smaller top funnel.
Step 2: Create the Attractant Mixture
- Mix 1/4 cup of brown sugar with hot water. In the bottom half of your cut plastic bottle, add 1/4 cup of brown sugar.
- Pour 400 ml (approximately 1 3/4 cups) of very hot water. Pour the hot water over the brown sugar in the bottom half of the bottle. Stir thoroughly until the brown sugar is completely dissolved. The heat helps the sugar dissolve quickly and uniformly.
- Let the mixture cool. This step is critical! Allow the sugar-water solution to cool down to a lukewarm temperature before proceeding. If the water is too hot, it will kill the yeast, rendering your trap ineffective. Aim for a temperature that feels slightly warm to the touch, similar to bathwater.
Step 3: Activate the Yeast
This is where the magic happens, as the yeast will begin producing the CO2 that attracts mosquitoes.
- Add the yeast. Once the sugar solution has cooled to lukewarm, carefully add a pinch or two of active dry yeast to the mixture. Simply sprinkle it over the surface of the liquid.
- No need to mix. It’s important NOT to stir the yeast into the solution. The yeast works best when it settles on the surface and slowly begins to ferment, creating a more sustained release of carbon dioxide. Let it sit undisturbed.
- Observe the reaction. Within a short time, you might start to see a slight fizzing or bubbling on the surface – this is the yeast activating and releasing CO2!
Step 4: Assemble the Trap
Now, it’s time to put the two halves of your bottle together to form the trapping mechanism.
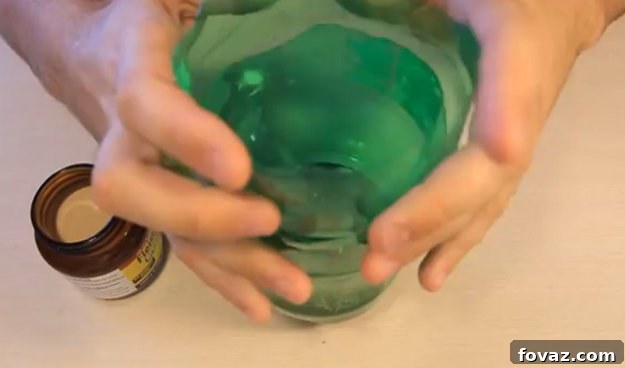
- Place the bottle top upside down. Take the top section of the plastic bottle (the funnel part) and invert it. Place it upside down, neck-first, into the bottom half of the bottle containing the sugar-yeast mixture. The mouth of the bottle’s neck should sit just above the liquid, creating a small gap for mosquitoes to enter.
- Ensure a snug fit. Make sure the edges of the inverted top fit securely into the base. If there are gaps, you can use duct tape or electrical tape to seal the seam where the two halves meet. A good seal helps to concentrate the CO2 inside the trap, making it more effective, and prevents mosquitoes from escaping through the sides.
When you’re all finished, your mosquito trap should look like this:
Optimizing Your Trap for Maximum Effectiveness
While making the trap is straightforward, its performance can be significantly boosted with a few strategic considerations:
- Strategic Placement is Key: Don’t place the trap directly where you’re sitting. Instead, place it in strategic locations around your yard where mosquitoes are known to congregate or breed. Ideal spots include:
- In shady, damp areas.
- Near standing water sources (though you should also eliminate these!).
- Under bushes or dense foliage.
- Away from strong winds, which can disperse the CO2.
- Not directly in sunlight, as it can overheat the mixture and kill the yeast.
- Dark Covering Enhances Attraction: Mosquitoes are often drawn to dark, contrasting colors and shady spots. Consider wrapping the outside of your trap with dark construction paper, a dark cloth, or painting it black. This can make the trap appear more appealing and natural to them.
- Regular Maintenance is Crucial: The yeast mixture will typically remain active for about 1 to 2 weeks, depending on temperature and yeast quality. Once the fermentation slows, the CO2 production decreases, and the trap’s effectiveness wanes.
- Check your traps every few days.
- When you notice fewer new mosquitoes, or after about two weeks, it’s time to empty the trap.
- Carefully dispose of the trapped insects and old solution.
- Wash the bottle thoroughly and prepare a fresh batch of sugar-yeast solution.
- Deploy Multiple Traps: For larger yards or areas with severe mosquito problems, a single trap might not be enough. Consider setting up several traps at different strategic points to create a broader mosquito-free zone.
Troubleshooting Common Issues
If your trap isn’t working as effectively as you’d hoped, consider these potential solutions:
- “My trap isn’t catching anything!”
- Check the yeast: Ensure it’s active dry yeast and not expired. The water temperature might have been too hot, killing the yeast. The water might have been too cold, inhibiting yeast activity.
- Review placement: Is it in a high-traffic mosquito area? Is it too windy? Is it in direct sunlight? Experiment with different locations.
- Mixture concentration: Ensure you’re using the correct proportions of sugar and water.
- “Mosquitoes are escaping!”
- Seal the edges: Use tape to create a tighter seal between the two bottle halves.
- Funnel width: Ensure the bottle’s neck creates a sufficiently narrow opening once inverted.
- “The mixture smells bad!”
- This indicates the yeast has done its job and the solution is expiring. Change the mixture regularly (every 1-2 weeks).
Beyond the Trap: Holistic Mosquito Control
While this DIY mosquito trap is highly effective, it’s best used as part of a comprehensive mosquito control strategy. Here are additional tips to keep mosquitoes at bay:
- Eliminate Standing Water: Mosquitoes breed in stagnant water. Regularly empty bird baths, pet water bowls, flowerpot saucers, and clear clogged gutters. Turn over kiddie pools and wheelbarrows.
- Maintain Your Yard: Keep grass trimmed short and prune overgrown bushes and shrubs. Mosquitoes often rest in dense vegetation during the day.
- Install or Repair Screens: Ensure all windows and doors have well-fitting screens to prevent mosquitoes from entering your home.
- Use Personal Repellents: When spending time outdoors, especially during dawn and dusk (peak mosquito hours), apply EPA-registered insect repellents containing DEET, picaridin, or oil of lemon eucalyptus.
- Consider Mosquito-Repelling Plants: Some plants like citronella, lemongrass, marigolds, and basil are thought to deter mosquitoes. Plant them around your patio or outdoor living spaces.
Embrace a Mosquito-Free Summer!
With this simple, homemade mosquito trap, you have a powerful, eco-friendly, and inexpensive tool in your arsenal against these unwelcome pests. By understanding the science behind the trap and implementing it with strategic placement and regular maintenance, you can significantly reduce the mosquito population around your home and enjoy your outdoor spaces in peace.
Don’t let mosquitoes ruin another beautiful summer evening. Give this DIY solution a try, and experience the satisfaction of a buzz-free environment. Happy trapping!