
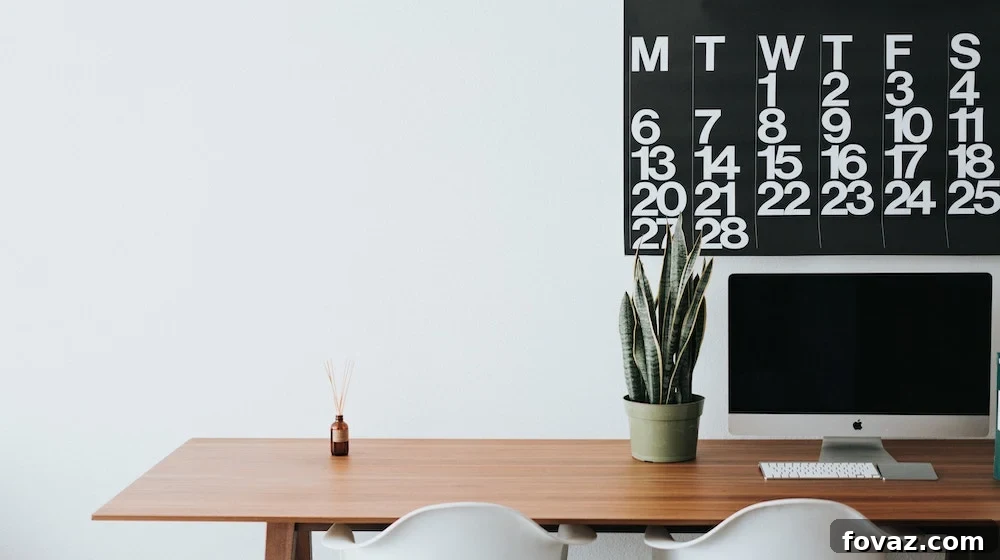
Are you constantly battling a chaotic schedule, struggling to keep track of appointments, deadlines, and personal commitments? Imagine a world where every important date is visible, easily updated, and even adds a touch of personalized charm to your space. This comprehensive guide will show you how to create your very own DIY chalkboard wall calendar, a simple yet powerful tool that will revolutionize how you manage your time and stay on top of everything.
Create Your Own DIY Chalkboard Wall Calendar: The Ultimate Guide to Staying Organized
In our fast-paced lives, forgetting a crucial meeting or missing a loved one’s birthday can be all too common. Paper calendars get lost, digital reminders sometimes get dismissed, but a giant, unmissable chalkboard wall calendar? That’s your new secret weapon for staying focused and incredibly organized. Say goodbye to forgotten errands, missed recitals, or overdue tasks. This project is not just about making a calendar; it’s about reclaiming control of your schedule, enhancing your workspace’s aesthetics, and boosting your overall productivity. Ready to transform your space and your routine? Let’s dive in!
Why a DIY Chalkboard Wall Calendar is Your Secret Weapon for Productivity
Beyond simply noting down dates, a custom chalkboard wall calendar offers a myriad of benefits that elevate it from a simple organizational tool to an indispensable part of your daily routine and home decor. It’s an investment in your peace of mind and efficiency.
Master Your Schedule Like Never Before
Unlike a small planner tucked away in a drawer, a wall-mounted chalkboard calendar provides an expansive, always-visible overview of your entire month or week. This constant visual reminder empowers you to proactively plan, allocate time effectively, and anticipate upcoming events. You’ll move from reactively scrambling to proactively managing your time, making it easier to juggle work, family, and personal commitments without feeling overwhelmed. It’s a proactive approach to time management that puts you firmly in the driver’s seat.
Aesthetic Appeal Meets Practical Functionality
Who says organization has to be boring? A chalkboard wall calendar adds a unique, rustic-chic, or modern industrial touch to any room. It’s a statement piece that’s both stylish and incredibly functional. You can customize its size, design, and even the “font” you use with chalk, making it a truly personal addition to your home office, kitchen, or even a child’s playroom for their activities. It’s a creative outlet that results in a beautiful, practical installation.
Budget-Friendly & Infinitely Customizable
Forget expensive store-bought planners or bulky whiteboards that don’t quite fit your space or aesthetic. A DIY chalkboard calendar is remarkably cost-effective, utilizing common materials you might already have or can easily acquire. The true beauty lies in its customizability. You dictate the dimensions, the layout, the grid style, and even the color of your “calendar.” This allows you to tailor it precisely to your specific needs, whether you need large daily squares, a dedicated notes section, or a meal planning area. This level of personalization is simply unmatched by off-the-shelf solutions.
Boost Focus and Reduce Stress
When your schedule is clear and visible, your mind is clearer too. The act of writing down tasks and seeing your week laid out can significantly reduce mental clutter and the anxiety that often accompanies a packed, disorganized schedule. It helps you prioritize, focus on one task at a time, and provides a satisfying sense of accomplishment as you physically check off items. This visual aid fosters better time management habits and a more mindful approach to your daily responsibilities, ultimately leading to a more focused and less stressed you.
Learning how to maximize your workspace is about more than just clearing clutter; it’s about creating an environment that supports your goals. This DIY project is a perfect example of intelligent space utilization.
Gathering Your Materials: What You’ll Need for This Project
Before you embark on your creative journey, gathering all the necessary tools and materials will ensure a smooth and enjoyable DIY experience. Most of these items are readily available at hardware stores, craft shops, or online retailers.
- Frogtape or High-Quality Masking Tape: Essential for creating crisp, clean lines. Frogtape is particularly recommended for its paint-blocking technology that helps prevent bleed-through, ensuring sharp edges for your calendar grid.
- Tape Measure: Accuracy is paramount for a professional-looking calendar. A reliable tape measure will be your best friend for precise measurements.
- Pencil: For initial marking of your grid lines before applying tape. A light pencil mark can be easily erased or covered by paint.
- Chalkboard Latex Paint: The star of the show! Choose a high-quality brand for the best results. While classic black is popular, chalkboard paint is also available in various shades of gray, green, and even custom-tintable options. Ensure you get enough for multiple coats, as recommended by the manufacturer.
- Small Foam Roller with Tray: Foam rollers are ideal for achieving a smooth, even finish with chalkboard paint, minimizing brush strokes and bubbles. A small size (e.g., 4-inch) works well for wall projects.
- Chalk: Of course! Stock up on a variety of colors if you plan on color-coding your entries. Consider dustless chalk for less mess, or liquid chalk markers for bolder, more permanent-looking entries (though these can be harder to remove entirely).
- Drop Cloth or Newspaper: To protect your floors and furniture from paint drips and spills.
- Cleaning Supplies: A damp cloth or sponge for cleaning the wall surface before painting.
- Level (Optional but Recommended): For ensuring your horizontal and vertical lines are perfectly straight, giving your calendar a polished look.
- Fine-Grit Sandpaper (Optional): If your wall surface isn’t perfectly smooth, a light sanding can help the paint adhere better and provide a more uniform finish.
Step-by-Step Guide: How to Create Your Custom Chalkboard Wall Calendar
Creating your chalkboard calendar is a rewarding process that combines careful planning with satisfying execution. Follow these steps for a professional and durable result.
Step 1: Strategic Planning & Precise Measurement
The success of your DIY chalkboard calendar hinges on thorough planning. First, identify the ideal location in your home or office. Consider factors like visibility, natural light, and ample wall space. Once you’ve chosen your spot, it’s time to measure. Determine the overall dimensions of your calendar, then meticulously calculate the spacing for each day, week, and month. Don’t forget to factor in a margin around the edges and potentially a dedicated section for notes, goals, or a key for your color-coding system. It’s immensely helpful to sketch out your entire calendar design on paper first, noting down all measurements. This blueprint will be your guide.
Step 2: Precision Taping for Crisp Lines
With your measurements in hand, it’s time to mark your grid on the wall. Instead of drawing full lines that might be visible through the paint, use your tape measure and a pencil to make small, light dots at regular intervals where your grid lines will be. For example, mark dots every few inches along where a vertical or horizontal tape line will run. Once all your dots are marked, carefully apply your Frogtape or masking tape, connecting these dots to form your calendar grid. Press down firmly along the entire length of the tape to create a tight seal, which is crucial for preventing paint bleed. Using a level during this step will ensure your lines are perfectly straight and your calendar looks professional.
Step 3: Applying Chalkboard Paint Like a Pro
Before you begin painting, lay down your drop cloth to protect your floors. Stir your chalkboard paint thoroughly. Using your foam roller, apply the first thin, even coat of paint within the taped-off areas. Resist the urge to apply a thick coat, as this can lead to drips and an uneven finish. Allow this first coat to dry completely according to the manufacturer’s instructions (typically 1-2 hours). Once dry, apply a second coat, and then a third. Most chalkboard paints require at least three thin coats to achieve a durable, uniform, and truly “chalkboard-like” surface. Patience is key during the drying phases between coats.
Step 4: The Reveal – Peeling Back the Tape
This is the exciting part! Ensure the final coat of paint is completely dry to the touch before you begin. Depending on humidity and paint type, this could take several hours, or even overnight. Once fully dry, carefully and slowly peel off all the tape. Pull the tape at a sharp angle away from the freshly painted surface. This technique helps ensure clean, crisp lines and minimizes the risk of pulling up any dried paint. If you notice any minor bleeding, small touch-ups can be done carefully with a fine-tipped brush and a small amount of your wall’s original paint color or the chalkboard paint.
Step 5: Seasoning Your Chalkboard (Crucial for Longevity!)
This is a vital, often overlooked step that protects your new chalkboard surface and prevents “ghosting” or permanent marks. Before you write anything on your calendar, you need to “season” it. Take a piece of chalk (any color) and lay it on its side. Rub the entire surface of your freshly painted chalkboard with the side of the chalk. Cover every inch thoroughly. Once the entire surface is covered with a light layer of chalk dust, erase it completely with a dry cloth or chalkboard eraser. This process fills in the microscopic pores of the chalkboard paint, making it ready for use and ensuring your future writings can be fully erased without leaving faint impressions.
Step 6: Populate Your Calendar & Get Organized
Your beautiful, easy, and inexpensive wall calendar is now ready for action! Grab your chalk and start filling it up. This is where your personalization truly shines. We highly suggest using colored chalk to implement a color-coding system. For instance, blue for work appointments, green for personal errands, red for important deadlines, and yellow for family events or birthdays. This visual categorization makes keeping track of your schedule a whole lot easier and more intuitive. Consider using stencils for permanent headings like “Monday,” “Tuesday,” or month names, or even for decorative elements to enhance your calendar’s appeal. Don’t forget to add your personal trips, holidays, and celebrations!
There it is! Your easy DIY chalkboard wall calendar, ready to streamline your life!
Do you want to see a step-by-step tutorial from InspirationsPaint in action? Check out this helpful video for a visual guide:
Maximizing Your DIY Chalkboard Wall Calendar for Peak Productivity
Now that you’ve created your personalized organizational masterpiece, let’s explore how to get the most out of it and integrate it seamlessly into your daily routine.
Beyond the Basics: Advanced Tips for Organization
- Weekly Planning Ritual: Dedicate 15-30 minutes at the start of each week to update your calendar. Transfer digital appointments, brainstorm upcoming tasks, and set priorities for the days ahead. This ritual solidifies your commitment to organization.
- Dedicated Sections: Beyond just dates, consider adding permanent sections to your calendar for things like “Weekly Goals,” “Shopping List,” “Meal Plan,” “Long-term Projects,” or “Inspiration/Quotes.” This centralizes all your important information.
- Legend/Key: If you’re using extensive color-coding, a small permanent key on the side of your calendar (or a separate smaller chalkboard) can be a useful reminder of what each color signifies.
- Hybrid Approach: Your chalkboard calendar doesn’t have to replace digital tools entirely. Use it as the “master view” for broad strokes and major events, while digital calendars can handle specific meeting details, alarms, and shared schedules.
Maintenance and Care for Your Chalkboard Calendar
To keep your chalkboard looking pristine and functioning perfectly for years to come, a little care goes a long way:
- Regular Cleaning: For daily or weekly erasing, a standard chalkboard eraser or a dry microfiber cloth works best.
- Deep Cleaning: Periodically, you may want to deep clean the surface to remove lingering chalk residue. Use a damp (not soaking wet) cloth with a small amount of mild soap and water, or a specialized chalkboard cleaner. Always test in an inconspicuous area first. Avoid harsh chemicals, as they can damage the paint finish.
- Re-seasoning: If your chalkboard starts to show signs of “ghosting” again after a deep clean, simply re-season it by rubbing chalk over the entire surface and erasing it.
Transform Your Workspace Today!
You’ve now got the knowledge and tools to create a truly transformative addition to your home or office. A DIY chalkboard wall calendar isn’t just a clever craft project; it’s a strategic investment in your time management, mental clarity, and personal productivity. Imagine the satisfaction of glancing at your wall and seeing a perfectly organized, aesthetically pleasing representation of your life, entirely created by your own hands. This project empowers you to take control, ensuring you never miss a deadline, an appointment, or a precious memory again.
Come on, you know making your own chalkboard office wall calendar is just what you need to keep track of your schedule — whether personal or professional. Embrace this creative way to stay organized and productive!
Do you have other awesome workspace ideas that will keep you on top of things? We’d love to hear from you in the comments section below! Share your insights and inspire others!
If you’re planning to add some more flair and functionality to your home office, then check out these 6 Cool Home Office Ideas for further inspiration!
Stay connected with us on Facebook, Twitter, Pinterest and Instagram for more inspiring DIY projects and tips!
Featured image via PBTeen