
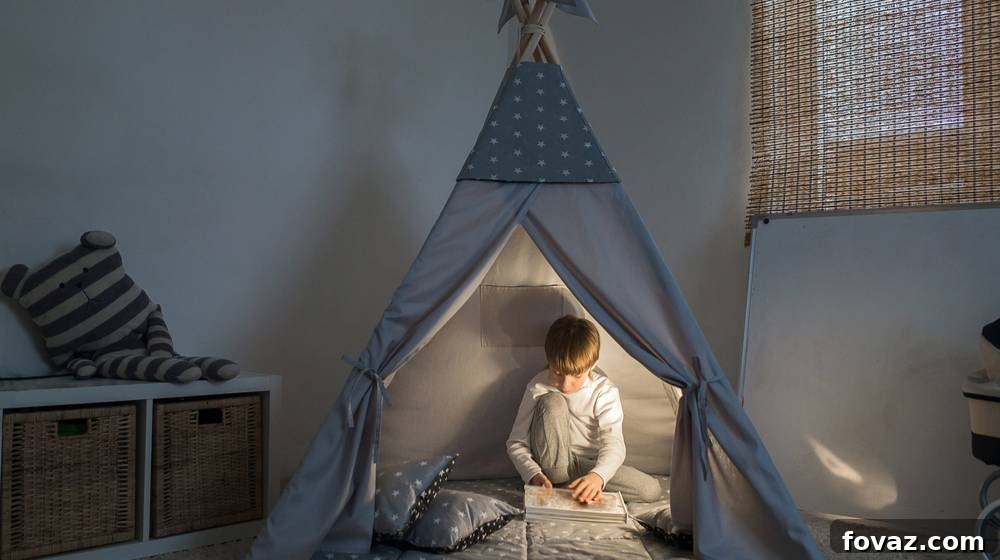
In a world increasingly dominated by screens, fostering a love for imaginative play and outdoor adventure in our children is more important than ever. What better way to spark their creativity and provide a personal sanctuary than with their very own teepee tent? While the idea of a DIY project, especially one involving fabric, might conjure images of complicated sewing patterns, we’re here to share a delightful secret: crafting a charming, sturdy teepee for your little one is incredibly simple, and yes, entirely achievable without a sewing machine!
The current climate, with its emphasis on staying cozy within our homes, presents the perfect opportunity to embark on a memorable DIY project for your kids. This isn’t just about building a tent; it’s about creating lasting memories as you involve them in every fun, easy step. Imagine the joy on their faces as they help construct their new favorite play space, a unique hideaway that reflects your shared effort and love.
You’ll be pleasantly surprised not only by how straightforward this no-sew teepee tent is to make but also by its affordability compared to store-bought alternatives. By following this comprehensive tutorial, your child will soon be enjoying countless hours of imaginative play, nestled within their very own custom-built haven. Get ready to transform your living room or backyard into a magical realm of adventure and comfort!
Create a Magical Haven: The Ultimate No-Sew DIY Teepee Tent for Kids
Every child dreams of a secret hideaway, a special place where adventures unfold and imaginations run wild. A DIY teepee tent isn’t just a play structure; it’s a launchpad for creativity, a cozy reading nook, and a personal sanctuary all rolled into one. This guide will walk you through building a beautiful, sturdy, and entirely no-sew teepee, perfect for both indoor escapades and outdoor fun. Say goodbye to complicated stitches and hello to simple, rewarding craftsmanship!
Why a DIY Teepee Tent is a Must-Have for Your Child
- Unleashes Imagination: A teepee becomes a castle, a space rocket, an explorer’s base, or a cozy home for stuffed animals. It’s a blank canvas for endless scenarios.
- Encourages Independence: Having a personal space empowers children, giving them a sense of ownership and a quiet corner for reflection or focused play.
- Promotes Outdoor Play: When placed in the backyard, a teepee transforms into a camping adventure, encouraging connection with nature and fresh air.
- Boosts Creativity and Problem-Solving: Involving your child in the building process teaches them about materials, structure, and following instructions.
- Cost-Effective and Customizable: Building your own teepee is significantly cheaper than buying one, and you have complete control over its style, colors, and decorations.
- Screen-Free Entertainment: Offers an engaging alternative to digital devices, promoting active and imaginative engagement.
Materials Needed to Craft Your No-Sew Teepee Tent
Before diving into construction, gather all your supplies. Opting for quality materials ensures a durable and safe play space for your child. Remember, the beauty of DIY lies in making it your own, so feel free to choose colors and patterns that spark joy!
- Four Sturdy Poles: Choose bamboo, wooden dowels, or even sturdy tree branches (birch is excellent) at least 5-6 feet long and roughly 1 inch in diameter for good stability. These can often be found at local hardware stores, craft shops, or even collected responsibly from nature. Ensure they are smooth and free of splinters.
- Durable Rope or Jute Twine: You’ll need about 10-15 feet of strong rope or jute twine. Natural fibers like jute or cotton provide a rustic, appealing look while offering excellent strength for securing the poles.
- Generous Fabric: Approximately 2.5 to 3 yards of fabric will be sufficient for a standard teepee. Ideal choices include sturdy canvas, a heavyweight cotton blend, or even repurposed flat bed sheets. Consider the fabric’s durability, washability, and how it will drape. Fun patterns or vibrant solid colors can make your teepee truly unique.
- Comfortable Playmat or Base: A soft rug, a thick blanket, or interlocking foam playmats will serve as the base inside the teepee, providing comfort and defining the play area.
- Optional but Recommended:
- Drill with a suitable bit (for drilling holes in poles).
- Hot glue gun and glue sticks (for extra stability, especially for the base).
- Sandpaper (to smooth any rough edges on wooden poles).
- Fabric scissors (for cutting your chosen fabric).
- Decorative elements: fairy lights (battery-operated for safety!), cushions, pillows, stuffed animals, ribbons, fabric paint, banners.
Step 1: Gather Your Supplies and Prepare Your Poles
Your crafting adventure begins with a thorough collection of materials. Lay everything out to ensure you have what you need. When selecting your poles, prioritize length and strength. Five to six feet is generally ideal for a toddler-friendly teepee, allowing enough headroom for comfortable play. If using wooden dowels or branches, give them a quick sanding to remove any splinters or rough patches that could harm little hands or snag the fabric.
For the fabric, consider using an old, clean flat sheet if you’re on a tight budget – it’s an excellent way to upcycle! Otherwise, a durable fabric like duck canvas or a heavy cotton blend from a fabric store works wonderfully and will withstand years of play. The cost for these materials can be surprisingly low, especially if you get creative with repurposed items around your home. With all your components ready, you’re set to move to the structural phase!
Step 2: Constructing the Sturdy Teepee Frame
This crucial step ensures the stability of your teepee, so don’t hesitate to enlist an extra pair of hands – perhaps your spouse, an older child, or a friend! Teamwork makes the dream work, especially when assembling the frame.
Carefully measure and drill a small hole through each of the four poles, approximately 6 to 8 inches from one end. Ensure the holes are large enough for your rope or twine to pass through easily. Once all holes are drilled, thread your rope through them, connecting all four poles at the top. This initial threading creates a basic connection.
Now, bring the poles together and form a bundle. Begin wrapping the rope tightly around the point where the poles intersect. Use a criss-cross or figure-eight pattern to create a strong, secure bond. Continue wrapping until the poles feel firmly connected and show no signs of slipping. Tie a robust knot to secure the rope. Once the top is secure, gently spread the bottom ends of the poles outwards, creating a stable, tent-like foundation. Adjust the spacing until the teepee stands balanced and sturdy. A wide base is key for preventing wobbles during enthusiastic play.
Step 3: Establishing the Base and Securing the Teepee’s Position
Whether your teepee is destined for indoor adventures or sunny backyard explorations, ensuring a stable base is paramount for your child’s safety and comfort. Once your pole frame is standing, position it over a soft playmat, rug, or several blankets. This not only provides a comfortable floor for play but also helps to anchor the teepee and protect your flooring.
Don’t fret if the footing of the tent seems slightly uneven initially. You can easily stabilize it. For added security, especially on slippery surfaces or outdoors where wind might be a factor, consider applying a dab of hot glue to the bottom of each pole where it meets the ground cover. Non-slip pads under each pole can also work wonders. Since kids are naturally energetic and prone to wiggling, a rock-solid foundation is non-negotiable. We want to eliminate any possibility of the teepee collapsing, ensuring a safe and secure play environment for your little adventurer.
Step 4: Draping the Fabric and Crafting the Entrance
With a stable frame in place, it’s time to give your teepee its cozy covering. Remember the fabric you selected in Step 1? This is where it shines! If you’re using an old sheet, ensure it’s clean and large enough. Drape the fabric over the top of the pole structure, letting it fall naturally down the sides. It’s wise to use a piece of fabric that’s generously sized, as the circumference at the bottom of the teepee will be much wider than at the top.
Carefully make small slits or holes in the fabric at the points where it makes contact with each of the four poles, roughly halfway down or closer to the base. Use your extra rope or twine to securely tie the fabric to the poles through these holes. This prevents the fabric from shifting or sliding down. For a neat and welcoming entrance, leave one section of the teepee fabric-free or create an opening. You can elegantly wrap the fabric edges around the two front poles and tie them back to keep the entrance open. This not only offers a cleaner aesthetic but also prevents your child from accidentally pulling the fabric down during enthusiastic play – we know how excited they can get with new toys!
This is also a fantastic opportunity to put any unused patterned sheets or fabric scraps to good use. Opting for cute patterns or bright colors will instantly give the teepee a more inviting and playful look, truly transforming it into a magical space.
Step 5: Adding the Magical Finishing Touches and Personalizing the Space
Your no-sew teepee tent is now structurally complete, but the real magic happens with the decorations! This is where you can infuse personality and comfort, making it truly your child’s own private sanctuary. Start by layering the inside with soft cushions, plush pillows, and a cozy small blanket. These elements invite snuggles and make the teepee an irresistible spot for quiet time or imaginative play.
Fill the interior with your child’s favorite companions: beloved stuffed animals, a selection of engaging children’s books, and perhaps even a small toy set like a pretend cooking kit or building blocks. Watch as their eyes light up, ready to dive into hours of creative fun. For a truly enchanting ambiance, consider adding battery-operated fairy lights draped around the poles or tucked along the fabric seams – they create a warm, magical glow, perfect for bedtime stories.
Don’t forget the exterior! Ribbons, fabric garlands, handmade banners, or delicate faux flower decor can be tied or glued to the poles and fabric, enhancing its visual appeal. If you’re feeling extra adventurous, you can even attach some faux feathers to the top for a more traditional and authentic teepee look. For a full outdoor experience, bring in toys like a pretend camping bonfire or small gardening tools. Remember, the possibilities are endless for customization. Want a bigger teepee for shared adventures or afternoon naps with your little one? Simply use longer, sturdier poles and a larger piece of fabric!
Safety First: Important Considerations for Your DIY Teepee
- Constant Supervision: Always supervise young children while they are playing in or around the teepee, especially until they are familiar with their new play space.
- Secure Construction: Double-check that all poles are tightly bound at the top and spread wide enough at the base to prevent tipping. Regular checks for stability are recommended.
- Smooth Edges: Ensure all wooden poles are sanded smooth to prevent splinters.
- Non-Toxic Materials: If painting or decorating the fabric, use child-safe, non-toxic paints and adhesives.
- Appropriate Decor: Avoid small items or string-like decorations that could pose a choking or strangulation hazard for very young children. Opt for battery-operated lights over electrical cords.
- Ventilation: While a teepee provides an enclosed space, ensure adequate ventilation, especially if using a heavier fabric or placing it outdoors on a warm day.
The Priceless Benefits of Imaginative Play
In an age dominated by digital entertainment, encouraging your child to engage in hands-on, imaginative play is incredibly valuable. A DIY teepee offers a unique retreat where they can disconnect from screens and truly immerse themselves in a world of their own making. This personal space fosters independence, encourages creativity, and provides a quiet haven for reading, reflection, or simply dreaming. The joy of having their very own special nook is immeasurable, creating cherished childhood memories that will last a lifetime.
This project is more than just building a tent; it’s about investing in your child’s development, creativity, and happiness. Good luck, parents – your DIY spirit is about to create something truly magical!
RELATED: 12 Fun DIY Teepee Ideas for Kids
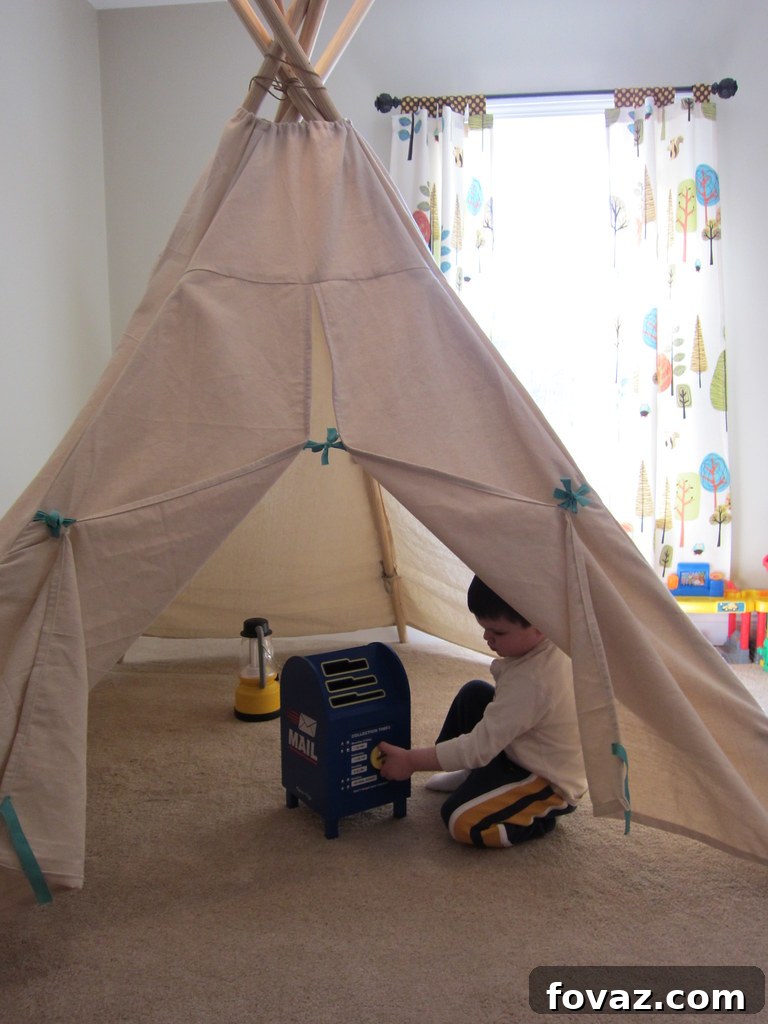
Here’s a quick visual guide on how to assemble a teepee tent for further inspiration:
The importance of allowing your child to explore and play in their own personal space during their formative years cannot be overstated. In an era where smartphones and digital games often take center stage, presenting them with a tangible, imaginative play space like a DIY teepee is a gift they will genuinely treasure and enjoy for years to come.
The sheer delight of having a personal haven is priceless, fostering a sense of security and belonging that children will fondly remember as they grow up. So, roll up your sleeves, gather your materials, and embark on this wonderful crafting journey. Happy building, parents!
Want more fantastic DIY projects like this to spark joy and creativity? Let us know! Pin your favorite DIY projects to Pinterest, and make sure to like us on Facebook to get regular updates on all the fun, new projects we’re working on!
UP NEXT:
- DIY Toy Storage Box You Can Make With Your Kids
- Ingeniously Easy DIY Projects To Entertain Kids
- DIY Fabric Dog Collar | How To Make A Dog Collar
Calling all crafting DIYhards, DIY Projects needs YOU! Click here if you’re interested in contributing your own creative ideas and tutorials.
Don’t forget to stay connected with us on Facebook, Twitter, and Instagram for daily doses of inspiration and project updates!