

Imagine a perfect evening: the air is crisp, the stars are out, and you’re gathered around a crackling fire with your closest friends and family. Perhaps there’s a cool drink in one hand and the enticing aroma of barbecue in the other. This idyllic scene truly comes to life with the perfect fire pit—one that’s simple, efficient, and exactly what you envisioned for your outdoor haven. Forget flashy or extravagant designs; sometimes, the best solution is a straightforward yet incredibly rewarding DIY project. This guide will walk you through creating an amazing stone fire pit that fits seamlessly into any backyard setting.
Build Your Own Outdoor Oasis: An Easy DIY Stone Fire Pit Project Guide
Unlike many fire pit designs that demand heavy concrete or other expensive, cumbersome materials, this DIY stone fire pit is designed for accessibility and simplicity. It’s constructed primarily from readily available bricks, stacked and secured with adhesive, making it an ideal project for even novice DIY enthusiasts. The beauty of this approach lies in its flexibility; you can easily customize its dimensions—whether height, diameter, or even shape—to perfectly match your personal taste and backyard aesthetic. Let’s dive into the materials you’ll need and the straightforward steps to construct your very own impressive stone fire pit.
Essential Supplies for Your DIY Stone Fire Pit Project
Before you begin, gather these key materials:
- Bricks: Approximately 36 pieces of 4″ x 11.2″ Ashland Flagstone bricks are recommended for a standard size. However, feel free to choose fire-rated landscaping blocks or pavers that complement your garden’s style. Ensure they are suitable for high-heat environments.
- Paver Sand: Two bags (0.5 cu. ft. each) will provide a stable and level base for your fire pit. This sand helps with drainage and ensures a solid foundation.
- Lava Rock: Two bags (0.5 cu. ft. each) are ideal for the fire pit bed. Lava rock is excellent for heat retention and provides an attractive, safe base for your fires. Alternatively, you can use other types of fireproof aggregate.
- Concrete Adhesive and Caulk Gun: You’ll need two tubes of high-temperature concrete adhesive, applied with a standard caulk gun, to secure the brick layers together. This ensures stability and durability.
Tools You’ll Need for Construction
These basic tools will help you efficiently complete your project:
- Spade Shovel: Essential for digging and removing sod, as well as spreading and leveling sand.
- Level: A crucial tool for ensuring your base and each subsequent brick layer are perfectly flat and even, preventing an unstable or crooked fire pit.
Step-by-Step Guide: Building Your Stone Fire Pit
1. Prepare Your Site: Removing Sod for a Solid Foundation
The first and most important step is selecting the perfect location for your fire pit, ensuring it’s a safe distance from any flammable structures, overhanging branches, or dry vegetation. Once you’ve chosen your spot, define the footprint of your fire pit. A simple way to do this is to place the first ring of bricks directly on the ground in your desired circular (or other) shape. Carefully trace around the outer and inner edges of this brick ring using a shovel or spray paint.
Once you have a clear outline, move the bricks aside. Using your spade shovel, begin to remove the sod and soil within the traced area. Dig down to a depth of approximately 2 inches. This depth is critical as it will accommodate a compact layer of paver sand, which serves as a crucial leveling agent and a solid, permeable base for your fire pit structure. Ensure the excavated area is as flat and uniform as possible before moving to the next step.
Palm Springs Outdoor/Patio Stone Coal/Wood Burner Fire Pit
Looking for ready-made options? Explore similar patio stone fire pits for instant warmth and ambiance.
View Product on Amazon
2. Laying the Foundation: Spreading and Leveling Paver Sand
With your site excavated, it’s time to create a truly stable base. Carefully empty your bags of paver sand into the dug-out area. Spread the sand evenly across the entire surface. The goal here is to achieve a consistent depth of about 2 inches, ensuring a firm and level foundation for your bricks.
Once the sand is spread, use a rake or the flat side of your shovel to gently pat down and compact the sand. This process removes air pockets and further solidifies the base. After compaction, grab your level and meticulously check the entire sand surface. Adjust any high or low spots by adding or removing sand until the entire area is perfectly flat and level. A perfectly level base is paramount for a sturdy and aesthetically pleasing fire pit.
3. Building the Walls: Laying the First Layer of Bricks
Now, the exciting part begins! Carefully position your first layer of bricks around the perimeter of your prepared sand base. Start with one brick and work your way around, ensuring each brick touches the next, creating a snug and continuous ring. Use your level to check the top surface of these bricks to confirm they are still perfectly horizontal. Minor adjustments can be made by tapping the bricks gently with a rubber mallet or adding a tiny bit of sand underneath.
Before proceeding to the second layer, apply a generous bead of high-temperature concrete adhesive to the top surface of each brick in the first layer. This adhesive acts as the mortar, binding the bricks together and significantly enhancing the structural integrity of your fire pit. Be sure to apply the adhesive close to the edges and in the middle of each brick for maximum adhesion.
Sun Joe SJFP35-STN Cast Stone Base, Wood Burning Fire Pit W/Dome Screen & Poker
This ideal outdoor centerpiece features a durable cast stone base and a large fire bowl. It’s perfect for warmth and enjoyment.
- Ideal outdoor centerpiece for warmth and enjoyment
- Durable cast stone base adds a sophisticated touch to any outdoor décor
- Large 29 in. (73.8 cm) fire bowl accommodates hardwood logs up to 21.5 in. (54.6 cm) long
- Mosquito-safe tip: add sage, Lemon balm, or Citronella leaves to your fire pit to help repel mosquitos
- No wood burning fire pits should be used on a wood deck
Buy on Amazon
4. Continue Building: Adding Subsequent Layers of Bricks
Once the adhesive is applied to the first layer, carefully place the second layer of bricks on top. For added stability and a professional look, it’s recommended to “stagger” the bricks. This means placing each brick in the second layer so that it bridges the joint between two bricks in the layer below, much like traditional bricklaying. This interlocking pattern significantly increases the strength and stability of your fire pit walls.
After completing the second layer, repeat the process: apply concrete adhesive to the top surface of each brick before setting the third layer. In this particular project, the top row was intentionally offset from the first two rows. This creates a slightly different visual appeal and can allow for better heat dispersion from the lower sections. This is where your creativity comes into play! Feel free to experiment with different brick placements, heights, or even adding a decorative capstone to the top layer to truly personalize your DIY stone fire pit. Always ensure each layer is level as you build upwards.
5. Adding the Fuel Bed: Lava Rocks for Heat and Aesthetics
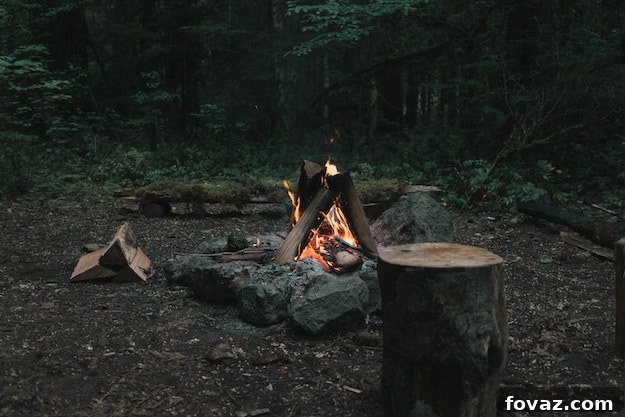
With the brick structure complete and the adhesive curing, the final step in construction is to prepare the fuel bed. Carefully empty your bags of lava rock (or your chosen fireproof aggregate) into the center of the fire pit, spreading them evenly across the sand base. The lava rock serves multiple purposes: it helps retain and radiate heat, provides excellent drainage, and creates a clean, attractive surface for your fires. Ensure the rocks are spread evenly to facilitate proper airflow and a consistent burn.
And just like that, you’ve completed a robust, attractive, and functional DIY stone fire pit for your outdoors! Allow the adhesive sufficient time to fully cure according to the manufacturer’s instructions before lighting your first fire. This ensures maximum durability and safety.
Best Choice Products Home Outdoor Patio Natural Stone Gas Fire Pit for Backyard, Garden – Multicolor
For those who prefer the convenience of gas, this natural stone gas fire pit offers a beautiful alternative.
Buy on Amazon
Customization Ideas for Your Stone Fire Pit
While the basic design is incredibly effective, don’t hesitate to make your fire pit truly unique. Consider varying the height by adding more brick layers for a more prominent feature. You could also experiment with different brick colors or textures. For a more sophisticated look, add a decorative stone capstone to the top layer. This not only enhances aesthetics but can also provide a convenient ledge. Think about integrating built-in seating around the fire pit, or even a small surrounding gravel path to define the space and prevent grass encroachment.
Fire Pit Safety Guidelines
Safety is paramount when enjoying your fire pit. Always ensure your fire pit is located on a level, non-combustible surface, far away from any structures, fences, or low-hanging tree branches. Never leave a fire unattended, and always have a fire extinguisher, a bucket of water, or a garden hose readily accessible. Be mindful of wind conditions; strong winds can carry embers and pose a significant fire risk. Supervise children and pets closely, and ensure the fire is completely extinguished before leaving the area. Regularly inspect your fire pit for any damage or instability.
And You’re Done! Enjoy Your Custom Fire Pit!
For a visual walkthrough of this project, you can watch the full video tutorial from Gilroy Vlogs:
Now, you possess a stunning fire pit that promises to keep you warm on chilly evenings and perfectly melt your marshmallows for delicious s’mores. This DIY project is remarkably achievable for beginners, requiring only a few readily available tools and supplies. The sense of accomplishment you’ll feel from building your own outdoor feature is incredibly satisfying, not to mention the countless memorable moments it will host. Investing a little time and effort now will yield years of outdoor enjoyment and create a truly inviting focal point in your backyard.
Looking for more ideas? Click here for a different version of a DIY fire pit you can also easily create, expanding your options for outdoor warmth.
You’ll Also Like These Inspiring Outdoor Fire Ideas…
10 Unique DIY Fire Pit Ideas To Amaze Your Guests
10 DIY Outdoor Fireplace Ideas to Combat the Winter Chill
27 Hottest Fire Pit Ideas and Designs
Featured Image from Old World Garden Farms
Best Choice Products® Elegant 29″ Outdoor Patio Firepit w/ Iron Fire Bowl, Stone Base, & Mesh Cover
An elegant option featuring an iron fire bowl, stone base, and mesh cover for added safety and style.
- Heat resistant iron fire bowl
- Log grill
- Poker/hook tool
- Weight: 85 lbs
- Overall dimensions: 28.5″(W) x 28″(D) x 22.5″(H) (screen included)
Buy on Amazon