
There’s an undeniable charm and comfort associated with cast iron cooking, a culinary tradition often passed down through generations. A while back, I shared an article exploring the joys of cooking with cast iron, and during the lively discussion that followed, I found myself reminiscing about my beloved grandmother’s homemade biscuit recipe. The very thought conjured images of her well-seasoned, decades-old cast iron skillet, effortlessly producing batch after batch of golden, fluffy perfection. It was a staple of my childhood, a taste of pure nostalgia.
To my surprise and delight, an overwhelming number of you reached out, eager to get your hands on Nana’s secret recipe. This, however, presented a unique challenge. Nana, like many seasoned home cooks, operates on instinct, guided by touch, feel, and intuition. Her measurements were a delightful but elusive language of “a pinch,” “a dash,” and “a handful” – quantities that, while perfectly clear to her, required a translator for the rest of us! Deciphering the exact amounts needed to achieve that ideal dough texture, the one she instinctively knows, was no easy feat.
Determined to unlock this culinary treasure, I spent countless hours with her in the kitchen, observing, learning, and finally, making them alongside her for the first time since I was a small boy. It was a truly heartwarming experience, bridging years with the simple act of baking. What astonished me most was how incredibly simple these biscuits were to make, despite their profound impact on my childhood memories. The recipe, a testament to her timeless wisdom, is now yours to discover below. A gentle word of advice, though: take these measurements with a grain of salt (pun absolutely intended!). Baking is an art, and you might find yourself needing to slightly adjust the amounts to perfectly match your flour, buttermilk, and environment, ultimately achieving that signature consistency.
Nana’s Classic Cast Iron Drop Biscuits: A Timeless Recipe for Fluffy Perfection
Nana’s Irresistible Homemade Biscuit Recipe: Your Guide to Cast Iron Perfection
There’s nothing quite like a warm, freshly baked biscuit, especially when it carries the comforting legacy of a family recipe. Nana’s drop biscuits, prepared in a trusty cast iron skillet, are a testament to simple ingredients yielding extraordinary results. This recipe is designed to be approachable for bakers of all skill levels, delivering a fluffy interior and a delightfully crispy exterior every time.
Ingredients You’ll Need:
- 2 Cups All-Purpose Flour: The foundation of our biscuits. While some prefer specific biscuit flours, all-purpose works beautifully here, providing a tender crumb.
- 2 Cups Buttermilk: Essential for its tangy flavor and its reaction with baking powder, which creates that wonderful rise. If you don’t have buttermilk, you can make a substitute by adding 1 tablespoon of lemon juice or white vinegar to regular milk and letting it sit for 5-10 minutes until it slightly curdles.
- 1 Teaspoon Salt: Crucial for enhancing the overall flavor profile of the biscuits and balancing the richness.
- 2 Teaspoons Baking Powder: The primary leavening agent that gives these biscuits their signature lift and airy texture. Do not skip this!
- 2-3 Tablespoons Oil/Grease: This is where the magic happens in the cast iron skillet. You’ll need enough to generously coat the bottom of the pan and lightly fry the dough.
Essential Equipment:
- A Well-Seasoned Cast Iron Skillet: The star of this recipe! Its ability to retain and distribute heat evenly is paramount for achieving perfectly golden, crispy bottoms. Any size from 8 to 12 inches will work, just adjust the number of biscuits accordingly.
- Large Mixing Bowl
- Measuring Cups and Spoons
- Spatula or Spoon for mixing
Detailed Directions for Perfect Drop Biscuits:
Following these steps carefully will ensure your biscuits are just as delicious and comforting as Nana used to make.
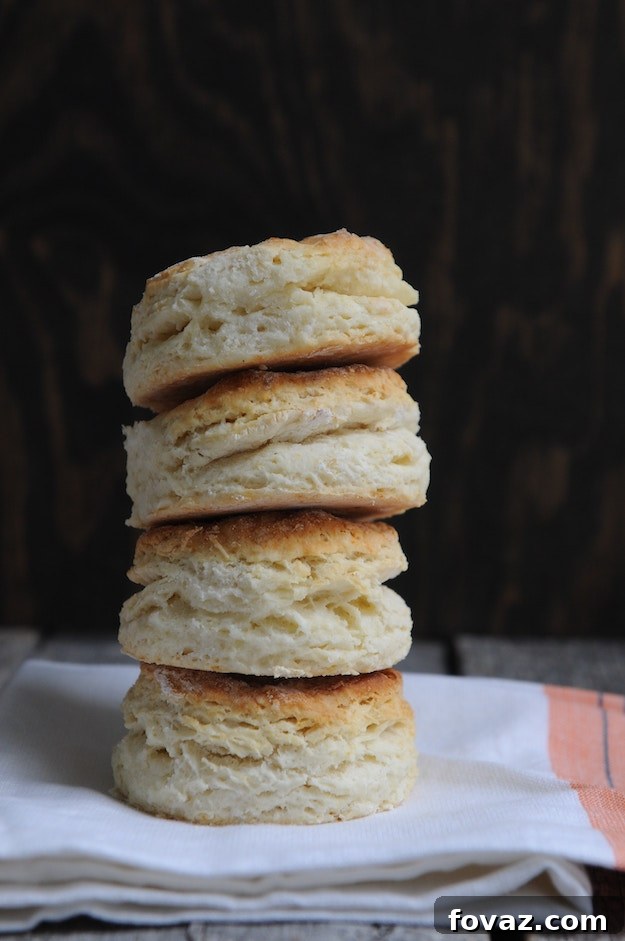
Step 1: Prepare Your Oven and Skillet for Optimal Baking
Begin by preheating your oven to a robust 425 degrees Fahrenheit (220 degrees Celsius). This high temperature is crucial for encouraging the biscuits to rise quickly and achieve a beautiful golden crust. As the oven preheats, place your empty cast iron skillet on a medium-high burner on your stovetop. Add 2-3 tablespoons of oil or grease to the skillet. Nana’s secret for an unparalleled depth of flavor is to use leftover bacon or sausage grease. This imparts a wonderfully savory note that store-bought oils simply can’t replicate. If you don’t have rendered grease, vegetable oil, lard, or shortening will also work. You want enough fat to fully coat the bottom of the skillet with a shallow layer, essentially creating a perfect bed for the biscuits to lightly fry in. Let the skillet heat until the grease is shimmering but not smoking. A properly heated skillet is fundamental for the crispy bottom texture that distinguishes these cast iron biscuits.
Step 2: Combine Your Dry Ingredients for Even Distribution
In a large mixing bowl, combine all of your dry ingredients: the 2 cups of all-purpose flour, 1 teaspoon of salt, and crucially, 2 teaspoons of baking powder. Ensure these ingredients are thoroughly mixed together. You can use a whisk or a fork to combine them well, making sure there are no lumps of baking powder. This step is more important than it might seem; an even distribution of baking powder is what guarantees that all your biscuits will rise uniformly and achieve that desired light, fluffy texture. Forgetting the baking powder, or not mixing it in properly, is a common pitfall that will result in flat, dense biscuits – they’ll still taste good, but they won’t have the characteristic fluffiness we’re aiming for.
Step 3: Incorporate Buttermilk and Achieve the Perfect Dough Consistency
Now, it’s time to add the buttermilk to your dry mixture. Pour approximately half of the 2 cups of buttermilk into the bowl and begin to mix it gently with a spoon or spatula. The key here is not to add all the buttermilk at once. You’re aiming for a specific dough consistency: it should be soft, sticky, and just thick enough to cling to your spoon, requiring a deliberate shake to dislodge it. If the dough is too thin and runs off your spoon easily, much like pancake batter, it means you’ve added too much buttermilk. Don’t panic! Simply add a little more flour, a tablespoon at a time, mixing gently until the desired consistency is achieved. Conversely, if the dough is too stiff and crumbly, add a splash more buttermilk. Remember, overmixing at this stage can lead to tough biscuits because it develops the gluten in the flour. Mix just enough until the ingredients are combined and no dry streaks of flour remain.
Important note for this step: Reconfirm that your cast iron skillet is very hot on the stovetop. This is absolutely critical! If the skillet isn’t hot enough when the dough is added, the biscuits won’t “set” quickly, and instead of developing a crispy bottom and rising beautifully, you’ll end up with a pan of glorified bread, lacking the distinctive biscuit texture. The sizzle you hear when the dough hits the hot grease is exactly what you want!
Step 4: Master the Art of Dropping Your Biscuits
With your perfectly textured dough and scorching hot skillet ready, it’s time to form your biscuits. Take a generous dollop of dough – think an overfilled tablespoon, or about a quarter cup – and prepare to “drop” it into the skillet. Nana, with her years of wisdom, doesn’t actually drop them from a height, as this can cause the hot grease to splatter dangerously. Instead, the technique involves gently sliding the dough off your spoon. Use your index finger to carefully push the dough off the spoon directly into the hot grease, laying it down with precision. You should immediately hear a satisfying sizzle as the dough makes contact with the hot oil, indicating that your skillet is at the perfect temperature.
After placing the first biscuit, wait a few seconds before adding the next. This brief pause allows the bottom of the first biscuit to begin crisping up and helps prevent the biscuits from melding together too much during cooking, making them easier to separate later. Depending on the size of your cast iron skillet and how generously you portion your dough, you should be able to make anywhere between 5 and 9 biscuits in a single batch. Arrange them evenly in the skillet, leaving a little space between each one for even baking.
Step 5: Baking to Golden Perfection and Removing Promptly
Once your cast iron skillet is filled with beautifully dolloped biscuit dough, carefully transfer it from the stovetop directly into your preheated 425-degree Fahrenheit oven. Bake the biscuits for approximately 15-20 minutes, or until their tops achieve a gorgeous golden brown color. Keep a close eye on them, as oven temperatures can vary. The golden hue signifies that they are fully cooked through and have developed that desirable slightly crispy crust on top.
As soon as the biscuits reach this perfect golden state, promptly remove the skillet from the oven. This next step is crucial: you need to immediately remove the biscuits from the hot cast iron skillet to halt the cooking process. A cast iron skillet retains heat incredibly well, and leaving the biscuits in the pan will cause their bottoms to continue cooking and potentially burn. If you properly greased your cast iron skillet in Step 1, the biscuits should release easily. Simply invert the skillet over a plate, and they should gently slide right out. If any stick, a quick scrape with a spatula should free them without issue. Transfer them to a wire rack for a moment if you wish, to prevent any residual steaming on the bottom, though they are best enjoyed straight away!
Step 6: The Best Part – Deciding How to Savor Your Masterpiece
Congratulations, you’ve just baked a batch of Nana’s legendary cast iron biscuits! Now comes the most delightful decision: how to enjoy them. The possibilities are truly endless, catering to both savory and sweet cravings. My personal favorite way to indulge is to immediately grab that trusty cast iron skillet (after the biscuits are out, of course!) and whip up a quick batch of homemade sausage gravy, generously seasoned with extra black pepper. The rich, creamy gravy spooned over warm, fluffy biscuits is a breakfast, brunch, or even dinner classic that’s simply unbeatable.
Alternatively, for a sweeter treat, nothing beats slathering a fresh-from-the-oven biscuit with a generous dollop of softened butter and a spoonful of Nana’s homemade canned grape jelly. The combination of warm, tender biscuit, creamy butter, and tangy-sweet jelly is pure comfort. But don’t limit yourself! These versatile biscuits are also incredible with honey, apple butter, fried chicken, or even split and used as a base for a mini breakfast sandwich. Share them with loved ones, or keep them all to yourself – either way, savor every bite of this homemade goodness.
Tips for Biscuit Success:
- Don’t Overmix: Overmixing develops gluten, which leads to tough biscuits. Mix just until the ingredients are combined.
- Hot Skillet is Key: Seriously, this cannot be stressed enough. A very hot skillet ensures a quick rise and a crispy bottom.
- Adjust for Your Environment: Humidity and altitude can affect baking. Don’t be afraid to slightly adjust flour or buttermilk amounts to get the right consistency.
- Fresh Ingredients: Ensure your baking powder is fresh for optimal leavening.
Variations to Try:
- Cheesy Biscuits: Fold in 1/2 cup of shredded cheddar cheese with the dry ingredients.
- Herb Biscuits: Add 1-2 teaspoons of fresh chopped chives, parsley, or rosemary.
- Sweet Biscuits: A pinch of cinnamon and a tablespoon of sugar can be added to the dry ingredients for a slightly sweet version.
Do you have a cherished homemade biscuit recipe passed down through your family, or a unique twist on this classic? I’d absolutely love to hear about it! Tell us all about your culinary adventures, your grandmother’s secrets, or your favorite biscuit pairings in the comments section below. Your insights and experiences enrich our cooking community!
Loved This Recipe? Stay Connected for More!
If you enjoyed diving into Nana’s classic biscuit recipe and are keen for more culinary inspiration, DIY projects, and helpful tips, make sure to stay connected with us across our social media platforms. Your engagement helps us create more content you’ll love!
- Like Us on Facebook: Be among the first to know about our latest project updates, new articles, and engaging discussions by giving our page a like. You won’t want to miss out on fresh content!
- Pin It for Later & Follow on Pinterest: Don’t let this delicious recipe get lost! Pin it to your favorite recipe board so you can easily come back to it whenever the biscuit craving strikes. While you’re there, follow us on Pinterest to get all our latest project pins, from home improvement to tasty treats.
- Share Your Thoughts in the Comments: Your feedback is invaluable to us. Let us know what you think of Nana’s recipe, any modifications you made, or what you’d like to see next. The more interest and engagement we receive on posts, the more likely we are to create similar content in the future!
This article was originally posted on Survival Life, sharing practical skills and timeless wisdom. To read the original article, click here.