
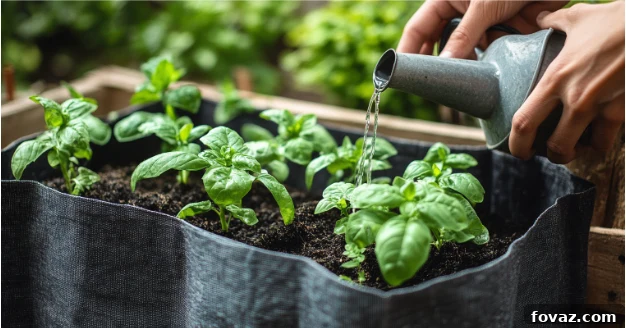
Transforming even the tiniest corner into a vibrant oasis is not just a dream for gardening enthusiasts; it’s an achievable reality with a DIY vertical garden. Whether you’re a seasoned green thumb or just beginning your gardening journey, the concept of growing upward rather than outward offers unparalleled opportunities. Imagine fresh herbs just steps from your kitchen, a burst of colorful flowers adorning your balcony, or crisp vegetables flourishing on a once-blank wall. A vertical garden liberates you from the need for a sprawling backyard, making urban gardening accessible and immensely rewarding. It’s a clever solution for maximizing limited space, enhancing your home’s aesthetic appeal, and bringing the tranquility of nature closer to you.
Unlocking the Potential: Why DIY Vertical Gardens Excel in Small Spaces
In an era where living spaces are often compact, a DIY vertical garden emerges as an ingenious solution to cultivate plants without sacrificing valuable floor real estate. This makes it an absolute game-changer for apartment dwellers, townhouse residents, and even those looking to introduce greenery into indoor environments. Beyond the obvious space-saving advantages, vertical gardens contribute significantly to your living quality. They act as natural air purifiers, filtering toxins and improving oxygen levels, thereby creating a healthier indoor atmosphere. Moreover, they inject life, color, and texture into otherwise dull or underutilized spaces, transforming them into inviting focal points.
The beauty of DIY vertical gardening lies in its incredible versatility. There’s a myriad of approaches to creating a vertical garden that perfectly aligns with your specific space constraints, budgetary considerations, and personal style preferences. You can embrace sustainability by repurposing everyday household items, giving them a new lease on life as plant holders, or you can opt for readily available, simple planters designed for vertical arrangements. Both avenues typically require minimal upfront effort and investment but promise substantial, eye-catching results. Even if you consider yourself a novice gardener, the concepts are straightforward, empowering anyone to embark on this rewarding project.
For additional inspiration and creative designs, explore The Spruce’s comprehensive guide to vertical gardening, which offers a wealth of innovative ideas to spark your creativity.
Creative & Accessible DIY Vertical Garden Ideas for Every Home
Are you eager to cultivate a thriving garden but find yourself limited by space? These inventive, budget-friendly DIY vertical garden concepts are designed to help you grow a lush array of plants without consuming precious floor or ground area. Each idea offers a unique way to transform neglected spaces into vibrant green sanctuaries.
1. The Lush Hanging Planter Wall
A hanging planter wall is an exceptional method to convert an otherwise barren surface—be it a balcony railing, a sturdy fence, an interior wall, or even the side of a shed—into a captivating vertical landscape. This design not only maximizes planting space but also organizes your greenery beautifully, making maintenance a breeze. It’s a fantastic way to introduce architectural interest and a living piece of art to your surroundings.
What You’ll Need:
- Wall Hooks or Brackets: Ensure these are robust enough to support the weight of your chosen pots, soil, and plants, especially after watering.
- Small Pots with Drainage Holes: Essential for preventing waterlogging and root rot. Consider a variety of sizes and materials to add visual interest.
- Zip Ties, S-Hooks, or Metal Hooks: For securely attaching the pots to your chosen grid, frame, or direct mounting system.
- High-Quality Potting Soil and Your Choice of Plants: Select a lightweight, well-draining soil mix suitable for containers.
- Optional: A lattice, metal grid, or wooden pallet as a base structure for hanging multiple pots.
Setting Up Your Hanging Planter Wall:
Begin by securely attaching your chosen mounting system (hooks, brackets, or a grid) to the wall. If using a grid or pallet, position it firmly against the surface. Fill your pots with potting soil, leaving about an inch of space from the rim. Plant your selected herbs, flowers, or small vegetables. Once planted, attach the filled pots to the grid or individual hooks, ensuring they are stable and evenly spaced. Strategically position your hanging planter wall in a location that receives appropriate sunlight for your chosen plants. To create a dynamic and visually appealing display, mix trailing plants like ivy, sweet potato vine, or petunias with more upright growers such as basil, rosemary, or various types of lettuce. This contrast adds depth and texture to your vertical garden.
2. Repurposed Shoe Organizer Garden
For an incredibly practical, affordable, and space-efficient DIY vertical garden, look no further than a fabric shoe organizer. The multiple pockets of these organizers are perfectly sized to accommodate individual plants, making them an ideal solution for even the most cramped spaces, whether indoors or outdoors.
How to Set It Up:
- Choose the Right Organizer: Opt for a sturdy, breathable fabric shoe organizer, preferably one made from felt or a similar material that allows for some air circulation and moisture evaporation. Avoid plastic-lined ones unless you plan to add extensive drainage holes yourself.
- Prepare for Drainage: If your organizer doesn’t have existing drainage holes, use a sharp pair of scissors or a utility knife to create small slits at the bottom of each pocket. Adequate drainage is crucial to prevent water from pooling and causing root rot.
- Fill Each Pocket with Potting Soil: Use a lightweight, nutrient-rich potting mix. Fill each pocket almost to the top, leaving a small space for your plants.
- Plant Your Selections: These pockets are perfect for a variety of small plants. Consider planting popular herbs like mint, parsley, chives, and oregano. Strawberries, cherry tomatoes, leafy greens such as lettuce and spinach, or small flowering plants like pansies and violas also thrive in this setup.
- Hang Securely: Use strong, reliable hooks to hang the filled organizer on a sturdy surface. A door, a fence, or a wall in a sunny spot on your balcony or patio are all excellent choices. Ensure the hooks can bear the considerable weight of the soil and plants, especially after watering.
Since each pocket functions as an individual planter, you gain remarkable flexibility. This allows you to easily rearrange plants based on their growth, light requirements, or simply to refresh the aesthetic of your garden. It also helps in isolating any potential pest issues to a single pocket, making management simpler.
Discover more ingenious gardening solutions and maximize your growing potential with Better Homes & Gardens’ comprehensive small-space gardening guide.
3. Robust Stacked Wooden Crates Garden
Stacked wooden crates offer a fantastic, rustic, and highly versatile foundation for a DIY vertical garden. They naturally create a tiered, stair-step design that not only looks appealing but is also highly functional, ensuring that plants on different levels receive adequate sunlight and air circulation. This type of setup is particularly well-suited for patios, decks, or any outdoor space where you desire a substantial, yet mobile, garden feature.
How to Build It:
- Select Sturdy Wooden Crates: Source robust wooden crates that can withstand outdoor elements. Wine crates, old fruit crates, or purpose-built decorative crates work well. Ensure they are free from splinters and treated for outdoor use if possible. Consider giving them a coat of weather-resistant paint or sealant for longevity.
- Arrange Them in a Staggered or Tiered Formation: Experiment with different stacking patterns. A pyramid-like structure, an offset staggered arrangement, or even a simple two-tier stack can be effective. Think about how sunlight will hit each level.
- Secure Them with Screws or Brackets: For safety and stability, it’s crucial to secure the crates to each other. Use wood screws to join adjacent crates or L-brackets for added reinforcement. This prevents them from toppling over, especially when filled with soil and plants.
- Line (Optional but Recommended): For better soil retention and to protect the wood from moisture, consider lining the inside of each crate with a landscape fabric or heavy-duty plastic sheeting. Poke drainage holes in the lining.
- Fill Each Section with Soil and Plants: Use a quality potting mix. Plant a diverse selection of herbs, flowers, or vegetables that can thrive in the volume provided by the crates.
This method offers easy access to all your plants, making watering, harvesting, and general care straightforward. If you value flexibility, consider using modular crates that can be easily rearranged. This allows you to adjust the layout according to seasonal planting changes, plant growth, or simply to refresh your garden’s design. The natural aesthetic of wood also blends seamlessly with many outdoor decors.
4. The Upcycled Pallet Garden
Wooden pallets, often found for free or at a low cost, can be ingeniously transformed into a charming and highly functional vertical garden. This sustainable approach is perfect for adding rustic appeal to any outdoor space.
How to Create a Pallet Garden:
- Source a Pallet: Look for heat-treated (HT stamped) pallets, as chemically treated (MB stamped) ones can leach harmful chemicals. Ensure it’s clean and in good condition.
- Prepare the Pallet: Sand down any rough spots or splinters. You might want to paint or stain it for aesthetics and weather protection.
- Create Planting Pockets: Orient the pallet vertically. The natural slats create pockets. To hold soil, you’ll need to create bottoms for these pockets. Staple landscape fabric or heavy-duty plastic sheeting along the bottom and sides of the “pockets” formed by the slats. Ensure good drainage by puncturing holes in the fabric/plastic.
- Fill and Plant: Fill the pockets with a quality potting mix. Plant herbs, shallow-rooted vegetables, or annual flowers. Position trailing plants at the top to cascade down.
- Secure It: Lean the pallet securely against a wall or fence, or attach it using strong brackets to prevent it from falling.
Pallet gardens are fantastic for creating a visually rich green wall, perfect for disguising an unsightly fence or adding greenery to a plain wall.
5. Innovative Gutter Garden
Repurposing old rain gutters into a vertical garden is a brilliant way to create tiered planting spaces, especially for edibles like lettuce and strawberries.
Building Your Gutter Garden:
- Gather Materials: You’ll need sections of rain gutters (new or old), end caps for each section, strong mounting brackets, and screws.
- Drill Drainage Holes: Before mounting, drill several small drainage holes along the bottom of each gutter section to prevent waterlogging.
- Install End Caps: Securely attach end caps to both ends of each gutter section.
- Mount the Gutters: Attach mounting brackets to a wall, fence, or a wooden frame. Space them evenly and ensure they are level. Attach the gutter sections to the brackets. You can stagger them or line them up directly.
- Fill and Plant: Fill the gutters with potting mix. They are ideal for shallow-rooted plants such as various types of lettuce, spinach, radishes, small herbs, and strawberries.
Gutter gardens offer excellent drainage and can be arranged in various patterns to suit your space and plant requirements.
Selecting the Ideal Plants for Your DIY Vertical Garden
While the concept of vertical gardening is incredibly flexible, not all plants are equally suited to this elevated environment. Optimal plant selection is crucial for a thriving vertical garden. The best choices are typically compact varieties with shallow root systems, as these will adapt more readily to containers and limited soil volume, making ongoing care significantly simpler.
Top Choices for Vertical Gardens:
- Herbs: These are consistently excellent performers in vertical setups due to their compact size and frequent harvesting needs.
- Basil: A staple for culinary use, thrives with ample sunlight.
- Mint: Grows vigorously and is best kept in its own pocket to prevent spreading.
- Thyme: Low-growing and drought-tolerant, perfect for sunny spots.
- Parsley: Both flat-leaf and curly varieties do well, preferring partial shade.
- Oregano, Rosemary, Chives: All are excellent choices that are relatively low-maintenance.
- Vegetables: Focus on compact, bush, or determinate varieties that don’t require extensive space or heavy support.
- Lettuce & Leafy Greens: Varieties like romaine, butterhead, spinach, and Swiss chard are perfect for continuous harvesting.
- Cherry Tomatoes: Opt for “bush” or “patio” varieties that are naturally smaller and produce abundant fruit.
- Radishes: Quick-growing and require minimal depth.
- Peppers: Bell peppers and chili peppers (especially smaller varieties) can do well if given enough sun.
- Strawberries: Trailing varieties are ideal for cascading from upper pockets or levels.
- Flowers: Brighten your vertical garden with colorful blooms that attract pollinators.
- Petunias: Known for their vibrant colors and trailing habit.
- Marigolds: Easy to grow, come in cheerful colors, and can deter some pests.
- Pansies & Violas: Perfect for cooler seasons, adding delicate beauty.
- Nasturtiums: Edible flowers and leaves, plus they have a trailing growth habit.
- Impatiens & Begonias: Excellent for shadier vertical garden spots.
- Succulents: Exceptionally low-maintenance and ideal for a minimalist, modern aesthetic, especially for indoor vertical gardens or very sunny, dry spots.
- Aloe Vera: Both decorative and useful.
- Echeveria: Forms beautiful rosettes.
- Jade Plants: Hardy and sculptural.
- Sedum: Many varieties offer diverse textures and colors.
Given that these plants are generally compact and have less demanding root systems, they adapt naturally and thrive in the confines of a vertical setup. Their relatively low-maintenance requirements also make them perfect for beginners, ensuring a higher chance of gardening success and enjoyment.
Essential Tips for Maintaining a Thriving DIY Vertical Garden
Ensuring your vertical garden remains lush, healthy, and productive throughout the season requires a consistent and thoughtful approach to care. Small adjustments and diligent practices can significantly simplify watering, sunlight management, and overall upkeep, making your gardening experience more enjoyable and successful.
- Water Consistently, but Avoid Excess Moisture: Vertical gardens, by their very nature, often have smaller soil volumes and increased exposure to air and sun, causing them to dry out much faster than traditional ground-level gardens.
- Frequency: Check soil moisture daily, especially during hot, windy weather. Water when the top inch of soil feels dry.
- Methods: Hand watering is effective for smaller setups. For larger installations, consider implementing a drip irrigation system, which delivers water directly to the plant roots, minimizing waste. Self-watering containers are another excellent option, offering a reservoir that provides a steady supply of moisture.
- Drainage: Always ensure your containers have adequate drainage holes to prevent waterlogging, which can lead to root rot.
- Ensure Proper Sunlight Exposure: Light is a fundamental requirement for plant growth, and different plants have varying needs.
- Assess Your Location: Observe how many hours of direct sunlight your vertical garden receives throughout the day.
- Plant Placement: Group plants with similar light requirements together. Sun-loving plants (e.g., most vegetables, petunias) should be placed in the brightest spots, while shade-tolerant plants (e.g., leafy greens, impatiens) should be positioned in areas with partial shade or indirect light.
- Rotation & Supplementation: If some plants aren’t getting enough light, rotate their position periodically. For indoor vertical gardens or areas with insufficient natural light, consider supplementing with artificial grow lights.
- Use Nutrient-Rich, Well-Draining Soil: The foundation of healthy plant growth is good soil.
- Potting Mix: Always use a high-quality, lightweight potting mix designed for containers. This type of soil offers excellent drainage and aeration, which are crucial for preventing compacted soil and promoting healthy root development.
- Nutrients: Since container plants deplete nutrients faster, opt for a potting mix that includes a slow-release fertilizer or supplement with organic compost to provide a steady supply of essential nutrients.
- Replenish: Over time, soil nutrients will diminish. Consider refreshing the top layer of soil annually or incorporating liquid fertilizers regularly.
- Trim and Prune Plants Regularly: Regular maintenance through trimming and pruning is vital for plant health and productivity.
- Encourage Growth: Pruning encourages bushier growth, more blooms, and higher yields, especially for herbs and vegetables. Remove spent flowers to encourage new blooms (deadheading).
- Prevent Overgrowth: Trimming keeps plants from becoming leggy or overcrowding their neighbors, which can restrict air circulation and light.
- Pest & Disease Prevention: Remove any yellowing, diseased, or dead leaves promptly to prevent the spread of pests and diseases.
- Implement Natural Pest Control: Vertical gardens can still attract pests, but proactive and natural measures can keep them at bay.
- Regular Inspection: Inspect your plants frequently for signs of pests or disease. Early detection is key.
- Manual Removal: For small infestations, physically remove pests (e.g., handpicking caterpillars, wiping off aphids with a damp cloth).
- Natural Sprays: Use neem oil spray or insecticidal soap as natural deterrents.
- Companion Planting: Plant specific herbs or flowers known for their pest-repelling properties, such as marigolds or nasturtiums.
- Fertilize Consistently: As vertical gardens use limited soil volume, nutrients are quickly used up.
- Choose Wisely: Use a balanced liquid fertilizer or an organic slow-release granular fertilizer specifically formulated for container plants.
- Follow Instructions: Always adhere to the product’s recommendations for dilution and frequency, typically every two to four weeks during the growing season. Over-fertilizing can harm plants.
Embark on Your Vertical Gardening Adventure!
A DIY vertical garden represents more than just a clever space-saving hack; it’s an invitation to embrace gardening, regardless of your living situation. From the simplistic elegance of hanging planters to the rustic charm of stacked crates or the innovative repurposing of shoe organizers, the possibilities are vast and wonderfully achievable. By cultivating plants upwards, you’re not just growing fresh produce or beautiful blooms; you’re creating a living, breathing extension of your home, enhancing its beauty, and benefiting from cleaner air and the therapeutic joy of nurturing life. Say goodbye to the notion that you need a sprawling backyard to enjoy the bounty of a garden—your perfect green space awaits, vertically!
Have you ventured into the world of DIY vertical gardening? We’d love to hear about your experiences, challenges, and successes. Share your story and tips in the comments below!
Frequently Asked Questions (FAQs) About DIY Vertical Gardens
1. Can I create a DIY vertical garden indoors?
Absolutely! Many plants thrive indoors in a vertical setup. Popular choices include various herbs (like basil, mint, chives), ferns, pothos, philodendrons, and small succulents. The key is ensuring they receive adequate light, either from a bright window or through the strategic use of artificial grow lights, especially during shorter daylight months.
2. What materials work best for building a vertical garden?
The best materials depend on your budget, aesthetic preference, and the location of your garden. Common and effective options include sturdy wooden pallets, breathable fabric pockets (like repurposed shoe organizers), wall-mounted ceramic or plastic pots, metal grids or trellises, and even recycled plastic bottles or PVC pipes. Each material offers unique advantages in terms of durability, design flexibility, and cost.
3. How do I prevent my vertical garden from drying out too quickly?
Vertical gardens are prone to drying out due to increased air circulation and sun exposure. To combat this, use a high-quality potting mix that retains moisture well but still offers good drainage. Installing a drip irrigation system is highly effective for consistent watering. Additionally, choosing self-watering planters or integrating moisture-retaining additives like vermiculite or coco coir into your soil mix can significantly help maintain hydration.
4. What are the easiest plants to grow in a vertical garden for beginners?
For those new to vertical gardening, beginner-friendly choices include most culinary herbs (basil, mint, parsley, thyme), leafy greens (lettuce, spinach), succulents (aloe, echeveria), and popular flowering plants like petunias and marigolds. These plants are generally forgiving, adapt well to container life, and require relatively straightforward care.
5. Can I grow vegetables in a DIY vertical garden?
Yes, absolutely! Many compact vegetable varieties thrive in vertical gardens. Excellent choices include leafy greens (lettuce, spinach, kale), cherry tomatoes (bush or determinate varieties), radishes, smaller pepper plants, and strawberries. Ensure you provide sufficient sunlight, nutrient-rich soil, and consistent watering to support their growth and fruit production.
6. Will a vertical garden attract pests?
Like any garden, a vertical garden can attract pests. However, their elevated position can sometimes make them less accessible to ground-dwelling pests. Regular inspection of your plants, promptly removing any dead or diseased leaves, and using natural pest deterrents (such as neem oil spray, insecticidal soap, or companion planting with marigolds) can effectively keep most insects at bay.
7. How much sunlight does a vertical garden typically need?
Most plants, especially vegetables and flowering varieties, require at least 4-6 hours of direct sunlight daily to thrive. Herbs can often tolerate slightly less, around 3-4 hours. If your chosen location doesn’t receive enough natural light, consider supplementing with artificial grow lights to ensure your plants get the energy they need.
8. How can I secure my vertical garden to prevent accidents or tipping?
Safety is paramount. Always use strong, appropriately sized hooks, brackets, or a reinforced frame to securely attach your vertical garden to a sturdy wall, fence, or railing. For stacked or freestanding units, ensure the base is stable and consider anchoring them to prevent accidental tipping, especially in windy conditions or if pets or children are present.
9. How often should I fertilize my vertical garden plants?
Due to the limited soil volume in containers, nutrients are depleted faster. A general guideline is to apply a balanced liquid fertilizer every two to four weeks during the active growing season. Always refer to the specific fertilizer product’s instructions, as requirements can vary based on plant type and growth stage. Organic compost or slow-release granular fertilizers can also provide sustained nutrition.
10. Can I easily move my vertical garden if needed?
Many DIY vertical garden designs offer excellent portability. Stacked crate systems, hanging planter walls (especially those on mobile frames), and shoe organizer gardens can often be relocated with relative ease. If mobility is a key factor for you, plan your design accordingly by choosing lighter materials or incorporating wheels into larger structures.