
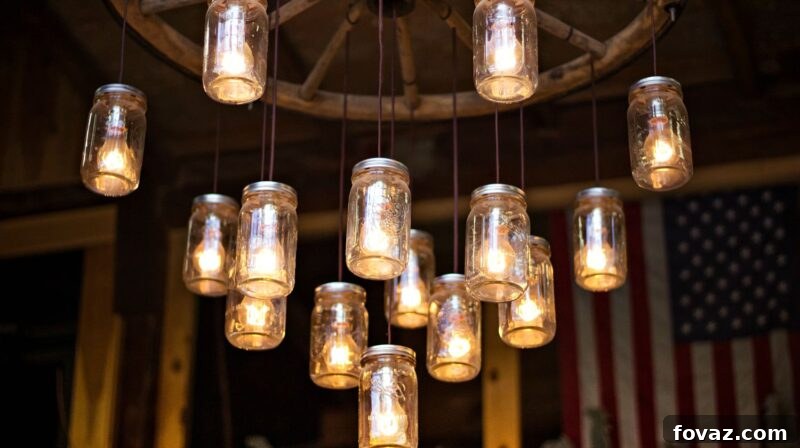
DIY Mason Jar Solar Lights: Illuminate Your Garden with Enchanting, Eco-Friendly Glow
Imagine your garden or patio bathed in a soft, ethereal glow as dusk settles. Envision charming, cost-effective lighting that not only enhances the ambiance of your outdoor space but also champions sustainability. This vision can easily become a reality with an incredibly simple and budget-friendly DIY project: crafting your own solar-powered mason jar lights. These enchanting solar jar lights are perfect for creating a magical experience without breaking the bank, offering a beautiful, functional, and eco-conscious solution for your outdoor decor needs.
RELATED: Create A Prism Candle Light | DIY Mason Jar Crafts
Why Choose DIY Solar Mason Jar Lights for Your Outdoor Space?
In a world increasingly focused on sustainability and personal expression, DIY solar mason jar lights stand out as an exceptional project. Not only do they offer a unique aesthetic that mass-produced lighting often lacks, but they also provide numerous practical benefits:
- Cost-Effective Brilliance: Repurposing readily available mason jars and inexpensive stake solar lights makes this project incredibly light on your wallet. You can achieve stunning outdoor lighting for a fraction of the cost of store-bought alternatives.
- Eco-Friendly Illumination: Harnessing the power of the sun, these solar jar lights operate entirely on renewable energy. This means zero electricity consumption, reducing your carbon footprint and saving on utility bills. It’s a truly green lighting solution.
- Effortless Creation: With just a few basic materials and minimal tools, even beginner DIY enthusiasts can successfully complete this project in under an hour. The simplicity of the design makes it accessible to everyone.
- Customizable Charm: Mason jars offer a blank canvas for creativity. Whether you prefer a rustic look, a vibrant splash of color, or a delicate frosted finish, these solar lights can be personalized to perfectly match your outdoor aesthetic.
- Versatile Decor: From illuminating pathways and accenting garden beds to serving as enchanting patio table centerpieces or hanging lanterns, the applications for these DIY solar lights are endless. Their portability allows for flexible placement and rearrangement.
- Ambiance Amplifier: The gentle, diffused light emitted by these jar lights creates a warm, inviting, and magical atmosphere, perfect for evening gatherings, quiet reflection, or simply enjoying the beauty of your garden after dark.
Embarking on this DIY journey allows you to craft sustainable, beautiful, and personalized outdoor lighting that truly makes your space shine. Let’s gather our materials and begin creating these delightful solar-powered mason jar lights.
Crafting Your Own Mason Jar Solar Lights: A Step-by-Step Guide
What You Need to Make Mason Jar Solar Lights:
Before diving into the creative process, ensure you have all the necessary components. The beauty of this project lies in its simplicity and the affordability of its materials.
- Solar Stake Light: The heart of your solar jar light. Look for inexpensive solar garden stake lights, often available for as little as $1 at dollar stores or in multi-packs online. The key is that the top solar panel and light component can be easily detached from the ground stake. Many popular brands are suitable, ensuring a reliable power source for your eco-friendly illumination.
Example Solar Stake Light - Mason Jar with Lid: Any standard-mouth or wide-mouth mason jar will work, but wider mouths often make assembly easier. The crucial part is the two-piece lid system: a flat metal disc and a separate screw-on ring. This design is essential for securely mounting your solar light. Consider different sizes (pint, quart) for varied lighting effects.
- Sticky Foam Tape: This versatile tape, typically double-sided, is key for creating a snug fit and preventing your solar light component from slipping into the jar. Its slightly compressible nature helps fill gaps and provide a secure hold. Choose a sturdy, adhesive foam tape for best results.
Example Sticky Foam Tape
Step 1. Prepare Your Solar Light by Removing the Stake
The first step in transforming a standard solar garden light into an elegant mason jar fixture is to carefully dismantle it. Begin by gently detaching the stake piece from the main solar panel and light unit. Most inexpensive stake lights are designed for easy separation, allowing the stake to simply slide or twist off from the upper portion.
Once separated, you should be left with the solar panel housing, which typically includes the rechargeable battery and the LED light component. In many cases, these lights come with a small plastic or metal casing around the LED. It is advisable to keep this casing, especially if it features a reflective interior. This reflector plays a vital role in intensifying and directing the light emitted by the LED, maximizing the brightness and overall impact of your finished mason jar solar light. Handle the components with care to avoid damaging the delicate internal wiring or the solar panel itself.
RELATED: Brighten Up Your Home With This DIY Mason Jar Lights
Step 2. Create a Snug Fit with the Mason Jar Ring
Now, direct your attention to the mason jar lid. Unscrew the entire lid assembly from your jar and separate the two components: the flat metal insert (the “flat part”) and the screw-on ring. For this project, you will only need the screw-on ring. Place the flat metal insert aside; you won’t need it for your solar light.
Next, carefully take your disassembled solar light (the panel and light component) and begin wrapping the sticky foam tape around the top portion of the light’s casing. The goal here is to build up enough thickness so that when you slide the solar light through the mason jar ring, it creates a snug, almost friction-fit. Start with a single layer and test the fit. You want the solar light to pass through the ring, but with a slight resistance, indicating a secure hold.
The foam tape serves a dual purpose: it prevents the solar light from falling into the jar and helps create a better seal against moisture, which is crucial for outdoor use. Ensure the tape is applied evenly around the circumference to provide consistent support and a clean finish.
Step 3. Achieve a Flush and Secure Installation
With the foam tape applied, it’s time to integrate the solar light into the mason jar ring. Carefully squeeze and guide the solar light component into the center of the lid ring. As you do this, adjust the positioning until the top surface of the solar panel is nearly flush or perfectly flush with the top edge of the lid ring. This ensures maximum sun exposure for charging and a visually appealing, integrated look.
If, after a single layer of tape, the fit is still too loose, remove the solar light from the ring and add another layer of foam tape, repeating the process until you achieve that desired snug and flush fit. The key is a secure installation that keeps the solar light firmly in place, allowing it to gather sunlight efficiently and illuminate consistently once darkness falls.
Step 4. Final Assembly: Screw the Lid Onto the Jar
With your solar light securely nested within the mason jar lid ring, the final step in assembling your DIY solar mason jar light is remarkably simple. Take the entire lid assembly, now complete with the integrated solar light, and carefully screw it onto the mouth of your mason jar. Ensure it’s tightened firmly but gently to create a good seal and prevent the lid from coming loose.
Congratulations! Your first DIY mason jar solar light is now complete and ready to bring a touch of magic to your outdoor spaces. Repeat these steps for as many lights as you wish to create, and soon you’ll have a delightful collection of eco-friendly, solar-powered illumination.
Beyond the Basics: Customizing and Enhancing Your Solar Jar Lights
The beauty of DIY projects lies in the freedom to personalize. While a plain mason jar solar light is charming on its own, here are some ideas to elevate your creations:
- Internal Decorations: Fill the bottom of the jar with decorative elements like sand, small pebbles, sea glass, marbles, or artificial flowers. Ensure these items don’t obstruct the light path or the solar panel’s view from the inside if it extends too far down.
- External Embellishments: Paint the exterior of the jars with glass paint for a stained-glass effect, use frosted spray paint for a softer glow, or wrap them with twine or lace for a rustic or elegant touch. Just make sure not to cover the solar panel itself.
- Colored Lights: Some solar stake lights come with color-changing LEDs or can be easily swapped for colored LEDs to create a vibrant display.
- Hanging Options: For overhead lighting, use mason jars with wire handles (available commercially or DIY using thick gauge wire) to hang them from shepherd hooks, pergolas, or tree branches.
- Pathways and Borders: Place your solar jar lights along garden paths, flower beds, or patio edges. They can be placed directly on surfaces or, for added height, consider repurposing the stakes you removed earlier by attaching them to the jar if feasible, or placing the jars on small pedestals.
Maximizing Performance and Longevity of Your Solar Jar Lights
To ensure your DIY mason jar solar lights shine brightly night after night for years to come, a little care and strategic placement go a long way:
- Optimal Charging Location: Always place your solar jar lights in a spot that receives at least 6-8 hours of direct, unobstructed sunlight daily. Shade from trees, buildings, or even dirty panels can significantly reduce charging efficiency.
- Regular Cleaning: Periodically wipe down the solar panel surface with a soft, damp cloth to remove dust, dirt, pollen, and debris. A clean panel absorbs sunlight more effectively, leading to brighter and longer-lasting illumination.
- Battery Maintenance: The rechargeable batteries inside solar lights typically last 1-2 years. If your lights become dim or stop working entirely, the battery is often the culprit. Most solar lights use standard AA or AAA NiMH rechargeable batteries, which are inexpensive and easy to replace. Simply open the solar panel housing (usually a few small screws) and swap out the old battery for a new one.
- Weather Protection: While most solar lights are designed for outdoor use, extreme weather conditions like heavy snowfall or prolonged freezing temperatures can impact their performance and lifespan. Consider bringing your solar jar lights indoors during harsh winter months or storing them in a sheltered location.
- Water Sealing (Optional but Recommended): For added durability, especially in rainy climates, you can apply a bead of clear silicone sealant around the edge where the solar panel unit meets the mason jar ring after assembly. This creates an extra barrier against moisture ingress.
Troubleshooting Common Issues with Your Solar Jar Lights
Even with careful assembly, you might encounter a few hiccups. Here’s how to troubleshoot common problems:
- Lights Not Turning On:
- Check Sunlight Exposure: Is the solar panel getting enough direct sunlight? Move it to a sunnier spot.
- Verify Battery: The battery might be dead or improperly inserted. Open the solar panel unit and check the battery’s orientation and charge. Replace if necessary.
- Internal Switch: Some solar lights have an ‘on/off’ switch inside the unit. Ensure it’s in the ‘on’ position.
- Lights Are Dim or Don’t Last Long:
- Clean the Panel: A dirty solar panel is the most common reason for dim lights. Clean it thoroughly.
- Battery Age: The rechargeable battery may be nearing the end of its life. Replace it with a new NiMH rechargeable battery.
- Insufficient Charge: The light might not be getting enough sun during the day.
- Water Inside the Jar:
- Check Seal: The foam tape might not be providing an adequate seal. Re-apply more tape, ensuring a tighter fit.
- Add Sealant: For robust waterproofing, consider applying clear silicone sealant around the edges where the solar unit meets the lid ring.
By following these tips, you can ensure your DIY mason jar solar lights continue to provide beautiful, reliable illumination for your outdoor spaces.
You might also want to try doing these easy DIY mason jar string lights. Follow the video tutorial from DIY Projects:
That concludes our comprehensive guide on crafting your very own enchanting DIY mason jar solar lights! I sincerely hope you found this simple, cost-effective, and eco-friendly DIY project inspiring and enjoyable. There’s immense satisfaction in creating beautiful and functional items with your own hands, especially when they contribute to a greener lifestyle and a more inviting home atmosphere.
Now that your solar-powered jar lights are complete, set them up in a sunny spot in your garden or on your patio during the day to allow their solar panels to fully charge. As twilight descends, watch in anticipation as they automatically spring to life, casting a warm, magical glow that will undoubtedly set the perfect mood for your evening relaxation or outdoor entertaining. Their soft illumination transforms ordinary spaces into extraordinary sanctuaries. Beyond outdoor use, remember their versatility: my kids even love taking some into their rooms as charming, eco-friendly night lights, proving their appeal across all ages. Have fun exploring all the creative ways you can integrate these beautiful lights into your life!
Will you give these magical DIY mason jar solar lights a try? We’d love to hear about your experience, your unique customizations, and any tips you discovered along the way! Share your thoughts and creations in the comments section below!
Up Next:
- DIY Backyard Project Ideas: Fence with Mason Jar Lighting
- Mason Jar Crafts | Creative and Useful DIY Projects
- 60 Gifts In A Jar That Are Oh So Cute And Easy To DIY
Stay connected with us on Facebook, Twitter, and Instagram!Editor’s Note: This post was originally published on July 23, 2018, and has been updated for quality and relevancy.