
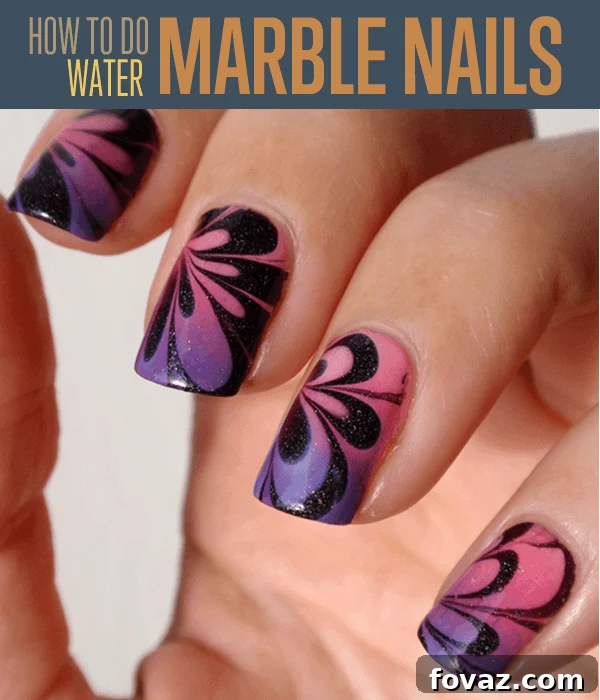
Master Water Marble Nails At Home: Your Ultimate Step-by-Step Guide
Ever gazed in admiration at those breathtakingly intricate water marble nail designs, wondering if such artistry could truly be achieved outside a professional salon? Good news! The mesmerizing effect of water marbling is not only accessible but also incredibly fun to create right in your own home. This comprehensive, step-by-step tutorial is designed to guide you through every nuance of the water marbling process, transforming you into a home manicure maestro. Get ready to dive into the world of vibrant colors and unique patterns, creating stunning nail art that will turn heads.
Water marble nails offer a fantastic way to express your creativity and personalize your look. Whether you’re preparing for a special occasion, aiming for a trendy everyday style, or simply enjoying a relaxing DIY beauty session, this technique promises an outcome as unique as you are. With a little patience and the right approach, you’ll be flaunting salon-quality designs without the salon price tag. Let’s gather our tools and embark on this exciting nail art journey!
Why Choose Water Marble Nails for Your Next Manicure?
Water marbling stands out as a unique nail art technique for several compelling reasons. Firstly, it allows for unparalleled creativity, as each design is inherently one-of-a-kind. The organic flow of polish on water creates patterns that can’t be replicated with traditional brushes, offering truly bespoke results. Secondly, mastering this technique at home is incredibly cost-effective compared to frequent salon visits. Once you have the basic supplies, the possibilities for endless designs are at your fingertips. Lastly, it’s an incredibly satisfying and therapeutic process. Watching the colors bloom and swirl on the water surface before transferring to your nails is a rewarding experience, transforming your manicure routine into an artistic endeavor. Embrace the trend, unleash your inner artist, and get ready for compliments!
Essential Tools and Materials You’ll Need for Water Marbling
Before we begin, gathering all your supplies is crucial for a smooth and successful water marbling session. Having everything within reach minimizes interruptions and ensures the polish doesn’t dry prematurely. Here’s a detailed list of what you’ll need:
- Nail Polishes: This is where the magic happens! Select 2-5 complementary colors. Crucially, your polishes should be new and relatively thin in consistency. Older, thick polishes often sink or spread poorly in water, ruining your design. Brands like Essie or O.P.I. are often recommended for their consistent formulas. Avoid quick-dry polishes as they can set too fast on the water surface.
- Base Coat: Essential for protecting your natural nails and providing a smooth canvas for your marble design. A nude or lighter tone base often works best to make your intricate patterns pop.
- Top Coat: A high-quality top coat will seal your design, add shine, and significantly extend the life of your water marble manicure.
- Disposable Cup or Bowl: An old, unwanted ceramic bowl, a plastic container, or even a recycled Chinese takeout box works perfectly. The marbling process can leave polish residue, so choose something you don’t mind getting messy or throwing away.
- Filtered Water: The type and temperature of water are critical! Use filtered or distilled water at room temperature or slightly warm. Cold or tap water can cause the polish to sink or dry too quickly. Let it sit for about an hour if it’s too cold.
- Toothpicks or Orange Wood Sticks: You’ll need several for creating your designs in the water and for cleaning up excess polish. Have a generous supply.
- Cotton Swabs or Q-tips: For precision cleanup around your nails.
- Nail Polish Remover: For cleaning up any stray polish on your skin and tools. Acetone-free remover is gentler on skin, but acetone works faster for tough spots.
- Scotch Tape or Liquid Latex: An absolute game-changer for cleanup! Applying tape around your cuticles or brushing on liquid latex prevents excess polish from adhering to your skin, making the post-marbling cleanup incredibly easy.
- Paper Towels or Old Cloth: For protecting your workspace and wiping tools.
Step-by-Step Water Marbling Tutorial
Step 1: Prepare Your Nails and Protect Your Skin
Begin by ensuring your nails are clean, dry, and shaped to your liking. Apply a protective base coat to all your nails and allow it to dry completely. This step is non-negotiable for nail health and for creating an optimal surface for your art. Once your base coat is dry, it’s time for skin protection. Carefully apply Scotch tape around the perimeter of each nail, covering your cuticles and the skin around your nail plate. Alternatively, brush on liquid latex, ensuring it completely surrounds the nail, without touching the nail itself. This barrier is your best friend for a hassle-free cleanup later.
Step 2: Choose Your Perfect Polish Palette
Now for the exciting part – selecting your colors! Pick out 2-5 nail polish shades that you wish to incorporate into your water marble design. For truly captivating results, opt for colors that complement each other or provide a striking contrast. Consider a lighter base color for your nails if you want your marble design to stand out prominently. Remember the golden rule: polishes should be fresh and have a smooth, fluid consistency. New bottles are ideal. Set your chosen polishes aside, ready for action, and shake them gently if they’ve been sitting for a while.
Step 3: Set Up Your Marbling Station
Take your chosen disposable cup or bowl and fill it with filtered or distilled water. The water should be at room temperature, or ideally, slightly warm. Lukewarm water helps the polish spread more easily. Avoid using cold water directly from the tap, as it can cause the polish to sink or clot. Letting the water sit out for about an hour before starting is a good practice to ensure it reaches the optimal temperature. Place your bowl on a protected surface, ensuring good lighting.
Step 4: Create Your Water Marble Design
This is where the artistry unfolds! Open your first polish bottle. Hold the brush directly over the center of the water surface, close to the water but not touching it. Allow a single drop of polish to fall onto the water. It should immediately spread outwards, forming a perfect circle.
Next, take your second polish color and drop it directly into the center of the first circle. Watch as it pushes the first color outwards, creating a concentric ring. Continue this process, alternating your chosen colors, dropping each new color into the center of the previous one. Aim for about 5-10 drops, depending on the desired complexity and size of your design. The goal is to build several distinct, colorful rings on the water’s surface.
Once you have your series of concentric circles, immediately take a clean toothpick or orange stick. Gently drag the toothpick through the layers of polish to create your desired pattern. You can make straight lines from the edge towards the center, zig-zags, swirls, or flower-like designs by dragging outwards from the center. Experiment! Every movement will create a unique effect. Work quickly but carefully, as the polish starts to dry on the surface after a minute or so. Use a fresh toothpick for each new design stroke if you notice polish building up on your tool.
Step 5: Dip Your Nail and Transfer the Art
With your stunning water design ready, it’s time to transfer it to your nail. Select one nail that has been prepped with a base coat and skin protection. Slowly and steadily, dip your nail (face down) into the water, aiming for the section of the design you wish to capture. Ensure your entire nail surface makes contact with the polish film.
While your nail is submerged, use a clean toothpick to gather and remove any excess polish from the water’s surface around your finger. This prevents the unwanted polish from adhering to your nail as you pull it out. Wait a few seconds for the remaining polish on the water to coagulate and for the polish on your nail to set slightly. Then, slowly lift your finger out of the water. Voila! Your unique water marble design should now be perfectly adhered to your nail.
Step 6: The Big Reveal and Initial Cleanup
Upon removing your finger from the water, carefully inspect your new design. It should be fully adhered to your nail plate. If the design appears incomplete or smudged, it likely means the polish was still too wet or your protective barrier wasn’t sufficient. Don’t fret if there’s a bit of excess polish on your protected skin; that’s what the tape or liquid latex is for! Gently peel off the tape or liquid latex from around your nail. Any remaining small specks can be tidied up with a cotton swab dipped in nail polish remover, working carefully around the edges of your design.
Step 7: Repeat for All Nails
Repeat the entire process – from creating a new polish design on fresh water to dipping and cleaning up – for each remaining nail. It’s often best to use fresh water for each nail or at least after every couple of nails to ensure optimal polish spread and crisp designs. Maintain a steady hand and consistent technique for beautiful results across all fingers.
Step 8: Final Detailing and Polish Removal
After all your nails have been marbled, take a fresh cotton swab or a precision brush dipped in nail polish remover. Carefully clean up any stray polish around your cuticles and nail edges. Pay close attention to achieving crisp lines around your nail to give your manicure a professional finish. Waiting a few moments for the design to fully dry on your nail before this step will make a significant difference in preventing smudges.
Step 9: Seal Your Masterpiece with a Top Coat
Congratulations! Your intricate water marble designs are complete. The final, crucial step is to apply a high-quality top coat. This not only adds a beautiful glossy finish but also protects your stunning artwork from chips and wear, ensuring your unique manicure lasts. Apply a generous, even layer, making sure to cap the free edge of your nail. Allow your top coat ample time to dry completely.
Pro Tips for Flawless Water Marble Nails
- Practice Makes Perfect: Don’t get discouraged if your first attempts aren’t flawless. Water marbling requires a bit of practice to get a feel for the polish consistency and water temperature.
- Steady Hand: A steady hand is crucial for dropping polish and dipping your nails. Take a deep breath and go slow.
- Room Temperature Matters: Ensure your room isn’t too cold, as this can affect how quickly polish dries on the water.
- Fresh Polish is Key: Always use new or relatively new polishes. Thick, gloopy polish will not spread correctly.
- Cleanup Hacks: Besides tape or liquid latex, a small brush dipped in acetone can be very effective for precise cleanup around the nail after marbling.
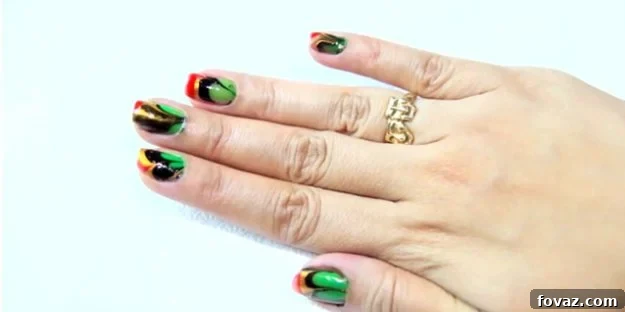
- Experiment with Designs: Once you get the hang of the basic technique, try different patterns like flowers, hearts, or spiderwebs by varying your toothpick movements.
Troubleshooting Common Water Marbling Issues
- Polish Sinking: If your polish drops sink instead of spreading, the water might be too cold, or the polish itself might be too thick, old, or a quick-dry formula. Try warmer water or a different brand of polish.
- Polish Not Spreading: This often indicates the water is too cold, or there’s an oily residue on the water surface. Use filtered, lukewarm water and ensure your bowl is clean.
- Muddy or Blurry Designs: This can happen if you drag your toothpick too many times, mix too many colors, or if the polish has started to dry on the surface before dipping your nail. Work quickly and use fewer strokes.
- Bubbles in the Design: Bubbles can appear if you drop the polish from too high, or if your water has air bubbles. Drop polish closer to the surface and let the water settle before starting.
Your Water Marble Masterpiece Awaits!
You’re now equipped with all the knowledge and steps to create stunning water marble nail art from the comfort of your home. This technique, while requiring a bit of practice, opens up a world of endless design possibilities, allowing you to flaunt unique and vibrant nails for any occasion. Don’t be afraid to experiment with different color combinations and swirl patterns. Embrace the creative process, enjoy the transformation of your fingertips, and get ready to impress with your beautiful, custom-designed water marble nails! We hope you enjoyed this detailed tutorial and wish you many delightful nail art sessions!