
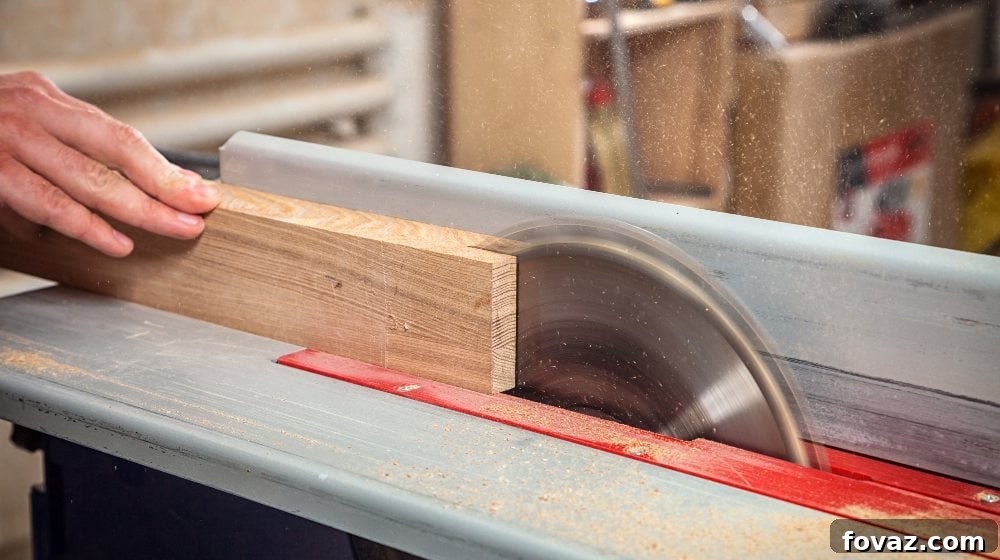
Master Your Woodworking: A Comprehensive Guide to Building Your Own DIY Table Saw
Every serious woodworker knows the immense value of a table saw. Whether you’re ripping long boards, cross-cutting accurately, or creating repetitive, identical pieces, a robust table saw transforms complex tasks into straightforward operations. While professional-grade table saws can be a significant investment, a DIY solution offers a cost-effective and highly functional alternative, perfectly tailored to your workshop needs. This comprehensive guide will walk you through building your own versatile and powerful DIY table saw, empowering you to tackle your woodworking projects with enhanced precision and confidence.
A homemade table saw, crafted from a circular saw and a sturdy workbench, can rival the capabilities of many commercial models for a fraction of the cost. It’s an excellent project for any DIY enthusiast looking to expand their toolset and improve their cutting accuracy. Follow these detailed instructions to construct this indispensable tool, and elevate the quality of your craftsmanship.
RELATED: DIY Pipe Leg Table | Workbench Plans And Rustic Furniture Tutorial
Build Your DIY Table Saw in 8 Easy Steps: A Step-by-Step Guide for Precision Woodworking
Before you dive into construction, careful preparation is key. Gathering all your materials and tools beforehand will ensure a smooth and efficient building process. Prioritize safety by understanding the function of each item and preparing your workspace.
What You’ll Need for Your Homemade Table Saw:
Materials:
- Circular Saw: The heart of your DIY table saw. Look for a model with a robust base plate, sufficient power, and reliable depth adjustment. A blade diameter of 7-1/4 inches is common and versatile.
- *Recommended:* Makita SH02Z 12V Max CXT Lithium-Ion Cordless Circular Saw, 3-3/8″. Makita-built motor delivers 1,500 RPM for faster cutting. 3-3/8″ blade delivers a maximum cutting depth of 1″ for a wide range of cutting applications. Adjustable cutting depth from 1″ at 90° and 5/8″ at 45°. Tilting base for bevel cuts from 0° – 45°. Cuts plywood, MDF, pegboard, particleboard, melamine, drywall, and more. Ergonomically designed handle with rubberized soft grip provides increased comfort.
- Plywood, Melamine, or Board: For the table legs and top. Choose a flat, rigid material that will not warp, with a smooth surface to allow wood to glide easily. Baltic Birch plywood, MDF, or laminated particleboard are excellent choices.
- *Recommended:* 6 mm Baltic Birch Plywood 1/4 x 12 x 24 Inch, Box of 6 B/BB Grade Craft Wood. Strong, durable, heavy-duty craft wood pieces offering exceptional durability, rigidity, and stability. Excellent holding power for glue and screws. Beautiful lengthwise grain that takes stain well. Designed to smoothly glide through laser cutters and scroll saws.
- Zip Ties: Essential for securing the power strip and managing cables. Opt for heavy-duty ties for maximum security.
- *Recommended:* SNUG Fasteners (SNG898) 100 Qty 14 Inch Black Nylon 50 lb. Cable Zip Ties. UL Rated for indoor & outdoor use. Tensile Rating: 50 lb. / 222 n. Length: 14. 35″ / 364. 49mm. Strap Width: . 18″ / 4. 57mm.
- Wood Screws with Flat Head: You’ll need both 16mm and 50mm lengths. Flat-head screws are crucial for mounting the circular saw flush with the table surface, preventing snags.
- *Recommended:* Wood Screws Assortment, 605 pcs M3/M3.5/M4/M5/M6 Flat Head – Phillips Drive. Includes 14 sizes of flat head screws to meet various demands. Self-tapping screws with a sharp point for penetrating metal, chipboard, wood, or plastic. Comes with a storage box for organization.
- Power Strip: This will serve as the convenient on/off switch for your table saw, allowing you to power the circular saw safely from a single point. A surge protector is highly recommended.
- *Recommended:* Amazon Basics 6-Outlet Surge Protector Power Strip, 2 USB Ports, 2 Ft Cord – 500 Joule, White, 2-Pack. Protects from power surges and spikes that can damage equipment. 500 joule suppression rating.
Tools:
- Clamps: Indispensable for securing your workpieces and holding components in place during assembly. A variety of sizes will be beneficial.
- *Recommended:* Amazon Basics 14-Piece Nylon Spring Clamp Set. Includes 3-3/8-inch, 4-1/2-inch, and 6-1/2-inch clamps. Securely holds items in place. Sturdy reinforced nylon construction. Durable pads protect surfaces.
- Drill and Bits: For pilot holes and mounting screws. Ensure you have bits suitable for both wood and the specific base material of your circular saw.
- *Recommended:* COMOWARE Cobalt Drill Bit Set – 13Pcs M35 High Speed Steel, Twist Jobber Length. Durable, higher heat & abrasion resistance. Precise 135° split point & twist design to prevent walking. Professional & widely used for hard metals, cast iron, hard plastics, and woods. Includes an organized holder.
- File: To smooth any rough edges or burrs after drilling and cutting, ensuring a clean and safe finish.
- *Recommended:* Powerextra 21Pcs File Set Premium Grade T12 Drop Forged Alloy Steel File Set with Carry Case. A comprehensive set for various filing needs, ensuring smooth finishes on wood and metal components.
- Measuring Tape or Ruler: For accurate measurements.
- Pencil or Marker: For marking drill points and cut lines.
- Safety Glasses and Hearing Protection: Always essential when operating power tools.
Step 1: Drill Mounting Holes in Your Circular Saw Base
The foundation of your DIY table saw’s stability and precision lies in how securely your circular saw is mounted. Begin by examining the base plate of your circular saw. You’ll need to drill five strategically placed holes, each measuring approximately 4mm in diameter. These holes will serve as the attachment points for fixing your circular saw securely to the underside of your tabletop.
When selecting the drilling locations, ensure they are in areas that will not interfere with the saw’s internal components, blade adjustment mechanisms, or the saw’s movement. Mark these spots carefully with a pencil. Use a drill bit appropriate for the material of your circular saw’s base (often aluminum or steel). Drill slowly and steadily to create clean holes. After drilling, it is critical to remove any metal dust or burrs using a file or sandpaper. Clean the holes thoroughly to ensure a flat, stable contact surface, which is paramount for both safety and cutting accuracy.
Step 2: Prepare Your DIY Table Saw Top – The Foundation of Precision
The choice of material for your DIY table saw top is crucial as it directly impacts stability, durability, and cutting performance. You have several excellent options, each with its own advantages:
- Plywood: Multi-layered and stable, especially Baltic Birch plywood. Offers good rigidity.
- Melamine: Particleboard with a durable, slick plastic laminate surface. Ideal for woodworking because it allows workpieces to slide smoothly without snagging.
- Laminated Particleboard: Similar to melamine, often available from repurposed furniture like old closet doors or cabinet panels, which can be a cost-effective choice.
Regardless of your material choice, the dimensions are critical: the board must be at least 1.8cm (approximately 3/4 inch) in thickness to provide sufficient rigidity. For width, 50cm (about 20 inches) offers a good working area, and a length of 80cm (about 31.5 inches) provides ample support for longer cuts. The most important aspect is that the board is perfectly straight, flat, and its edges are precisely square. Any warps or unevenness will compromise the accuracy of your cuts. Use a long straightedge and a reliable square to verify these crucial dimensions before proceeding.
Step 3: Precisely Position Your Circular Saw on the Tabletop
Careful positioning of your circular saw on the tabletop is essential for optimizing blade exposure and establishing clear working space. Lay your chosen tabletop material flat on a workbench or a stable surface. Place your circular saw, upside down, onto the underside of the board. Visualize the blade’s path and consider where your fence will ultimately run. A common and practical placement is to leave approximately 30cm (about 12 inches) of space between what will be the front edge of your tabletop and the tip of your circular saw’s base plate. This provides sufficient room for workpiece support at the start of a cut.
Ensuring that the saw is perfectly square to the table’s intended cutting plane is absolutely critical for straight cuts. Use a reliable square to align the saw base parallel to the long edge of your board. Once the position is finalized, carefully trace through the five pre-drilled holes in your circular saw’s base onto the tabletop board. These marks will guide your next step. After marking, carefully remove the circular saw from the board.
Step 4: Securely Fix Your Circular Saw to the Tabletop
With your marks clearly visible, it’s time to drill pilot holes into the tabletop. Using a drill bit slightly smaller than your 16mm wood screws, bore holes through the marked spots on your board. These pilot holes will prevent the wood from splitting and ensure the screws go in straight and tight.
Now, reposition your circular saw onto the preferred area on the underside of the board, aligning the holes in its base with the pilot holes you just drilled. Insert the 16mm flat-head wood screws. Flat-head screws are specifically chosen because they sit flush with the surface of the circular saw’s base, avoiding any protrusions that could interfere with the saw’s function or snag on the table. Tighten these screws firmly but carefully, ensuring the circular saw is securely mounted and does not wobble. A stable mounting is paramount for both safety and cutting precision. Double-check that the saw is still square to the board’s edge after tightening the screws.
RELATED: DIY Pool Table You Can Make For Your Man Cave
Step 5: Perform the Initial Cut Through Your Board – Creating the Blade Slot
This step is where your DIY table saw truly comes to life. With the circular saw securely mounted to the underside of your tabletop, it’s time to create the blade slot. This first cut is essential as it creates a perfect zero-clearance opening for your blade, reducing tear-out and improving cut quality.
Carefully turn your entire table saw assembly upright, so the tabletop is facing up. Ensure the circular saw’s blade guard is retracted, allowing the blade to protrude through the table surface. Adjust the blade depth on your circular saw so it cuts fully through the table material and slightly beyond. Take all necessary safety precautions: wear safety glasses and hearing protection, ensure your hands are clear of the blade’s path, and stand to the side of the blade. Turn your circular saw on, allow it to reach full speed, and slowly push the tabletop over the blade to cut a straight slot. This cut should be made smoothly and consistently. Once the cut is complete, turn the saw off and allow the blade to stop completely before handling the unit.
Step 6: Construct Sturdy Legs for Your DIY Table Saw
A stable cutting platform is non-negotiable for a safe and accurate table saw. Begin by marking the precise areas on the underside of your tabletop where you intend to attach the support beams and legs. For optimal stability, plan for two main support beams running parallel to the blade slot, extending across the width of the table. These beams should measure approximately 8cm by 4cm (about 3.15 x 1.57 inches) and be made from a strong, straight wood. Attach these beams to the underside of your board using the longer 50mm wood screws, ensuring they are firmly anchored.
Next, fashion the legs for your table. You can use the same type of board material as your tabletop for consistency and ease of construction. Determine a comfortable working height for your table (typically around 34-36 inches). Cut four legs to this desired length. Attach these legs to the support beams, ideally using corner braces or robust joinery for maximum rigidity. To further enhance stability and prevent racking, insert additional pieces of the same board material as cross-braces between the legs – both horizontally and diagonally. Drill pilot holes and use plenty of 50mm wood screws to secure all these components, creating a robust and immovable base for your table saw.
Step 7: Install Your Convenient and Safe Power Switch
For ease of use and, more importantly, safety, a readily accessible on/off switch for your table saw is vital. Your power strip will serve this function effectively. On one side of your DIY table saw (ideally the front or a highly accessible side), drill two small holes. These holes should be just large enough to thread a zip tie through. Insert your zip ties into these holes and use them to securely attach your power strip to the side of the table.
Once the power strip is mounted, plug your circular saw directly into one of its outlets. This setup transforms the power strip into your primary on and off switch for the entire table saw. This method provides an easily reachable shut-off point, crucial in case of an emergency or when needing to quickly power down the saw. Ensure all cables are neatly managed and secured with additional zip ties to prevent them from snagging on workpieces or becoming trip hazards.
Step 8: Test Your DIY Table Saw and Prioritize Safety

The final and most crucial step is to thoroughly test your newly built DIY table saw. Begin by making a few practice cuts on scrap pieces of wood. Observe the blade’s performance, the smoothness of the cut, and the stability of the table. Check for any vibrations or movements that might indicate loose connections. Ensure your fence (which you’ll likely add as a separate accessory) aligns perfectly with the blade for accurate ripping.
Safety is paramount when operating any table saw, especially a homemade one. Kickbacks are a significant danger, where the workpiece is violently thrown back towards the operator. This can cause severe injuries, including deep cuts or even amputation. It is imperative to understand and implement proper safety protocols. Always use a push stick to guide small workpieces through the blade, never your hands. Maintain a firm grip on your material, ensure your fence is perfectly parallel to the blade, and avoid cutting warped or twisted wood. Wear appropriate personal protective equipment (PPE) such as safety glasses, hearing protection, and dust masks. Never reach over or behind the spinning blade.
To deepen your understanding of table saw safety and kickback prevention, watch this highly informative video by Stumpy Nubs:
Once you’ve successfully completed your test cuts and familiarized yourself with the safety guidelines, your DIY table saw is ready for action. This custom-built tool will significantly enhance your woodworking capabilities, allowing you to achieve precise, repeatable cuts and tackle more ambitious projects with confidence and efficiency.
Conclusion: Empower Your Woodworking with a Custom DIY Table Saw
Building your own DIY table saw is more than just a project; it’s an investment in your woodworking journey. This versatile tool, crafted with care and precision, will become an invaluable asset in your workshop. From making intricate identical cuts to effortlessly ripping down large sheets of plywood, your homemade table saw will empower you to execute a wider range of projects with professional-grade accuracy and efficiency. Remember, the core principles of woodworking—precision, patience, and paramount safety—are amplified when using a tool of this caliber. Take pride in your craftsmanship, always prioritize your well-being, and enjoy the countless possibilities that your new DIY table saw opens up for your creative endeavors.
Do you have other innovative ideas or useful tips on how to make a DIY table saw even better? Share your thoughts and experiences with us in the comment section below! Your insights could help fellow DIY enthusiasts enhance their projects.
Up Next:
- DIY Lego Table Ideas For Countless Hours of Creative Fun
- Repurposed Pallet Furniture | Make A Wood Pallet Coffee Table
- Make Your Own Fire Starter At Home | 11 DIY Fire Starter Ideas
Don’t forget to stay connected with us on Facebook, Twitter, Pinterest, and Instagram for more inspiring DIY projects and tips!