
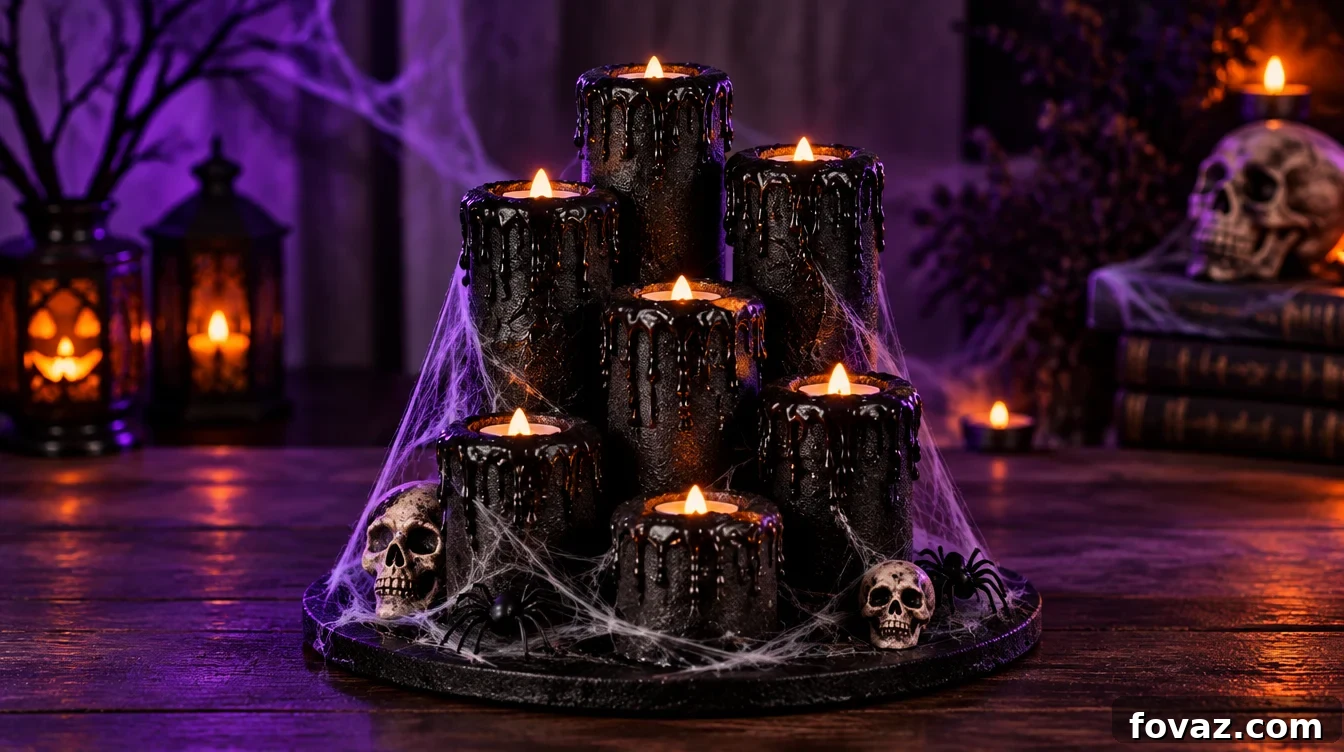
At a Glance: Pool Noodle Halloween Candles
- Six steps, about 30 minutes of hands-on time. Cut, glue, add drips, paint, then finish with cobwebs and battery lights.
- Use light coats of paint. Pool noodle foam tolerates spray paint well when applied in thin passes. Avoid soaking the foam by keeping the can back and building color gradually.
- Budget-friendly. A six-candle cluster costs roughly $10 to $15 when using dollar-store supplies.
To make pool noodle Halloween candles, cut pool noodles into varied lengths, glue them upright on a base, add hot-glue drips for a melted-wax effect, then paint the assembled cluster matte black once the glue is dry. Finish with fake cobwebs and battery tea lights. Jump to the supplies with the supplies section, or go straight to the steps in the make-it section.
This project looks like something from a Halloween store but is made from two pool noodles, a glue gun, and a can of spray paint. The build is forgiving; the main thing to take slowly is the painting—light, controlled passes make the difference.
What Can Go Wrong With Pool Noodle Halloween Candles?
Spraying Too Heavily
Pool noodles are closed-cell polyethylene foam, not the polystyrene used in some craft foam. Polystyrene can dissolve with solvent-based paints, but polyethylene tolerates ordinary spray paint if you avoid heavy, wet coats. Holding the can too close and laying paint on thick can soften or pit the foam surface. Keep the can about a foot away, spray in light passes, and allow each coat to dry before adding another. Water-based or latex spray paint tends to behave best; chalk paint or craft acrylic applied with a brush is also safe if you prefer that route.
Glue Joints That Come Apart Later
A single thin bead of hot glue is usually enough to hold pieces while you build, but it can fail after storage or handling. After the initial glue cools, go back and add a second, heavier bead to every joint where pieces meet. That small extra step makes the display much more durable and keeps it intact from season to season.
What You Need to Make Pool Noodle Halloween Candles
For one six-candle cluster
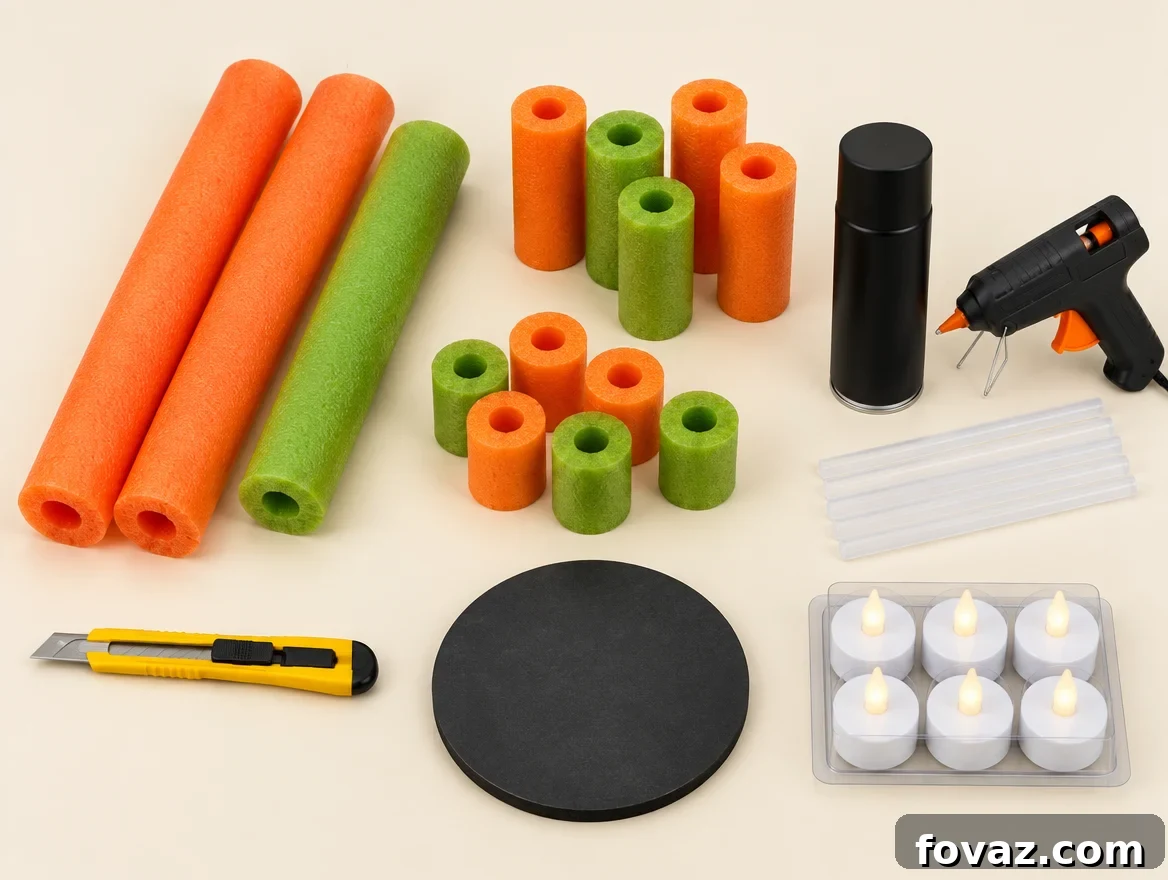
- 2 pool noodles. Enough to cut six pieces of varied lengths. Color doesn’t matter because you’ll paint them.
- A utility knife. For cutting and scooping the tops to seat tea lights.
- A hot glue gun and plenty of sticks. You’ll use more than you expect for assembly and drip effects.
- Matte black spray paint. Water-based or latex formulas work best on foam. Chalk paint or craft acrylic can be brushed on as an alternative.
- A flat base. Cardboard, a foam disc, or a small wood round to anchor the cluster.
- Battery-powered tea lights. One per candle.
- Optional decor. Fake cobweb material, warm white fairy lights, small plastic skulls or spiders for extra detail.
Tools: utility knife, hot glue gun. Optional: rubber bands to hold pieces while glue sets, clear sealant if the display will be outdoors or handled frequently.
Quick tip: Cut the six pieces to intentionally different heights, roughly between 6 and 24 inches. A varied cluster looks naturally melted; identical heights read as manufactured.
How to Make Pool Noodle Candles
Six steps, about 30 minutes of hands-on time plus drying time for glue and paint.
- Cut the pieces. Slice the pool noodles into six lengths between 6 and 24 inches. Use a utility knife to cut a shallow scoop into the top of each piece, angled toward the front, so a tea light will sit securely inside.
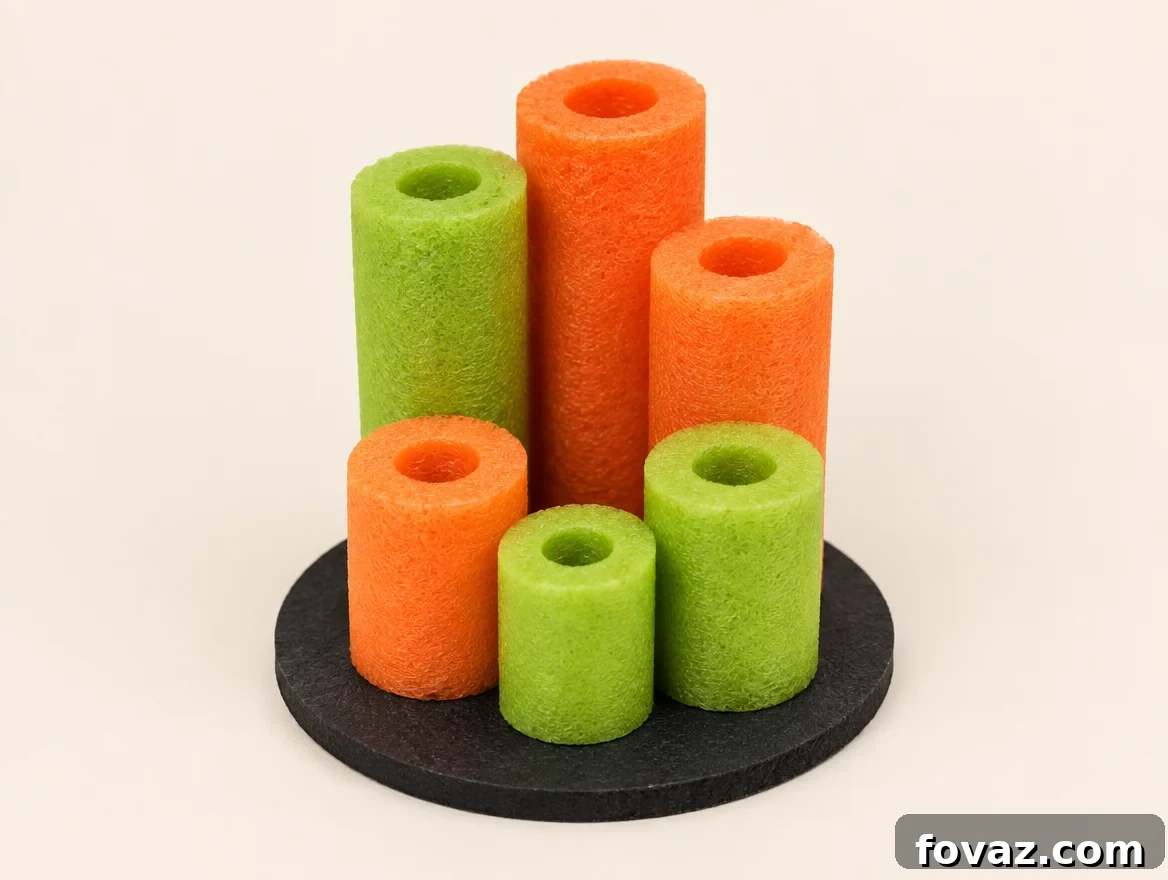
- Arrange and glue. Position the pieces with taller ones toward the back and shorter ones up front. Glue each piece to the base and add glue where pieces touch each other. Hold or rubber-band each piece for a minute while the glue sets.
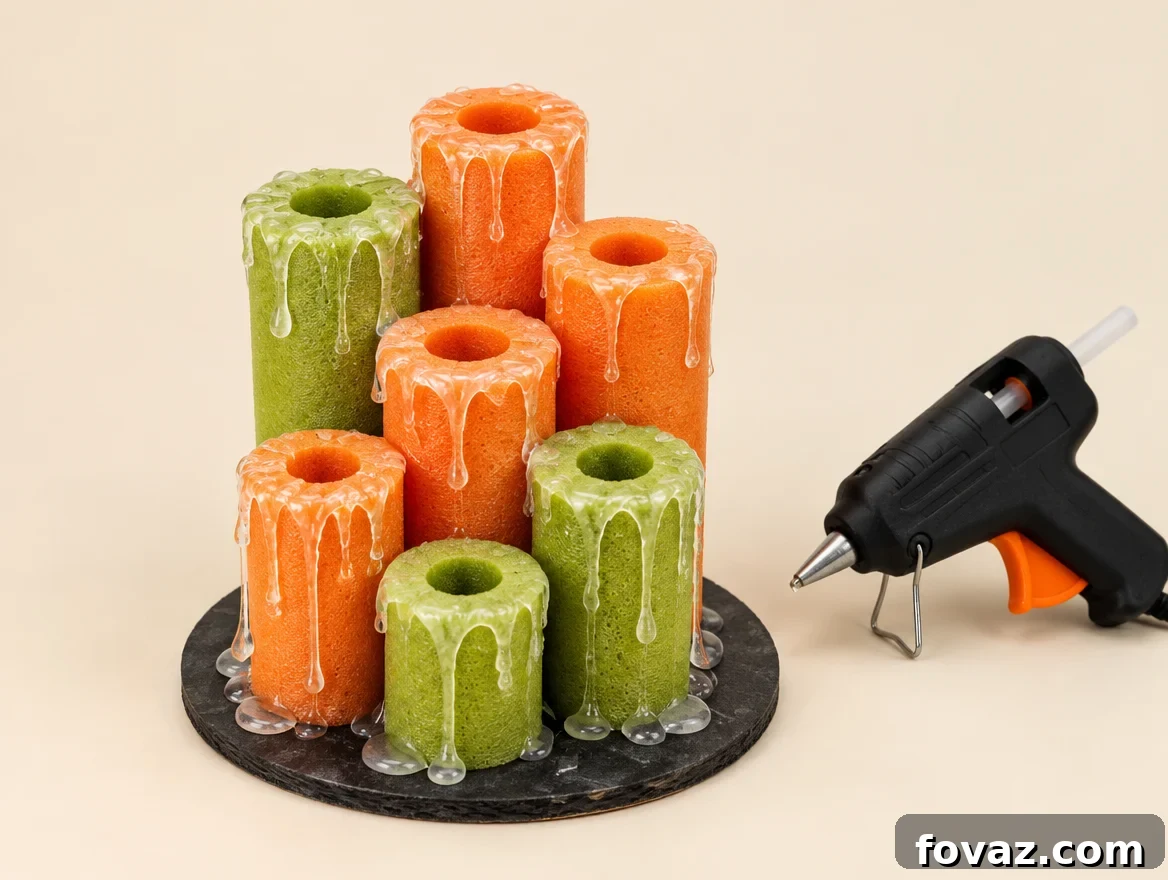
- Add the drip wax. When the glue has set, run a bead of hot glue from the top edge of each candle down the side, allowing it to pool and run unevenly. These irregular drips create the convincing melted-wax effect. Slight dimpling from a hot glue tip can enhance realism and is fine to leave.
- Spray it matte black in light coats. Hold the can about a foot away and spray across the cluster in sideways passes rather than blasting straight down. Two or three thin coats are better than one heavy wet coat. Allow roughly 20 minutes between passes. If you’re unsure how a specific can behaves on foam, test it on a scrap end for a few seconds before spraying the whole piece.
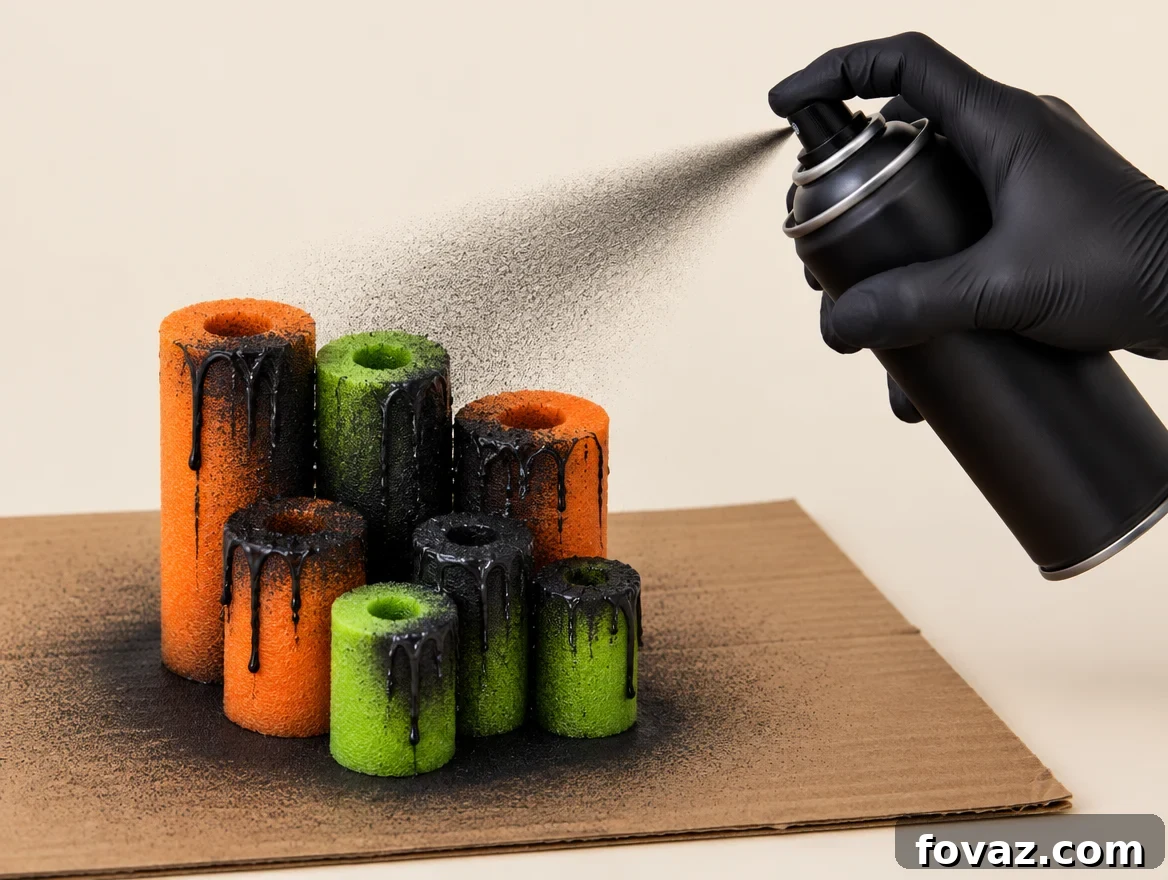
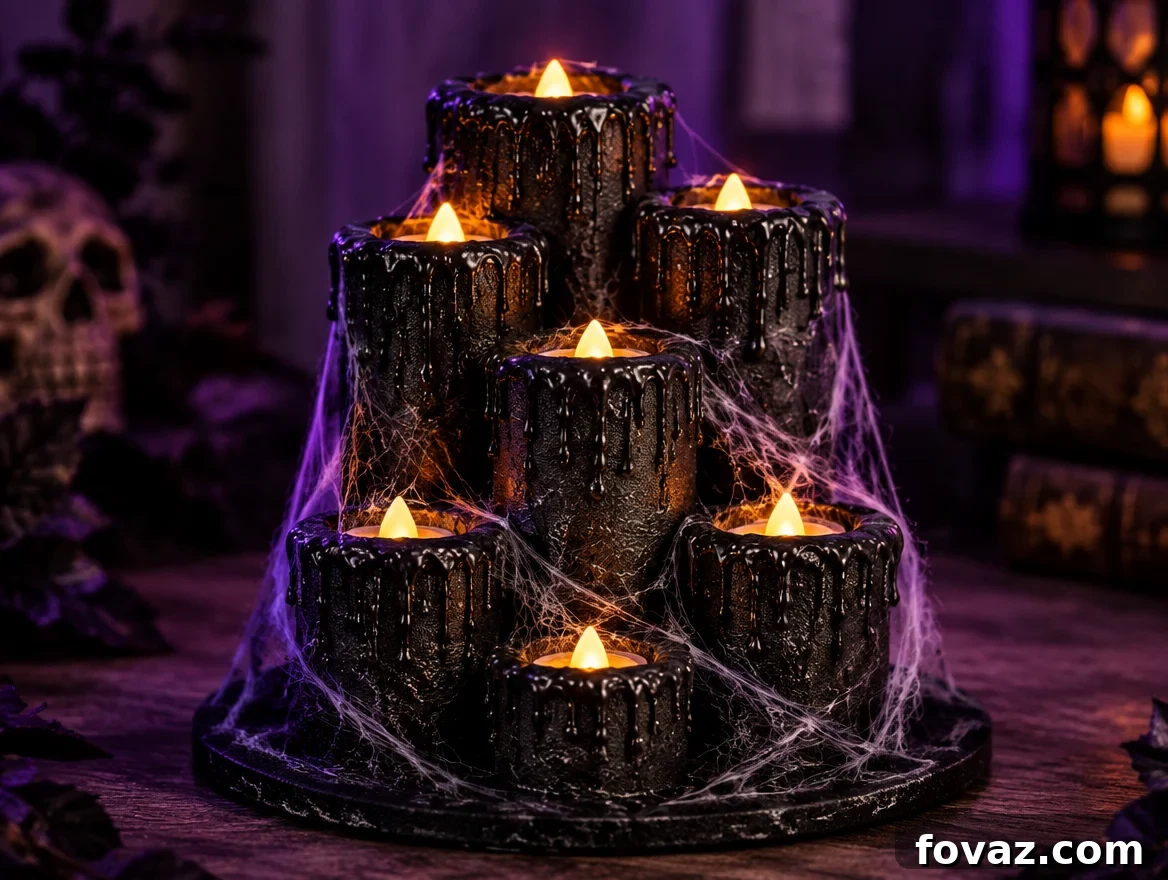
- Add the cobwebs. Once the paint is fully dry, stretch fake cobweb material across the base and around the candles. Pull some areas thin so the webbing looks airy and windblown rather than piled on.
- Add the lights. Place a battery tea light into the scooped top of each candle and switch them on. Check the effect in a dim or dark room and adjust the webbing or lights as needed.
Three Ways to Build Pool Noodle Halloween Candles
Budget Build (about $10 to $15)
Two inexpensive pool noodles, a can of matte black spray paint, a pack of battery tea lights, and a hot glue gun. This version is quick and effective for seasonal decor.
Upgraded Build (about $25 to $35)
Use a water-based paint formulated for plastics, add a clear sealant to protect the finish, use real spun cobweb material, weave warm white fairy lights through the cluster, and mount everything on a wood or MDF base for a neater look.
Built-to-Last Build (about $45 to $50)
Reinforce every glued joint with a second heavy bead, add a weighted base to prevent tipping, and store the finished cluster in a labeled box sized to fit it. These steps make the decoration reusable year after year.
Going outside? Paint adheres to foam differently than to wood; flex and weather can cause cracking over time. Apply a clear sealant after the black paint dries if the display will sit on a covered porch. Always use battery tea lights—never a real flame inside foam—and if you need permanent outdoor lighting, choose an outdoor-rated product rather than improvising wiring.
You Nailed It If
Quick checks to confirm your cluster turned out well:
- No two candles are the same height.
- Hot-glue drips look uneven and pooled rather than as straight raised lines.
- The black finish is even and dry, with no tacky or sunken spots from a heavy coat.
- The cluster lifts by the base without pieces shifting or popping loose.
Conclusion
Pool noodle Halloween candles are an easy, inexpensive way to add dramatic seasonal decor. The basic process—cut, glue, drip, paint, and dress up—delivers reliable results. The key is the painting technique: keep the spray can about a foot away, use light passes, and allow proper drying time. With that handled, the rest of the project is forgiving and quick to repeat.
Show Us Your Cluster
Take a photo of your finished cluster and share it where you post your DIYs. We’d love to see how you styled yours and what extras you added.
Frequently asked questions
Pool Noodle Halloween Candles FAQs
Answers to common questions about this project.
Will spray paint melt pool noodle candles?
Not if you use the right technique. Pool noodles are polyethylene foam, which tolerates common spray paints. The problem is heavy, soaking coats—those can soften or pit the surface. Hold the can about a foot away and apply light coats, testing briefly on a scrap end if you’re unsure about a specific product.
What’s the best paint for pool noodle Halloween candles?
Matte black, water-based or latex spray paint is ideal. Chalk paint or craft acrylic can also be used and brushed on. More important than the exact product is the application: light coats, adequate distance, and drying time between passes.
What do the tea lights sit on inside the candle?
Just the foam itself. Cut a shallow scoop into the top of each piece while cutting to length. The tea light fits into that scoop—no additional support needed.
How do you make them look like real dripping wax?
Use uneven hot-glue drips before painting. Run a bead of hot glue from the top and let it pool and run naturally. Avoid smoothing the glue into straight lines; irregular pooling looks like real melted wax once painted.
Can you reuse them next year?
Yes, with proper reinforcement and storage. Add a second heavy bead to every glued joint after the first one cools. Consider a clear sealant for the painted surface and store the cluster in a box sized to fit to prevent crushing.
Still have a question? Ask in the comments of wherever you found this guide.
Spray Paint: Straight From the Can or Test First?
Builders split on this. If you’ve used a particular spray before and know it works, many skip testing. If you’ve never used that brand on foam, a quick test on a scrap end for ten seconds is cheap insurance and can prevent problems.