
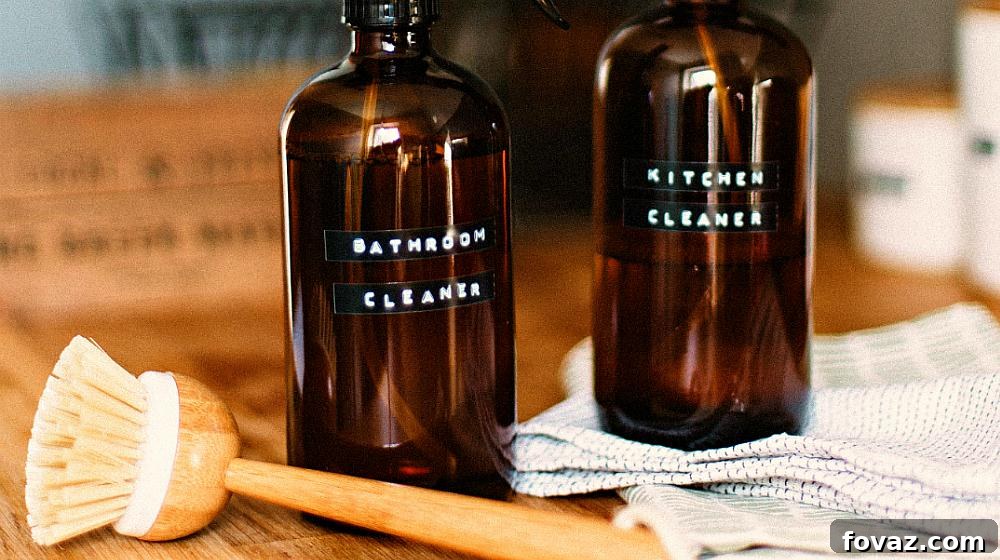
In the quest for a clean home, many of us seek products that are effective, affordable, and safe for our families and the environment. Commercial cleaners often come with hefty price tags and ingredient lists that are hard to pronounce, let alone understand. This is where the beauty of a DIY all-purpose cleaner shines. Crafting your own cleaning solutions provides an unparalleled balance of cost-effectiveness, ingredient control, and proven efficacy, ensuring a spotless home without harsh chemicals or unnecessary expenses. This comprehensive guide will empower you to create tailored cleaning solutions for virtually every surface, demystify common cleaning myths, and equip you with the knowledge to maintain a pristine, healthy living environment.
RELATED: Natural Cleaning Products You Can Use To Deep Clean Your Home
The Ultimate Guide to Making Your Own Effective All-Purpose Cleaners for Every Surface
Crafting the Right Cleaner for Each Unique Surface
Understanding that different surfaces demand specific care is the first step toward effective and damage-free cleaning. While the market is flooded with products claiming “all-purpose” capabilities, a tailored approach using DIY solutions often yields superior results and prolongs the life of your household items. Here, we delve into meticulously crafted recipes designed for optimal cleaning on a variety of materials, explaining the science behind each ingredient for maximum impact.
1. The Everyday Essential: Most Surfaces All-Purpose Cleaner
At its core, soap is a remarkably versatile and powerful cleaning agent. Its surfactant properties excel at emulsifying and lifting common dirt, grime, and grease from a multitude of surfaces. When appropriately diluted in water, this solution performs exceptionally well, ensuring a clean finish without leaving behind any sticky or hazy residue. This gentle yet potent recipe is perfect for routine maintenance and can tackle a vast array of daily household messes, leaving your countertops, sinks, and other washable surfaces sparkling clean and fresh.
Why this cleaner works wonders:
- Liquid Soap: Acts as a surfactant, which means it reduces the surface tension of water. This allows the water to spread more easily and penetrate grime, encapsulating dirt and grease particles so they can be effectively wiped away. Using a mild, eco-friendly dish soap is often sufficient.
- Baking Soda: A mild abrasive that aids in gently scrubbing away tougher, dried-on grime without scratching delicate surfaces. Furthermore, baking soda is a natural deodorizer, helping to neutralize unpleasant odors rather than just masking them.
- Water: Serves as the primary solvent, diluting the active ingredients to a safe and effective concentration. Using distilled water can prevent mineral buildup and water spots, especially in hard water areas.
- Optional Essential Oils: Beyond adding a pleasant aroma, certain essential oils like lemon, tea tree, or lavender offer natural antibacterial and antiseptic properties, boosting the cleaner’s efficacy and leaving a truly fresh scent.
Materials you’ll need:
- 2 cups (16 oz) of water (distilled water is recommended to prevent mineral deposits)
- 1 teaspoon of baking soda
- 1/4 teaspoon of liquid soap or dishwashing liquid (opt for a biodegradable brand)
- (Optional) 5-10 drops of your preferred essential oil (e.g., lemon, wild orange, tea tree)
- A clean, clearly labeled spray bottle
Step-by-step instructions:
Begin by combining all the ingredients directly into your spray bottle. Secure the lid tightly and shake vigorously for about 30 seconds to ensure all components are thoroughly mixed and the baking soda is dissolved. To use, simply mist the cleaner onto the desired surface. Allow it to sit for a few moments to break down any dirt or grease, then wipe clean with a damp cloth. For optimal, streak-free results, a microfiber cloth is highly recommended. This versatile solution is excellent for sealed countertops, ceramic tiles, chrome fixtures, and painted walls. Always perform a quick patch test on an inconspicuous area first, especially on new or particularly delicate surfaces.
2. Sparkling Shine: Homemade Stainless Steel Cleaner
Stainless steel appliances and surfaces are a cornerstone of modern kitchen design, admired for their durability, hygiene, and sleek aesthetic. Despite their rust and corrosion-resistant properties, they still require regular, specific maintenance to preserve their inherent luster and extend their lifespan. This specially formulated cleaner not only effectively removes fingerprints and smudges but also actively helps prevent the formation of unsightly water spots and minor oxidation, which can appear as reddish-brown marks. The key ingredient in this powerful concoction is white vinegar, celebrated for its mild acidic nature that dissolves mineral deposits, grease, and even minor rust, leaving your stainless steel surfaces brilliantly gleaming.
Understanding the magic behind this cleaner:
- White Vinegar: Its acetic acid content is highly effective at dissolving hard water stains, grease, mineral deposits, and the initial stages of rust (iron oxide) without causing damage to the stainless steel finish. It also naturally disinfects and brightens surfaces.
- Water: Crucial for diluting the vinegar to an appropriate concentration, making it safe for regular use and preventing any harshness on the surface.
- Essential Oils: Offer more than just a pleasant scent; certain oils can contribute additional cleaning benefits. For instance, citrus oils (like orange or grapefruit) are excellent degreasers, while peppermint or eucalyptus provide a refreshing aroma.
Materials you’ll need:
- 2 cups (16 oz) of water
- 1 cup (8 oz) of white vinegar
- 10-15 drops of essential oil (e.g., orange, lemon, or grapefruit for a fresh, clean aroma)
- A durable spray bottle
Step-by-step instructions:
Combine all the listed ingredients into your spray bottle and shake vigorously to ensure a well-mixed solution. When cleaning stainless steel, the technique is as important as the solution itself: always wipe in the direction of the metal grain to avoid streaks and maintain the integrity of the finish. Lightly spray the cleaner directly onto the stainless steel surface. For general cleaning and removing fingerprints, wipe immediately with a slightly damp microfiber cloth, consistently following the grain. For tougher smudges or stains, allow the mixture to penetrate for a few minutes before wiping clean. Finish by buffing the surface with a separate, dry microfiber cloth. This final step is crucial for enhancing the shine and preventing any residual water spots, leaving your stainless steel looking brand new.
3. Gentle Elegance: Granite and Marble Surface Cleaner
Granite and marble are natural stones that embody luxury and sophistication, making them popular choices for countertops, backsplashes, and even flooring. Their smooth, polished surfaces are undoubtedly beautiful, but they are also uniquely sensitive. These porous materials can easily show streaks and residue if not cleaned correctly, and they are particularly vulnerable to acidic cleaners which can etch their surface or degrade their protective sealant over time. While a very mild soap and water solution can sometimes suffice, this alcohol-based cleaner is specifically formulated to deliver a brilliant, sleek finish without leaving any residue or risking damage to these precious stones.
Understanding the superiority of this blend:
- Rubbing Alcohol (70% Isopropyl): The star ingredient here, rubbing alcohol evaporates quickly and completely, ensuring a perfectly streak-free finish. It is highly effective at dissolving greasy residues, fingerprints, and smudges without leaving any film. Additionally, it acts as an effective disinfectant, which is a welcome bonus.
- Water: Used to dilute the rubbing alcohol to a safe and gentle concentration, suitable for daily use on natural stone without stripping its sealant. Distilled water is highly recommended to avoid introducing any hard water minerals that could lead to spots.
Materials you’ll need:
- 1/3 cup (2.67 oz) of 70% rubbing alcohol
- 3 cups (24 oz) of water (distilled water is preferred for streak-free results)
- A reliable spray bottle
Step-by-step instructions:
Pour all the ingredients into the spray bottle and give it a good shake to mix thoroughly. Lightly mist the cleaner onto your granite or marble surface. It is crucial to immediately wipe clean with a soft, dry cloth. Microfiber cloths are exceptionally well-suited for this task, as their fine fibers are gentle on delicate surfaces and highly absorbent, effectively preventing scratches and ensuring a smooth, gleaming finish. Avoid allowing the cleaner to sit on the surface for extended periods, as this could potentially compromise the stone’s sealant over time. This method ensures your exquisite stone surfaces remain pristine, streak-free, and undamaged.
Important Note for Delicate Surfaces: When cleaning any delicate or expensive surface, especially natural stone, the choice of cleaning cloth is paramount. Always opt for soft materials such as microfiber or high-quality cotton cloths. Avoid abrasive sponges, rough rags, or paper towels that might contain wood fibers, as these can cause irreversible scratches or leave behind lint, diminishing the beauty of your countertops and other finishes.
4. Nourishing Luster: All-Purpose Wood Cleaner and Polish
Wood surfaces, whether they grace your furniture, cabinetry, or flooring, infuse your home with warmth, character, and timeless elegance. However, they demand a distinct cleaning regimen that goes beyond merely removing dirt. Frequent washing with harsh chemical cleaners can strip wood of its natural oils, leading to dryness, brittleness, and a dull, worn appearance. This unique DIY recipe offers a dual benefit: it effectively cleans while simultaneously nourishing and polishing your wood surfaces. The strategic inclusion of olive oil is key to this dual action, restoring the wood’s natural sheen and providing a subtle protective barrier against everyday wear and tear.
The secret behind its conditioning power:
- Warm Water: Helps to dissolve grime and sticky residues more effectively than cold water, allowing for easier cleaning.
- Distilled White Vinegar: Acts as a mild disinfectant and cuts through light grease and dirt. It’s used sparingly in this recipe to ensure it cleans without drying out the wood.
- Olive Oil: This is the conditioning hero. Olive oil penetrates the wood, hydrating it, enriching its color, and creating a natural, soft luster. It helps to repel dust and moisture, offering a gentle protective barrier.
- Optional Essential Oils: Beyond scent, certain essential oils can enhance the wood-polishing properties. Lemon oil is known for its ability to cut through grime and leave a shine, while cedarwood or orange oil can nourish and protect wood surfaces.
Materials you’ll need:
- 2 cups (16 oz) of warm water
- 1 tablespoon of distilled white vinegar
- 2 tablespoons of olive oil (extra virgin or light olive oil works best)
- (Optional) 10-15 drops of essential oil (e.g., lemon, orange, cedarwood for a naturally rich aroma and added cleaning benefits)
- A clean spray bottle
Step-by-step instructions:
Pour all the ingredients into your spray bottle. It’s crucial to shake the bottle vigorously before *each* use, as oil and water will naturally separate. Lightly mist the cleaner onto the wooden surface, taking care not to oversaturate the wood. Immediately wipe clean with a dry, soft microfiber cloth, always moving in the direction of the wood grain. The olive oil will gently polish the wood, leaving a beautiful, subtle sheen that makes the grain pop. This versatile cleaner is suitable for a wide range of wood items, including furniture, cabinets, doors, and even sealed wooden floors. For wooden floors, apply the cleaner sparingly – a little goes a long way. Mist a small section at a time and immediately wipe dry with a mop or cloth to avoid leaving any slippery residue or causing moisture damage. Always test this cleaner in an inconspicuous area first, especially on antique, unsealed, or waxed wood finishes, to ensure compatibility.
Note for Wooden Floors: While effective, exercise particular caution to prevent pooling the cleaner on wooden floors. Excessive moisture can cause warping or damage to the finish. Lightly mist and wipe immediately.
5. Crystal Clear: Streak-Free Glass Cleaner

Achieving truly streak-free glass can often feel like a perpetual challenge. Many commercial glass cleaners tend to leave behind a hazy film or frustrating streaks, particularly when windows are exposed to direct sunlight. Fortunately, attaining impeccably clean and perfectly clear glass doesn’t have to be a struggle. This simple yet highly effective DIY recipe masterfully combines distilled water, vinegar, and rubbing alcohol to ensure your windows, mirrors, glass tables, and other glass surfaces are flawlessly clean, transparent, and free from any annoying residue.
The science behind streak-free brilliance:
- Distilled Water: The most crucial ingredient for streak-free cleaning. Unlike tap water, distilled water is free from minerals and impurities (like calcium and magnesium) which are typically responsible for leaving behind unsightly streaks and water spots as the water evaporates.
- White Vinegar: Its mild acidity is excellent at cutting through grease, fingerprints, smudges, and general grime. It helps dissolve residues from previous cleaners and leaves a sparkling, clear finish without harsh chemicals.
- Rubbing Alcohol (70% Isopropyl): Acts as a powerful and rapid-evaporating solvent. The quick evaporation time is key to preventing streaks from forming, as it ensures the liquid doesn’t linger on the surface long enough for residues to settle. It also provides a degree of sanitization.
Materials you’ll need:
- 1 cup (8 oz) distilled water
- 2-3 tablespoons of white vinegar
- 1/4 cup (2 oz) of rubbing alcohol (70% isopropyl alcohol is ideal)
- A clean spray bottle
Step-by-step instructions:
As with our other effective recipes, simply combine all the ingredients directly into the spray bottle and shake well to ensure they are fully integrated. Spray a fine, even mist onto the glass surface. Immediately wipe clean with a thoroughly wrung damp cloth, or even better, a dedicated clean microfiber cloth. Many professional cleaners also swear by crumpled newspaper (black and white print only, to avoid ink transfer) as its fibers are excellent for streak-free results. Work in small sections, wiping from top to bottom or side to side in a consistent, overlapping pattern. For larger windows or glass doors, clean one pane or a manageable section at a time to prevent the solution from drying prematurely.
Optimal Cleaning Conditions: For exterior windows, pay close attention to the weather conditions. Cleaning on very hot, sunny, or windy days can cause the cleaner to evaporate too rapidly, leading to unavoidable streaks. Overcast, mild days are ideal for achieving the best possible streak-free results, as the slower evaporation allows more time for thorough wiping.
RELATED: Homemade Cleaning Products: What You Should Know Before You DIY
Debunking Common Cleaning Myths and Misconceptions
The world of cleaning is often influenced by persistent myths, anecdotal evidence, and clever marketing that can lead to ineffective practices or, worse, damage to your precious belongings. Understanding the truth behind these widespread misconceptions is paramount for maximizing your cleaning efficiency, ensuring the safety of your household items, and fostering a truly clean and healthy living environment. Let’s separate the facts from the fiction and equip you with accurate knowledge.
1. The “All-Purpose” Misnomer: Why Multi-Purpose is a More Accurate Term
The term “all-purpose cleaner” is incredibly pervasive in marketing, yet it’s fundamentally misleading. It often implies that a single product can safely and effectively clean every single surface and tackle every type of stain in your home. In reality, a more accurate and responsible designation would be “multi-purpose cleaner.” While a carefully formulated cleaner can certainly handle most common dirt and grime on a wide variety of non-delicate surfaces, it’s crucial to acknowledge its limitations. For example, highly acidic cleaners are detrimental to natural stone surfaces, strong alkaline solutions can strip finishes from certain woods, and abrasive cleaners will inevitably scratch delicate or polished materials. Effective cleaning truly hinges on using the right tool for the job. Always take a moment to consider the specific ingredients of your cleaner and the material you’re cleaning to prevent unwanted damage, ensure the longevity of your surfaces, and achieve optimal cleaning performance. A true “all-purpose” cleaner, without potential compromises or risks, simply does not exist.
2. The Fizzing Fallacy: Baking Soda and Vinegar – When Not to Mix
Among the most widely circulated “homemade cleaning hacks” is the combination of baking soda and vinegar. It’s undeniable that when these two ingredients meet, a dramatic chemical reaction ensues, characterized by vigorous bubbling and fizzing. However, it’s precisely this immediate, visible reaction that largely diminishes their combined cleaning power in many applications. The fizzing is primarily an acid-base neutralization reaction, which produces water, a salt (sodium acetate), and carbon dioxide gas. Once the bubbling subsides, the active cleaning properties of both the acidic vinegar and the alkaline baking soda are significantly reduced, essentially leaving you with a solution of salty water that has minimal cleaning efficacy. While both are exceptional cleaners independently – baking soda as a mild abrasive, deodorizer, and alkaline cleaner, and vinegar as an acidic disinfectant and grease cutter – combining them prematurely in a spray bottle for general cleaning renders them much less effective than using them separately. For optimal results, use them sequentially: sprinkle baking soda on a surface to act as an abrasive, then spray vinegar on top to activate a localized fizzing action for tackling stubborn clogs, stains, or grout. The reaction needs to occur directly where it’s needed to be most effective, not prematurely in a bottle.
3. The Aroma Overload: Essential Oils – Quality Over Quantity for Safety
The allure of essential oils in DIY cleaners is immense. Beyond their delightful, natural aromas, many possess inherent antibacterial, antiviral, and antifungal properties, making them a popular and beneficial addition for cultivating a healthier home environment. It’s incredibly tempting to add a generous abundance of drops, believing that more means better efficacy or a stronger, more lasting scent. However, this common misconception can lead to potential health risks. Essential oils are highly concentrated plant extracts; their potency means that in excessive doses, their toxicity levels can become a legitimate concern. Overuse can lead to various adverse reactions, including skin irritation (especially with undiluted contact), respiratory issues (from excessive inhalation), or even more severe systemic reactions, particularly in sensitive individuals, young children, and pets. For example, some citrus oils can increase skin photosensitivity, while certain oils are toxic if ingested. Always adhere strictly to recommended dilution rates (typically 5-10 drops per 2 cups of cleaner is sufficient for efficacy and scent) and thoroughly research the specific properties and safety guidelines of each essential oil you choose to use. Balance is paramount – enjoy the incredible benefits and beautiful scents of essential oils responsibly without succumbing to the temptation of overdoing it.
Ready to elevate your cleaning game further? Watch this insightful video by Emily Carmona to learn how to make an effective disinfectant spray and keep those pesky bacteria at bay:
In conclusion, the efficacy of your cleaning endeavors ultimately depends on a thoughtful approach to selecting and preparing the right cleaner for the specific task at hand. By embracing the principles of DIY cleaning, understanding the unique properties of various natural ingredients, and tailoring your solutions to different surfaces, you are not only achieving superior, sparkling results but also cultivating a safer, healthier, and more sustainable home environment. Empower yourself with the knowledge to create your own effective homemade cleaners and maximize your cleaning prowess for a consistently pristine living space!
Did these homemade all-purpose cleaners revolutionize your cleaning routine? We’d love to hear about your experiences, favorite recipes, and any additional tips in the comments section below!
UP NEXT:
- How to Clean Your Keurig
- 10-Minute Cleaning Hacks To Keep Your Home Sparkling
- 6 Cool Home Office Ideas
Calling all crafting DIYhards, DIY Projects needs YOU! Click here if you want to contribute for us.
Don’t forget to stay connected with us on Facebook, Twitter, Pinterest, and Instagram!