
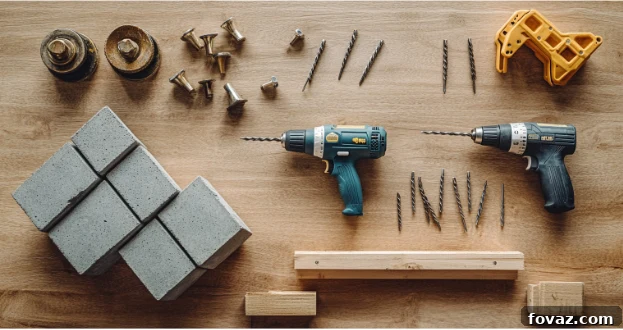
Transform Your Outdoor Space: The Ultimate Guide to DIY Patio Furniture
Imagine lounging in a custom-built Adirondack chair, dining at a handcrafted outdoor table, or simply relaxing on a unique bench you created with your own hands. Outdoor furniture doesn’t have to drain your wallet or demand professional expertise. With a few basic materials, some simple tools, and a free weekend, you can build functional, attractive, and highly personalized DIY patio furniture, regardless of your experience level. Each completed project not only enhances the comfort and style of your outdoor space but also imbues it with a sense of personal achievement and unique charm.
Choosing to build your own patio furniture offers unparalleled flexibility. You gain complete control over the materials, the finish, the dimensions, and the overall layout, ensuring that every piece perfectly complements your outdoor area and lifestyle. Even a small initial effort can lead to a significant transformation, converting an underutilized backyard into a vibrant extension of your home.
Why Build Your Own Outdoor Furniture? Unlocking the Benefits
Beyond the satisfaction of creating something with your hands, DIY patio furniture brings a wealth of advantages:
- Significant Cost Savings: Store-bought outdoor furniture, especially high-quality pieces, can be remarkably expensive. By sourcing raw or reclaimed materials, you can often build comparable pieces for a fraction of the retail price, freeing up your budget for other home improvements.
- Complete Customization: Forget settling for limited styles or sizes. DIY allows you to design furniture that perfectly fits your aesthetic preferences, unique space dimensions, and specific functional needs. Want a longer bench? A table with a specific height? A unique color? The choice is yours.
- Skill Development and Personal Satisfaction: Each project is an opportunity to learn new skills, from basic cutting and joining to more advanced carpentry techniques. The pride of relaxing on furniture you’ve personally constructed is an incredibly rewarding experience that ready-made items can’t replicate.
- Enhanced Durability and Quality: When you build your own, you select the materials and ensure the construction quality. You can choose weather-resistant woods, use robust fasteners, and apply superior sealants, often resulting in furniture that outlasts mass-produced alternatives.
- Sustainability and Eco-Friendliness: Opting for reclaimed wood, pallets, or upcycled materials reduces waste and minimizes your environmental footprint. It’s a fantastic way to give new life to discarded items and contribute to a more sustainable lifestyle.
Getting Started: Essential Tools, Materials, and Safety Tips
Before you dive into your first project, it’s wise to gather your essentials and prioritize safety. A little preparation goes a long way in ensuring a smooth and successful build.
Your Essential DIY Tool Kit
Even for beginner projects, a few fundamental tools will be indispensable. As you progress to more complex builds, you can gradually expand your collection:
- Measuring Tape and Pencil: For accurate measurements and markings.
- Saw: A hand saw is sufficient for simple cuts, but a miter saw or circular saw will significantly speed up and improve precision for larger projects.
- Drill/Driver: Essential for pre-drilling holes and driving screws, saving your wrists from fatigue.
- Sander (or Sandpaper): To smooth rough edges and prepare surfaces for finishing. An orbital sander is a great investment.
- Clamps: Invaluable for holding pieces together while gluing or fastening.
- Safety Gear: Always wear safety glasses to protect your eyes, gloves to prevent splinters, and hearing protection when using power tools.
- Level and Square: To ensure your builds are straight, plumb, and structurally sound.
Selecting the Right Materials for Outdoor Longevity
The success and lifespan of your DIY patio furniture heavily depend on your material choices, especially wood. Consider these popular options:
- Cedar: Naturally resistant to rot, decay, and insect infestations, cedar is an excellent choice. It’s lightweight, attractive, and holds up well in various climates.
- Teak: Known for its exceptional durability and natural oils that protect against moisture, pests, and UV rays. Teak is a premium option, often more expensive but incredibly long-lasting.
- Pressure-Treated Pine: This wood is chemically treated to resist rot and insects, making it very suitable for outdoor use and usually more budget-friendly than cedar or teak. Ensure it’s fully dry before sealing or painting.
- Cypress: Similar to cedar, cypress offers good natural resistance to decay and insects due to its inherent oils.
- Reclaimed Wood/Pallets: A sustainable and cost-effective option, but ensure pallets are heat-treated (HT) and not chemically treated (MB). Always clean and inspect reclaimed wood thoroughly.
Beyond wood, remember to use exterior-grade fasteners (stainless steel or galvanized screws and bolts) and apply high-quality outdoor sealants, paints, or stains to protect your creations from the elements.
Safety First: Protecting Yourself During DIY Projects
Working with tools and materials requires vigilance. Always:
- Wear appropriate personal protective equipment (PPE): safety glasses, gloves, and hearing protection.
- Read and understand the manuals for all power tools before use.
- Work in a well-ventilated area, especially when cutting wood or applying finishes.
- Keep your workspace clean and organized to prevent tripping hazards.
- Never operate tools when fatigued or under the influence of substances.
- If you’re unsure about a step, consult an expert or an online tutorial.
Beginner-Friendly DIY Patio Furniture Projects: Quick Wins and Budget Savers
If you’re new to building or prefer projects that require minimal tools and time, start here. These ideas are fast, budget-friendly, and perfect for boosting your confidence.
Cinder Block Bench: Instant Seating with No Tools
This is arguably one of the easiest and fastest DIY outdoor furniture projects. It requires no cutting, drilling, or complex assembly, making it ideal for absolute beginners.
Materials Needed:
- 8-12 cinder blocks (depending on desired length)
- 2-3 sturdy wooden beams or 4×4 posts (e.g., pressure-treated lumber), cut to your desired bench length
- Optional: Outdoor cushions, spray paint for cinder blocks, strong outdoor adhesive
Construction:
- Choose a flat, stable surface for your bench.
- Arrange two sets of 2-3 cinder blocks vertically, spaced apart to form the legs. Ensure the holes face outwards.
- Carefully slide the wooden beams through the top holes of the cinder blocks, spanning the gap between the two sets of legs.
- For added stability, you can stack another layer of cinder blocks on top of the first, securing them with outdoor adhesive.
- Add comfortable outdoor cushions, and your instant seating is ready!
Variations: Paint the cinder blocks a vibrant color, use multiple rows of blocks for a higher backrest, or integrate additional blocks for built-in side tables.
Pallet Coffee Table: Rustic Charm with Practicality
Wooden pallets are a DIY enthusiast’s dream, offering a sturdy base for countless projects. A pallet coffee table is simple yet highly functional, adding a touch of rustic charm to any patio.
Materials Needed:
- 1-2 heat-treated (HT) wooden pallets (ensure they are clean and free of splinters)
- Sandpaper (medium to fine grit) or an orbital sander
- Outdoor wood stain, paint, or sealant
- Optional: 4 caster wheels with mounting screws, a piece of tempered glass for the top
Construction:
- Thoroughly clean the pallet(s) and sand down all surfaces to remove splinters and rough spots. Pay extra attention to areas that will be frequently touched.
- Apply your chosen outdoor stain, paint, or sealant according to product instructions. Allow it to dry completely.
- If using caster wheels, attach one to each corner of the bottom pallet using appropriate screws.
- If using two pallets, stack one on top of the other for added height and stability, securing them with screws.
- Place a piece of tempered glass on top for a smooth, easy-to-clean surface, or leave it rustic for a more natural look.
This piece is low-effort but high-function, providing a perfect spot for drinks, snacks, or decorations.
Milk Crate Stools: Lightweight, Affordable, and Multi-Purpose
Plastic milk crates are incredibly versatile and can be transformed into lightweight, affordable stools that double as storage units. They are perfect for small spaces or as extra seating when guests arrive.
Materials Needed:
- 1-2 sturdy plastic milk crates per stool
- Plywood or a thick piece of wood cut to fit the top of the crate
- Foam padding or a small cushion
- Outdoor fabric (e.g., canvas, duck cloth)
- Staple gun, strong outdoor adhesive, or Velcro
Construction:
- Flip the plastic milk crate(s) upside down.
- Cut a piece of plywood or wood to the exact dimensions of the crate’s top opening. This will provide a solid base for the cushion.
- Cut the foam padding to the same size as the wood base.
- Wrap the foam and wood base with your chosen outdoor fabric, securing it neatly with a staple gun on the underside of the wood. Ensure the fabric is taut.
- Secure the upholstered cushion to the top of the flipped milk crate using strong outdoor adhesive or heavy-duty Velcro.
These complete stools are lightweight, affordable, and, as a bonus, offer convenient storage inside the crate for small items like garden tools or children’s toys.
For more simple and inspiring outdoor builds, explore Family Handyman’s patio project list.
Intermediate DIY Builds: Enhancing Your Craft and Outdoor Aesthetic
Once you’ve gained confidence with basic tools and techniques, it’s time to tackle projects that offer improved design, greater durability, and a more custom look. These mid-level builds require a bit more time and precision but deliver significantly more impact.
Classic Adirondack Chairs: Timeless Comfort and Style
Adirondack chairs are renowned for their comfortable, reclined design and timeless appeal. While they may appear detailed, using readily available templates makes creating these iconic chairs much more manageable for the intermediate builder.
Materials Needed:
- Pressure-treated lumber or cedar (specific dimensions as per template)
- Exterior-grade screws and bolts
- Wood glue (waterproof)
- Sandpaper or orbital sander
- Outdoor wood stain or paint
- Adirondack chair plan/template
Construction:
- Obtain a detailed plan or template online (many free resources are available).
- Carefully cut all pieces according to the plan, paying close attention to angles and curves.
- Assemble the backrest, seat, and armrests separately using wood glue and screws.
- Join these components to form the complete chair frame, ensuring all connections are sturdy and square.
- Sand all surfaces thoroughly to smooth edges and prepare for finishing.
- Apply multiple coats of an outdoor-rated stain or paint for protection and desired aesthetic.
With patience and meticulous sanding, you’ll have a pair of classic, incredibly comfortable seats perfect for relaxing in your backyard or on your deck.
Robust Outdoor Sofa Frame: Customized Lounge Experience
Building your own outdoor sofa frame allows you to create a lounge area perfectly sized for your patio, complete with cushions that suit your style. It’s a foundational project that offers both comfort and aesthetic appeal.
Materials Needed:
- 2×4 or 2×6 pressure-treated lumber (or cedar)
- Exterior-grade screws and bolts
- Wood glue (waterproof)
- Optional: Slats for seat and backrest, weather-resistant outdoor cushions
- Outdoor sealant or paint
Construction:
- Construct a rectangular base frame for the seat using sturdy lumber, ensuring it’s level and square. Reinforce corners with additional bracing.
- Add vertical posts to form the armrests and backrest frame, securing them firmly to the base.
- Install slats across the seat area, spaced evenly to support cushions. You can also add slats for the backrest.
- Sand all surfaces, paying attention to exposed edges.
- Apply several coats of an exterior-grade sealant or paint to protect the wood from moisture and UV rays.
- Top with high-quality, weather-resistant outdoor cushions for ultimate comfort.
The completed sofa frame looks fantastic on patios or small decks and can be designed as a single sofa, a love seat, or even a sectional by building multiple units.
Elegant Slatted Coffee Table: Clean Lines and Custom Finish
A slatted coffee table offers a clean, modern aesthetic and is a versatile addition to any outdoor seating arrangement. Its design allows for good drainage, which is beneficial in an outdoor environment.
Materials Needed:
- Pressure-treated lumber or cedar (e.g., 1x3s or 1x4s for slats, 2x2s or 2x4s for the frame)
- Exterior-grade screws and wood glue
- Miter saw for precise cuts
- Sander or sandpaper
- Outdoor paint, stain, or varnish
Construction:
- Build a sturdy rectangular base frame for the table, ensuring it’s square and level.
- Cut numerous equal-length boards for the tabletop slats.
- Attach the slats to the top frame, spacing them slightly apart (e.g., 1/4 inch) to allow for drainage and a consistent look. Use a spacer block to ensure even gaps.
- For the legs, attach 2×2 or 2×4 lumber to the inner corners of the frame, ensuring they are plumb and secure. Add cross-bracing for stability if needed.
- Thoroughly sand all surfaces to achieve a smooth finish.
- Apply your desired outdoor-rated paint, stain, or varnish to protect the wood and enhance its appearance.
The result is a clean-lined, durable, and fully customizable coffee table that will serve as a stylish centerpiece for your outdoor gatherings.
Advanced DIY Furniture: Creating a Stunning Outdoor Oasis
If you’ve mastered the basics and intermediate builds, it’s time to elevate your outdoor living area with more ambitious projects. These ideas involve precise cuts, careful assembly, and a greater time investment, but the payoff in terms of impact and functionality is truly worth the effort.
Built-In Storage Seating: Combining Comfort and Organization
Maximizing space and functionality is key in outdoor areas. Built-in storage seating offers comfortable lounging options while providing discreet storage for cushions, garden tools, or children’s toys. This project requires careful measurement and robust construction.
Materials Needed:
- Pressure-treated lumber or cedar (various dimensions for frame, panels, and tops)
- Exterior-grade screws, bolts, and waterproof wood glue
- Heavy-duty outdoor hinges for the tops
- Outdoor sealant or paint
- Weather-resistant cushions
Construction:
- Design your seating layout, typically an L-shape or straight bench, and plan individual box units.
- Construct sturdy wooden boxes with solid bases and sides, ensuring they are square and built to withstand outdoor elements.
- Create hinged tops for each box that fit snugly and can support weight when closed. Use heavy-duty outdoor hinges.
- Arrange the individual boxes to form your desired sectional or bench. Secure them together if necessary.
- Apply multiple coats of an exterior-grade sealant or paint to protect the wood from moisture and UV damage, paying close attention to all seams and edges.
- Add comfortable, weather-resistant cushions to complete the seating.
This project not only provides ample seating but also helps keep your outdoor space tidy and organized, making it a highly practical and impressive addition.
Custom Outdoor Dining Set: The Heart of Al Fresco Gatherings
A custom-built outdoor dining set can become the focal point of your backyard, perfect for hosting barbecues, family meals, and social gatherings. This project typically involves building a full-length table and matching benches, requiring solid construction techniques for stability and longevity.
Materials Needed:
- High-quality cedar, treated lumber, or composite decking for ultimate durability
- Heavy-duty exterior-grade screws, bolts, and carriage bolts for strong joinery
- Waterproof wood glue
- Miter saw, circular saw, and drill
- Sander
- Exterior-grade finish (stain, paint, or clear sealant)
Construction:
- Begin by constructing a robust frame for the table using thick lumber, ensuring the legs are firmly attached and cross-braced for maximum stability.
- Assemble the tabletop using carefully selected boards, joining them securely. Consider spacing for drainage or solid planks for a smooth surface.
- Next, build matching benches, replicating the same quality and design elements as the table. Ensure the benches have reinforced supports to accommodate multiple people.
- Thoroughly sand all components to eliminate splinters and prepare the surfaces for finishing.
- Apply multiple coats of an exterior-grade finish to protect against the elements, enhance the wood’s natural beauty, and ensure long-term durability.
A handcrafted dining set provides a unique and inviting space for outdoor entertaining, designed precisely to your specifications and built to last for many seasons.
Dreamy Pergola Swing Bed: The Ultimate Outdoor Retreat
For the truly ambitious DIYer, a pergola swing bed is a luxurious and unforgettable addition to any large backyard. It combines the architectural beauty of a pergola with the ultimate relaxation of a suspended bed, creating a tranquil outdoor escape.
Materials Needed:
- Sturdy 4×4 or 6×6 pressure-treated posts for the pergola frame
- 2×6 or 2×8 lumber for crossbeams and rafters
- Heavy-duty rope, chains, or braided steel cables for hanging the bed
- Wood for the twin mattress platform frame and slats
- Exterior-grade screws, bolts, and lag screws
- Concrete footings or post anchors
- Twin mattress, outdoor pillows, and canopy fabric
- Outdoor lights (optional)
Construction:
- Start by securely installing the 4×4 or 6×6 pergola posts into the ground using concrete footings or robust post anchors. Ensure they are perfectly plumb and level.
- Construct the top pergola frame using crossbeams and rafters, securing them firmly to the posts to create a strong overhead structure.
- Build a sturdy platform frame for a twin-sized mattress, using robust lumber and adding evenly spaced slats for support.
- Install heavy-duty eye bolts or hooks into the pergola’s crossbeams, ensuring they are rated for significant weight.
- Attach the ropes, chains, or cables to the corners of the mattress platform and then to the pergola’s hanging points, adjusting for level and desired swing height.
- Adorn the swing bed with a comfortable twin mattress, an abundance of outdoor pillows, a protective canopy, or enchanting string lights for a truly magical outdoor retreat.
This project may be complex and time-consuming, requiring careful planning and execution, but the resulting furniture piece is a stunning, unforgettable oasis that will be cherished for years.
The Lasting Value of Handcrafted Outdoor Furniture: Build Skills, Save Money, and Enjoy Your Space
Building your own patio furniture is far more than just a means to save money—it’s an enriching journey that sharpens your practical skills, nurtures your creativity, and allows you to craft truly unique pieces tailored precisely to your needs and taste. Each handcrafted item adds invaluable function and personality to your outdoor space while offering long-term value that store-bought items simply cannot match.
From simple, basic items like sturdy cinder block benches or charming pallet tables to more elaborate outdoor sofas and dining sets, the transformation you can achieve in your backyard is remarkable. With the right tools, a bit of planning, and a dedicated weekend, you can start small and progressively work your way up, continuously enhancing your outdoor living area with bespoke furniture that tells a story—your story.
What project are you planning to tackle next? Share your DIY patio furniture ideas and experiences in the comments below—we’d love to hear from you and inspire others!
Frequently Asked Questions About DIY Patio Furniture
- What is the best wood for DIY patio furniture?
Cedar, teak, and pressure-treated pine are highly recommended for outdoor use due to their natural resistance to rot, decay, and insects, offering excellent durability and longevity. - Can I build DIY patio furniture without power tools?
Absolutely! Many beginner projects like cinder block benches, pallet coffee tables, and milk crate seats require minimal to no power tools, making them accessible even if you only have hand tools. - How do I waterproof my outdoor furniture effectively?
To waterproof your DIY furniture, apply an exterior-grade wood sealant or paint that offers UV and moisture protection. Use waterproof cushions, and consider storing smaller items or cushions under cover during heavy rain or off-season. - Are pallets safe for building furniture?
Yes, but choose wisely. Only use heat-treated pallets marked with “HT,” which means they’ve been sanitized with heat. Avoid pallets marked “MB” (Methyl Bromide) as they contain harmful chemical treatments. Always clean and sand pallets thoroughly. - How much can I save by building instead of buying?
Savings vary widely depending on the project’s complexity and materials used. However, you can typically save anywhere from $100 to $600 or even more per piece by utilizing reclaimed materials or purchasing raw lumber yourself, compared to retail prices for similar quality items. - Where can I find reliable plans for advanced patio furniture?
Numerous excellent online resources provide free downloadable guides and cut lists for advanced projects. Websites like Ana White, Instructables, and Family Handyman are fantastic starting points for detailed plans and step-by-step instructions. - What tools are typically needed for intermediate projects?
For intermediate projects, you’ll generally benefit from a miter saw (for accurate angle cuts), a cordless drill/driver, a measuring tape, a speed square (for ensuring square cuts), a sanding tool (orbital sander), and, of course, essential safety gear. - Can I stain or paint my DIY patio furniture?
Yes, absolutely! Using outdoor-rated paints or stains is highly recommended. Not only do they allow you to customize the look of your furniture, but they also provide an essential layer of protection against weather damage, UV rays, and moisture, extending its lifespan. - How do I maintain DIY furniture seasonally for longevity?
To maintain your DIY outdoor furniture, wipe it down regularly to remove dirt and debris. Re-seal wood surfaces annually or bi-annually with an appropriate exterior sealant. Store cushions indoors when not in use or during harsh weather to prevent mildew and fading. - What’s a fast weekend project for beginners looking for quick results?
For a quick weekend project, try building a cinder block bench, a simple pallet coffee table, or a few milk crate seats. Each of these can often be completed in a few hours, providing instant gratification and functional outdoor pieces.