
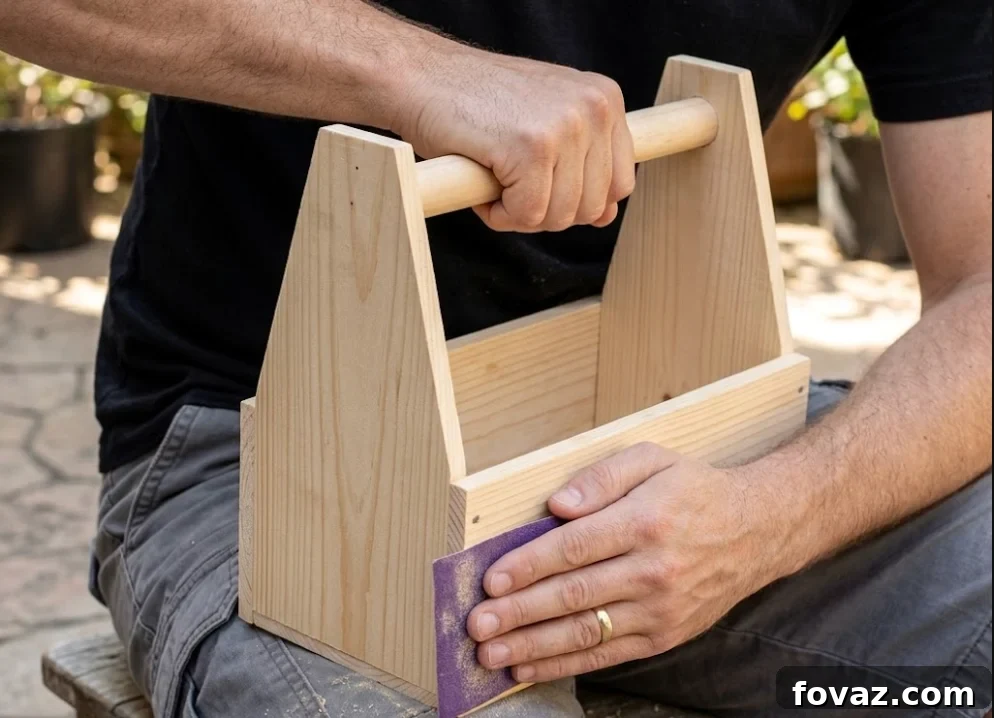
At a Glance: DIY Classic Wooden Toolbox
- Build a classic, heavy-duty wooden tool tote from standard 1.80 cm stock with a solid, comfortable dowel handle.
- Complete material breakdown, exact component dimensions, and a beginner-friendly assembly workflow using basic shop tools.
- Practical fixes for common woodworking mistakes to avoid splitting, blowout, and blotchy finishes.
There’s a special satisfaction in clearing the bench, selecting lumber, and shaping it into something useful. Whether you want a meaningful handmade Father’s Day gift or a focused weekend project to sharpen skills, this wooden tool tote is straightforward, sturdy, and rewarding to build.
Materials List
- Lumber: One 4×4 foot panel of 1.80 cm (approx. 3/4-inch / 18 mm) plywood or solid pine board.
- Dowel: One 3.50 cm diameter hardwood dowel (min. 60.00 cm long).
- Fasteners: 3.80 cm (1.5-inch) wood screws or 18-gauge brad nails.
- Adhesive: High-strength wood glue.
- Finishing: 120-grit and 220-grit sandpaper, plus a low-VOC sealer or finishing oil.
Master Cut List
| Component | Qty | Thickness | Width | Length | Shape |
| 1. Base Panel | 1 | 1.80 cm | 24.40 cm | 56.40 cm | Rectangle |
| 2. Long Side Panels | 2 | 1.80 cm | 25.00 cm | 60.00 cm | Rectangle |
| 3. End Gable Panels | 2 | 1.80 cm | 28.00 cm | 43.87 cm | Tapered Hexagon |
| 4. Round Handle Dowel | 1 | 3.50 cm (Dia.) | — | 60.00 cm | Cylinder |
Tip: Lay out the pieces on your sheet to minimize waste. Dry-fit parts before cutting or gluing to confirm measurements.
DIY Classic Wooden Toolbox Step-by-Step Instructions
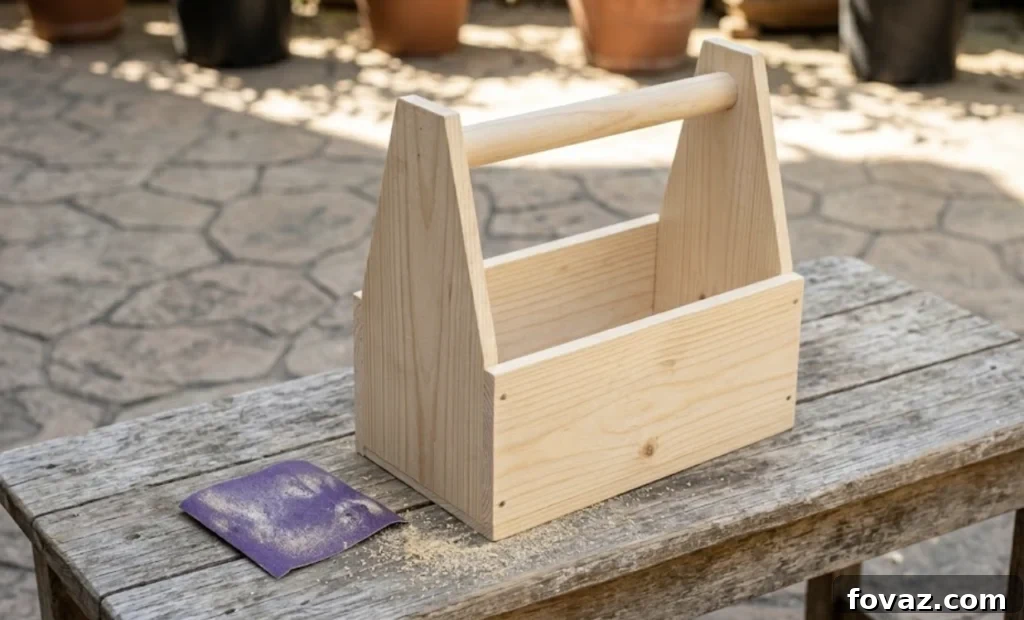
Step 1: Cut and Taper the End Gables
Cut two End Gable blanks to 28.00 cm wide by 43.87 cm tall. From the bottom, mark 25.00 cm up both side edges. On the top edge, find the horizontal center and mark 4.23 cm out from center on each side so the flat top measures 8.46 cm. Connect the 25.00 cm side marks to the outer top marks with straight lines and cut the angled shoulders with a jigsaw or miter saw.
Step 2: Drill the Handle Holes
On the upper tapered section of each End Gable, locate the center just below the 8.46 cm flat top. Use a 3.50 cm Forstner bit (or equivalent spade bit) to bore a clean hole through each panel sized to accept the dowel handle.
Step 3: Prep and Sand the Pieces
Sand all inside faces and the dowel before assembly. Start with 120-grit to remove machine marks, then finish with 220-grit for a smooth surface that accepts finish evenly.
Step 4: Assemble the Core Box
Place the Base Panel face up. Spread a thin, even bead of glue along its short (24.40 cm) edges and press each End Gable flush against the base; clamp in place. Apply glue to the base’s long edges and the lower vertical edges of the gables, then attach the two Long Side Panels. Secure with screws or brad nails driven through the side panels into the base and gables.
Step 5: Lock in the Handle
Slide the 60.00 cm dowel through both gable holes until the ends are flush with the outside faces. Add a small drop of glue in each hole to help seat the dowel. To prevent rotation under load, drive a small finishing nail through the top peak of a gable into the dowel. Wipe away excess glue with a damp cloth and allow the assembly to cure fully.
5 Common Mistakes & How to Fix Them
- Mistake: Splitting thin panels when driving fasteners near edges.
- Fix: Always pre-drill screw holes with a countersink bit to remove fibers and give the screw a clean path.
- Mistake: Splintering and blowout behind the handle hole.
- Fix: Drill from one side until the pilot just breaks through, then flip the board and finish from the opposite side for a clean exit.
- Mistake: The tote wobbles because the assembly is out of square.
- Fix: After clamping, measure both diagonals across the box. If they match, the box is square — adjust clamps if they don’t.
- Mistake: Blotchy stain or bare spots after finishing.
- Fix: Wipe away glue squeeze-out immediately during assembly; dried glue prevents stain absorption and leaves blotches.
- Mistake: Side panels overhang or fall short of the gables.
- Fix: Verify the base panel measures exactly 56.40 cm. When positioned between two 1.80 cm gables the total length equals 60.00 cm and aligns with the side panels. Always dry-fit before gluing.
When the glue cures you’ll have a durable, heirloom-quality tote. Populate it with your everyday tools, apply a protective oil or sealer, and enjoy a practical piece of woodworking you made yourself.
Tool Upgrades Worth Considering
Once the toolbox is finished, consider compact, durable tool upgrades that fit inside it and make weekend builds smoother. A reliable hammer, good drill bit set, a multi-bit screwdriver, quality pliers, and a heavy-duty utility knife are efficient additions for most DIYers.
5 FAQs
1. Can I use standard 3/4-inch or 18mm plywood for this project?
Yes. The 1.80 cm thickness in the plan is functionally equivalent to standard 18mm or 3/4-inch plywood or board products available at lumberyards and big-box stores.
2. What drill bit size do I need for the handle hole?
Use a 35mm (approx. 1-3/8-inch) Forstner bit for a clean hole that fits the 3.50 cm dowel diameter closely.
3. Can I build this without a table saw?
Yes. Straight cuts can be made with a circular saw and a clamped straightedge; a jigsaw will handle the angled shoulders on the gables.
4. What wood is best for outdoor use?
For outdoor exposure choose rot-resistant species like cedar or redwood. For an indoor workshop tote, select pine or Baltic birch plywood for a clean look and easy finishing.
5. Is glue and nails sufficient or are screws required?
High-quality wood glue creates a bond stronger than the wood. Brad or finish nails are fine to hold pieces while glue cures for everyday use; screws add extra mechanical strength if desired.
Quick Poll
What should we build together next?
Not in the choices? Comment below with your idea.