
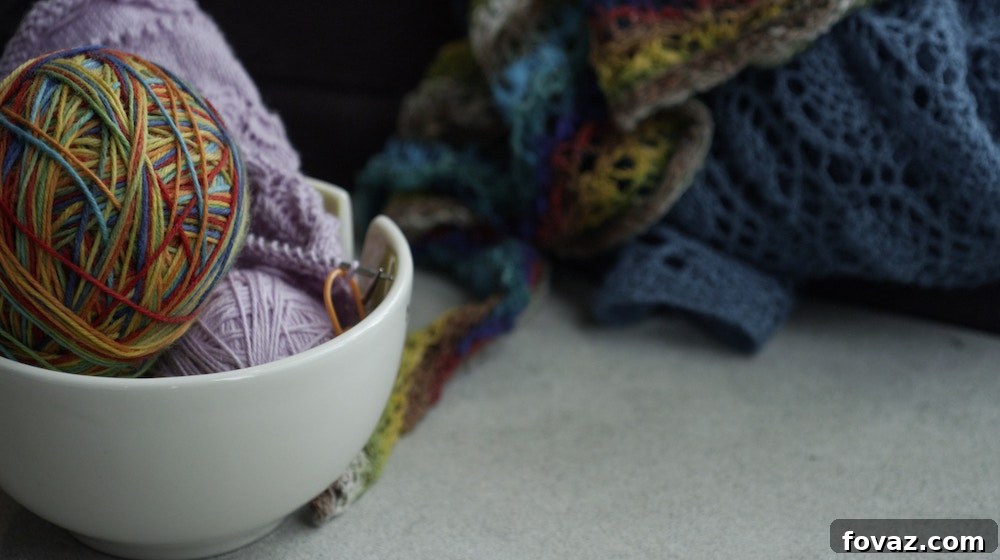
Every knitter and crocheter knows the universal frustration: the tangled yarn. It’s a common scenario – you’re in the flow, deeply engrossed in your project, when suddenly your yarn snags, knots, or worse, rolls away, collecting every speck of dust, lint, and pet hair in its path. This minor catastrophe can disrupt your rhythm, dampen your enjoyment, and add unnecessary time to your crafting process as you meticulously untangle and clean your precious fibers. If you’ve ever wished for a simple yet effective solution to keep your yarn pristine and manageable, you’ve stumbled upon the perfect guide. Welcome to the world of yarn bowls – an ingenious tool that promises to revolutionize your crafting experience. Far from being just a fancy accessory, a yarn bowl is a practical staple designed to maintain order, protect your yarn, and enhance your focus. And the best part? You don’t always have to buy one; you can craft your own! Dive in to discover clever DIY yarn bowl ideas that will banish tangles forever and bring more joy to your knitting or crocheting journey.
Master Your Yarn: Creative DIY Yarn Bowl Ideas for Knot-Free Knitting & Crocheting
The Tangled Truth: Why Every Knitter & Crocheter Needs a Yarn Bowl
— This post is courtesy of sewing.com and shared with permission —
The persistent problem of tangled yarn has plagued crafters for generations. Picture this: you’re halfway through a complex stitch pattern, your tension is perfect, and suddenly your yarn ball rolls off your lap, spirals under the couch, or simply becomes a chaotic mess of knots. Not only does this interrupt your creative flow, but it also exposes your yarn to dirt, pet fur, and lint, compromising the cleanliness of your finished project. While you might be accustomed to managing these minor annoyances, experiencing the seamless efficiency of a yarn bowl will fundamentally change your perspective. This unique crafting accessory isn’t just about convenience; it’s about optimizing your entire creative process, allowing you to truly immerse yourself in the joy of making.
A yarn bowl serves multiple invaluable functions for any fiber artist. It keeps your yarn ball contained, preventing it from rolling away and collecting debris. It provides a smooth exit for your working yarn, allowing it to glide effortlessly as you pull, maintaining consistent tension and reducing snags. With fewer interruptions and less frustration, you can dedicate your full attention to your stitches, leading to a more relaxing and productive crafting session. Once you integrate a yarn bowl into your routine, you’ll wonder how you ever managed without it, transforming it from a mere tool into an indispensable companion in your creative space.
Beyond the Basics: Understanding Yarn Bowl Benefits in Detail
While the primary benefit of a yarn bowl is to prevent tangles and runaway yarn, its advantages extend far beyond these immediate conveniences. Integrating a yarn bowl into your crafting setup brings a host of subtle yet significant improvements that elevate your entire experience, making your hobby more enjoyable and your projects more professional. Let’s delve into the detailed benefits that make a yarn bowl an essential accessory:
- Effortless Yarn Feeding: One of the most significant advantages is the smooth and consistent feeding of your yarn. The precisely carved or designed opening in a yarn bowl allows the yarn to unwind without resistance, preventing frustrating tugs or snags. This consistent tension is crucial for creating even stitches and a uniform fabric, which is especially important for intricate patterns and delicate fibers.
- Immaculate Cleanliness: Say goodbye to dusty, lint-covered yarn balls! By keeping your yarn contained within a bowl, you shield it from environmental hazards like pet hair, crumbs, dust bunnies, and accidental spills. This ensures your finished item is as clean and fresh as the yarn you started with, preserving its quality and appearance.
- Unwavering Stability: A well-designed yarn bowl, whether store-bought or DIY, offers a stable base that keeps your yarn ball securely in place. No more chasing after a runaway skein across the floor, especially when working with slick yarns or in high-traffic areas. This stability allows you to focus solely on your craft, enhancing concentration and reducing interruptions.
- Enhanced Focus & Relaxation: With your yarn neatly managed, you eliminate a major source of distraction and frustration. The smooth operation of a yarn bowl allows you to get into a meditative crafting rhythm, fostering a more relaxed and mindful experience. This uninterrupted focus can even help improve your speed and accuracy as you’re not constantly pausing to untangle or retrieve your yarn.
- Portable Convenience: Many yarn bowls are designed to be easily transportable, making them perfect for crafters on the go. Whether you’re moving from room to room, crafting outdoors, or taking your project to a knitting group, a yarn bowl keeps your yarn contained and ready to use, no matter where your creative spirit leads you.
- Aesthetic Appeal: Beyond their functional benefits, yarn bowls can also serve as beautiful decorative pieces for your craft space. From rustic wooden designs to vibrant ceramic creations or cleverly upcycled items, a yarn bowl adds a touch of charm and personality, turning a practical tool into a cherished part of your creative environment.
Once you experience the seamless functionality and myriad benefits of a yarn bowl, it will quickly become an indispensable part of your working area. While many beautiful and functional yarn bowls can be purchased from craft stores or directly from artisans, creating your own offers a uniquely satisfying experience. It’s an opportunity to personalize your crafting tools, utilize recycled materials, and save money. Ready to craft your own? Let’s explore some ingenious DIY yarn bowl ideas that are both practical and fun to make.
Craft Your Own: Ingenious DIY Yarn Bowl Ideas
The beauty of a DIY yarn bowl lies in its potential for personalization and resourcefulness. You can transform everyday objects or simple materials into a functional and stylish accessory tailored to your specific needs and aesthetic preferences. This approach is not only budget-friendly but also offers the immense satisfaction of creating something truly unique for your crafting journey. Here are several imaginative examples, ranging from simple hacks to more involved projects, that will inspire you to make your own yarn bowl or dispenser:
1. Upcycled Plastic Container Yarn Bowl
Put your idle plastic containers to excellent use by transforming them into practical yarn holders. This budget-friendly and eco-conscious DIY project is perfect for beginners and requires minimal tools. Begin by selecting a sturdy plastic container – an old food storage container, a sturdy bucket, or even a recycled detergent bottle can work beautifully. Ensure it’s large enough to comfortably hold your typical yarn ball. To create the yarn feeding mechanism, you’ll need to make a perfectly shaped circle or a J-shaped slot on the side or rim of the container. While a drill with an appropriate bit can create a clean hole, a craft knife can also be used for a J-slot (exercise caution). For a smooth, snag-free edge, consider using an eyelet kit around the hole or simply sand the edges thoroughly. You can then decorate your new yarn bowl with paint, fabric, or decoupage to match your style. Learn how to make a basic version here.
2. Eco-Friendly Knitted Plarn Yarn Bowl from Plastic Store Bags
For crafters who love sustainable projects, creating a knitted yarn bowl from “plarn” (plastic yarn) made from recycled plastic bags is a fantastic idea. This unique approach not only gives new life to single-use plastics but also results in a surprisingly sturdy and flexible yarn bowl. The first step involves preparing your plarn by cutting plastic store bags into continuous strips and joining them to create a long strand, much like traditional yarn. Detailed instructions for making plarn can be found here. Once you have a sufficient amount of plarn, you can knit or crochet it into a bowl shape using large needles or a hook, creating a dense fabric that holds its form. To add extra structure and durability, incorporate a material like paracord into your stitches as you work, making the bowl even more robust. This method creates a lightweight, washable, and truly one-of-a-kind yarn holder. Find a step-by-step tutorial for a similar concept here.
3. Elegant Bamboo Salad Bowl Conversion
Achieve a sleek, natural aesthetic for your yarn bowl by repurposing a bamboo salad bowl. These bowls are often inexpensive and have a lovely weight and finish that mimics high-end crafting tools. For this project, you would need a sturdy bamboo bowl, such as an IKEA Blanda Matt bowl. The key step is to carefully create a yarn slot or hole. Using a rotary tool like a Dremel is ideal for precision cutting and shaping. However, extreme caution is advised as bamboo can splinter. Work slowly, wear appropriate safety gear, and ensure the cut edges are thoroughly sanded smooth to prevent any snagging of your delicate yarn. You can then finish the cut edge with a bit of wood wax or oil to protect it and enhance its appearance. Check out how Dtextor made his in this inspiring tutorial.
4. Vibrant Polymer Clay Yarn Bowl
For those who love to infuse their crafting tools with color and personality, a polymer clay yarn bowl offers unparalleled creative freedom. Polymer clay is a versatile medium that allows you to sculpt virtually any shape, incorporate intricate designs, and bake it to a durable finish. You can create a bowl in any size or form, from whimsical animal shapes to elegant minimalist designs, and swirl together various colors for a marbled or speckled effect. Begin by conditioning your polymer clay until it’s pliable, then form it into your desired bowl shape, either freehand or by molding it over an oven-safe form. Remember to create a smooth J-shaped slot or a hole for the yarn to exit. Once sculpted, bake the clay according to the manufacturer’s instructions until hardened. After cooling, you can sand any rough edges and apply a clear glaze for added shine and protection. This method allows you to truly create an “out-of-the-box” design that is uniquely yours. Check out a helpful tutorial here!
5. The Clever Binder Clip Hack (Instant Yarn Holder)
Sometimes, the simplest solutions are the most effective. If you’re in need of a quick, temporary, and incredibly cheap yarn holder, look no further than a binder clip. This ingenious hack transforms any heavy, stable bowl into an instant yarn dispenser. Simply take a large binder clip and attach it to the rim of a sturdy bowl (ceramic or metal works best for weight). Feed your working yarn through one of the silver wire loops of the binder clip, allowing it to hang freely into the bowl. The binder clip acts as a guide, ensuring your yarn feeds smoothly and stays contained within the bowl. While this method doesn’t offer the fully enclosed protection of a traditional yarn bowl, it’s an excellent on-the-fly solution for preventing your yarn ball from rolling away and provides a surprisingly smooth pull. It’s perfect for when you’re traveling, at a friend’s house, or simply haven’t gotten around to making a dedicated yarn bowl yet. Ta-da! You now have a functional yarn holder in seconds.
6. Rustic Wooden Crate or Box Yarn Holder
For those who prefer a more rustic or minimalist aesthetic, converting a small wooden crate or box into a yarn holder is a straightforward and rewarding project. Find a small, sturdy wooden box, perhaps an old cigar box, a decorative wooden storage box, or even a mini fruit crate. The process involves creating an opening for the yarn to feed through. You can either drill a hole (using a spade bit for larger openings) or carefully cut a J-shaped slot into one of the sides or the lid if you prefer a lidded design. Once the opening is created, thoroughly sand all cut edges and any rough spots on the box to ensure your yarn won’t snag. You can leave the wood unfinished for a natural look, or apply wood stain, paint, or even stencil a design to personalize it. This type of yarn holder offers excellent stability and can often double as a small storage container for your notions when not in use.
7. Sturdy Crocheted or Macrame Fabric Yarn Basket
If you’re a fiber artist who enjoys working with textiles, why not create a yarn bowl from yarn itself? A crocheted or macrame basket made with sturdy materials can serve as a soft, flexible, yet surprisingly effective yarn holder. Use chunky yarn, fabric strips (like T-shirt yarn), or even rope to create a rigid structure. For a crocheted version, work in tight, dense stitches (like single crochet) and consider using a smaller hook than recommended for your chosen material to achieve a stiff fabric. You can shape it into a traditional bowl, or a cylindrical basket with a wide opening. For macrame, use sturdy cords to knot a basket with a firm base and sides. The natural friction of the textile material helps to keep the yarn ball from rolling too freely within the basket, and the soft edges are incredibly gentle on your yarn. These fabric bowls are often lightweight, washable, and can be easily folded for storage, making them a versatile choice for crafters.
Essential Tips for Your DIY Yarn Bowl Project
No matter which DIY yarn bowl project you choose, keeping a few key considerations in mind will ensure your creation is as functional and effective as possible. These tips will help you avoid common pitfalls and craft a yarn bowl that truly enhances your knitting or crocheting experience:
- Smooth Edges Are Key: This is perhaps the most crucial tip. Any rough edges, splinters, or sharp points around the yarn slot or hole can snag, fray, or even break your delicate yarn, leading to immense frustration. Always sand, file, or smooth all edges that will come into contact with the yarn until they are perfectly smooth to the touch. For wooden or plastic bowls, this might involve fine-grit sandpaper, a Dremel tool, or even applying a protective coating.
- Stability Matters: A yarn bowl is designed to keep your yarn contained and in place. Ensure your chosen container or material has a heavy enough base or a wide footprint to prevent it from tipping over easily, especially when holding a large ball of yarn. For lighter bowls, consider adding weight to the bottom (e.g., small pebbles or sandbags encased in fabric) or affixing non-slip pads to the base.
- Size Appropriately: Consider the size of the yarn balls you typically use. A small bowl might be fine for sock yarn, but if you frequently work with bulky skeins or multiple colorways, you’ll need a larger, more accommodating container. Also, ensure the opening for the yarn is wide enough to prevent friction but not so wide that the yarn easily slips out.
- Personalize Your Creation: One of the greatest joys of DIY is making something uniquely yours. Don’t shy away from decorating your yarn bowl with paint, fabric, decoupage, or embellishments that reflect your style and personality. A beautiful tool can make your crafting experience even more enjoyable.
- Safety First: When working with tools like drills, saws, or craft knives, always prioritize safety. Wear protective eyewear, use gloves if necessary, and ensure you understand how to use your tools correctly. If you’re unsure, opt for simpler, no-cut DIY methods.
Finding Your Perfect Yarn Bowl: DIY vs. Buying
The decision to DIY your yarn bowl or purchase one often comes down to a balance of cost, customization, and convenience. Opting for a DIY yarn bowl is an excellent choice if you’re on a budget, enjoy crafting, or have specific aesthetic or functional requirements that aren’t met by commercial options. It allows for creative expression and the satisfaction of using a tool you made yourself. However, if you prefer immediate gratification, a professionally finished product, or lack the time and tools for a DIY project, buying a yarn bowl from a craft store or an artisan is a fantastic alternative. Many beautiful ceramic, wooden, and plastic yarn bowls are available, often featuring intricate designs and superb craftsmanship. Ultimately, the “best” yarn bowl is the one that fits seamlessly into your crafting routine and makes your experience more enjoyable and tangle-free. Whether you craft it or buy it, the benefits remain the same.
Want to see the full article?
Keep Reading Here On Sewing.com!
Now, with these clever ideas and practical tips, you can confidently say goodbye to the vexing problem of tangled yarns! Yarn bowls, whether handcrafted or store-bought, are the simple yet powerful solution that allows us all to enjoy knitting, crocheting, and other fiber arts more fully. Remember that the key to a great yarn bowl lies in smooth edges, stable design, and appropriate sizing, ensuring your yarn feeds effortlessly, stays clean, and remains knot-free. Embrace the satisfaction of creating your own, or choose a beautifully made one; either way, you’re investing in a more peaceful and productive crafting future.
Take your pick! What’s your favorite DIY method, or do you have another clever hack? Share your thoughts and experiences in the comments section below. Need more inspiring DIY crafting projects to spark your creativity? Be sure to check out these 13 DIY fleece fabric ideas now!
Stay connected with us on Facebook, Twitter, Pinterest and Instagram for more creative inspiration!