
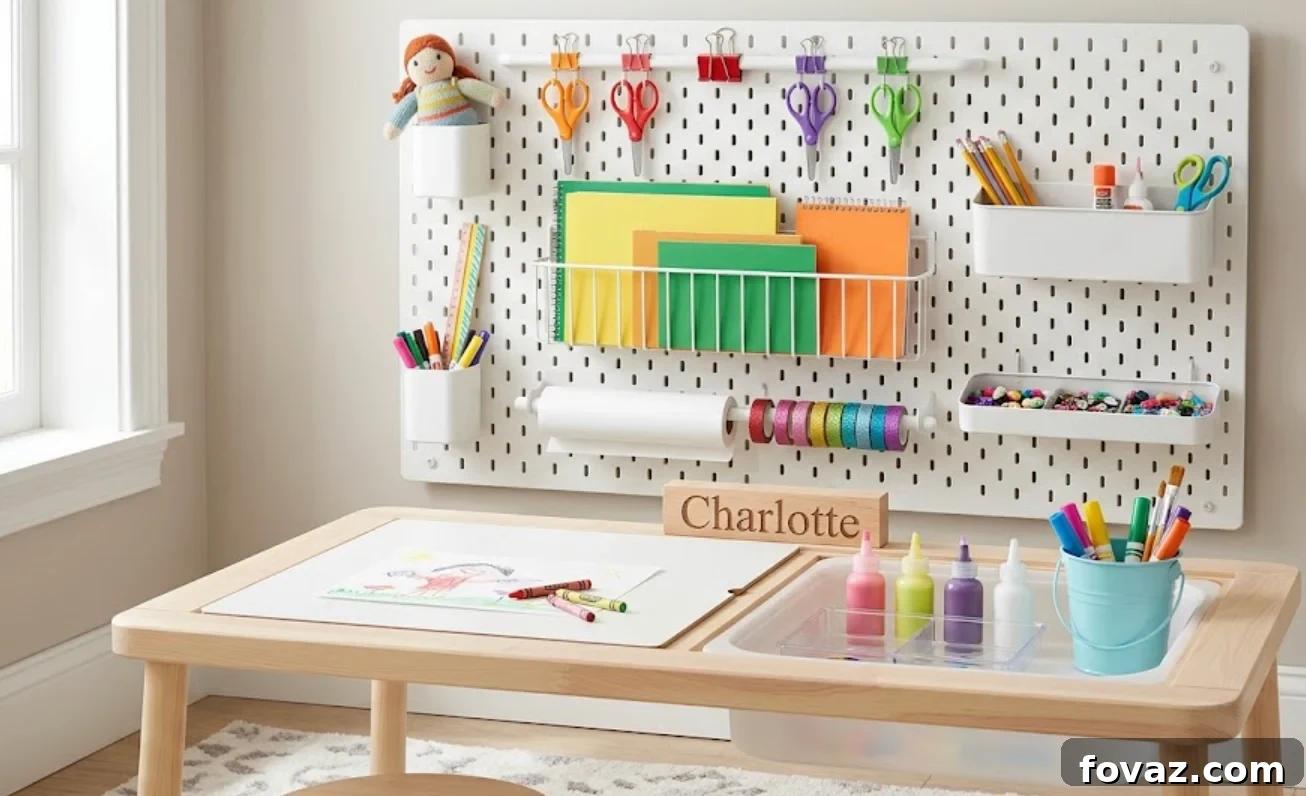
At a Glance: Organize Kids Crafts Using Pegboard
- Saves Space: Mounting supplies on empty wall area clears desks and floors so play and work areas stay tidy.
- Grows With Your Child: Hooks, cups, and baskets are easy to move, so the system adapts as needs and supplies change.
- Encourages Independence: Visible, labeled storage helps children find and return what they use, speeding up cleanup.
If you’re a parent, you’ve likely faced the post-craft chaos—uncapped markers under the couch and glitter everywhere. A well-designed pegboard turns that mess into an organized, accessible craft center. When art tools are visible and reachable, kids create more easily and learn to tidy up afterwards. With back-to-school season approaching, now is a great moment to create a homework and craft zone that supports creativity and keeps your home neater.
Safety Reminder: Prioritize safety when building. Adults should handle saws and drills, wear safety goggles and a dust mask, and work in a ventilated area. To limit environmental impact, use scrap wood when available and choose low-VOC paints and finishes.
How to Organize Kids Craft Supplies With a Pegboard
A pegboard is a perforated panel designed to use vertical wall space efficiently. Instead of burying craft items in deep drawers, a pegboard displays supplies visibly and keeps them off tables and floors. With hooks, wire baskets, and hanging cups, each item—crayons, scissors, glue sticks—gets a designated spot. The modular nature of pegboards makes them flexible: rearrange storage as your child’s needs change.
Materials List
Gather the basic materials from your local hardware store. When possible, choose responsibly sourced wood and eco-friendly paint.
- Pegboard sheet: A standard 2′ x 4′ panel is a versatile size for most areas.
- 1×2 pine boards: Use these to create a spacer frame behind the pegboard so hooks can fit.
- Wood screws: 2-inch screws work well for attaching the frame and the pegboard.
- Pegboard hooks and cups: A mixed kit gives you hooks, cup holders, and small baskets.
- Low-VOC paint: Pick a color your child likes; eco-friendly paint helps indoor air quality.
- Tools: Drill, stud finder, tape measure, level, paintbrush or foam roller.
Steps to Build Your Pegboard
Step 1: Paint the Pegboard
Lay the pegboard flat on a drop cloth and apply low-VOC paint with a foam roller or brush. Let the surface dry fully before handling. Avoid filling the perforations with paint so hooks will remain functional.
Step 2: Build and Mount the Frame
Create a simple spacer frame from 1×2 boards so the pegboard stands off the wall and hooks can engage easily. Find wall studs with a stud finder and screw the frame securely into those studs for a safe, stable mount.
Step 3: Attach the Pegboard
Position the painted pegboard over the frame and drive screws through the panel into the wooden frame. Check alignment with a level as you secure it so the finished board hangs straight.
Step 4: Add Storage and Organize
Arrange hooks, cups, and baskets to suit your child’s most-used items. Tall containers are ideal for markers and paintbrushes; small baskets hold glue sticks, tape, and small embellishments. Place safety scissors and commonly used tools within easy reach. Consider labeling spots or using a simple color-coding system to help kids return items to the correct place.
Conclusion
A pegboard is an affordable, practical weekend project that makes a measurable difference. Parents regain a clutter-free living space, and children benefit from a visible, inviting art station that supports creativity and responsibility. The modular setup adapts as needs change, creating a long-lasting solution for craft and homework organization. Tackle this project together and enjoy the satisfaction of a tidy, efficient creative corner.
FAQs
1. Where is the best place to hang the pegboard?
Mount it low enough for children to access supplies easily—above a small desk, table, or craft station is ideal.
2. What size pegboard do I need?
A 2′ x 4′ board fits most spaces and offers ample storage, but you can cut or buy smaller panels to fit tighter areas.
3. Can I paint the pegboard?
Yes. Use a foam roller and low-VOC paint, and avoid filling the holes so hooks still fit properly.
4. What should go in the pegboard cups?
Cups work best for tall, narrow items like markers, colored pencils, paintbrushes, and scissors with rounded tips for safety.
5. Are pegboards safe for young children?
Yes, when securely fastened to wall studs and used with child-safe supplies. Make sure heavier items are stored low and keep hazardous materials out of reach.