
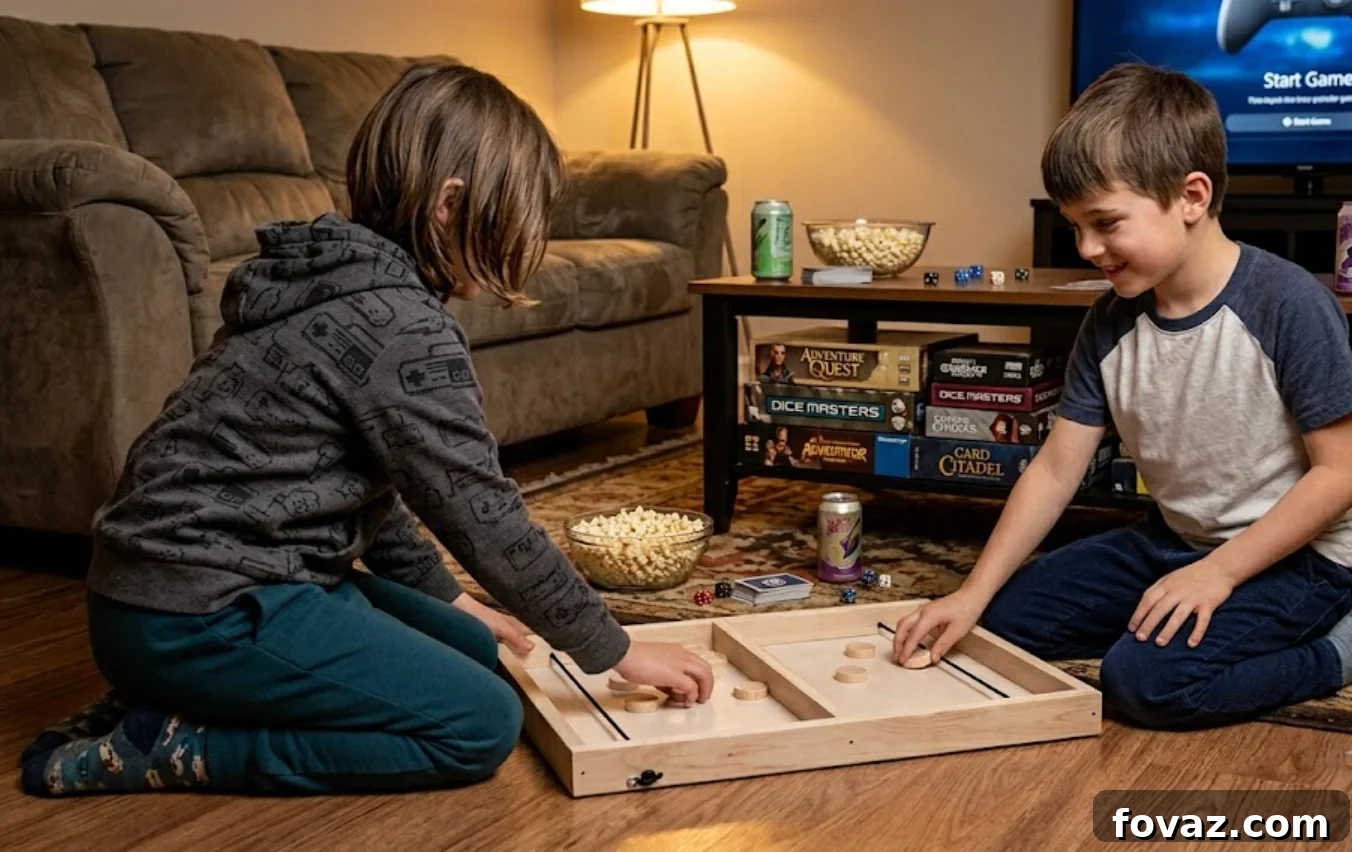
Project At a Glance: DIY Pucket Game Woodworking Project
- Skill Level: Beginner (Perfect for adult-kid collaboration!)
- Time Investment: 2 to 3 Hours (plus finish dry time)
- What This Guide Features: Step-by-step task delegation, precise dimensions, and tips for maximum puck glide.
⚠️ Safety Reminder: Always wear personal protective equipment—gloves, safety goggles, ear protection, and a dust mask. Use sharp tools responsibly, work in a well-ventilated area, and take steps to minimize dust. For structural or load-bearing work, consult local building codes and a professional when necessary.
RELATED: 3 Easy Summer Woodworking Projects You Can Complete In a Day (Free Build Plans)
Imagine a warm evening when the kids are listless and screens dominate the room. Instead of handing them another device, invite them into a hands-on project that leads to a fast, addictive tabletop game. The DIY Pucket Game—also called Sling Puck—is quick to build and instantly playable. It’s an ideal project to break up digital routines and create a family keepsake.
What the game is: Players use a stretched elastic band to launch small wooden pucks through a narrow center opening into the opponent’s side. The first player to clear their side wins. The rules are simple, the action is fast, and the build offers safe, meaningful tasks for kids while adults handle power tools and precision cuts.
Materials
- Frame & Divider Wood: 1 piece of 1×2 select pine board, 8 feet long (actual: 3/4″ x 1-1/2″ x 96″)
- Bottom Panel: 1 piece of 1/4″ thick plywood or hardboard, cut to 16-1/2″ x 20″
- Pucks: 1 piece of 1-1/2″ diameter wooden dowel, at least 12″ long (to cut 16 pucks)
- Bungee Cord: 2 pieces of elastic bungee/shock cord (approx. 1/8″ thick), each 16″ long
- Fasteners: Wood glue and 1-1/4″ brad nails or small finish nails and hammer
Tools Needed
- Miter saw, hand saw, or miter box (miter box is great for involving kids)
- Jigsaw or coping saw (for cutting the center gate)
- Power drill and a drill bit matching your bungee diameter (commonly 5/32″ or 3/16″)
- Brad nailer or lightweight hammer
- Sanding block with 120 and 220-grit sandpaper
- Tape measure and pencil
📐 The Complete Cut List
Use this quick cut list to prepare materials before assembly. Cutting everything ahead makes assembly smoother and keeps children engaged with simple tasks.
| Component | Quantity | Material | Dimensions |
| Sides (A) | 2 | 1×2 Pine | 3/4″ x 1-1/2″ x 20″ |
| Backboards & Center (B) | 3 | 1×2 Pine | 3/4″ x 1-1/2″ x 15″ |
| Bottom Board (C) | 1 | 1/4″ Plywood | 16-1/2″ x 20″ |
| Pucks | 16 | 1-1/2″ Dowel | 1/2″ thick |
🛠️ Step-by-Step DIY Pucket Game
Tasks are divided into child-friendly activities and adult responsibilities so everyone contributes safely and with purpose.
- Kids/Collab Task: Safe, rewarding tasks that build skill and involvement.
- Adult Task: Work requiring power tools, sharp blades, or careful alignment.
Phase 1: Measuring & Cutting
Step 1.1: Measuring and Marking
- Kids/Collab Task: Let children help measure and mark two 20″ cuts and three 15″ cuts on the 1×2 board. Use a square to draw clear lines and teach basic measuring skills.
- Adult Task: Make clean cuts using a miter saw, hand saw, or miter box, keeping cuts square for accurate assembly.
Step 1.2: Preparing the Center Gate
- Blueprint note: The center divider is 15″ long. To center a 2-1/4″ x 3/4″ opening, measure 6-3/8″ from each end, leaving the opening centered in the 15″ piece.
- Kids/Collab Task: On one 15″ piece, mark 6-3/8″, then mark an additional 2-1/4″ to outline the gate. Shade the 3/4″ deep area to indicate material to remove.
- Adult Task: Cut the notched gate with a jigsaw or coping saw and sand the cut smooth.
Phase 2: Drilling and Layout
Step 2.1: Locating the Bungee Holes
- Kids/Collab Task: On the outside face of each 20″ side piece, measure and mark 2-3/4″ in from both ends and 1/2″ up from the bottom edge.
- Adult Task: Drill through those marks with a bit slightly larger than the bungee to allow smooth movement.
Phase 3: Assembly
Step 3.1: Framing the Box
- Kids/Collab Task: Spread a thin bead of wood glue on the ends of two 15″ backboards.
- Adult Task: Sandwich the two backboards between the two 20″ sides to form a rectangle. Fasten the corners with 1-1/4″ brad or finish nails, ensuring the frame is square.
Step 3.2: Setting the Center Divider
- Kids/Collab Task: Draw a centerline 10″ from each end inside the frame. Apply glue to the ends of the center divider with the notch facing down.
- Adult Task: Position the divider on the marks and secure it through the side walls with nails.
Step 3.3: Attaching the Bottom Panel
- Kids/Collab Task: Flip the frame and run a continuous bead of glue along the bottom edges and the divider. Place the 1/4″ plywood bottom panel, aligning all edges flush.
- Adult Task: Nail the bottom board to the frame using brad nails spaced about every 4 inches for a secure hold.
Phase 4: Pucks & Final Setup
Step 4.1: Cutting the Pucks
- Adult Task: Cut sixteen 1/2″ thick discs from the 1-1/2″ dowel using a miter saw. Use a scrap stop block clamped 1/2″ from the blade for consistent thickness.
Step 4.2: Sanding & Tuning
- Kids/Collab Task: Have kids sand each puck with 220-grit paper until both faces are very smooth. Also sand any sharp edges on the frame. Smooth pucks glide better and are safer to handle.
Step 4.3: Threading the Bungee
- Kids/Collab Task: Push one end of a 16″ bungee through a side hole from inside to outside and tie a secure double-knot around the outside face.
- Adult Task: Pull the bungee across to the opposite hole, tension it so it snaps back reliably without pulling the frame inward, and tie a second knot. Repeat on the other side and trim excess cord.
Tip: For a rustic look and to reduce waste, cut pucks from a fallen hardwood branch such as oak, maple, or birch. Natural wood pucks add character and keep the project eco-friendly.
FAQs DIY Pucket Game
1. What is the best wood to use for the frame?
Pine or poplar are economical and easy to work with for beginners. For a more durable, heirloom-quality board, choose hardwoods like oak or walnut.
2. How do I make the pucks slide faster on the board?
Sand the bottom panel to 220-grit and the puck faces smooth. A light coat of paste wax on the playing surface and puck bottoms significantly improves glide. A fine dusting of baby powder or cornstarch also reduces friction.
3. What if I don’t have a miter saw to cut the puck dowels?
You can buy pre-cut wooden toy wheels or craft coins at a craft store as an alternative. Choose pieces about 1-1/2″ in diameter and 3/8″ to 1/2″ thick for best play.
4. How tight should the bungee cords be?
Bungees should be snug enough to snap back quickly but not so tight that they pull the sidewalls inward. Test tension with a trial fling and adjust before final knots.
5. Can I make this game board larger?
Yes. You can scale the board to 24″ or 30″ lengths. Increase the bottom panel size, lengthen the bungees, and add more pucks for longer, more chaotic matches.