
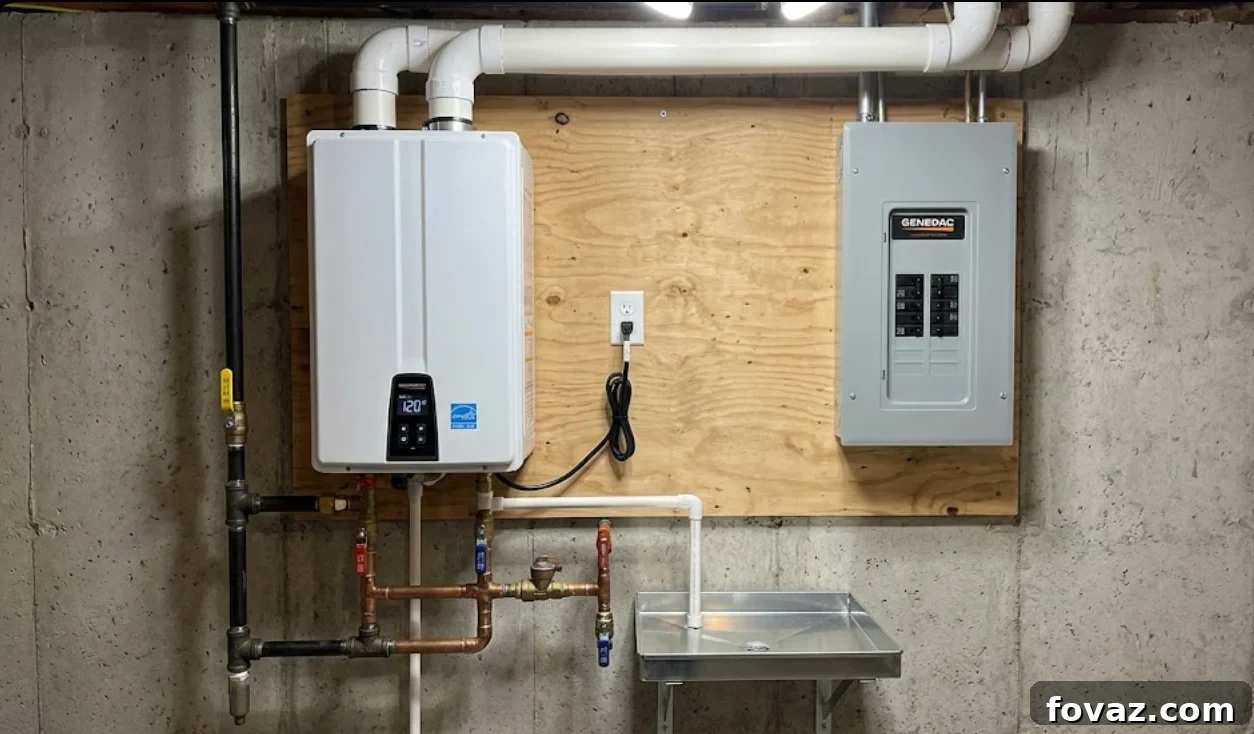
Thinking about upgrading to an electric tankless water heater? The promise of endless hot water and lower energy bills is incredibly appealing. This has many homeowners asking a crucial question: “Can I handle the installation myself?” The answer is a qualified “yes,” but it depends entirely on your project’s scope and your home’s existing electrical system. A simple point-of-use unit for a single sink can be a straightforward weekend project. However, installing a whole-house system is a different beast, requiring professional electrical expertise and careful planning.
This comprehensive guide will walk you through everything you need to know about a DIY electric tankless water heater installation. We’ll cover the critical differences between unit types, how to assess your electrical panel, the tools you’ll need, and a step-by-step installation process. Most importantly, we’ll clearly define the line where a DIY project should stop and a licensed electrician must take over to ensure your home remains safe and up to code.
The First Critical Check: Is Your Electrical Panel Ready?
Before you even browse for models online, your first step is a trip to your main electrical panel. The capacity of your home’s electrical service is the single most important factor determining whether this project is feasible, especially for a whole-house unit. Ignoring this step can lead to purchasing a heater you can’t install without a costly and extensive electrical upgrade.
How to Assess Your Electrical Service
- Find Your Main Breaker: Open the door to your main electrical panel. At the very top (or sometimes in the middle), you will find a large, double-wide breaker that is separate from the others. This is the main breaker that shuts off power to the entire house.
- Read the Amperage: Stamped on the handle of this main breaker is a number, typically 100, 150, or 200. This number represents your home’s total electrical service capacity in amps (A).
- Evaluate Your Capacity: A 200A service is common in modern homes and generally has enough capacity to support a whole-house electric tankless heater. A 150A service might be sufficient, but will require a careful load calculation by an electrician. If you have a 100A service, which is common in older homes, installing a whole-house electric tankless unit is almost certainly impossible without a full service upgrade, a project that can cost several thousand dollars.
If you have a 100A panel, your DIY journey for a whole-house unit stops here. You must consult a licensed electrician to discuss a service upgrade before proceeding. For point-of-use units, even a 100A panel is usually fine, as their power draw is much smaller.
Point-of-Use vs. Whole-House: Defining Your Project Scope
The type of heater you choose dramatically changes the installation complexity, cost, and DIY feasibility. Understanding the difference is key to planning a successful project.
Point-of-Use (POU) Heaters: The Ideal DIY Project
Point-of-use units are small, compact heaters designed to serve a single fixture, like a bathroom sink, kitchen faucet, or utility shower. They are perfect for locations far from the main water heater, eliminating the long wait for hot water.
- Electrical Needs: They have modest power requirements. The smallest models run on a standard 120V, 20A circuit, while more powerful ones require a dedicated 240V circuit of 30A to 50A.
- DIY Feasibility: This is where DIY shines. If a suitable, dedicated circuit is already in place (perhaps from a previous appliance), the installation is very manageable for a confident homeowner. It primarily involves mounting the unit and making simple plumbing and electrical connections.
Whole-House Heaters: A Job for the Pros (Mostly)
A whole-house electric tankless heater is a powerful appliance designed to replace your traditional tank-style water heater completely. It can supply endless hot water to multiple bathrooms, a kitchen, and a washing machine simultaneously.
- Electrical Needs: Their power demand is immense. These units require between 120A and 160A of dedicated capacity. This is typically achieved by running three separate 40A or 50A, 240V circuits directly from the panel to the heater.
- DIY Feasibility: While an experienced DIYer can handle the physical mounting and plumbing connections, the electrical work is not a DIY job. Running multiple high-amperage circuits and connecting them to the panel requires a licensed electrician in virtually every jurisdiction. It’s dangerous, complex, and legally required to be done by a professional.
Essential Tools and Materials for Installation
Gathering the right supplies before you start will ensure a smoother, safer installation. Here’s what you’ll likely need, broken down by project complexity.
For a Basic Point-of-Use Installation:
- The electric tankless water heater unit of your choice.
- Safety First: A non-contact voltage tester to confirm power is off. This is non-negotiable.
- Mounting: Drill with bits, a stud finder, and appropriate screws for mounting.
- Plumbing: Two flexible, braided stainless steel water lines, Teflon tape for threaded fittings, and an adjustable wrench.
- Electrical: Wire strippers, wire nuts, and a screwdriver.
For a More Advanced or Whole-House Installation:
- All of the above, plus:
- Plumbing: A pipe cutter (for copper or PEX), push-to-connect fittings (like SharkBite, rated for hot water), or a soldering kit for copper pipes.
- Professional Services: The contact information for a licensed electrician to handle the panel work and circuit installation ($500 – $1,500+).
- Permit: A paid permit from your local building department ($50 – $150).
Step-by-Step Guide: Installing a Point-of-Use Electric Tankless Heater
This guide assumes a dedicated electrical circuit is already properly installed and ready for connection. If not, hire an electrician to run the circuit first.
SAFETY WARNING: Before starting any work, turn off the corresponding breaker in your electrical panel. Use a non-contact voltage tester to verify that there is absolutely no power at the installation site. Test every wire.
- Turn Off Water and Power: Shut off the breaker controlling the circuit. Then, close the hot and cold water shutoff valves under the sink or at the main line. Open the faucet to drain any remaining water.
- Mount the Heater: Use a stud finder to locate a secure mounting spot on the wall. The unit must be mounted vertically according to the manufacturer’s instructions. Use the provided template to drill pilot holes and secure the unit firmly to the wall studs.
- Connect the Cold Water Inlet: Connect the cold water supply line to the heater’s inlet fitting. Use Teflon tape on all threaded connections to prevent leaks. Hand-tighten, then give it a quarter-turn with a wrench. Do not overtighten.
- Connect the Hot Water Outlet: Connect the hot water outlet line from the heater to the hot water input on your faucet. Again, use Teflon tape and be careful not to overtighten.
- Make the Electrical Connections: Remove the cover from the heater’s wiring compartment. Following the manufacturer’s diagram, connect the wires. For a 240V unit, you will connect the two hot wires (usually black and red) to the corresponding terminals (L1 and L2) and the ground wire (bare copper or green) to the ground screw. Secure all connections firmly. A loose connection is a fire hazard.
- Power On the Water (Crucial Step): Slowly open the cold water shutoff valve. Let water flow through the unit and out of the hot side of the faucet for at least 2-3 minutes. This purges all air from the system and ensures the heating elements are fully submerged. Never turn on the power before the unit is completely full of water. Doing so will instantly destroy the heating elements.
- Check for Leaks: With the water on, carefully inspect all plumbing connections for any drips or leaks. Tighten as needed.
- Restore Power: Go to your electrical panel and turn the breaker back on. The unit’s indicator lights should activate.
- Test the System: Turn on the hot water at the faucet. You should feel hot water within 20-30 seconds. Adjust the temperature setting on the unit as desired.
Red Flags: When to Immediately Stop and Call a Professional
A successful DIY project is knowing your limits. Your safety and your home’s integrity are paramount. Stop work immediately and call a licensed electrician if you encounter any of the following:
- Any Work Inside the Main Panel: If your project requires adding a new breaker or modifying existing wiring inside the panel, this is not a DIY task.
- No Existing Circuit: If you need to run a new 240V wire from the panel to the heater location.
- 100A Service for a Whole-House Unit: Your system lacks the capacity and requires a professional assessment for a service upgrade.
- Aluminum Wiring: If you discover silver-colored aluminum wiring instead of copper, stop. It requires special handling and is a known fire risk if not connected properly.
- Uncertainty: If you are even slightly unsure about identifying hot, neutral, and ground wires or reading a wiring diagram. Guesswork in electrical work can be deadly.
Frequently Asked Questions (FAQ)
Do I really need a permit to install a tankless water heater?
Yes. In nearly all U.S. jurisdictions, a permit is required for any new 240V circuit installation. Many areas also require a plumbing permit for any water heater replacement. A permit ensures the work is inspected for safety and code compliance, protecting your insurance coverage and your home’s resale value.
What size wire and breaker do I need?
This is determined by the heater manufacturer, not by you. The unit’s specification plate will list the required amperage (e.g., 40A) and voltage. A 40A circuit requires a minimum of 8-gauge (AWG) copper wire. A 50A circuit requires 6-gauge wire. Always use the specified wire gauge and breaker size; a mismatch is a serious fire hazard.
Can I use the old circuit from my tank water heater?
Almost never for a whole-house unit. A standard tank heater typically uses a single 30A, 240V circuit. A whole-house electric tankless heater needs significantly more power, often three separate 40A or 50A circuits. The old wiring is insufficient and cannot be reused.
Why is my new tankless heater’s water temperature fluctuating?
This can be common if the water flow is too low. Most tankless units have a minimum flow rate (e.g., 0.5 gallons per minute) required to activate and maintain heating. Try increasing the flow at the faucet. If the problem persists, check for sediment in your faucet aerators or showerheads that could be restricting flow.