
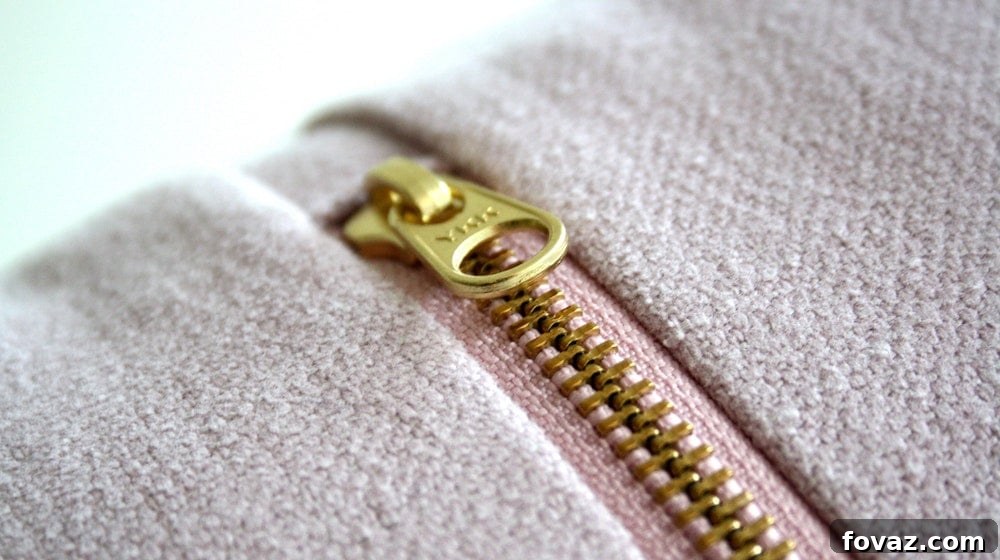
Transform Your Old Apron into a Stylish Zippered Pouch: An Eco-Friendly DIY Project
Every kitchen, workshop, or crafting space often has an essential companion: the humble apron. A guardian against spills, splashes, and stains, it dutifully protects our clothes while we immerse ourselves in creative endeavors or culinary adventures. But what happens when an apron reaches the end of its primary life, perhaps due to wear and tear, or when you simply find yourself with more aprons than you need? Instead of relegating it to the back of a drawer or, worse, the landfill, imagine giving it a vibrant second life. This comprehensive guide will walk you through the rewarding process of upcycling an old apron into a practical, durable, and infinitely versatile zippered pouch.
This ingenious transformation allows you to create a personalized storage solution that can hold anything from gardening tools to craft supplies, or even your daily essentials. It’s a fantastic way to embrace sustainable living, reduce waste, and add a touch of handmade charm to your organization efforts. This creative project, originally inspired by the brilliant ideas from Jaime Costiglio in collaboration with The Home Depot, offers a simple yet satisfying sewing experience for enthusiasts of all skill levels. Get ready to turn something old into something wonderfully new and useful!
Why Repurpose Your Apron? The Benefits of DIY Upcycling
Before we dive into the nitty-gritty of stitching and snipping, let’s explore why transforming an apron into a zippered pouch is such a brilliant idea:
- Embrace Sustainability: In an era where textile waste is a growing concern, upcycling plays a crucial role. By repurposing an old apron, you prevent it from contributing to landfills, giving fabric a renewed purpose and extending its lifecycle. It’s a small but significant step towards a more eco-conscious lifestyle.
- Practicality Meets Style: Who doesn’t need more storage? A zippered pouch offers a secure and organized way to store a myriad of items. Plus, by choosing your favorite old apron, you ensure your new pouch has a unique aesthetic and perhaps even a touch of sentimental value, making it far more interesting than a mass-produced item.
- Cost-Effective Creativity: This project utilizes materials you likely already have on hand – an old apron and a zipper. This makes it an incredibly budget-friendly craft. Instead of buying new storage containers or pouches, you’re creating a bespoke solution at minimal expense.
- Skill Building and Satisfaction: For beginners, this project is an excellent introduction to basic sewing techniques like attaching a zipper, sewing a straight seam, and working with lining fabric. For experienced sewers, it’s a quick and gratifying project. There’s immense satisfaction in creating something useful and beautiful with your own hands.
- Personalized Organization: Unlike generic store-bought options, your apron pouch will be truly unique. You can select an apron with a pattern, color, or fabric that perfectly matches your personality or the intended use of the pouch.
Unleash Its Potential: Versatile Uses for Your New Zippered Pouch
Once you’ve completed your transformation, you’ll be amazed at the sheer versatility of your new zippered pouch. Its sturdy construction, especially if your apron was made from durable canvas or denim, makes it suitable for a wide array of applications. Here are just a few ideas to get your creative juices flowing:
- Gardening Tools Organizer: Keep your hand trowel, pruning shears, gardening gloves, and seed packets neatly organized and easily accessible. The durable fabric of the apron will stand up well to dirt and wear.
- Kitchen Utensil Caddy: Perfect for picnic sets, BBQ tools, or for storing specialty kitchen gadgets that often get lost in drawers. Imagine a pouch dedicated to your baking tools or your favorite set of skewers.
- Crafting Companion: Whether you knit, crochet, sew, or draw, this pouch can house your needles, hooks, yarn scraps, embroidery floss, markers, or small fabric pieces. Say goodbye to scattered craft supplies!
- Makeup and Toiletry Bag: Ideal for keeping your cosmetics, brushes, travel-sized shampoos, or dental hygiene items tidy, whether at home or on the go. The lining will help protect against minor spills.
- Tech Accessories Holder: Tame the tangled mess of chargers, USB cables, power banks, earbuds, and small external drives. Your devices will thank you for the organized home.
- School or Office Supplies: Pens, pencils, highlighters, erasers, paper clips, and sticky notes can all find a neat home in this pouch, making it easy to grab and go for study sessions or work.
- Kids’ Toy Organizer: Small LEGO bricks, toy cars, doll accessories, or craft beads can be contained within the pouch, making playtime cleanup a breeze and reducing clutter.
- Travel Essential Kit: From passports and travel documents to medications and first-aid items, this pouch can keep all your crucial travel necessities in one secure place.
- Car Console Organizer: Store loose change, registration papers, phone chargers, or even snacks for road trips, keeping your car interior neat and tidy.
Gathering Your Materials: What You’ll Need to Begin
Before you embark on this exciting DIY journey, ensure you have all your tools and materials ready. Having everything prepared beforehand will make the process smooth and enjoyable. Here’s a detailed list of what you’ll need:
- An Old Apron: The star of our project! Look for an apron made from sturdy materials like cotton, denim, canvas, or linen. The size of your apron will largely determine the size of your finished pouch, so choose one that offers enough fabric for your desired dimensions. A standard kitchen apron works perfectly.
- Zipper (minimum 9″ length): The length of your zipper is crucial. A zipper of at least 9 inches will provide a good opening for most apron pouches. You can choose a zipper that coordinates or contrasts with your apron fabric. Nylon zippers are generally easier for beginners to sew than metal ones.
- Sharp Scissors: Good quality fabric shears are a must for clean, precise cuts. Dull scissors can fray edges and make the process frustrating.
- Medium Weight Fusible Interfacing (approximately 7″w x 17″l): This is a key ingredient for giving your pouch structure, durability, and a professional finish. Fusible interfacing has an adhesive on one side that bonds to your fabric when ironed, adding stability without bulk. The suggested size is a good starting point, but adjust based on your apron’s dimensions.
- Cotton Lining Fabric (2 pieces, approximately 9″w x 8″h each): The lining gives your pouch a neat interior finish, protects the contents, and hides raw seams. Choose a cotton fabric that complements your apron. The suggested dimensions are for a standard pouch; adjust these to match the final size of your apron body after preparation.
- Sewing Machine or Needle and Thread: While a sewing machine will make this project much faster and produce more consistent stitches, it’s entirely possible to hand-sew this pouch. If hand-sewing, ensure you use a strong thread and small, even stitches.
- Matching All-Purpose Thread: Choose a thread color that either matches your apron and lining fabrics or provides a subtle contrast.
- Fabric Pins or Clips: Essential for holding fabric layers together securely while you sew, ensuring accurate alignment.
- Iron and Ironing Board: Crucial for pressing seams, adhering fusible interfacing, and achieving crisp, professional-looking results. Don’t skip the pressing steps!
- Ruler or Measuring Tape: For accurate measurements and cuts.
- Fabric Marker or Tailor’s Chalk: Useful for marking cutting lines or sewing lines on your fabric.
Step-by-Step Transformation: Turning Your Apron into a Zippered Pouch
Now that you have all your materials, let’s get started on bringing your apron pouch to life. Follow these instructions carefully for the best results.
Step 1: Preparing the Apron Body and Saving the Strings
Begin by laying your apron flat and smoothing out any wrinkles. Carefully cut off the apron strings, ensuring you leave approximately 1/2 inch of the string binding attached to the apron body on one side. This small piece of binding will be used later for a neat finish around the zipper ends, adding a professional touch and allowing you to utilize the remaining apron strings as a custom zipper pull. Set aside the long portions of the apron strings for later use.
Step 2: Adding Structure with Fusible Interfacing
Turn your apron fabric to its wrong side. Lay the medium-weight fusible interfacing onto the wrong side of the apron, ensuring it covers the area that will form the main body of your pouch. Using a hot iron, carefully press the interfacing onto the fabric according to the manufacturer’s instructions. This step is vital as the interfacing provides crucial structure, stability, and durability to your pouch, helping it maintain its shape and making it more resilient to daily use.
Step 3: Forming the Apron Tube
With the interfacing now fused, fold the apron fabric to create a tube shape. To do this, overlap the short ends of the apron fabric, aligning the edges precisely. Once aligned, carefully fold the raw edge of the remaining apron string binding (the 1/2 inch pieces you left) under itself. This creates a clean, finished edge that won’t fray. Pin the overlapped edges securely. Using your sewing machine, stitch the tube closed with a zig-zag stitch. A zig-zag stitch is recommended here as it provides flexibility and prevents the fabric from fraying along the seam, creating a durable and neat closure for the pouch body.
Step 4: Shaping and Flattening the Apron Tube
Once the tube is stitched, it’s time to give it its final pouch shape. Press the apron tube flat with your iron. As you press, ensure that the original center of the apron fabric aligns perfectly with the back center seam you just created. This meticulous alignment is important for ensuring your pouch is symmetrical and lies flat, providing a clean canvas for the zipper installation. Press firmly to create crisp edges.
Step 5: Preparing Your Zipper for Installation
Before attaching the zipper to your pouch, you need to prepare it. Measure the top open space of your flattened apron tube. Subtract 1 inch from this measurement; this adjustment accounts for the small fabric tabs that will be sewn onto the zipper ends, creating a neat finish and preventing the zipper pull from coming off the track. For example, if your apron opening measures 8 1/2 inches, your complete zipper length (with end tabs) will be 7 1/2 inches. Take a small piece of the saved apron string binding and sew it perpendicularly to each end of the zipper, covering the metal stoppers. These small fabric tabs provide a professional finish and integrate the zipper seamlessly into the pouch structure.
Step 6: Attaching the Lining to the Zipper (First Side)
Take one piece of your cotton lining fabric. Place it right side up. Now, take your prepared zipper and place it right side down along one of the long edges of the lining fabric. The raw edge of the zipper tape should align with the raw edge of the lining fabric. Pin these layers together carefully. Using your sewing machine and a zipper foot (which allows you to sew very close to the zipper teeth), stitch along this edge, attaching the zipper to the lining. Backstitch at the beginning and end for added security.
Step 7: Attaching the Main Pouch Fabric to the Zipper (First Side)
Now, take your main apron pouch body (the tube you’ve created). With the right side of the apron fabric facing down, align its top raw edge with the same side of the zipper tape you just sewed to the lining. Essentially, you’re “sandwiching” the zipper tape between the right side of the lining and the right side of the apron fabric. Pin securely. Stitch along this edge, ensuring you’re sewing through all three layers (apron fabric, zipper tape, and lining). Press the fabric away from the zipper.
Step 8: Attaching the Lining and Main Fabric to the Zipper (Second Side)
Open the zipper partially. Take the second piece of your cotton lining fabric. Place it right side up. Align the remaining unsewn edge of the zipper (right side down) along one long edge of this second lining piece. Pin and stitch as you did in Step 6. Next, take the other open edge of your main apron pouch body. With the right side of the apron fabric facing down, align its top raw edge with the zipper tape you just sewed to the second lining piece. Pin and stitch, effectively creating the second “sandwich” with the zipper. Press the fabric away from the zipper.
Step 9: Assembling the Pouch Body
Open the zipper completely (this is crucial for turning the pouch later). Lay out your fabric so that the two main apron fabric pieces are right sides together, and the two lining fabric pieces are also right sides together. The zipper should be in the middle, open. Pin around the three raw edges of the main apron fabric, ensuring all edges are aligned. Stitch these three sides (bottom and two sides) using a straight stitch, leaving a 1/2 inch seam allowance. Repeat this process for the lining fabric, but on one of the bottom edges, leave a gap of approximately 3-4 inches unstitched. This opening will be used to turn the pouch right side out later.
Step 10: Squaring the Corners (Optional but Recommended)
For a more structured, box-like pouch bottom, you can “box” the corners. At each of the four corners (two on the main fabric, two on the lining), pinch the corner so that the side seam meets the bottom seam, forming a triangle. Measure in about 1 to 1.5 inches from the point and draw a line perpendicular to the seam. Stitch along this line. Trim the excess fabric, leaving a 1/4 inch seam allowance. This creates a flat bottom for your pouch, giving it more capacity and a neater finish.
Step 11: Turning and Finishing Your Zippered Pouch
Reach into the opening you left in the lining fabric and carefully pull the entire pouch right side out through this hole. Gently push out all the corners so they are crisp. Once the pouch is completely turned, you will see the main apron fabric on the outside and the lining on the inside, with the zipper neatly integrated. Press the pouch thoroughly to set the seams. Finally, close the opening in the lining by hand-stitching with an invisible ladder stitch or by machine-stitching very close to the edge. Take one of the saved apron strings and tie or loop it through the zipper pull for an added touch of charm and functionality. Your brand new, repurposed apron pouch is now complete!
Tips for Success and Personalization
To ensure your apron pouch project is a resounding success, consider these helpful tips:
- Press, Press, Press: Ironing at each stage (after fusing interfacing, after stitching seams, and at the end) makes a huge difference in the professional appearance of your finished pouch.
- Use Quality Thread: A good quality all-purpose polyester thread is strong and durable, standing up to the wear and tear your pouch will experience.
- Pin Generously: Don’t be shy with pins, especially when attaching the zipper. They keep layers from shifting and ensure accurate stitching.
- Test Your Machine Settings: Before sewing on your actual project, test your stitch length and tension on a scrap piece of fabric from your apron and lining.
- Take Your Time: Sewing is not a race. Go slowly, especially around curves or when attaching the zipper, for precise results.
- Personalize It: Consider adding a patch, some embroidery, or even fabric paint to your apron before you begin to make your pouch truly unique. You could also use contrasting thread for topstitching.
- Consider Fabric Weight: If your apron fabric is very thick (like heavy canvas), your sewing machine might struggle. Use a heavy-duty needle and go slowly.
Caring for Your Upcycled Pouch
To ensure your newly transformed zippered pouch lasts for years to come, proper care is essential. The cleaning instructions will largely depend on the original material of your apron. For most cotton or canvas aprons, a gentle machine wash in cold water with a mild detergent is usually appropriate. If your apron had any delicate embellishments, or if you’re unsure, hand washing is always the safest bet. Air dry your pouch to help it maintain its shape and prevent any potential shrinkage or damage to the interfacing or zipper. Regular cleaning will keep your pouch looking fresh and ready for all its versatile uses.
Conclusion: A Second Life for Your Beloved Apron
And there you have it – a complete guide to transforming an ordinary, perhaps forgotten, apron into an extraordinary, functional zippered pouch! This project isn’t just about sewing; it’s about embracing creativity, practicing sustainability, and finding joy in making something useful with your own hands. From protecting your clothes in the kitchen to neatly organizing your essentials, your apron has always been a loyal companion. Now, it gets to embark on a new adventure, serving you in a completely different, yet equally valuable, capacity.
We hope this detailed tutorial has inspired you to look at your old textiles with a fresh perspective and perhaps even sparked a new passion for upcycling. The satisfaction of crafting something beautiful and practical from materials destined for waste is immense. We encourage you to share your creations and experiences with fellow DIY enthusiasts. What will you store in your new zippered pouch? The possibilities are truly endless!
For more inspiring DIY projects and creative tutorials, continue exploring the world of handmade crafts and home improvement.