
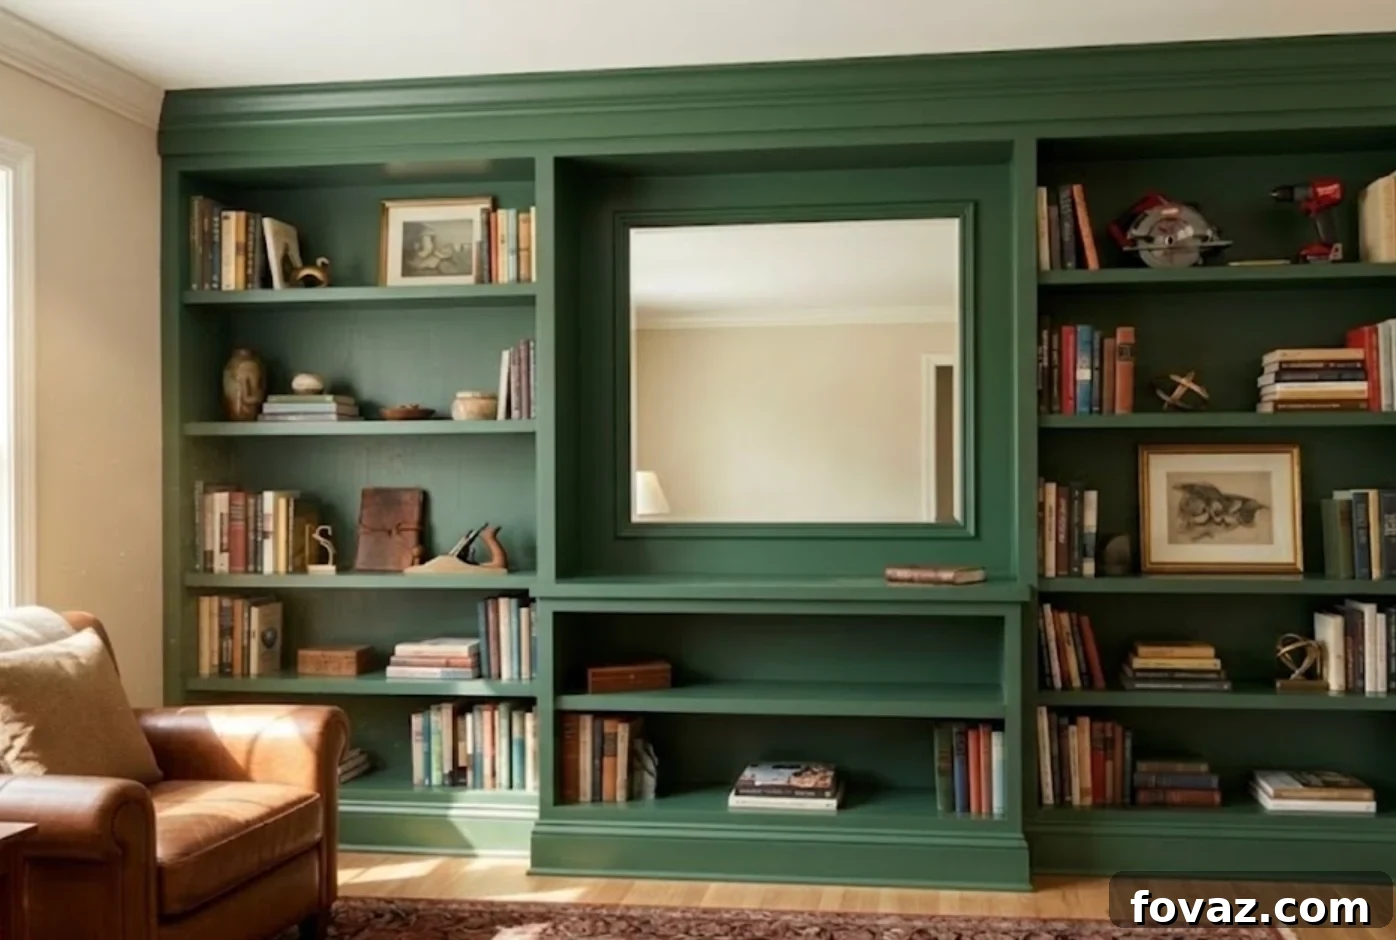
Transforming your home with built-in cabinetry is consistently ranked as one of the most impactful home improvement projects, offering exceptional value for money. While professional contractors typically charge between $3,000 and $8,000 for a 10-foot wall of custom bookcases, homeowners can achieve a remarkably similar high-end aesthetic through a DIY approach for a fraction of the cost. By leveraging stock cabinets, applying careful finishing techniques, and integrating elegant molding, you can create built-ins for an estimated material cost of $400 to $1,200.
The beauty of a well-executed DIY built-in lies in its indistinguishable quality from custom work. This comprehensive guide will illuminate the precise techniques and crucial details that elevate a simple cabinet installation into a sophisticated, integrated architectural feature. We’ll delve into the foundational steps, material considerations, and finishing touches that ensure your DIY project exudes a truly custom appeal, saving you thousands while enhancing your living space significantly.
Before You Begin: The Essential Wall Check
Many built-in tutorials jump straight into cabinet selection, but the secret to a flawless installation begins with a thorough assessment of your wall. Skipping this critical preparatory stage often leads to frustrating rework or a finished product that falls short of expectations. A diligent wall check is the fundamental step that differentiates a successful, integrated design from an ill-fitting, amateur attempt.
Critical Wall Checks for Built-in Cabinet Installation
Before any design work or material purchases, conduct these essential wall evaluations to ensure a smooth, professional installation:
Locate and Mark All Studs: Your built-ins will require secure anchoring. Use a reliable stud finder to meticulously map out every vertical stud across the entire width and height of your proposed installation area. Mark each stud clearly with painter’s tape. To prevent false positives—often encountered near electrical boxes or plumbing—always verify the stud location by gently pushing a small finishing nail through the drywall. This guarantees a solid anchor point for your cabinets, crucial for their stability and weight-bearing capacity.
Assess for Plumb and Level: Walls and floors are rarely perfectly straight or level. To determine how much adjustment your built-ins will require, hold a 4-foot level vertically against the wall at the far left, center, and far right points of your installation zone. Note any discrepancies from true vertical (out of plumb). Repeat this horizontally along the floor line to check for levelness. These measurements are vital: they dictate the necessary scribe allowance for cabinet sides to eliminate gaps and inform whether you’ll need to shim the base platform to create a perfectly level foundation.
Identify Pipes and Electrical Components: Prior planning prevents costly mistakes. If your wall contains electrical outlets, light switches, or plumbing supply/drain lines, accurately map their exact locations. Built-ins cannot obstruct access to critical elements like electrical load center panels. Be prepared to relocate or extend existing outlets; an outlet extender box may be necessary to bring the receptacle flush with the new cabinet face. Understanding these limitations upfront allows you to adjust your design accordingly and avoid unforeseen complications during installation.
Check for Moisture Levels: This step is paramount for exterior walls and basement walls, which are prone to moisture issues. Before enclosing any area with built-in storage, use an inexpensive moisture meter (typically around $15) to check readings. Readings exceeding 15% on a wood substrate indicate a significant moisture problem. Installing cabinets over a damp wall will inevitably lead to warping, mold growth, and potential structural damage to your new investment. Address any moisture issues with a professional contractor or waterproofing specialist before proceeding with your built-in project.
What You’ll Need: Budget Tiers for a 10-foot DIY Built-in
The beauty of DIY built-ins is the flexibility to choose materials that align with your budget and skill level. For a 10-foot wall installation, here are three common budget tiers, each offering a distinct path to achieving a custom look:
Three Budget Tiers for Your Built-in Project
Minimum Tier ($400–$600): The “Flat-Pack Hack”
This entry-level option utilizes readily available flat-pack furniture such as IKEA KALLAX or BILLY bookcases as the core structure (carcass). This approach is highly cost-effective and surprisingly forgiving for those new to built-in projects. You’ll enhance these modular units by adding custom face frames and crown molding, typically crafted from paint-grade poplar or MDF. Spacer panels are used to fill any gaps between units or at wall junctions, creating a seamless appearance. While this tier demands meticulous measurement and a high degree of precision in finishing work—especially sanding, caulking, and painting—it can yield an incredibly convincing custom result. The modular nature of these cabinets makes them adaptable to imperfect walls, particularly when combined with proper scribing techniques. This tier is an excellent starting point for first-time builders, offering the quickest path to a finished look with the lowest financial risk associated with measurement errors.
Mid Tier ($700–$1,000): “Home Center Heroes”
Stepping up in quality, this tier incorporates stock kitchen base or upper cabinets sourced from your local home improvement center (e.g., Kraftmaid’s in-stock lines or comparable brands). These cabinets offer a more robust construction than flat-pack units, often featuring superior hinge quality and a broader range of standard sizes. For any non-standard sections or specific design elements, you can supplement these with paint-grade plywood panels, cut to exact dimensions. The critical custom touch in this tier comes from a comprehensive molding package, including base shoe, crown molding, and additional built-in surround trim to create a cohesive, integrated appearance. This option provides a significant upgrade in durability and aesthetics over the minimum tier, requiring a moderate level of DIY skill.
Quality Tier ($900–$1,200): “Workshop Crafted”
For the most durable and dimensionally precise built-ins, this tier involves constructing the cabinet boxes from scratch using high-quality paint-grade plywood. Typically, 3/4-inch maple or birch ply is used for the carcasses, with 1/2-inch plywood for the backs, often dadoed into the side panels for superior strength. These shop-built boxes are crafted to exact dimensions, allowing for complete design control and ensuring a perfect fit. They are then face-framed with solid poplar, providing a substantial, custom look and feel. While this tier demands more time, advanced woodworking skills, and essential tools like a table saw, it results in significantly better long-term durability and structural integrity compared to flat-pack options. This tier is recommended for experienced DIYers who prioritize maximum customization and longevity.
For those embarking on their very first built-in project, the minimum tier (IKEA stock cabinets combined with custom molding) offers the fastest and most budget-friendly route to a stunning finished look. It minimizes the financial impact of potential measurement errors and allows you to build confidence before moving on to more complex, higher-tier projects.
The Installation: What Makes Built-In Cabinets Look Truly Custom
The transformation of standard cabinets into a bespoke built-in feature doesn’t hinge on expensive materials alone. Instead, it’s a meticulous attention to specific details that truly elevates the aesthetic. These seemingly small elements bridge the gap between “cabinets attached to a wall” and a design that appears to have always been an integral part of your home’s architecture. Mastering these steps ensures your DIY built-ins look genuinely custom and expensive.
The Secrets to Expensive-Looking DIY Built-ins
The perception of high-end, custom built-ins boils down to three critical details that account for nearly all the visual distinction: the strategic base build-up, the precise scribing to seamlessly meet the wall, and the elegant integration of crown molding. Get these three elements right, and the underlying quality or origin of your cabinet carcasses becomes largely irrelevant to the observer. It’s the finish that makes the statement.
Step 1: Construct the Base Platform First
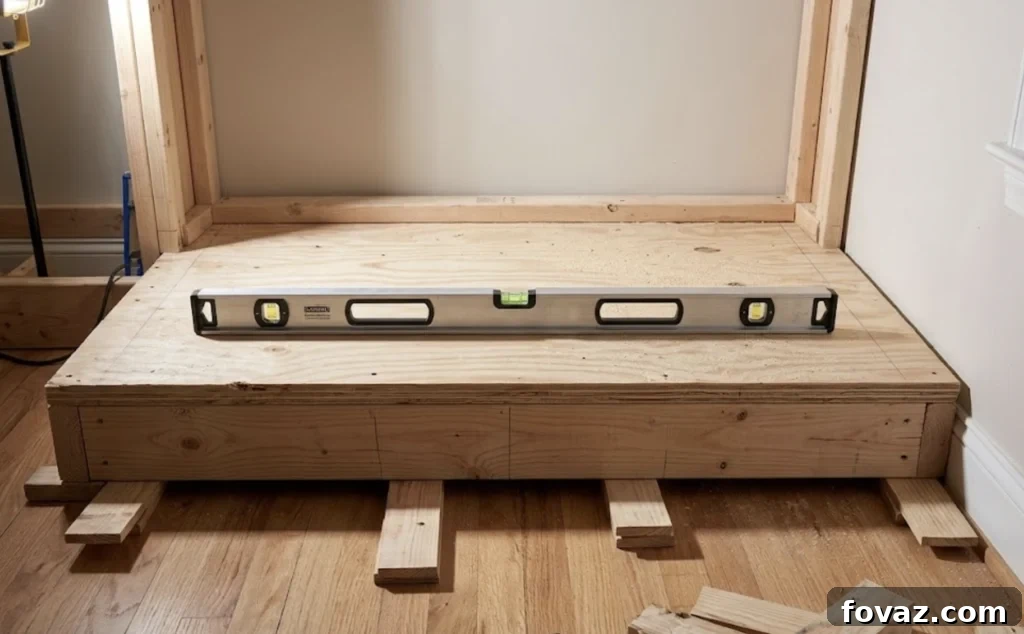
Never place built-in cabinets directly onto an uneven floor. This is a common mistake that immediately betrays a DIY project. Instead, begin by constructing a sturdy base platform, typically 3.5 to 4 inches high, using 2×4 lumber. This platform serves two crucial purposes: first, it elevates the cabinets to a more architecturally pleasing height, often aligning with existing window sills or other room features, giving the entire installation a designed, floor-to-ceiling proportion. Second, and most importantly, it allows you to create a perfectly level plane for your cabinets, irrespective of any variations or unevenness in your existing floor.
It is absolutely essential to shim this base platform to a dead level before anchoring it to the floor. Use a 4-foot level to check for perfect levelness in both longitudinal and transverse directions. This shimming process is arguably the most critical precision step in the entire project. Every subsequent vertical measurement, and indeed the overall alignment of your cabinets, will depend entirely on this base being perfectly level. Once level, anchor the platform securely to the floor, often into joists, ensuring a stable foundation for your built-ins.
Step 2: Anchor Cabinets Securely to Studs, Not Drywall
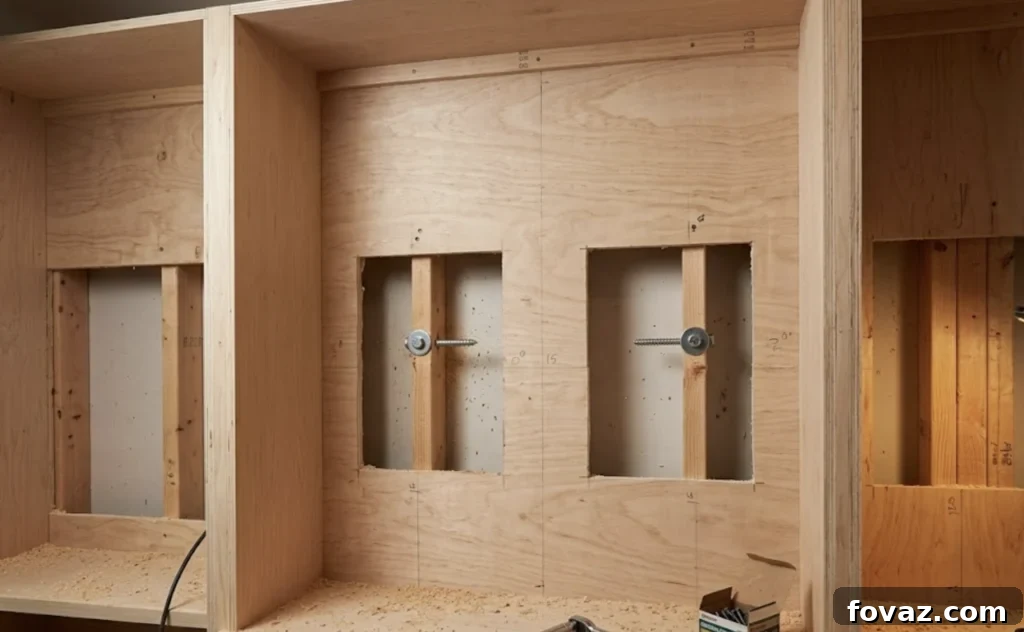
Once your level base platform is established, carefully position each cabinet unit onto it and push it flush against the wall. With the cabinets temporarily in place, transfer the previously marked stud locations onto the interior back panel of each unit. Pre-drill pilot holes through the cabinet’s back panel and any integral nailer strips at the top or bottom of the cabinet. Then, drive 3-inch cabinet screws directly into the wall studs, ensuring a minimum of two screws per cabinet unit for maximum stability. This robust anchoring is non-negotiable for built-ins, especially those intended to hold heavy items like books or media equipment.
For upper cabinets or shelving units designed to bear significant weight, consider installing a ledger board. This is a strip of wood (e.g., a 1×4) securely anchored to the studs at the desired height, which the cabinets can then rest upon or be hung from, providing additional support. Crucially, avoid using drywall anchors for any built-in components that will carry a load. Drywall anchors are prone to progressive failure under repeated stress, weight, and vibration, which can lead to sagging, damage, or even collapse. Direct anchoring into solid wood studs provides superior, long-lasting support.
Step 3: Precisely Scribe to the Wall
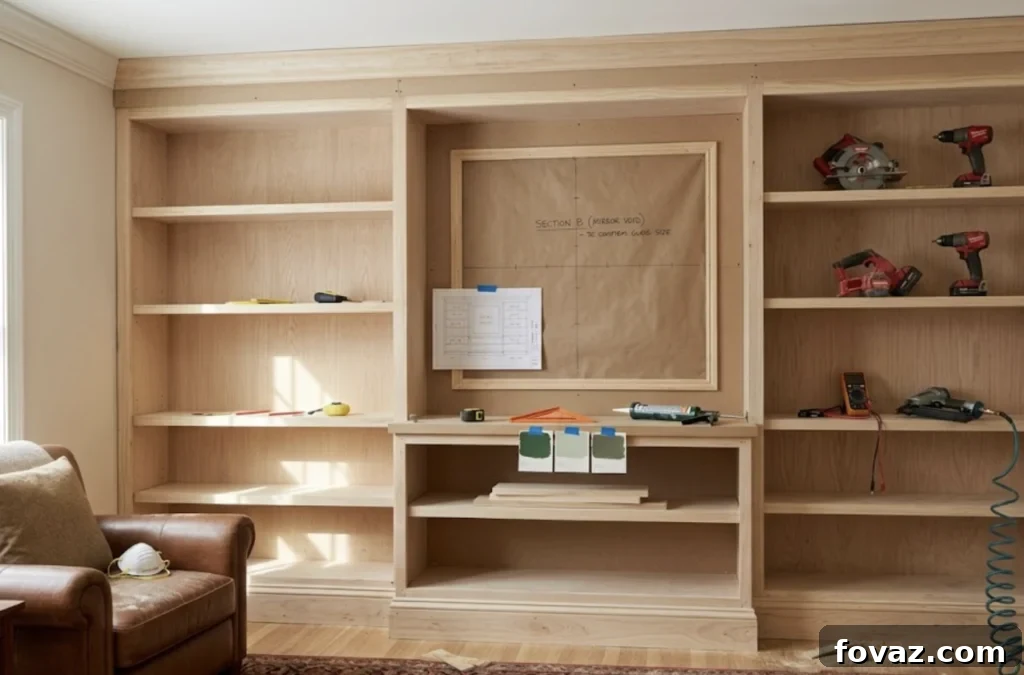
This is arguably the most critical step in achieving a truly custom, built-in appearance. Once your cabinets are securely anchored, you’ll inevitably notice slight, uneven gaps between the cabinet sides and the wall due to variations in wall flatness. To eliminate these gaps, measure the largest distance between the cabinet side and the wall along the entire length of the contact point. Add approximately 1/2 inch to this measurement, then cut a “scribe strip”—a narrow piece of matching material, typically 1.5 to 2 inches wide, from solid wood or MDF—to this width.
Now, set your compass to the exact measurement of that largest gap. Position the scribe strip against the cabinet side, flush with the wall. With one leg of the compass tracing the wall’s actual contour, run the other leg along the scribe strip, transferring the wall’s imperfections directly onto the strip. This creates a perfectly customized cut line. Carefully cut along this line with a jigsaw, making sure to sand the edge smooth. When this custom-cut scribed strip is installed, it will follow the wall’s exact undulations, creating a perfectly tight, gap-free seal that makes the cabinet appear as though it was built directly into the wall. This meticulous detail is a hallmark of professional-grade work.
Step 4: Integrate the Complete Molding Package
The molding package is where a DIY built-in truly transcends from “cabinets attached to wall” to a seamlessly integrated, custom architectural feature. Strategic application of various trim elements creates the illusion of a continuous, built-in unit. You’ll need:
Crown Molding at the Ceiling Transition: Install crown molding between the top of your built-in cabinets and the ceiling. This crucial element conceals any gaps and provides an elegant, finished transition that draws the eye upward, enhancing the custom feel. Just as you scribed to the wall, you’ll need to account for uneven ceilings. If your ceiling isn’t perfectly level (which is common), you may need to scribe the blocking behind the crown molding or the molding itself to follow the ceiling’s irregularities. Pay close attention to the spring angle of your crown molding (typically 38-degree or 52-degree); choosing the correct angle is essential for it to sit properly and create the intended profile against both the cabinet and the ceiling. A well-chosen and installed crown molding adds significant architectural grandeur.
Base Molding at the Floor Transition: To create a truly cohesive look, match the existing baseboard profile in your room as closely as possible. Run this base molding continuously across the front of your newly constructed base platform and the cabinet kick plate. This eliminates the standard, often recessed, cabinet toe kick, making the built-in appear as if it rises directly from the floor. Additionally, where the baseboard meets the floor, install base shoe molding (either quarter-round or a flat shoe molding). This smaller trim piece covers any minor gaps at the floor line, creating a clean, finished interface and accommodating slight irregularities in the flooring surface.
Pilasters or Side Returns: At any point where your built-in terminates at an open wall (i.e., it doesn’t run wall-to-wall), adding a vertical trim element is essential. This could be a simple painted 1×4 or a more detailed pilaster, chosen to complement the overall style. This “side return” gives the installation a crisp, defined edge, preventing it from looking abruptly unfinished. Without this crucial vertical trim, the built-in can appear to simply stop, detracting from the desired integrated aesthetic. It frames the built-in, making it feel intentional and complete.
Step 5: Caulk and Paint as One Unified Operation
The final, transformative step is the meticulous application of caulk and paint. This is where all the individual components—cabinets, face frames, and various moldings—are visually unified into a single, seamless structure. Before any paint touches the surface, apply high-quality paintable latex caulk to every single joint: between molding pieces, where molding meets the wall, and where cabinet faces meet their face frames. Smooth every caulk bead with a wet finger or a caulking tool immediately after application, before it begins to skin over. This creates perfectly smooth, invisible transitions.
Once the caulk is completely dry (allow at least 2 hours for latex caulk, or as per manufacturer instructions), proceed with painting. The key to the “it was always here” look is to paint all cabinets, all molding, and any adjacent wall surfaces within the built-in footprint in one consistent color and finish. Using a high-quality, cabinet-specific paint (such as Benjamin Moore Advance or Sherwin-Williams Emerald Urethane) applied in thin coats with a brush or foam roller, and lightly sanding between coats with 220-grit sandpaper, will yield a durable, professional-grade finish that can withstand daily contact, cleaning, and door handles. Resist the temptation to use different colors for cabinets and walls at this stage, as a two-toned scheme will instantly break the illusion of a custom, integrated built-in.
Common Mistakes to Avoid in DIY Built-in Projects
Even with the best intentions, certain missteps can compromise the quality and appearance of your DIY built-ins. Being aware of these common pitfalls can save you time, money, and frustration:
Installing Built-in Cabinets Directly on an Uneven Floor: This is perhaps the most glaring error. Even a subtle 1/4-inch variation across a 10-foot span will result in visibly crooked cabinet doors, misaligned shelves, and an overall unprofessional appearance. Always, without exception, build a level base platform first. Shim it meticulously to a dead level, checking and re-checking with a 4-foot level in multiple directions before securing anything. This foundational step is critical for a straight, true installation.
Using Rattle-Can Spray Paint Instead of Proper Cabinet Finishes: While spray paint offers quick coverage, the finish from aerosol cans on large surfaces like cabinets often looks uneven, lacks durability, and quickly shows wear in person, even if it appears decent in photos. For a robust, professional-grade finish that withstands daily use, opt for cabinet-specific paints (e.g., Benjamin Moore Advance, Sherwin-Williams Emerald Urethane enamel). Apply these paints in thin, even coats using a high-quality brush or a dense foam roller. Lightly sand between coats with 220-grit sandpaper for optimal adhesion and smoothness. This method creates a hard, durable surface that resists chips, scratches, and cleaning, ensuring your built-ins look great for years.
Buying Crown Molding Before Measuring Ceiling Angles and Heights: Crown molding profiles are designed with specific spring angles (commonly 38-degree or 52-degree) to fit between a wall and a ceiling at a particular pitch. A beautiful profile in the store might be completely unsuitable for your specific ceiling and cabinet height combination. First, accurately measure the distance between the top of your cabinet and the ceiling. Then, choose a crown molding profile that proportionally fills that space and has the correct spring angle for your installation, ensuring it sits flush and creates the desired aesthetic.
Neglecting to Plan for Outlet Locations: If your built-in will cover an existing electrical outlet, you absolutely must plan for its relocation or extension. Failing to do so means either losing access to the outlet or having to cut into your beautifully finished cabinets later—a task that is messy, difficult to make look good, and potentially damaging. The simple solution is an outlet extender box, a $6 part from any hardware store, which allows you to bring the receptacle flush with the new cabinet face. This quick, 10-minute install during the framing or early installation stage prevents significant headaches later on.
Painting Before Caulking: This sequencing error can lead to visible flaws. Paint, as it cures, undergoes a certain amount of shrinkage. If you paint before caulking, this shrinkage can open up small, unsightly gaps at caulk lines, especially at joints where two surfaces meet. The correct order is always: caulk first, allowing the caulk to fully dry and cure (typically a minimum of 2 hours for latex, but always check manufacturer instructions) before applying any paint. This ensures the caulk creates a seamless fill that remains intact under the paint, resulting in a perfectly smooth and unified finish.
When to Hire a Professional for Your Built-in Project
While the majority of built-in cabinet projects fall squarely within manageable DIY territory, even for those with minimal carpentry experience—especially when adopting the accessible base/cabinet/molding approach—there are specific situations where calling a licensed professional is not just advisable, but essential. Knowing your limits can prevent significant safety hazards, costly structural damage, or legal issues.
Electrical Relocation or New Wiring: If your built-in design requires moving an existing electrical outlet, switch, or light fixture, or if you need to run new wiring or add junction boxes within the wall, this is licensed electrical work. Unless you are a certified electrician, do not attempt these tasks yourself. While installing an outlet extender box to bring an existing receptacle flush with a new cabinet face is a safe DIY task, actually moving the electrical box itself or altering the wiring is not and carries significant risks of fire, shock, or code violations. Always consult a licensed electrician for any modifications to your home’s electrical system.
Moisture Readings Above 15%: As emphasized in the initial wall check, a moisture reading exceeding 15% on a wood substrate indicates an underlying building envelope problem. Installing closed cabinets over a damp wall will effectively trap that moisture, creating an ideal environment for mold growth, mildew, and accelerated structural decay. This is not a DIY fix. Before proceeding with any installation, you must address the root cause of the moisture. Contact a qualified contractor or a waterproofing specialist to diagnose and remedy the issue. Ignoring high moisture levels will lead to expensive damage to your new built-ins and potentially compromise your home’s integrity.
Uncertainty Regarding Load-Bearing Walls: If your built-in plans involve significant modifications to a wall—such as creating a pass-through opening, widening an existing doorway, or removing a section of the wall—and you have any doubt whatsoever about whether that wall is load-bearing, you must seek a structural consultation. Drilling, cutting, or removing elements from a load-bearing wall without proper structural support can have catastrophic consequences, potentially leading to collapse. A structural engineer can accurately assess the wall’s function and provide professional guidance or design necessary reinforcements. Prioritize safety above all else in such scenarios.
The Bottom Line: Precision is Key to Perfection
The distinction between a DIY built-in that looks like a seamless, custom feature and one that clearly appears to be a weekend project boils down to a handful of fundamental principles and an unwavering commitment to detail. These critical elements include establishing a perfectly level base, securely anchoring your cabinets to wall studs, meticulously scribing panels to eliminate all gaps against uneven walls, and applying a unified, professional paint finish complemented by impeccable caulk work. None of these techniques require advanced carpentry skills; rather, they demand patience, precision, and a refusal to cut corners.
The journey begins with a thorough substrate check: meticulously mapping stud locations, verifying plumb and level, and performing a crucial moisture assessment. Your design should always adapt to the realities of your existing wall, not assume perfection. Then, proceed systematically: build a rock-solid, level base, anchor every cabinet unit securely into studs, scribe all vertical gaps to the wall for a flawless fit, integrate a complete molding package to provide architectural continuity, and finally, unify the entire installation with a consistent paint and caulk job. By adhering to these steps, you can achieve a result that rivals contractor-installed built-ins—potentially saving you thousands of dollars—regardless of which of the three budget tiers you choose.
Frequently Asked Questions About DIY Built-in Cabinets
1. How do you make DIY built-in cabinets look expensive and custom?
The secret to achieving a high-end, custom look with DIY built-ins lies in meticulous finishing details. First, always build a perfectly level base platform for your cabinets, raising them off the floor and ensuring stability. Second, meticulously scribe all cabinet sides and filler panels to the wall’s actual contour, eliminating any visible gaps. Third, integrate a complete molding package: use crown molding at the ceiling transition, match your existing room baseboard along the cabinet’s base, and add pilasters or side returns where the built-in terminates. Finally, apply a unified, high-quality paint-grade finish using a durable urethane enamel, painting all cabinets, trim, and adjacent wall surfaces in the same consistent color. These details collectively create a seamless, professionally installed appearance.
2. Can you use stock cabinets for high-end built-ins?
Absolutely, using stock kitchen cabinets from a home center or even modular, flat-pack furniture like IKEA units is an incredibly cost-effective strategy for creating expensive-looking built-ins. The key is to transform these standard units through strategic enhancements. Begin by building a custom, level base platform to elevate the cabinets. Then, add custom face frames to create a uniform, integrated look across multiple units. Bridge any gaps between cabinets or to the wall with precisely cut filler panels and scribe strips. Finish with an extensive molding package—including crown, base, and side trim—and a unified paint job. This “hack” significantly reduces material costs, leveraging the structural carcass of affordable stock units to achieve a high-quality, custom result that can save thousands compared to bespoke cabinetry.
3. What is the most common mistake with DIY built-ins?
The most common and impactful mistake in DIY built-in projects is failing to properly anchor the cabinets to wall studs. Many DIYers mistakenly rely on drywall anchors, which are insufficient and prone to progressive failure under the significant weight of books, media, or other display items. This leads to sagging, instability, and potential damage over time. Always locate and mark every wall stud across your installation area before mounting. Secure each cabinet unit with at least two 3-inch cabinet screws driven directly into the studs. Another frequent error is skipping the crucial leveling and shimming process for the base platform, which inevitably results in crooked cabinet doors, uneven shelves, and visible gaps, undermining the custom aesthetic.
4. How much do DIY built-in cabinets cost vs. professional installation?
In 2026, the cost for professional installation of a 10-foot wall of custom built-in cabinetry typically ranges from $3,000 to $8,000, encompassing materials and labor. In stark contrast, a DIY built-in project, utilizing stock cabinets, flat-pack units, or paint-grade plywood and incorporating the necessary finishing materials, generally costs between $400 and $1,200. This substantial cost difference highlights why DIY built-ins represent one of the highest-ROI (Return on Investment) home improvement projects for homeowners who are prepared to invest their own labor and attention to detail, delivering significant aesthetic and functional value for a modest material outlay.
5. Should I paint or stain my DIY built-ins for a custom look?
For the quintessential custom-built-in appearance, a paint-grade finish is almost always superior to a DIY stain. Staining often highlights the material of the stock cabinets, which might reveal their less expensive origins. A unified paint scheme, however, completely unifies disparate materials and creates a seamless, architectural feature that looks “built-in from the start.” Use a consistent, high-quality paint color for all cabinet surfaces, trim work, and any adjacent wall sections within the built-in footprint. Apply a durable, cabinet-specific paint, such as a urethane enamel, using a foam roller or fine-bristle brush for a smooth, resilient surface. This type of paint offers significantly better resistance to wear, tear, and cleaning compared to standard wall paint, ensuring your built-ins maintain their elegant appearance over time.