
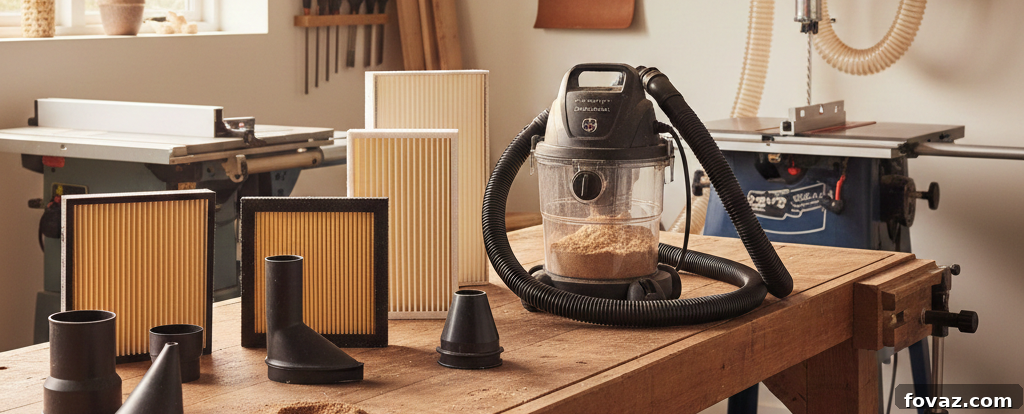
The Ultimate Tool Maintenance Checklist: Keep Your Workshop Running Smoothly
Every DIY enthusiast knows the frustration of a dull saw blade, a sluggish drill, or a shop vacuum struggling with dust. These issues aren’t just inconvenient; they can compromise the quality of your projects, slow down your progress, and even pose safety risks. The secret to avoiding such pitfalls and ensuring your tools perform at their peak lies in consistent, proactive care. This comprehensive guide introduces you to an effective tool maintenance checklist, transforming tool upkeep from a dreaded chore into a quick, rewarding habit.
Designed for both beginner and intermediate DIYers, this guide provides actionable steps to maintain your power tools and hand tools with minimal effort. We’ll delve into a practical 15-minute monthly routine, a helpful maintenance calendar, and essential tips for extending the lifespan of your valuable equipment. By adopting these simple practices, you’ll enjoy safer operation, more accurate results, and tools that are always ready for your next project.
Tool Maintenance Checklist: Key Principles at a Glance
Our approach to tool maintenance is built on efficiency and impact. This isn’t about lengthy, complex procedures, but rather a series of short, repeatable checks that deliver significant benefits. Here’s what you can expect from this guide:
- Streamlined Routine: Discover a concise, repeatable tool maintenance routine designed to keep your equipment accurate, safe, and always project-ready.
- Time-Efficient Plan: Learn a highly effective 15-minute monthly checklist, perfectly paired with an intuitive tool maintenance calendar to simplify your schedule.
- High-Impact Focus: Our tasks prioritize critical areas such as blades, batteries, dust control systems, lubrication points, and crucial safety features, ensuring maximum benefit for minimal time investment.
- Realistic Time Estimates: Practical time estimates are provided to help you complete essential maintenance without it escalating into a time-consuming project.
- Clear Guidance: Understand precisely which issues demand immediate attention and which can be monitored over time, empowering you to make informed decisions.
- Accessibility for All: Crafted for DIYers of all skill levels, from beginners to experienced hobbyists, who seek reliable tools without extensive upkeep.
If you’ve noticed your drill losing power, your saw leaving rougher cuts, or dust accumulating far too quickly, it’s a clear sign that tool maintenance is overdue. This guide aims to demystify tool care, turning routine upkeep into a quick, satisfying habit instead of a daunting weekend task.
Beyond the monthly routine, you’ll also receive a useful quarterly deep-dive plan and clear instructions on when to restore a tool versus when to consider a replacement. The ultimate goal is simple: fewer frustrating breakdowns, enhanced safety in your workshop, and consistently superior results with less overall effort.
Recommended Product: To help keep moving parts smooth and protected, consider a high-quality dry lubricant. For example, WD-40 Specialist Dry Lube with Smart Straw offers superior lubrication and long-lasting corrosion protection for table saws, drills, and lathes, without leaving a sticky residue. (As an Amazon Associate, we earn from qualifying purchases.)
Your Essential 15-Minute Monthly Tool Maintenance Checklist
This monthly tool maintenance routine is built on practical workshop habits, focusing on small, impactful checks that proactively prevent the majority of common tool breakdowns and safety hazards. It’s designed to be quick, efficient, and easy to integrate into your existing schedule. For maximum convenience, keep a printed copy of this checklist near your workbench or save it digitally on your phone, ensuring it’s always accessible when it’s time for maintenance.

1. Blades and Bits: Precision & Performance
Sharp and clean cutting tools are fundamental for quality work and tool longevity. Take a moment to inspect and clean these vital components.
- Inspect Thoroughly: Carefully check all saw blades, router bits, drill bits, and planer knives for any signs of chips, bends, cracks, or heavy pitch buildup. Even minor damage can compromise safety and cut quality.
- Clean Off Debris: Use a stiff nylon brush to remove sawdust, resin, and pitch from cutting surfaces. Follow up with a dry rag to wipe them clean. For stubborn pitch, a specialized blade cleaner can be highly effective.
- Touch Up Edges: If necessary, give dull edges a quick hone using a diamond sharpening card or appropriate sharpening stone. This can significantly extend the life between professional sharpenings.
- Confirm Seating and Lock: Ensure that all bits and blades seat fully and lock properly in their chucks or arbor. A loose blade or bit is a significant safety hazard.
Why it matters: Clean, sharp cutters not only produce smoother, more accurate cuts, but they also drastically reduce the strain on your tool’s motor, preventing premature wear and overheating. Dull blades can lead to tear-out, binding, and kickback.

2. Batteries: Powering Your Cordless Freedom
Cordless tools offer unparalleled convenience, but their performance heavily relies on proper battery care. These checks ensure your battery packs remain healthy and reliable.
- Optimal Storage Charge: If you won’t be using a battery pack for an extended period, store it at approximately 40% to 60% charge. Storing them fully charged or completely drained can degrade their long-term capacity.
- Rotate Battery Packs: Avoid leaving one battery idle for too long while others are in constant use. Regularly rotate your packs to ensure even usage and prevent any single battery from degrading faster.
- Clean Contacts: Use a dry, lint-free cloth to gently clean the metal contacts on both the battery pack and the tool. Dirty contacts can lead to poor connections, reduced power, and inefficient charging.
- Inspect for Damage: Visually check the battery cases for any cracks, swelling, or signs of overheating. Swelling is a serious indicator of internal damage and such a battery should be safely disposed of.
Why it matters: Adhering to proper battery storage and care practices significantly extends the overall lifespan of your battery packs, ensures consistent charge times, and maintains maximum power delivery throughout their service life.

3. Dust Control and Filters: Breathe Easy, Work Clean
Dust is the enemy of power tools, leading to motor strain, reduced efficiency, and poor air quality. Effective dust management is crucial for both tool health and your personal well-being.
- Empty Collection Systems: Regularly empty your shop vacuums, dust collectors, and the dust bags on tools like sanders and miter saws. Overfilled systems lose suction power.
- Clean or Rinse Filters: Depending on their type, tap or rinse your filters to remove accumulated dust. Washable filters should be cleaned according to manufacturer instructions and allowed to dry completely before reinstallation.
- Check Hoses and Ports: Inspect all dust collection hoses and tool dust ports for any clogs or blockages. Compressed air can often clear stubborn obstructions.
- Wipe Intake Vents: Use a brush or dry cloth to clean the cooling intake vents on your power tools. Blocked vents can cause motors to overheat, drastically shortening tool life.
Why it matters: Unrestricted airflow is vital for keeping tool motors cool, preventing premature failure. Furthermore, efficient dust collection preserves suction power, maintains a cleaner workshop, and significantly improves air quality, protecting your health.

4. Lubrication Points and Fasteners: Smooth Operation, Lasting Accuracy
Moving parts and secure connections are key to a tool’s precision and durability. A quick check of these elements can prevent a host of problems.
- Apply Dry Lubricant: Add a small drop or spray of dry lubricant (like PTFE or silicone-based options) to any sliding rails, guides, or adjustment screws. Dry lubes attract less dust than wet oils.
- Tighten Visible Fasteners: Systematically check and tighten any visible screws, bolts, and knobs on your tools. Loose fasteners can lead to inaccurate cuts, excessive vibration, and component wear.
- Test Moving Parts: Manually spin or slide moving parts, such as drill chucks, saw fences, or depth adjustments, to feel for any unusual resistance, grinding, or stiffness. Address these issues early.
Why it matters: Properly lubricated parts ensure smooth, precise movement, which is critical for accuracy in woodworking and other DIY tasks. Secure fasteners prevent wobble and reduce wear on mating surfaces, greatly extending a tool’s operational life.
5. Safety Checks: Prioritizing Your Well-being
Beyond performance, tool maintenance is fundamentally about safety. A few quick checks can prevent serious accidents in the workshop.
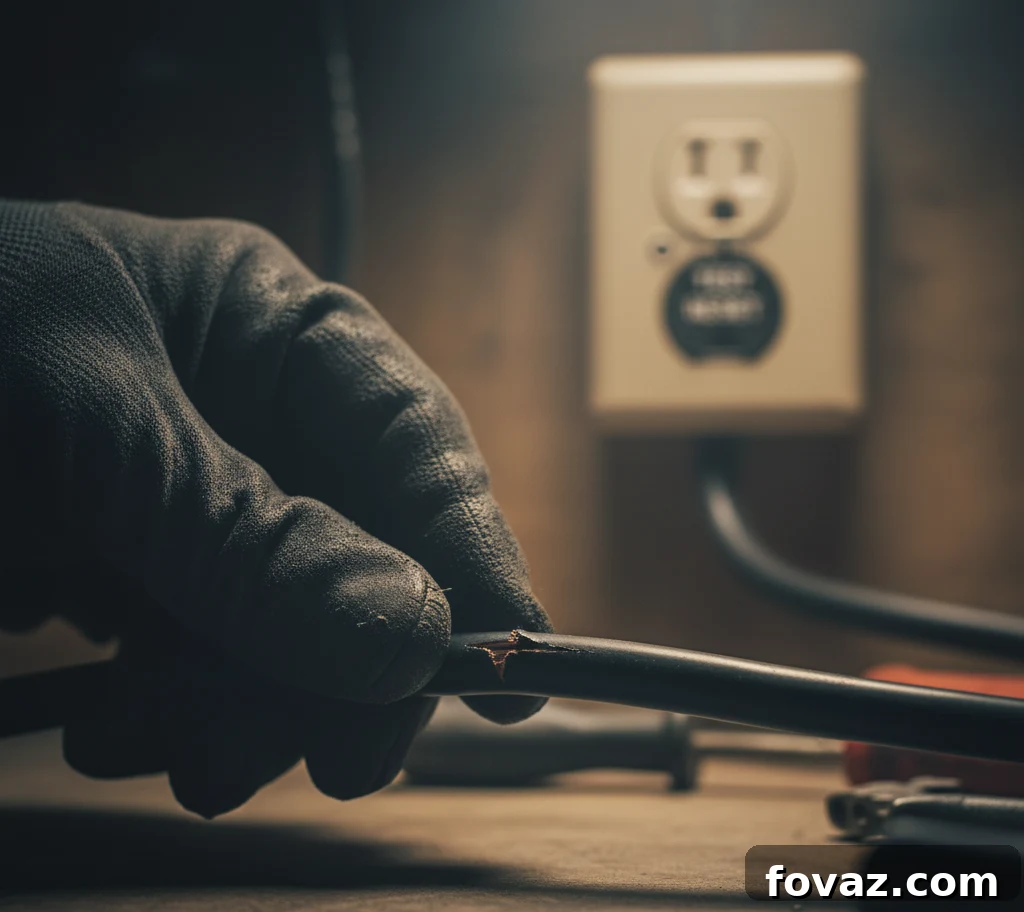
- Inspect Power Cords: Thoroughly examine all power cords for any nicks, cuts, frayed insulation, or exposed wires. Damaged cords are an electrocution hazard and should be replaced immediately.
- Test GFCI Outlets: If your workshop uses Ground Fault Circuit Interrupter (GFCI) outlets, press the “Test” button, then the “Reset” button, to confirm they are functioning correctly. This ensures protection against electrical shocks.
- Confirm Guard Freedom: Verify that all safety guards on saws, grinders, and other tools move freely and return to their proper position without sticking or obstruction. Never operate a tool with a malfunctioning or removed guard.
- Verify Switch Function: Ensure that all power switches operate smoothly, latch securely in the “on” position, and reliably return to the “off” position when released or pressed. A sticky switch can be extremely dangerous.
Why it matters: Neglecting small safety checks can lead to significant injuries. Regular inspection of electrical components, safety features, and mechanical functions is paramount for a secure and accident-free working environment.
Recommended Product: For cleaning delicate electronic contacts and components, an electronic cleaner is indispensable. CRC 05103 QD Electronic Cleaner is a fast-drying, plastic-safe, and residue-free formula ideal for maintaining electronic parts of your tools. (As an Amazon Associate, we earn from qualifying purchases.)
Your Simple Monthly Tool Maintenance Calendar
To make tool maintenance even more manageable, use this lightweight calendar as a rotating focus system. Instead of tackling everything at once, each month emphasizes one priority area. A full 15-minute reset is strategically scheduled twice a year, ensuring all tools remain dependable and ready for any task. This methodical approach prevents overwhelm and builds consistency.
January: Blades and Bits Focus
- Conduct a detailed inspection of all cutting edges on saw blades, router bits, and drill bits.
- Remove any accumulated pitch, resin, or debris using a brush and appropriate cleaner.
- Perform quick touch-ups or honing on edges as needed to restore sharpness and improve cut quality.
February: Batteries Focus
- Check charge levels on all cordless tool batteries. Recharge any that are critically low or store them at optimal levels (40-60%) if not in immediate use.
- Rotate battery packs in your charging station or storage to ensure even usage and prevent any single pack from sitting idle too long.
- Clean battery contacts on both the packs and the tools with a dry cloth to ensure efficient power transfer.
March: Dust and Filters Focus
- Empty shop vacuums, dust collection bags, and cyclonic separators.
- Thoroughly clear all hoses and dust ports on power tools for any clogs or obstructions.
- Clean or replace air filters on your shop vac and wipe down intake vents on all tools to ensure proper airflow and cooling.
April: Lubrication and Fasteners Focus
- Apply a small amount of dry lubricant to sliding components, such as table saw fences, miter saw rails, and drill press columns.
- Systematically tighten all visible screws, bolts, and knobs on your power tools and fixtures.
May: Safety Checks Focus
- Perform a thorough inspection of all power cords for nicks, cuts, or frayed insulation.
- Test GFCI outlets in your workshop to confirm they are providing essential electrical protection.
- Confirm that all tool guards move freely and spring back into position without hindrance.
June: Full Maintenance Pass
- Dedicate time to run through the complete 15-minute tool maintenance checklist, covering all five key areas (blades, batteries, dust, lube, safety) in detail. This ensures nothing is overlooked.
July: Blades and Bits (Repeat Focus)
- Recheck all cutters and bits. Assess their sharpness and overall condition.
- Identify and replace any blades or bits that are chipped, bent, or no longer hold a sharp edge, as these can compromise safety and project quality.
August: Batteries (Repeat Focus)
- Inspect battery packs for any signs of heat damage, physical deformation, or swelling.
- Confirm that all packs charge properly and seat securely in their corresponding tools and chargers.
September: Dust and Airflow (Repeat Focus)
- Re-evaluate the condition of all filters in your shop vac and dust collection system.
- Replace any filters that are significantly clogged, torn, or showing signs of wear and tear to maintain optimal suction and airflow.
October: Lubrication and Fasteners (Repeat Focus)
- Listen carefully for any unusual resistance, squeaks, or vibrations when operating tools with moving parts.
- Address any identified stiffness or looseness promptly before it develops into a more serious issue or causes damage.
November: Safety Checks (Repeat Focus)
- Re-inspect all power cords, switches, and safety mechanisms ahead of increased usage during winter project season.
- Fix any discovered issues immediately to ensure your tools are safe and ready for upcoming projects.
December: Full Maintenance Reset
- Conclude the year with a comprehensive full 15-minute pass through the entire tool maintenance checklist.
- This full reset prepares all your tools for a fresh start in the new year, ensuring they’re in prime condition for future projects.
Tip: To cultivate consistency, set a recurring monthly phone reminder labeled “15-Minute Tool Maintenance.” This simple nudge can make all the difference in establishing a lasting habit.
Recommended Product: For efficient cleaning of tools, surfaces, and delicate components, a supply of microfiber cloths is invaluable. Amazon Basics Microfiber Cleaning Cloths are ultra-absorbent, lint-free, and non-abrasive, perfect for a range of workshop tasks. (As an Amazon Associate, we earn from qualifying purchases.)
The Quarterly Deep Dive: Beyond the Monthly Checks
While the monthly checklist addresses immediate needs, a quarterly deep dive allows you to tackle more systemic issues that develop over longer periods of use. These checks focus on aspects like alignment, calibration, and internal wear, which are critical for maintaining long-term accuracy and preventing cumulative damage.
- Check Alignments: Carefully verify the alignment of critical components on your larger tools, such as the fence and miter gauge on your table saw, or the blade parallelism on your planer. Minor misalignments can lead to significant inaccuracies in your work.
- Wax Cast Iron Tops: For tools with cast iron surfaces, like table saws and jointer beds, apply a fresh coat of paste wax. This creates a protective barrier against rust and helps workpieces glide smoothly.
- Calibrate Depth Stops and Angle Scales: Re-calibrate depth stops on drill presses and router tables, as well as angle scales on miter saws and band saws, using known squares and gauges. Over time, these can drift, impacting precision.
- Inspect Belts and Brushes: If accessible, inspect drive belts for cracks, fraying, or excessive tension, and motor brushes for wear. Worn belts can slip, reducing power, while worn brushes can cause intermittent motor function or sparking. Replace them according to manufacturer recommendations.
Regular attention at this quarterly stage helps maintain consistent accuracy over time and prevents small alignment issues or wear from accumulating into bigger, more costly problems down the line. It’s an investment in your tools’ long-term health and your project quality.
What to Replace vs. What to Restore: Making Smart Decisions
Knowing when to put in the effort to restore a tool versus when it’s safer and more economical to replace it is a crucial skill for any DIYer. Use this quick decision guide to determine the best course of action, balancing cost, safety, and performance.
Restore if:
- Minor Performance Issues: The tool still functions but feels rough, lacks its usual power, or shows slight inaccuracies that can be corrected through cleaning, lubrication, or adjustment.
- Dull but Undamaged Blades: Blades, bits, or cutters are dull but do not have significant chips, bends, or missing teeth. These can often be sharpened or reconditioned.
- Degrading Battery Performance: Batteries still hold a charge but drain noticeably faster than they used to. This can sometimes be improved by proper cycling and cleaning, or it might just be normal aging where replacement isn’t yet critical.
- Cosmetic Blemishes: The tool has surface rust, faded paint, or minor dings that don’t affect its structural integrity or functionality.
Replace if:
- Structural Damage: The tool’s housing is cracked, warped, severely deformed, or otherwise compromised in a way that affects its structural integrity or protective capabilities.
- Exposed Wiring or Damaged Cords: Power cords have exposed wires, severe fraying, or damaged plugs, posing a significant risk of electric shock or fire.
- Loud Grinding Bearings: After cleaning and lubrication, bearings still produce loud grinding noises or excessive vibration. This often indicates irreparable internal wear that can lead to catastrophic failure.
- Compromised Safety Features: Essential safety guards are broken or permanently seized, or switches are unreliable and fail to engage or disengage properly.
- Excessive Cost of Repair: The cost of parts and labor for repair approaches or exceeds the cost of a new, equivalent tool.
Remember, restoring a tool saves money and reduces waste. However, when it comes to fundamental safety and structural integrity, replacing a compromised tool is always the smarter and safer option. Never compromise on safety to save a few dollars.
Common Beginner Tool Maintenance Mistakes to Avoid
New DIYers, in their enthusiasm, sometimes make well-intentioned mistakes that can subtly shorten tool life and negatively affect performance. Being aware of these common pitfalls can significantly enhance the effectiveness of your maintenance routine.
- Skipping Dust Cleanup: Focusing solely on sharpening blades but neglecting crucial dust cleanup is a common oversight. Accumulated dust not only dulls blades faster but also chokes motors, leading to overheating and premature failure.
- Over-lubing with Wet Oil: Applying too much wet oil to moving parts can be counterproductive. Wet lubricants attract and trap sawdust and grit, forming an abrasive paste that actually increases wear rather than reducing it. Always opt for dry lubricants in dusty environments.
- Improper Battery Storage: Storing cordless tool batteries fully charged for extended periods (months) or allowing them to deeply discharge repeatedly can significantly shorten their overall lifespan and capacity. Follow manufacturer guidelines for optimal storage.
- Ignoring Loose Fasteners: Dismissing loose screws or knobs as minor issues is a mistake. Unsecured fasteners lead to increased vibration, loss of accuracy, accelerated wear on components, and potential safety hazards.
- Using the Wrong Cleaner: Applying harsh chemicals or abrasive cleaners to tool surfaces or electronic components can cause damage. Always use cleaners appropriate for the material and component, such as contact cleaner for electrical contacts.
- Neglecting Hand Tool Maintenance: While power tools get most of the attention, hand tools also require care. Leaving chisels dull, planes rusty, or screwdrivers with stripped tips reduces efficiency and can lead to frustration or injury.
By consciously avoiding these common errors, your woodworking tool maintenance routine will become far more effective, ensuring your tools remain in top condition for years to come.
Recommended Small Supplies for Your Tool Maintenance Kit
Having a dedicated, organized set of supplies on hand makes monthly tool maintenance not just faster, but also more consistent and less of a hassle. You don’t need an elaborate collection; a small, well-chosen kit will suffice.
Keep a compact box or tray with these essentials:
- Nylon Brush and Microfiber Cloths: A stiff nylon brush is excellent for dislodging stubborn sawdust and debris, while soft microfiber cloths are perfect for wiping surfaces clean without scratching.
- Dry Lubricant Spray: A can of PTFE or silicone-based dry lubricant is ideal for rails, slides, and gears, as it reduces friction without attracting excessive dust.
- Contact Cleaner for Battery Terminals: A specialized electronic contact cleaner spray helps remove corrosion and grime from battery terminals and electrical connections, ensuring optimal conductivity.
- Pleated Replacement Filters: Keep at least one or two spare pleated filters specifically sized for your shop vacuum. Having them on hand means you won’t delay filter replacement, which is critical for suction.
- Small Honing Stone or Diamond Card: For quick touch-ups on blades and chisels between major sharpenings, a small, fine-grit honing stone or diamond card is incredibly useful.
- All-Purpose Shop Towels: Absorbent shop towels are indispensable for general wiping, cleaning up spills, and applying waxes or cleaners.
A small, well-chosen set of dedicated supplies effectively supports steady power tool upkeep, while simultaneously keeping your workbench and storage areas organized, clutter-free, and manageable. This readiness ensures that maintenance never feels like a scramble.
Make Tool Care a Habit That Sticks and Elevates Your Craft
The most effective tool maintenance routine is one that integrates seamlessly into your workshop habits. A short, repeatable tool maintenance checklist, requiring just fifteen minutes each month, is your key to preserving accuracy, significantly extending tool life, and consistently supporting safer, higher-quality projects. This isn’t just about keeping tools clean; it’s about investing in your craft and your peace of mind.
Empower yourself by putting this guide to work today. Save it, print it, or bookmark it, and begin building consistent maintenance into your regular workflow. Try the checklist this month, revisit it whenever needed, and continue exploring related DIY topics on sharpening techniques, advanced dust collection strategies, and comprehensive battery care. By making tool maintenance a priority, you’ll ensure your tools are always in peak condition, ready to tackle whatever exciting project comes next, enhancing both your productivity and the enjoyment of your work.
Frequently Asked Questions About Tool Maintenance
How often should I follow a tool maintenance checklist?
Most DIYers find that completing a tool maintenance checklist once a month is ideal. This frequency effectively catches common issues such as dust buildup, loose fasteners, and battery problems before they significantly impact tool performance or compromise safety in the workshop.
How long does monthly tool maintenance really take?
A basic monthly tool maintenance checklist, focusing on the highest-impact tasks, typically takes only about 15 minutes for a standard home workshop. By dedicating attention to one priority area each month, as suggested by our calendar, the process remains fast and highly manageable.
Does this tool maintenance checklist work for power tools and hand tools?
Yes, absolutely. This comprehensive checklist is designed to benefit both power tools and hand tools. Power tools specifically benefit from consistent dust control, proper battery care, and precise lubrication, while hand tools require regular cleaning, edge touch-ups, and thorough rust prevention. The monthly routine effectively covers the essential needs of both types of equipment.
What tools need the most frequent maintenance?
Tools that generate significant dust and heat, such as cordless drills, various saws (table saws, miter saws), sanders, and shop vacuums, generally require the most frequent attention. Additionally, all cutting tools (blades, bits) and battery packs should always be checked on a monthly basis to ensure optimal performance and safety.
Is monthly tool maintenance enough for heavy or frequent use?
For tools that are used several times a week or for heavy-duty projects, monthly maintenance should be supplemented with quick weekly dust cleanups. While the core checklist still fully applies, high-use tools will naturally require more frequent minor attention to maintain peak condition and prevent premature wear.
What happens if I skip a month of tool maintenance?
Skipping one month of tool maintenance is generally not a significant problem and won’t cause immediate, severe damage. Simply resume the next month by performing a full 15-minute pass through the entire tool maintenance checklist to effectively reset everything and get your tools back on track.
Do I need special products for tool maintenance?
No specialty or overly expensive products are typically required for effective monthly tool maintenance. Basic, readily available supplies such as a stiff nylon brush, soft microfiber cloths, a good quality dry lubricant, and electronic contact cleaner are sufficient to handle most routine maintenance tasks.
Can I use a digital reminder instead of a printed checklist?
Yes, absolutely. Many DIYers find that a digital phone reminder, a recurring calendar alert, or even a dedicated app works perfectly well. The most crucial factor for successful tool maintenance is consistency and adherence to the routine, not the specific format of your tool maintenance checklist.
How does tool maintenance extend the life of my tools?
Regular tool maintenance extends tool life by preventing premature wear and tear. Cleaning reduces friction and corrosion, lubrication ensures smooth operation, and checking for loose parts prevents damage from excessive vibration. This proactive approach minimizes breakdowns and delays the need for costly replacements.
What are the immediate benefits of a well-maintained tool?
A well-maintained tool offers several immediate benefits, including enhanced accuracy and precision in your work, increased safety during operation due to functional guards and cords, consistent power delivery, and a more enjoyable, frustration-free user experience. Sharp blades cut faster, and smooth mechanisms operate more efficiently.