
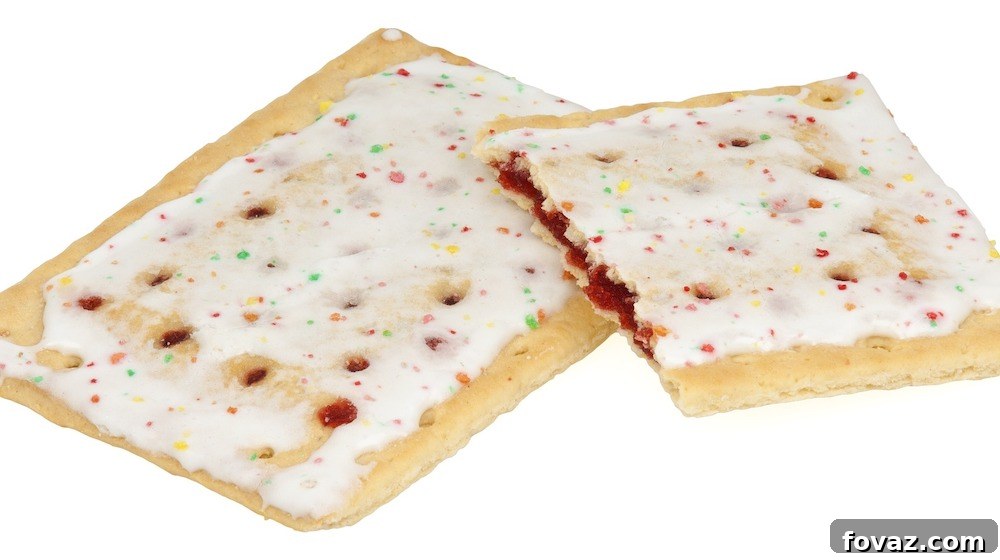
Craving a delightful breakfast pastry that’s both healthier and more satisfying than anything store-bought? Look no further than homemade pop tarts! These customizable treats offer the perfect blend of natural ingredients and delicious flavor, making them an ideal choice for a quick breakfast, a satisfying snack, or even a fun dessert. You might be surprised to discover just how incredibly easy it is to make these flaky, fruity pastries right in your own kitchen. The beauty of baking your own pop tarts lies in the endless possibilities for customization, allowing you to tailor them to your exact preferences. Whether you dream of classic strawberry, decadent chocolate hazelnut, or a unique blend of flavors, the power is in your hands. My personal favorite? A rich and comforting peanut butter pop tart. Get ready to embark on a delicious baking adventure as we guide you through the simple steps to create your very own batch of irresistible homemade pop tarts!
Mastering Homemade Pop Tarts: A Delicious Journey to Better Breakfasts
Do you ever find yourself battling a persistent sweet craving? I certainly do, and that’s why having a go-to recipe for a quick and satisfying treat is absolutely essential. It was this very need that led me to explore the art of making homemade pop tarts. Not only are they a comforting indulgence I love to enjoy myself, but they also serve as a fantastic and versatile sweet treat that can be shared with family and friends, especially children. The joy of creating these pastries stems from their incredible adaptability. You can fill them with virtually any jam, fruit spread, or sweet filling imaginable, from traditional berry preserves to innovative nut butter concoctions. What’s more, decorating them offers another layer of fun and creativity, making it a wonderful activity for all ages. If you’ve ever pondered the secret behind those iconic pastries and wondered, “How do they make pop tarts?”, prepare to uncover the simple, satisfying truth and become a homemade pop tart expert!
Beyond satisfying a sweet tooth, making pop tarts at home offers numerous advantages. You gain complete control over the ingredients, allowing you to choose organic fruits, reduce sugar content, and avoid artificial flavors and preservatives often found in commercial versions. This makes them a significantly healthier alternative for your family. Moreover, the process itself is a rewarding experience. The aroma of freshly baked pastry filling your kitchen is incomparable, and the pride of serving a warm, handcrafted treat is immense. It’s a fantastic way to introduce kids to the joys of baking, fostering creativity and basic kitchen skills. Plus, let’s be honest – they just taste better when they’re made with love and fresh, quality ingredients.
The Ultimate Homemade Pop Tart Recipe: Simple Steps to Sweet Success
Creating your own batch of delicious pop tarts is a straightforward process that requires minimal ingredients and equipment. The key to a fantastic pop tart lies in a flaky crust, a flavorful filling, and a sweet, simple glaze. Here’s everything you’ll need to get started on your baking journey.
Essential Ingredients for Your Pop Tarts:
- 1 package (approximately 14 oz) pre-made pie crust dough (or your favorite homemade pie crust recipe for an extra touch)
- 1/2 cup chocolate hazelnut spread or Nutella (for a rich, decadent option)
- 1/2 cup high-quality strawberry jam (a classic choice)
- 1/2 cup luscious blueberry jam (for a tangy, fruity burst)
- 2 tablespoons cinnamon mixed with 2 tablespoons granulated sugar (perfect for a sweet, spiced filling or topping)
- Assorted sprinkles (to add a festive and fun decorative touch)
Key Tools You’ll Need:
- A sturdy pizza cutter (for precise and easy dough cutting)
- A large baking sheet (preferably lined with parchment paper or a silicone mat for easy cleanup)
- A reliable rolling pin (for flattening and shaping the dough, especially if making your own crust or re-rolling scraps)
- A fork (for sealing the edges and creating that classic crimped look)
Ingredients for the Irresistible Vanilla Glaze:
- 2 cups powdered sugar (the base for our smooth, sweet glaze)
- 2-4 tablespoons milk (start with 2 and add more slowly until desired consistency is reached)
- 2 teaspoons pure vanilla extract (for a classic, aromatic flavor)
- A few drops of food coloring (optional, but highly recommended for vibrant, fun decorations. I personally love using red and violet for a playful touch!)
Now that you have all your ingredients and tools ready, let’s dive into the fun part: assembling and baking your homemade pop tarts!
Step 1: Prepare Your Workstation and Dough
Begin by preheating your oven to a precise 400 degrees Fahrenheit (200 degrees Celsius). This ensures an even bake and golden-brown crust. While the oven heats, carefully unroll your prepared pie crust dough onto a lightly floured surface or a piece of parchment paper. If you’re feeling ambitious and prefer to make your pie crust from scratch, now is the time to prepare it and roll it out evenly. Using your pizza cutter, meticulously cut the dough into uniform 2×3 inch rectangles. Aim for clean lines to ensure your pop tarts look professional and seal properly.
Step 2: Fill and Form Your Pop Tarts
Once you have your rectangles, gently set aside any excess dough for later use. Take one tablespoon of your chosen filling – be it the rich chocolate hazelnut spread, the sweet strawberry jam, the vibrant blueberry jam, or even a sprinkle of cinnamon sugar – and carefully place it in the center of one of your cut pie crust rectangles. Be mindful not to overfill, as this can lead to messy leaks during baking. Carefully place another precisely cut pie crust rectangle directly on top of the filled one, ensuring the edges align as closely as possible.
Step 3: Seal for Perfection
To prevent your delicious filling from oozing out during baking, it’s crucial to seal the edges effectively. Take a fork and gently, yet firmly, press down along all four edges of your assembled pop tart. This creates a charming crimped pattern and, more importantly, securely seals the two layers of pie crust together. This step is key to achieving that classic pop tart look and keeping your filling safely inside.
Step 4: Repeat and Arrange
Continue this satisfying process until you have used up all your cut pie crust rectangles and created a full batch of pop tarts. As you finish each one, carefully transfer them to your prepared baking sheet. Ensure there’s a little space between each pop tart to allow for even airflow and baking. This step can be a fun assembly line activity if you have little helpers in the kitchen!
Step 5: Utilize Every Scrap
Remember that excess pie dough you set aside earlier? Don’t let it go to waste! Gather the scraps and gently roll them out together until you have a flat, even sheet once more. You’ll likely be able to create at least one or two more pop tarts from these leftover pieces, ensuring maximum deliciousness and minimal waste.
Step 6: Bake to Golden Perfection
Now that all your beautifully assembled pop tarts are ready, carefully slide the baking sheet into your preheated oven. Bake for approximately 8-10 minutes, or until the edges are beautifully golden brown and the pastry appears flaky and cooked through. Keep a close eye on them, as oven temperatures can vary. Once baked, remove them from the oven and transfer them to a wire rack to cool completely. This cooling step is absolutely essential before applying the glaze; attempting to glaze warm pop tarts will result in a runny, messy outcome.
Step 7: Prepare the Silky Vanilla Glaze
While your homemade pop tarts are cooling down, it’s the perfect time to prepare the sweet and silky vanilla glaze. In a medium-sized bowl, combine the powdered sugar, milk, and vanilla extract. Whisk these ingredients together thoroughly until you achieve a smooth, lump-free consistency. If the glaze is too thick, add milk a teaspoon at a time until it reaches a spreadable, yet not too thin, texture. If it’s too thin, whisk in a little more powdered sugar. This simple glaze forms the perfect base for your decorations.
Step 8: Unleash Your Creative Colors
I absolutely adore adding a splash of color to my decorations, which is why I incorporate food coloring as the final touch to my glaze. Grab a few small bowls or cups – the number depends on how many different colors you wish to create. Divide your freshly made vanilla glaze evenly among these bowls. Now, add just a few drops of your desired food coloring to each bowl and mix well until you achieve the perfect hue. Repeat this process until you have an exciting palette of colors ready for decorating. This step transforms plain glaze into vibrant artistic potential!
Step 9: The Joy of Decorating and Serving
This is arguably the most enjoyable part! Once your pop tarts are completely cool and your colorful glazes are ready, it’s time to decorate. Spoon or spread your chosen glaze generously over the top of each pop tart. While the glaze is still wet, quickly add your assorted sprinkles, edible glitter, or any other fun toppings you desire. The wet glaze will ensure the decorations adhere beautifully. Get creative – drizzle contrasting colors, create patterns, or simply cover them in a celebratory burst of sprinkles!
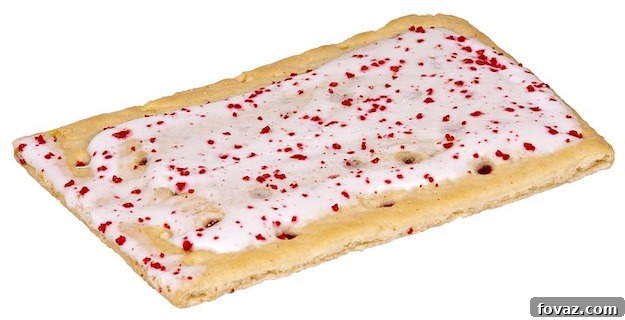
Once decorated, allow the glaze to set and dry for a little while – about 15-30 minutes, depending on its thickness – before serving. Then, it’s time to enjoy the fruits of your labor! Wasn’t that an incredibly fun and straightforward process? This recipe is also a fantastic way to engage children in the kitchen, fostering a love for baking and creative expression. I’m confident that anyone, regardless of baking experience, will have an absolute blast experimenting with different fillings, glazes, and decorative styles.
Customization Ideas & Expert Tips for Perfect Homemade Pop Tarts
The beauty of homemade pop tarts lies in their versatility. Don’t feel limited to the fillings listed above! Here are some ideas to spark your creativity:
- Fruit Fillings: Try cherry pie filling, apple butter, raspberry preserves, or even fresh mashed berries mixed with a touch of sugar and cornstarch for a thicker consistency.
- Nut Butters: Almond butter, cashew butter, or even a mix with a little honey and cinnamon can be delightful.
- Chocolate Delights: Beyond Nutella, consider mini chocolate chips, a spread of melted dark chocolate, or even a swirl of cream cheese and chocolate.
- Savory Options: For a unique twist, you could even try a savory pop tart with cheese, herbs, or a thin layer of cooked, seasoned vegetables.
- Spiced Fillings: Add a pinch of nutmeg, cardamom, or pumpkin pie spice to fruit fillings for an extra layer of warmth.
Tips for Success:
- Don’t Overfill: This is the most common mistake. Too much filling will inevitably ooze out during baking, making a mess. Stick to a tablespoon or less.
- Proper Sealing: Ensure the edges are firmly pressed with a fork. You can even go around twice to be sure.
- Even Thickness: If rolling your own dough, aim for an even thickness to ensure consistent baking.
- Chill if Needed: If your dough becomes too warm and sticky while working, pop it back into the refrigerator for 10-15 minutes.
- Parchment Paper is Your Friend: Lining your baking sheet prevents sticking and makes cleanup a breeze.
- Cool Completely: Patience is key before glazing. Warm pop tarts will melt the glaze.
- Storage: Store homemade pop tarts in an airtight container at room temperature for up to 2-3 days, or in the refrigerator for up to a week. They can also be frozen for longer storage; thaw and gently reheat in a toaster oven for best results.
Making pop tarts from scratch is a rewarding endeavor that yields a superior product to anything you can buy. They are fresher, more flavorful, and free from the additives often found in commercial versions. Plus, it’s a fantastic project for a rainy afternoon or a fun activity to share with the whole family.
Explore More Delicious Dessert Recipes and DIY Creations!
Did you thoroughly enjoy our detailed guide on how to make pop tarts? We’d love to hear your thoughts! Please share your feedback in the comments section below. Do you have any other cherished dessert recipes or baking tips you’d like to share with our community? We are always eager to try new culinary adventures and expand our collection of delightful treats. We at DIY Projects are passionate about all things do-it-yourself, whether it’s crafting unique home decor, upcycling forgotten treasures, mastering new recipes, or providing helpful tutorials for a variety of projects. Our mission is to inspire people to connect with their creative side and discover the immense satisfaction that comes from making things themselves. We invite you to become a part of our vibrant community of DIY enthusiasts, where inspiration and projects are always just a click away. Stay connected with us for daily doses of creativity and exciting new ideas on Facebook, Twitter, Pinterest, and Instagram!