
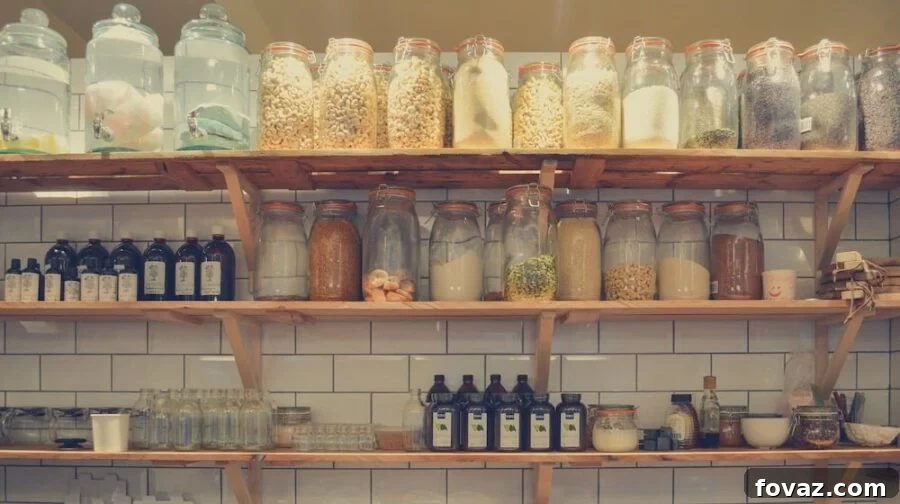
Are you looking for innovative and eco-friendly ways to breathe new life into your old glass jars? You’ve landed on the perfect article! Glass jars are incredibly versatile, often overlooked treasures that can be transformed into stunning and practical items for your home. Instead of tossing them into the recycling bin or, worse, the landfill, why not embark on a fun and rewarding upcycling journey? Today, we’re diving into a curated collection of 17 DIY glass jar crafts that are not only easy to make but also add a unique, personal touch to your living space.
17 Creative Ways to Upcycle Glass Jars: Transform Your Home Decor with DIY Crafts
The trend of upcycling has taken the world by storm, and for good reason. It’s a fantastic way to reduce waste, save money, and unleash your creativity. When it comes to glass jars, the possibilities are truly endless. From elegant decor pieces to practical organizational tools, these humble containers can become almost anything you imagine. I’ve personally tried and loved countless glass jar projects, and I’m thrilled to share my absolute favorite upcycling ideas with you. Get ready to turn your discarded glass jars into functional art!
Things To Do With Glass Jars: Upcycling 101
Before we dive into the specific projects, let’s briefly touch upon why upcycling glass jars is such a brilliant idea. Firstly, it’s environmentally conscious. Every jar you repurpose is one less item in the waste stream. Secondly, it’s incredibly cost-effective. You’re using materials you already have, saving you from buying new, often plastic, alternatives. Thirdly, it allows for endless personalization, letting your unique style shine through in every corner of your home. So, gather your empty jars, a few basic craft supplies, and let’s get started!
1. Elegant Soap Dispensers
Tired of generic plastic soap bottles cluttering your bathroom or kitchen sink? Repurposing glass jars into chic soap dispensers is a game-changer. I’ve used both glass jars and bottles for this purpose, and I can confidently say that glass offers a far more elegant and timeless aesthetic compared to its plastic counterparts. The process is surprisingly simple, requiring just a few tools and a little creativity.
DIY Tip: To easily create a hole for your pump mechanism, use a hammer and a sharp screwdriver. Gently tap the screwdriver point onto the center of the jar lid to puncture a pilot hole, then gradually enlarge it to fit your chosen pump. Ensure you’re working on a sturdy surface and wearing safety goggles.
This project is not only stylish but also sustainable, allowing you to buy soap in bulk and refill your beautiful dispensers, further reducing plastic waste.
2. Stylish Striped Vases
Transforming ordinary glass jars into eye-catching striped vases is an incredibly easy way to add a pop of color and sophistication to any room. The beauty of this project lies in its simplicity and the endless design possibilities. You can match your decor, embrace seasonal colors, or simply experiment with your favorite hues.
The basic method involves using spray paints and masking off areas to create your desired stripe pattern. For clean lines, use painter’s tape or even rubber bands. If you’re going for a more rustic or textured look, crumpled paper or aluminum foil can also work to create unique patterns.
- Pro Painting Tip: For a professional, opaque finish, apply the spray paint in several light, even coats. Allow each layer to dry completely before applying the next. This prevents drips and ensures a smooth, durable finish.
- Alternative Design: For a different texture and pattern, consider using rolls of colorful washi tape. Wind strips of tape around your jar in various widths and colors to create a whimsical or geometrically patterned vase without any paint at all. This is a great option for kids or those who prefer a less permanent design.
3. Clever Craft Storage Hacks
For any crafter or hobbyist, organization is key. Leftover glass jars are perfect for storing a myriad of crafting materials. From tiny beads and buttons to markers, paintbrushes, and coloring pencils, these clear containers allow you to see exactly what’s inside, making your creative process much smoother. Grouping similar items in jars helps declutter your workspace and keeps everything within easy reach.
Personalization Idea: To add a touch of whimsy and make your storage pieces truly unique, consider attaching a small plastic animal figurine to the top of the lid. Paint the animal and the lid in a coordinating color for a cohesive look. This not only adds a quirky charm but also provides an easy grip for opening the jar.
You can also label the jars with chalkboard paint or sticker labels for even better organization, ensuring every glitter tube and googly eye has its proper place.
4. Magical DIY Galaxy Glow Jar
Bring a touch of the cosmos into your home with a DIY galaxy glow jar. This enchanting project is perfect for a child’s bedroom, a cozy reading nook, or as a unique night light. The ethereal glow creates a calming and magical atmosphere, reminiscent of a starry night sky.
All you need is a clean glass jar, some glow-in-the-dark paint, and a paintbrush. The basic technique involves adding small dots of paint to the inside of your jar, starting from the bottom and working your way up to create a cosmic effect. You can use different shades of glow paint for added depth and realism.
Efficiency Tip: For a faster and more authentic galaxy look, try this trick: place your paintbrush inside the jar with a generous amount of glow paint, then gently flick the paint off the brush onto the inner surfaces of the jar. This creates a scattered, star-like effect that’s both beautiful and easy to achieve. Experiment with layering different colors of glow paint for a truly mesmerizing result.
A post shared by DIY Projects (@diyprojectsdotcom) on
5. Adorable Minion Party Favors
If you have little ones, you’re probably familiar with the never-ending supply of empty baby food jars. Instead of discarding them, why not transform them into the cutest Minion party favors? These tiny, lovable characters are a hit with kids and make for memorable takeaways at birthday parties or themed gatherings.
The process usually involves painting the jars yellow and blue, then adding their iconic goggle eyes and expressive mouths. Fill them with small candies, stickers, or tiny toys for a delightful surprise. This project is not only fun to make but also a fantastic way to engage older children in the crafting process.
Creative Tip: Don’t shy away from getting artistic with a black Sharpie when drawing the Minions’ facial features. You can give each Minion a unique personality by adding spiky hair, a cheeky grin, a surprised expression, or even a mischievous wink. This level of detail makes each favor truly special and personalized.
6. Functional Utensil Holders
Kitchen organization can sometimes feel like a never-ending battle, especially when it comes to keeping utensils tidy and accessible. I recently grew tired of rummaging through cluttered drawers, so I decided to create a set of stylish and practical utensil holders using glass jars. These holders not only keep your spatulas, whisks, and spoons neatly arranged but also add a rustic or modern charm to your countertop.
You can paint them to match your kitchen decor, leave them clear for a minimalist look, or even distress them for a farmhouse aesthetic. Varying jar sizes can accommodate different types of utensils, keeping everything sorted and easy to grab while cooking.
Painting Precaution: When pouring acrylic paint inside the jars to coat the interior, be careful to pour slowly and rotate the jar evenly to ensure a smooth, consistent finish. Once the paint has rolled around the sides, you’ll want to place the jar upside down on a piece of cardboard or newspaper to catch any excess paint and allow it to dry thoroughly. This step is crucial for preventing puddles at the bottom and ensuring an even coat.
7. Enchanting Fairy Lanterns
Illuminate your evenings with the soft, magical glow of DIY fairy lanterns. These charming creations are perfect for adding ambiance to a patio, a child’s bedroom, or as enchanting centerpieces for a special occasion. The unique frosted texture gives them an ethereal quality that captures the imagination.
The secret to achieving that beautiful textured frost on the glass jar involves gluing a sheet of tissue paper onto its surface. If your tissue sheet is larger than the jar, simply trim off the excess. Remember, the more tissue overlaps there are, the harder it will be for the light to shine through, so aim for a single, smooth layer if you want maximum brightness. You can also add glitter, small dried flowers, or even silhouettes cut from black paper to create different scenes and effects inside your lantern. Finish by adding a battery-operated tea light or fairy lights for a safe, consistent glow.
8. Cherished Memory Jars
Life moves fast, and precious memories can sometimes fade. A memory jar is a wonderful way to preserve cherished moments and look back on them fondly. This is an especially heartwarming project to do with kids, encouraging them to appreciate and document their experiences. Imagine creating a summer memory jar filled with treasures from your family adventures!
In a memory jar, you and your children can place small mementos collected throughout a specific period, such as a summer vacation, a school year, or a special trip. Think seashells from the beach, colorful pressed leaves, ticket stubs from a movie or concert, small notes, photos, or even a tiny vial of sand. Decorate the jar with the date or theme, and open it together later to relive those joyful times. It’s a beautiful way to create a tangible timeline of your family’s journey.
9. Enchanting Snow Globes
Snow globes aren’t just for store shelves; you can easily DIY your own enchanting version, perfect for holiday decor, a child’s room, or as a thoughtful homemade gift. The magic of falling glitter and a tiny world encapsulated in glass is captivating for all ages. You can customize the scene inside to reflect a holiday, a favorite animal, or a miniature landscape.
To craft your own snow globe, you’ll need a clean glass jar with a tight-fitting lid, distilled water, a touch of glycerine (to help the glitter float gracefully), glitter of your choice (fine glitter works best for a snow effect), a strong waterproof glue gun, and a small, waterproof toy or figurine to place inside. Glue your chosen figurine to the inside of the lid, fill the jar with distilled water and a few drops of glycerine, add the glitter, then carefully seal the lid. Turn it over, shake, and watch the magic unfold!
10. Personalized Monogram Light
Add a personalized and warm glow to any room with a DIY monogram light. This elegant piece makes a fantastic focal point for a living room, bedroom, or entryway, and it’s also a thoughtful gift. You can choose any letter, symbol, or even a simple shape to illuminate, creating a bespoke piece of art.
The original idea for this monogram light involves using a wooden board, outlining your chosen letter, and then drilling holes to insert small string lights or fairy lights. The glass jars come into play as covers or decorative elements around the lights, or you could even fill small jars with lights and arrange them to form the monogram on a shelf.
Precision Tip: When painting or outlining your letter on a wooden board or other surface, use painter’s tape to help get the edges perfectly straight and crisp. Apply the tape along the lines you want to keep clean. That way, if your brush or paint goes slightly beyond the intended line, the excess will adhere to the tape, not your board, ensuring a professional-looking finish. Once the paint is dry, carefully peel off the tape to reveal sharp, clean edges.
11. Calming Ocean In A Bottle
Create a mesmerizing sensory experience with an “ocean in a bottle” craft. This project is not only visually stunning but also incredibly calming, resembling a mini lava lamp with its gentle movement. It’s perfect for kids as a quiet activity, or simply as a decorative piece for a relaxed vibe in any room. The combination of water and oil creates a beautiful, undulating effect.
To make this captivating project, you’ll need a mini glass jar or bottle, water, blue food coloring (or green for a different ocean hue), and cooking oil (vegetable or baby oil works well). Fill about two-thirds of the jar with oil, then carefully add water until the jar is almost full. Add a few drops of food coloring, and watch as the colors separate and blend to create an oceanic effect. You can add glitter or small plastic sea creatures for extra detail.
Pouring Aid: When pouring liquids into a small-mouthed glass jar, especially oil and water which can be messy, a funnel is your best friend. It helps direct the liquids precisely into the jar, preventing spills and ensuring a clean crafting experience. Take your time and pour slowly for the best results.
12. Engaging Money Saving Jars
Teaching children the value of saving money is an important life lesson, and a DIY money-saving jar can make the process fun and tangible. This project empowers kids to visualize their savings grow, encouraging responsibility and goal setting. It’s a much more engaging alternative to a traditional piggy bank.
Create a personalized DIY money bank by decorating a glass jar with paint, labels, or even photos of what they’re saving for. The key element is to leave a clear strip or window so they can actually see how much money they’ve saved so far. This visual progress is highly motivating! You can even make separate jars for “saving,” “spending,” and “giving” to introduce different financial concepts.
13. Lush Tabletop Terrariums
Bring a touch of nature indoors with a charming glass jar terrarium. These miniature ecosystems are low-maintenance, beautiful, and perfect for adding greenery to small spaces like desks, shelves, or windowsills. They make wonderful gifts and are a fantastic way to enjoy gardening even if you have limited space.
Creating a terrarium is all about layering. Start with a base layer of decorative rocks or pebbles for drainage, followed by a thin amount of activated charcoal (this helps keep the environment fresh and prevents mold). Next, add your potting soil, ensuring it’s suitable for the plants you’ve chosen. Finally, arrange your plants – succulents, mosses, and small ferns thrive in terrariums. You can also add small decorative elements like miniature figurines, tiny stones, or twigs to create a personalized scene. Whether you use a large pickle jar or a medium-sized canning jar, your terrarium will be a delightful display of living art.
14. Practical Herb Garden
Imagine having fresh herbs at your fingertips for all your culinary adventures! A DIY herb garden made from glass jars is a stylish and practical way to grow your favorite herbs right in your kitchen or on a sunny windowsill. It’s a sustainable solution for fresh produce and adds a vibrant, fragrant touch to your home.
This project often involves mounting jars to a wooden board using pipe clamps, creating a vertical garden that saves space. Plant herbs like basil, mint, rosemary, or thyme directly in the jars, ensuring they have adequate drainage (small pebbles at the bottom) and sunlight. You can label each jar to easily identify your herbs.
Installation Tip: When securing your glass jars to a wooden board with pipe clamps, it’s crucial to tighten the clamps firmly but gently. This ensures the glass jars are securely held in place and won’t slip or fall, especially when filled with soil and plants. Always test the stability of your setup before fully loading the jars.
Because a little extra dough won’t hurt! Amirite, crafters? 😉 https://t.co/MNLhr5G5x4 pic.twitter.com/sfe55LRMtP
— DIY Projects (@DIYProjectsCom) March 22, 2017
15. Organized Bathroom Storage Essentials
Declutter your bathroom countertops and cabinets with this neat storage hack using glass jars. Bathroom essentials like cotton swabs, cotton balls, hair ties, and bath salts often come in bulky, unappealing packaging. Repurposing glass jars provides a stylish and uniform storage solution that enhances your bathroom’s aesthetic while keeping everything tidy and accessible.
To create these personalized storage containers, simply paint the lids of your jars in a color that complements your bathroom decor. Once dry, drill a small hole in the center of each lid. Insert a screw from the underside and attach a quirky knob or handle on top. These knobs not only make opening easier but also add a decorative flourish. Fill the jars with your various bathroom essentials for an organized and visually pleasing display.
16. Ambient Lanterns
Transform ordinary glass jars into chic and inviting lanterns, perfect for adding a warm, ambient glow to any indoor or outdoor setting. These versatile lanterns can grace your dining table, illuminate a patio gathering, or provide a soft light in a cozy corner. They are incredibly easy and cost-effective to make, offering endless possibilities for customization.
To craft a simple yet elegant lantern, start by winding some rustic twine or rope around the mouth of the jar, securing it with a knot to create a handle for hanging or just for decorative texture. Then, add a handful of decorative rocks, sand, or pebbles to the bottom of the jar for stability and aesthetic appeal. Finally, carefully prop a small candle (real or LED tea lights work great for safety) inside. Voila! You now have a beautiful, homemade lantern that exudes charm and warmth. Experiment with different colored candles or add fairy lights for a magical touch.
17. Adorable Glass Jar Planters
Glass jar planters are an adorable way to showcase small plants, succulents, or even propagate new plant cuttings. They make charming centerpieces for tables, delightful mini party favors for guests, or a simple way to add living greenery to any shelf or desk. The transparency of glass also allows you to observe root growth, which can be fascinating!
These planters are particularly well-suited for succulents and air plants, which require minimal soil and can thrive in small, self-contained environments. For plants that need drainage, you can add a layer of pebbles at the bottom or simply be mindful of watering sparingly. For party favors, tie a small tag with care instructions or a personalized message around the jar.
Cleaning Tip for Sticky Residue: Often, old food jars come with stubborn sticky labels or food residue. Here’s a trick to easily remove them: Pour hot water into the jar and let it sit for a few minutes. The heat helps to loosen the adhesive and soften any dried-on food. Once the water has cooled enough to handle, discard it and begin scraping the residue with a non-abrasive scrubber. You’ll find that the hot water has made it significantly easier to scrape off those remaining sticky bits, leaving you with a perfectly clean jar ready for its new life!
Want even more creative things to do with glass jars? Press play for a fantastic makeup brush holder DIY project:
I sincerely hope this comprehensive roundup has sparked your imagination and provided you with a wealth of inspiring ideas and things to do with glass jars! Remember, creating a chic, organized, and personalized home doesn’t have to be an expensive endeavor. Sometimes, all it takes is a keen eye for potential, a dash of creativity, and a few simple upcycling projects to help get you started on transforming your space. Embrace the art of repurposing, reduce your environmental footprint, and enjoy the satisfaction of crafting something beautiful with your own hands.
Which of these brilliant ideas for glass jar upcycling have you decided to try first? We’d love to hear your plans and see your creations! Share your thoughts and photos in the comments below!
Interested in more ingenious upcycling and organization hacks? Explore what incredible things you can do with your extra mason jars for even more inspiration!
Stay connected with our vibrant DIY community on Facebook, Twitter, Pinterest, and Instagram for daily inspiration, tips, and project ideas!
Feature image via Freshly Found