

Dreaming of fresh, plush carpeting but deterred by the steep cost of professional installation? Look no further! Installing your own carpet is an incredibly rewarding DIY home improvement project that offers substantial savings. While it certainly demands dedication, patience, and some foundational knowledge, the immense satisfaction of transforming your living space with your own hands is truly unmatched. This comprehensive guide, complete with practical tips and an embedded video tutorial, is designed to empower you to tackle this ambitious task confidently, helping you achieve a beautifully finished room without the hefty price tag. Get ready to revitalize your home, one carpet roll at a time.
Mastering DIY Carpet Installation: Your Ultimate Step-by-Step Guide
Embarking on a carpet installation project solo can initially feel daunting, but with the correct instruction and the right set of tools, it’s a perfectly attainable goal for most homeowners. This meticulously crafted tutorial aims to demystify the entire process, breaking it down into easily digestible steps that span from crucial initial preparation to the precise final touches. We will delve into the specific equipment you’ll need, outline vital safety precautions, and provide invaluable expert advice to help you skillfully navigate potential challenges and avoid common mistakes. By diligently following this guide, you will acquire the necessary skills and boost your confidence to dramatically enhance the comfort and aesthetic appeal of your home, all while maintaining a smart budget. Let’s begin your journey to a professionally carpeted space, crafted by you.
The Benefits of Installing Your Own Carpet
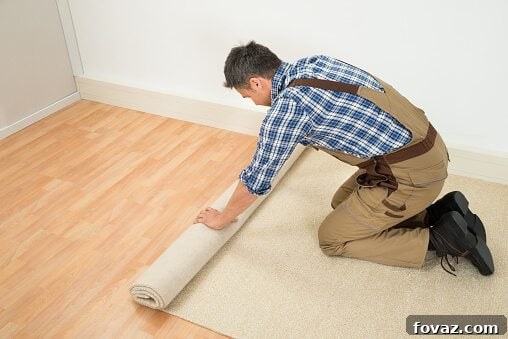
The most compelling reason for many homeowners to undertake DIY home projects like carpet installation is the significant financial savings. Professional installers not only charge for their labor but often include additional service fees that can quickly inflate the overall cost. By choosing the DIY route, you effectively eliminate these substantial labor expenses, freeing up funds that can either be saved or reinvested into purchasing higher-quality carpet or other valuable home improvements. Beyond the financial advantages, there’s an immense sense of pride and accomplishment derived from stepping back and admiring a project meticulously completed by your own hands. It presents a fantastic opportunity to acquire new practical skills, customize your living space precisely according to your vision, and gain a deeper, more intimate understanding of your home’s structure and potential.
Is DIY Carpet Installation the Right Choice for You?
Before fully committing to laying your own carpet, it’s prudent to candidly assess your personal readiness and capabilities. While highly rewarding, this project demands a considerable amount of physical exertion, meticulous attention to detail, and a significant time investment. You should be comfortable spending extended periods on your knees, proficient in handling various specialized tools, and capable of following detailed instructions precisely. When considering the scope, think about the size and complexity of the room. A small, simple, rectangular room is an ideal starting point for beginners, offering a manageable introduction to the process. Conversely, larger areas with intricate shapes, multiple doorways, or challenging staircases might be better entrusted to professional installers if you lack prior experience or confidence. If you possess the necessary patience, a willingness to learn, and a hands-on attitude, then DIY carpet installation is certainly within your grasp.
Essential Tools and Materials for Your Carpet Installation Project
Possessing the correct tools is absolutely critical for ensuring a successful and efficient carpet installation. While some items might already be part of your household toolkit, others, particularly specialized equipment like a power stretcher, may need to be rented from a local home improvement store or equipment rental center. It is highly advisable to gather and organize every single item on this list before you begin the project to prevent any inconvenient interruptions once you start working.
- Vacuum: Indispensable for a thorough cleaning of the subfloor before installation and for the final cleanup after the carpet is laid.
- Work Gloves: Provides crucial protection for your hands from sharp staples, the potentially jagged edges of tackless strips, and abrasive carpet fibers.
- Safety Glasses: Essential eye protection against flying dust, debris, and any errant staples during the installation process.
- Utility Knife: A heavy-duty knife equipped with multiple sharp, replaceable blades is an absolute necessity for making precise and clean cuts on carpet, underlay, and tackless strips.
- 1 ½-inch Screws (if needed): Used for securely fastening any loose subfloor sections or reinforcing areas where the existing subfloor might be weak or uneven.
- Tackless Strips: These thin strips, typically made of wood or plastic, are embedded with sharp, upward-angled pins. They are installed around the room’s perimeter to firmly grip and hold the carpet in place.
- Underlay (Carpet Padding): Offers vital cushioning, enhances insulation, and significantly extends the lifespan of your carpet by absorbing foot traffic impact. Available in various thicknesses and material compositions.
- Stapler (and Staples): Utilized to securely fasten the carpet underlay to the subfloor. A robust, heavy-duty staple gun is strongly recommended for this task.
- Duct Tape or Seaming Tape for Underlay: Applied to seal the seams of the underlay, preventing any shifting or bunching during the subsequent carpet installation.
- Measuring Tape: Crucial for taking accurate measurements of the room’s dimensions and for making precise cuts of the carpet. A long, durable, retractable tape measure is ideal.
- Chalk Line: Used to snap perfectly straight and visible lines on the subfloor or directly on the carpet, serving as a guide for cutting and alignment.
- Seam Cutter: A specialized tool specifically engineered to create clean, razor-sharp cuts along carpet edges that are intended for seaming.
- Seam Tape: A heat-activated adhesive tape explicitly designed to invisibly join two separate pieces of carpet together, creating a seamless appearance.
- Seaming Iron: A dedicated iron that heats the seam tape, melting the adhesive to forge an incredibly strong and durable bond between adjacent carpet sections.
- Rolling Pin (or Rental Seam Roller): Applied to firmly press down on carpet seams immediately after heating, ensuring optimal adhesion and a completely flat, smooth finish.
- Knee Pads: Absolutely indispensable for comfort and protection, given the significant amount of time you will spend working on your knees.
- Knee Kicker: A short-handled tool featuring teeth that grip the carpet, primarily used for pushing and stretching the carpet onto the tackless strips, particularly effective in confined or tighter areas.
- Power Stretcher: A more robust and powerful tool compared to the knee kicker, utilized for stretching carpet across larger rooms, ensuring it is drum-tight and effectively preventing future wrinkles and unsightly buckling. This is typically an item rented from a specialized store.
- Wall Trimmer: A purpose-built tool designed to neatly and precisely trim carpet along the edges of walls, creating a clean, consistent edge ready for tucking.
- Stair Tool (if applicable): Essential for the intricate process of installing carpet on staircases, aiding in tucking and shaping the carpet perfectly into the contours of each step.
- Door Edge Strip (Transition Strip): Used to establish a smooth, safe, and aesthetically pleasing transition between the newly installed carpet and any adjacent existing flooring in doorways.
Preparing Your Room for Flawless Carpet Installation
Thorough and diligent preparation forms the bedrock of a successful carpet installation project. Neglecting these vital preliminary steps can inevitably lead to a less-than-perfect finish, potential issues with carpet longevity, and even costly problems arising in the future. Invest your time wisely in this stage.
Clear the Room Completely
Before any other action is taken, meticulously remove all furniture, decorative items, and any other obstructions from the room. This crucial step provides you with a completely clear, unobstructed, and safe workspace. It’s also highly advisable to remove any existing baseboards if your plan includes installing new ones after the carpet is laid. Alternatively, if keeping existing baseboards, ensure they are adequately protected from damage during the process.
Remove Old Flooring and Prepare the Subfloor
Carefully and completely remove any existing carpet, underlay, or other flooring materials. Once the subfloor is fully exposed, conduct a thorough inspection. The subfloor must be impeccably clean, completely dry, and structurally sound. Take the time to securely nail down any loose floorboards, replace any sections that show signs of damage or weakness, and fill any substantial gaps or holes with an appropriate patching compound. Afterwards, meticulously sweep and vacuum the subfloor multiple times to eliminate every trace of dust, dirt, and debris. A perfectly clean and level subfloor is paramount, ensuring that both the underlay and the new carpet lay perfectly flat and adhere properly.
Acclimatize Your New Carpet
Carpet, much like many other construction and home furnishing materials, requires a specific period to adapt and adjust to the temperature and humidity levels of its new environment. Unroll the carpet completely within the room where it will ultimately be installed, and allow it to relax and settle for a minimum of 24 to 48 hours. This vital acclimatization process helps significantly in preventing the formation of unsightly wrinkles and ensures that the carpet will lay perfectly flat and smooth once it is permanently installed.
Your Step-by-Step Guide: How to Install Your Own Carpet
Step 1: Accurately Measure and Determine the Area of the Room
Precise measurement is arguably the most critical initial step in any carpet installation. To accurately determine the required square yardage, begin by measuring the longest length and the longest width of your room. Even if the room appears to be an irregular shape or not perfectly square, always use these maximum dimensions. Multiply the length by the width (ensuring both measurements are in feet) to calculate the total square footage. Then, divide this total square footage by 9 to convert it into square yardage. For example, a room that measures 12 feet in length and 15 feet in width has a total area of 180 square feet (12 x 15). When divided by 9, this equates to 20 square yards. To generously account for potential measurement errors, minor room irregularities, or the need to match patterns flawlessly, it is always a best practice to add an additional 10-15 percent to your calculated total. This surplus material can prove invaluable for unforeseen mistakes or for future repairs. Always double-check your measurements for accuracy before placing your order!
Step 2: Install Tackless Strips Around the Room’s Perimeter
Tackless strips are an absolutely essential component for securely anchoring your new carpet along its edges. Using your measuring tape, carefully position and install the tackless strips around the entire perimeter of the room. It’s crucial to leave a consistent gap of approximately 3/8 to 1/2 inch between the strips and the base of the wall. This specific gap is necessary to allow the carpet to be neatly tucked in during the final stages. If your subfloor is concrete, you will use specialized concrete nails; for wood subfloors, use the shorter nails or screws typically provided with the strips. Ensure that the sharp pins on the tackless strips are angled correctly, pointing towards the wall, to effectively grip the carpet. Cut the strips precisely to fit snugly at all corners, making sure to avoid any overlapping pieces.
Step 3: Lay and Secure the Carpet Underlay (Padding)
The underlay serves multiple vital functions: it provides a comfortable cushioning layer underfoot, enhances thermal and sound insulation, and significantly extends the life of your carpet by absorbing the impact of foot traffic. Begin by rolling out the underlay across the entire room, ensuring that each piece butts snugly against the tackless strips without extending over them. Trim the underlay precisely to fit the room’s exact dimensions using your utility knife. Secure the underlay to the subfloor using a heavy-duty stapler, placing staples approximately every 6 inches around the perimeter and along all seams. For superior stability and to prevent any shifting, use strong duct tape or specialized underlay seaming tape to firmly seal any seams between individual pieces of underlay, thereby creating a smooth, continuous, and stable surface.
Step 4: Position and Make Initial Rough Cuts of the Carpet
Carefully unroll your new carpet into the room, taking great care to ensure that it completely covers the entire area and extends a few inches up the walls on all sides. Take your time to precisely align the carpet, especially if it features a distinct pattern, to guarantee a consistent and harmonious look throughout the room. If your room necessitates more than one width of carpet to cover the area, position them strategically to minimize the number of visible seams and perfectly align any patterns. After unrolling, allow the carpet to relax and settle for a period. Then, use your utility knife to make initial rough cuts, trimming the excess carpet so that it extends approximately 3 to 6 inches up each wall. This preliminary rough cut significantly eases handling and precise positioning for the subsequent installation steps.
Step 5: Create Professional and Seamless Carpet Joins (If Required)
If your room’s dimensions require the use of more than one width of carpet, creating an invisible, seamless join is a paramount step for achieving a professional finish. Begin by overlapping the two pieces of carpet by several inches where they are intended to join. Using a long, sturdy straight edge and a specialized seam cutter, carefully make a single, clean, straight cut through both layers of carpet simultaneously. This “double cutting” technique guarantees an absolutely perfect match between the two edges. Remove the waste strips from both sides. Next, lay specialized seam tape directly beneath the precise line of the join, ensuring the adhesive side is facing upwards. Meticulously align the two carpet edges directly over the seam tape. Gently heat the tape with a seaming iron, slowly moving it along the entire length of the seam. As the adhesive melts, firmly press the carpet edges together and roll over the seam with a heavy rolling pin or a dedicated seam roller to ensure maximum adhesion and a perfectly flat, imperceptible bond.
Step 6: Expertly Stretch and Trim the Carpet for a Tight Finish
This critical stage is where the carpet truly becomes taut, smooth, and entirely wrinkle-free. Begin by utilizing the knee kicker to stretch the carpet onto the tackless strips along one wall. Work systematically from the center of the wall outwards towards the corners, hooking the carpet securely onto the sharp pins of the strips. For larger rooms or more extensive areas, a power stretcher is an indispensable tool that provides superior leverage and tension. Position the power stretcher approximately 6 inches away from the wall you are working on, extend its pole to reach the opposite wall, and apply controlled pressure to systematically stretch the carpet across the room. Continue to use the knee kicker for any final, minor adjustments and to ensure the carpet is firmly secured onto the tackless strips around the entire perimeter. As you stretch, meticulously use your wall trimmer or utility knife to carefully trim the excess carpet along the walls, leaving just enough material to be neatly tucked into the pre-existing gap created by the tackless strips.
Step 7: Neatly Tuck and Finish All Edges for a Polished Look
Once the carpet is stretched drum-tight and precisely trimmed, it is time for the final, crucial step of tucking. Using a dedicated stair tool or a dull utility knife, carefully and firmly tuck the trimmed edge of the carpet into the gap situated between the tackless strip and the wall. Work your way methodically around the entire room, paying close attention to ensuring that all edges are immaculately secured and tucked away for a clean appearance. Dedicate extra time and precision to corners and doorways to achieve a truly polished and professional finish. In doorways, install a suitable transition strip or door edge strip to create a smooth, safe, and aesthetically pleasing transition to the adjacent flooring material.
Step 8: Final Inspection and Post-Installation Cleanup
After all the carpet has been successfully installed, take a thorough walk around the entire room to meticulously inspect your handiwork. Carefully check for any loose spots, minor wrinkles, or areas where the carpet might not be properly secured. Make any necessary adjustments immediately. Finally, give your newly carpeted room a comprehensive and thorough vacuuming to remove any loose fibers, cutting debris, and lingering dirt. This final cleaning will reveal the fresh, clean, and inviting look of your professionally installed DIY carpet, ready for enjoyment.
Maintaining Your Newly Installed Carpet
Once your beautiful new carpet is expertly installed, consistent and proper maintenance practices are key to ensuring its long-term longevity and preserving its pristine appearance. Regular vacuuming is absolutely essential, particularly in high-traffic areas, to prevent dirt and grit from embedding deeply into the fibers. Address any spills or stains immediately using appropriate cleaning methods to prevent them from setting permanently. Consider scheduling professional carpet cleaning every 12 to 18 months to deep clean and refresh the carpet fibers, extending their life and vibrancy. Additionally, protecting your carpet from prolonged direct sunlight exposure can significantly prevent premature fading over time. With a little diligent care, your personally installed carpet will continue to enhance the beauty and comfort of your home for many years to come.
Installing your own carpet is undeniably a challenging yet incredibly fulfilling home improvement project. By meticulously following this detailed and comprehensive guide, you possess the capability to achieve results that are comparable to professional installations, all while realizing significant cost savings and gaining invaluable DIY skills. Always remember to prioritize safety above all else, take your time with each individual step, and never hesitate to seek additional assistance or advice if you encounter any difficulties. We genuinely hope this tutorial empowers you to confidently transform your home!
Video Tutorial: Watch and Learn How to Install Carpet Like a Pro
More Engaging DIY Articles You Might Enjoy:
Further expand your home improvement knowledge and explore more exciting projects with these expert guides:
- Build This Simple And Affordable Work Bench in 60 Minutes
- How to Heat and Finish a Slab Floor the Right Way