
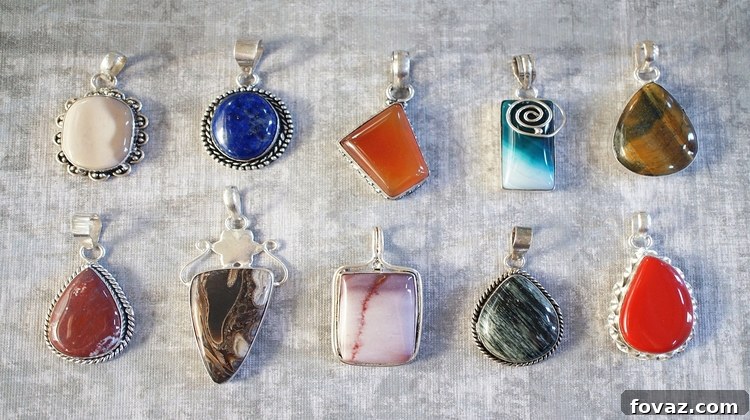
Wire jewelry is an exquisite and timeless art form that has captivated creators and enthusiasts for centuries. Far from being a fleeting trend, this ancient craft offers a unique path to crafting truly one-of-a-kind pieces that reflect personal style and creativity. If you’ve ever admired a stunning necklace, a delicate bracelet, or intricately designed earrings and wished you could create something similar, then wire wrapping might be your calling. While the idea of fashioning your own jewelry might seem daunting at first, we’re here to assure you that it is not only possible but incredibly rewarding. Join us as we unravel the secrets of wire jewelry making, transforming raw wire into wearable art.
The Art of Wire Wrapping: A Comprehensive Guide to Creating Stunning Wire Jewelry
Embarking on the journey of wire jewelry making can be a fulfilling adventure, whether you’re seeking a new creative outlet, a relaxing hobby, or even a potential source of supplemental income. In a world increasingly valuing handmade and personalized items, the demand for unique jewelry remains consistently high. Mastering this craft allows you to tap into a vibrant community of makers and offers endless possibilities for self-expression. Beyond the personal satisfaction, imagine the joy of gifting a beautifully handcrafted piece of jewelry to a loved one for a birthday, anniversary, or any special occasion – a truly personal gesture that store-bought gifts can rarely match. This guide aims to equip you with the knowledge and inspiration to confidently begin your wire wrapping journey, turning simple wire into cherished treasures.
What Exactly is Wire Wrapping? Delving into an Ancient Craft
Wire wrapping is an ancient jewelry-making technique that distinguishes itself from modern methods primarily by its lack of soldering, heating, or casting. Instead, jewelry is meticulously formed by bending, twisting, and weaving wire components using specialized hand tools. This technique has a rich history, with evidence of wire-wrapped jewelry dating back to ancient civilizations, including the Egyptians and Romans. These early artisans recognized the versatility of wire, transforming precious metals into intricate adornments without the need for sophisticated heating equipment.
At its core, wire wrapping involves manipulating different gauges and types of wire to secure gemstones, beads, or other decorative elements, creating a cohesive and aesthetically pleasing design. The process relies on the strength and flexibility of the wire itself, expertly shaped and intertwined to hold components firmly in place. This method allows for an incredible range of designs, from delicate filigree work to robust, sculptural pieces. It’s a craft that celebrates the material, allowing the wire to become an integral part of the design, not just a utilitarian component. For anyone interested in jewelry making, understanding wire wrapping opens up a world of creative freedom, offering a tactile and engaging way to bring unique visions to life.
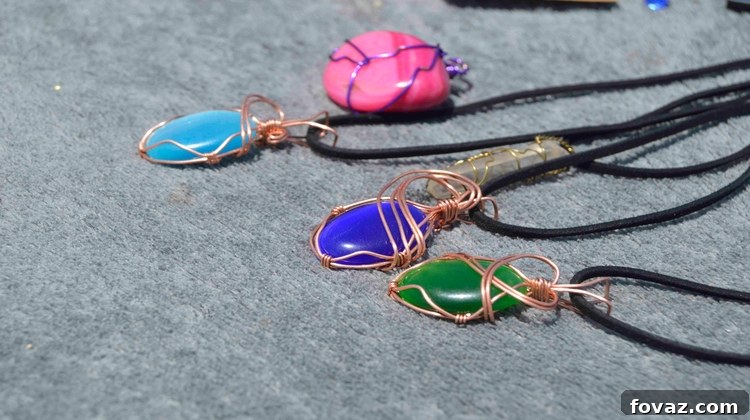
Essential Tools and Materials for Aspiring Wire Wrappers
To embark on your wire wrapping adventure, you’ll need a few fundamental tools and materials. Investing in good quality equipment from the start can significantly enhance your experience and the quality of your finished pieces.
Essential Tools:
- Round-Nose Pliers: Indispensable for creating perfect loops, curves, and coils. Their tapered jaws allow for a variety of loop sizes.
- Chain-Nose Pliers (or Flat-Nose Pliers): These pliers have flat, smooth jaws, ideal for gripping wire, straightening it, bending sharp angles, and opening/closing jump rings.
- Bent-Nose Pliers: Similar to chain-nose pliers but with angled jaws, making it easier to reach into tight spaces.
- Flush Cutters: Essential for cleanly cutting wire without leaving sharp edges. A good pair of flush cutters will provide a smooth, even cut.
- Nylon-Jaw Pliers: These are excellent for straightening wire or reshaping it without marring or scratching the surface of delicate or finished wire.
- Steel Ruler or Tape Measure: For accurate measurement of wire lengths.
- Jeweler’s Files or Emery Boards: To smooth any sharp wire ends after cutting.
- Mandrels (various shapes/sizes): Used for shaping wire into consistent curves, rings, or specific forms. Ring mandrels are common for ring making.
Key Materials:
- Jewelry Wire: This is your primary material. It comes in various metals, gauges (thickness), and tempers (hardness).
- Metals: Common options include copper, brass, sterling silver, gold-filled, rose gold-filled, and colored craft wire (often copper with a colored coating). For beginners, copper or craft wire is excellent for practice due to its affordability and workability.
- Gauges: Wire gauge refers to its thickness; the higher the number, the thinner the wire. Common gauges for wire wrapping include 16-gauge (thick, structural), 18-gauge (medium, for frameworks), 20-gauge (all-purpose, for wrapping and connecting), 22-gauge (finer wraps), and 24-28 gauge (very fine, for intricate weaving and securing small beads).
- Tempers: Wire temper describes its hardness or malleability.
- Dead Soft: Very pliable, easy to bend and shape, but less resilient. Ideal for intricate wraps.
- Half-Hard: Offers a good balance of pliability and strength, holding its shape well. Suitable for ear wires, clasps, and structural components.
- Full-Hard: Very rigid and holds its shape exceptionally well, but difficult to bend. Best for specialized findings or very sturdy structures.
- Beads and Gemstones: The decorative elements that bring color, sparkle, and personality to your designs. Choose those with appropriate drill holes for your wire gauge.
- Jump Rings and Clasps: For connecting components and finishing your jewelry pieces securely.
The Golden Rules: Dos and Don’ts for Successful Wire Wrapping
Wire wrapping is a journey of learning, practice, and patience. Adhering to certain principles will not only make the process more enjoyable but also significantly improve the quality of your finished pieces. Here are some crucial dos and don’ts to guide you:
- The Importance of Starting Slow and Steady: This art requires a calm hand and a deliberate approach. Rushing through steps often leads to mistakes, frustration, and wasted materials.
DO: Begin with simple projects and basic techniques. Focus on neatness, precision, and consistency in your wraps. Allow yourself ample time for each step, and don’t be afraid to unravel and re-do if a wrap isn’t perfect. This slow start builds muscle memory and confidence.
DON’T: Dive straight into complex designs. Trying to create intricate patterns before mastering foundational techniques will only lead to frustration and potentially developing bad habits.
- Understanding the Fundamentals Before Complex Designs: Every intricate wire-wrapped piece is built upon a series of basic wraps, loops, and coils. A strong foundation is paramount.
DO: Dedicate time to practicing basic loops (simple, wrapped), coiling, creating consistent angles, and securely attaching beads. Watch tutorials, read guides, and practice these individual elements until they become second nature.
DON’T: Skip the basics. Without a solid understanding of fundamental wire manipulation, more advanced techniques will prove overly challenging and your work may lack polish and structural integrity.
- Common Jewelry Making Mistakes to Avoid: Even experienced crafters make mistakes, but recognizing common pitfalls can save you time and material.
DO: Pay attention to wire tension – too loose, and your components will shift; too tight, and you might warp the wire or crack beads. Ensure your cuts are flush, and file any sharp ends to prevent snags. Always check your work for security and symmetry. Regularly inspect your tools for wear and tear, as damaged tools can mark your wire.
DON’T: Over-work your wire. Repeated bending and straightening can weaken and ultimately break the wire, especially thinner gauges. Try to get it right in as few bends as possible. Also, avoid using pliers with serrated jaws directly on finished wire, as they can leave unsightly marks.
- When to Use Finer Materials and Precious Metals: While craft wire is excellent for practice, understanding when to upgrade your materials is crucial for creating professional-looking and valuable pieces.
DO: Once you are confident in your techniques and consistently producing neat, secure wraps, consider transitioning to sterling silver, gold-filled, or even solid gold wire for your projects. These materials elevate the perceived value and longevity of your jewelry. Finer gauge wires (26-28g) are ideal for intricate weaving, delicate accents, and securing small, lightweight beads or cabochons.
DON’T: Waste expensive materials on practice pieces. Perfect your technique with copper or coated craft wire first. Also, avoid using very fine wire for structural components that need to bear weight or withstand significant stress.
- Materials to Approach with Caution (or AVOID): Not all wires are created equal, and some can hinder your progress or even be unsafe.
DO: Stick to wires specifically designed for jewelry making. These are generally nickel-free (to prevent allergic reactions) and coated or treated to resist tarnishing. Always choose wires with a consistent gauge and smooth finish.
DON’T: Use floral wire, electrical wire, or other industrial wires that are not intended for jewelry. These can contain harmful alloys, tarnish quickly, be difficult to work with, or lack the aesthetic quality needed for wearable art. Be wary of very cheap, generic “jewelry wire” that might be brittle or flake easily.
- Essential Principles for Crafting Beautiful Pieces: Beyond individual techniques, certain design principles elevate your work.
DO: Strive for symmetry and balance in your designs, unless intentionally going for an asymmetrical look. Ensure all components are securely fastened; loose wires or beads diminish the quality. Pay attention to the finishing touches – neat closures, smooth ends, and a polished appearance. Clean your finished pieces to remove fingerprints and oils.
DON’T: Neglect the back or unseen parts of your piece. A truly well-crafted item is beautiful from all angles. Avoid overcrowding designs with too many elements; sometimes, less is more.
- Embrace the Journey: Don’t Give Up! Wire wrapping can be challenging, and you will encounter moments of frustration. Persistence is key to mastery.
DO: View mistakes as learning opportunities. Take breaks when you feel frustrated. Seek inspiration from other artists, join online communities, and share your progress. Celebrate small victories and acknowledge your improvements over time. The “ugly” pieces you make early on are crucial steps in your development.
DON’T: Let setbacks define your entire journey. Every artist, regardless of medium, faces challenges. Keep practicing, keep experimenting, and trust that with time and dedication, your skills will flourish. Your perseverance will pay off in stunning creations.
This video tutorial offers a fantastic visual introduction to some core wire wrapping techniques and principles:
Beyond the Basics: Expanding Your Wire Wrapping Horizons
Once you’ve grasped the fundamental techniques, the world of wire wrapping truly opens up. You can start experimenting with more complex weaves, combining different types of wires, and integrating a wider variety of beads and cabochons. Consider exploring techniques like wire weaving (creating fabric-like patterns with wire), sculptural wire wrapping (forming three-dimensional figures), and intricate bezel settings for irregularly shaped gemstones. Online communities, advanced tutorials, and workshops can provide further inspiration and guidance as you evolve your craft.
Share Your Creations and Learn from Others
The wire wrapping community is vibrant and supportive. We encourage you to share your journey, your triumphs, and even your challenges with fellow enthusiasts. Have you discovered any ingenious tips or tricks while making wire jewelry? Perhaps a clever way to finish an end, or a unique tool hack? Please share your insights and experiences in the comments below. We’d love to hear how your wire wrapping adventures are unfolding!
Explore More Wire Wrapping Articles and Tutorials
Continue to expand your knowledge and skill set with more in-depth guides:
How to Make Wire Jewelry | Wire Jewelry Design – Learn advanced design principles and techniques for truly custom pieces.
Click Here for the Next Lesson >>
<< Click Here to go back to the Table of Contents