

Transform your man cave into the ultimate entertainment hub with a stunning, custom-built DIY pool table. This comprehensive guide will walk you through every step of the process, allowing you to craft a high-quality billiard table using materials readily available at your local hardware store. Imagine the satisfaction of sinking the winning shot on a table you constructed with your own hands – it’s an experience unmatched by any store-bought alternative.
RELATED: 11 Amazing Wood Carving Ideas Perfect For The Season
Mastering the Man Cave Upgrade: Build Your Own Custom Pool Table
Building a pool table is more than just a woodworking project; it’s an investment in countless hours of enjoyment, a testament to your DIY prowess, and a centerpiece that will undoubtedly impress friends and family. A custom-built table offers the unique advantage of tailoring dimensions, finishes, and playing characteristics to perfectly suit your space and style, something mass-produced tables simply cannot match. While it requires dedication and attention to detail, the reward of a professional-grade billiard experience in your own home is truly invaluable.
Essential Tools for Your DIY Pool Table Project:
- Table saw: Indispensable for accurate, straight cuts on large pieces of lumber.
- Jointer or router table: Crucial for achieving perfectly flat and square edges for strong joints.
- Level: Absolutely critical for ensuring a perfectly flat playing surface. A high-quality spirit level or laser level is recommended.
- Drill: For pilot holes, driving screws, and creating various fastenings.
- Electric sander: To achieve smooth finishes on all wooden components.
- Mallet: Useful for gently tapping joints together without damaging wood.
- Shims: Essential for precise leveling of the playing surface, especially if using slate.
- Razor Blade or utility knife: For trimming felt with precision.
- Staple gun: For securely attaching the billiard felt to the table surface and rails.
- Tape measure: For accurate measurements throughout the entire build.
- Safety gear: Always wear safety glasses, hearing protection, and appropriate gloves when working with power tools.
Key Materials for Your Custom Pool Table:
- Slate or medium-density fiberboard (MDF) pool table surface: The foundation of your playing area.
- High-quality lumber: For legs, frame, and rails. Hardwoods like oak, maple, or ash are ideal for durability and stability.
- Steel brackets: For reinforcing joints and adding structural integrity.
- Wood glue: A strong adhesive for permanent wood joints.
- Polyurethane finisher: To protect and seal wood surfaces, offering resistance to moisture and wear.
- Varnish: Another excellent option for wood finishing, providing a durable and attractive sheen.
- Portable clamps: Essential for holding pieces securely while glue dries.
- Straight-edge clamp: For guiding saws or routers for perfectly straight cuts.
- Bolts and screws: For assembling the frame, legs, and rails. Choose appropriate lengths and gauges for strength.
- Shims (if using slate for your tabletop): To achieve precise leveling.
- Pool table felt, cushions (rubber bumpers), and pockets: The vital components for playability.
- Cushion end facings: For a clean finish on the rail ends.
1. Strategic Space Planning for Your Pool Table
Before you even pick up a tool, the most crucial first step is to meticulously plan your space. A pool table isn’t just furniture; it’s an interactive gaming station that requires ample clearance for comfortable play. Consider not only the footprint of the table itself but also the necessary space around it for players to maneuver cues without hitting walls or other obstacles. A general rule of thumb is to allow at least 5 feet of clearance on all sides of the table for standard cue lengths.
When designing your custom pool table, ensure its size is proportional to the room. Common pool table sizes include 7-foot, 8-foot, and 9-foot lengths. A 7-foot table (often called a bar box) works well in smaller rooms (minimum 13′ x 16′ for comfortable play), while a 9-foot regulation table demands a much larger space (at least 15′ x 20′).
Ensure your design adheres to these critical dimensions:
- Maintain a 2:1 ratio between the length and width of your playing surface for authentic gameplay. For example, a standard 7-foot table has a playing surface of approximately 78″ x 39″.
- The height of the playing surface should be between 29″ and 31″ from the ground. This ensures ergonomic comfort for players.
Thorough measurement and planning at this stage will prevent frustration later and guarantee a truly enjoyable gaming experience in your man cave.
2. Constructing Robust Pool Table Legs
The legs of your pool table are the foundation of its stability and level playing surface. Proper construction here is paramount. You have several options for leg design, catering to different skill levels and aesthetic preferences. Regardless of your choice, always use high-quality, stable lumber immediately upon purchase to minimize warping, which can severely compromise the table’s levelness.
Here are a few popular approaches for crafting your pool table legs:
- **L-Shaped Frame Legs:** For a sturdy and relatively straightforward approach, construct an L-shaped frame using 2” x 10” lumber boards. You can then add additional lumber inside this frame to create a solid, substantial leg. This design provides excellent support and a classic look.
- **Milled Hardwood Legs:** If you possess woodworking skills and tools like a jointer and planer, milling your legs from solid hardwood (such as oak, maple, or cherry) offers superior durability and aesthetic appeal. Always mill along the grain of your lumber to ensure maximum strength and prevent splitting. This method allows for intricate designs and a truly bespoke feel.
- **Pre-Made Leg Pieces:** For those short on time or new to woodworking, purchasing pre-made leg pieces online or from specialty suppliers is a viable option. Ensure these pieces are sturdy and designed to bear the significant weight of a pool table.
Crucially, your legs should incorporate an L-shaped inner slot or a secure recess where your main frame will sit. This interlocking design provides maximum stability and support for the heavy playing surface.
Before attaching the legs to the frame, take the time to finish them. Apply a durable varnish or a high-quality veneer. Finishing them now, while they are separate components, is far easier than trying to do so once they are bolted to the frame. Once the initial finish has dried, seal them with a protective coat of polyurethane for enhanced durability and moisture resistance.
3. Crafting the Core Frame Structure
The frame is the skeletal system of your pool table, connecting the sturdy legs to the playing surface. Its robust construction is vital, as it provides the necessary support and rigidity, ensuring the table remains perfectly level and stable under pressure. The frame typically features a grid-like structure, distributing the weight evenly and providing attachment points for the playing surface.
The height of your frame will depend on your overall table design and the depth of your playing surface, but it generally ranges from 10 to 12 inches tall. This height allows for proper rail attachment and pocket depth.
Follow these steps to construct a reliable frame:
- **Accurate Cutting and Joinery:** Begin by precisely cutting your chosen wood (e.g., solid hardwood, high-quality plywood) to the appropriate dimensions. Utilize dado slots, mortise and tenon joints, or sturdy half-lap joints to fit the wood pieces together. These joinery methods provide maximum surface area for glue adhesion and superior structural integrity compared to simple butt joints.
- **Test Fit and Refine:** Before applying any adhesive, dry-fit all your frame pieces. Sand off any rough edges and make any necessary adjustments to ensure a perfect, snug fit. Precision at this stage is critical for a square and level frame.
- **Assembly and Clamping:** Once you’re satisfied with the fit, apply a generous amount of high-quality wood glue to all mating surfaces. Assemble the frame pieces, using clamps (such as F-clamps or pipe clamps) to apply even pressure and hold the pieces together firmly as the glue dries. Allow ample drying time as per the glue manufacturer’s instructions.
- **Alternative Fastening (Optional):** If you prefer the option to disassemble the table for moving or future modifications, you can reinforce or even replace some glued joints with screws and steel brackets. However, for ultimate rigidity and playability, a well-glued and clamped frame is highly recommended.
4. Securely Installing the Legs onto the Frame
With the frame constructed and dried, it’s time to integrate the legs, forming the complete base of your pool table. This step requires careful alignment and robust fastening to ensure unwavering stability.
Carefully slot each leg into its designated L-shaped recess or directly under your frame, depending on your chosen leg design. Precision here is key; use a square to ensure each leg is perfectly perpendicular to the frame. Securely attach the legs using heavy-duty bolts. For each leg, we recommend using at least one long bolt driven straight into the leg from the frame, augmented by two or more additional bolts or lag screws positioned strategically to provide lateral support and prevent any twisting or movement.
If you opted for pre-made legs that simply butt up against the frame, ensure you use substantial L-brackets or corner braces in addition to bolts or screws to create a rock-solid connection that can withstand the table’s weight and player interaction.
For an extra layer of stability, especially for larger tables or if you anticipate frequent movement, consider constructing a sub-frame that fits neatly within the main frame, spanning between the legs. This sub-frame provides additional support for the playing surface and further ties the entire leg and frame assembly together, dramatically reducing any potential wobble. While installing the pool table without a sub-frame is possible, it necessitates even more diligent reinforcement of the main frame and leg connections to compensate for the reduced structural support.
RELATED: DIY Wood Cutting Board You Can Make From Scrap Wood
5. Precision Placement of the Pool Table Surface
The playing surface is the heart of your pool table, and its precise installation is crucial for true rolls and fair gameplay. You have a choice between two primary materials: slate or MDF, each with distinct installation requirements.
- **Slate Pool Table Surface:**
* Professional pool tables almost exclusively use slate due to its exceptional flatness, weight, and resistance to warping. Slate surfaces typically come in multiple pieces (often three) with a backing made of MDF or plywood. This backing usually slides onto or rests directly on top of your sub-frame or inner frame supports.
* Carefully position each slate piece onto the frame, ensuring they are perfectly aligned. Then, securely screw them into place from underneath or through pre-drilled holes in the slate’s perimeter.
* The most critical step with slate is leveling. Use a high-quality level and precision shims (thin wooden or plastic wedges) placed between the slate and the frame to achieve an absolutely flawless, perfectly flat playing surface across all three pieces. This meticulous leveling process is vital for consistent ball roll and is often considered the most challenging aspect of building a high-quality table. - **MDF Pool Table Surface:**
* MDF (Medium-Density Fiberboard) is a more budget-friendly and lighter alternative to slate, often used in home and entry-level tables. It offers a reasonably flat surface but can be susceptible to moisture and warping if not properly sealed.
* When using MDF, you will need to cut the six pocket openings yourself. Precise measurements are key here. Each pocket opening should be carefully cut, typically ranging from 4.5 inches (for side pockets) to 4.625 inches (for corner pockets) in width, although these can be adjusted slightly based on your preference and pocket liner design. Use a template or a precise guide for clean, uniform cuts.
* After cutting the pockets, place the MDF sheet onto the frame and attach it securely with screws, ensuring even spacing and ample fastening for rigidity. Consider sealing the MDF edges and surface with a polyurethane or lacquer to protect against humidity and enhance durability.
Regardless of the material chosen, ensure the surface is immaculately clean and free of any dust or debris before proceeding to the next step, as even tiny particles can affect the felt application and ball roll.
6. Constructing and Attaching the Pool Table Railings
The side rails are integral to the game of pool, guiding the balls into pockets and providing the rebound action that defines strategic play. A well-constructed and accurately aligned set of rails is essential for a high-performance table. The railings are comprised of four distinct, interconnected parts:
- **The Railings (Wood Blocks):** These are the primary wooden components that form the outer perimeter of the playing surface, housing the rubber cushions and providing structural support.
- **The Featherstrips:** These thin strips of wood are used to securely “pinch” and hold the billiard felt in place along the underside of the rails, ensuring a taut and smooth felt surface.
- **The Blinds:** These decorative pieces of wood attach to the outside of the rails, aesthetically concealing the underside of the table and the pocket mechanisms.
- **The Bumpers (Rubber Cushions):** These are the crucial rubber pieces attached to the inside face of the wooden rails. Their precise angle and quality dictate the bounce and rebound characteristics of the ball, directly impacting gameplay. K-66 profile rubber is standard for most modern pool tables.
When assembling your rails, pay close attention to the bolt holes that will secure them to the main pool table frame and the integrated pocket openings. The precise alignment of these elements is critical. Use super glue or contact cement to firmly attach the rubber bumpers to the wooden rail sections. It is absolutely vital that these bumpers are installed at the correct angle (typically 17-20 degrees) to ensure accurate and consistent ball rebound. Any deviation here will result in “dead spots” or unpredictable shots, ruining the playing experience. Allow sufficient time for the adhesive to cure completely before proceeding.
7. Expert Felting of the Pool Table Surface
The felt, also known as billiard cloth, is the final layer that transforms your raw playing surface into a vibrant, functional pool table. The choice of felt color is a personal one – while traditional green is common, blue, red, or even custom colors can personalize your man cave further. Consider a color that complements your existing decor (check out some man cave ideas here).
Follow these steps for a professional felt application:
- **Felt Before Rails:** It is crucial to felt the main playing surface before permanently attaching the rails. This allows for easier access and a cleaner application.
- **Inspect and Prepare:** Carefully unroll your pool table felt and inspect both sides for any dust, debris, snags, or imperfections. Simultaneously, give your slate or MDF surface a thorough sweep and wipe-down. Even the smallest particle can create an inconsistent roll or a noticeable bump under the felt.
- **Pocket Liners:** Cut small felt strips (or use pre-made liners) to line the edges of your pocket openings. These provide a clean finish and protect the raw edges of your playing surface.
- **Attach Pocket Liners:** Using a small amount of super glue or contact cement, carefully stick the felt pocket liners around the inside perimeter of each pocket opening. Once dry, use a razor blade or sharp utility knife to trim off any excess felt for a perfectly clean edge.
- **Secure the Main Felt:** Lay the main piece of felt over the entire playing surface, ensuring it’s centered and has an even overhang on all sides. Start stapling the felt to the underside of the slate’s MDF backing or the MDF surface itself, beginning from the center of one long side and working outwards, alternating sides (long side, opposite long side, short side, opposite short side). This technique, combined with gentle but firm stretching, ensures an even tension across the entire surface. **Never use glue to attach the main felt,** as it can create unsightly bumps, uneven tension, and make future replacement difficult. Use a staple gun with short staples (e.g., 1/4 inch) to avoid piercing the playing surface. The goal is a perfectly smooth, taut, and wrinkle-free playing surface.
- **Prepare for Rail Bolts:** Once the main felt is stretched and stapled, you’ll need to create openings for the rail bolts. Carefully locate the pre-drilled bolt holes in your slate or MDF. Use a small, sharp punch or an awl to create clean holes in the fabric, using the existing bolt holes as your guide. Avoid tearing the felt.
8. Adding the Critical Finishing Touches
With the felt applied and the rails prepared, it’s time to bring your DIY pool table to completion with the final, crucial touches. These steps ensure both functionality and a professional appearance.
- **Install the Rails:** Carefully position each felted rail assembly onto the table frame. Align the bolt holes in the rails with the holes punched in the felt and the underlying frame. Insert the rail bolts and tighten them securely, ensuring the rails are flush and square with the playing surface. Do not overtighten, as this can warp the wood or compress the felt too much.
- **Assemble the Pockets:** Attach the pocket liners and nets (or ball return system components) to the designated pocket openings. Ensure they are securely fastened and positioned to effectively catch balls. Many pocket assemblies come with specific hardware for this step.
- **Mark Your Table Lines:** For standard play, you’ll need to mark the head string, foot string, and various spots (head spot, foot spot, center spot) on the felt. These lines are critical for breaking and placing balls during different game variations. Use a precise measuring tape and a piece of tailor’s chalk or a thin, washable marker to make these markings. Refer to official billiard rules for exact dimensions for your table size. A perfectly square layout is essential here.
- **Final Leveling and Inspection:** Once fully assembled, take one last, meticulous pass with your level. Fine-tune any leg levelers or shims to ensure the table is absolutely, perfectly level in all directions. Run your hand across the felt to check for any hidden imperfections or loose areas.
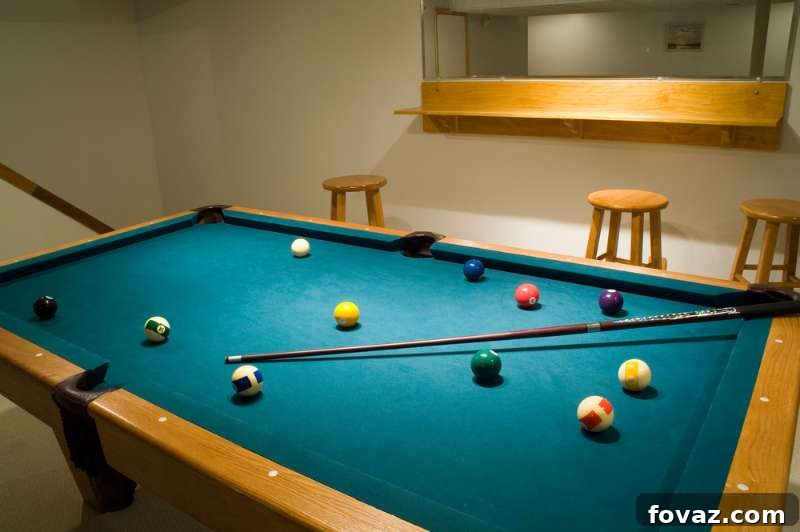
The final product should be a source of immense pride and countless hours of entertainment, ready for your first game of pool:
For additional ingenious tips and visual guidance on building a pool table, watch this insightful video from Rollie Williams:
Bringing a DIY pool table to life is undoubtedly a significant woodworking undertaking, demanding precision, patience, and a bit of elbow grease. However, the satisfaction of completing such a rewarding project – and the sheer joy of capping off a long day with a spirited game of pool with friends or family in your custom man cave – makes every effort truly worthwhile. We hope this detailed tutorial has empowered you with the knowledge and confidence to embark on your own pool table construction journey. Stay tuned for more exciting DIY projects and creative inspiration!
Have you ever considered or attempted to build your own DIY pool table? Share your thoughts, experiences, and any tips in the comments section below! We’d love to hear from you.
Up Next:
- Beautiful DIY Wooden Coasters From Hardwood Scraps
- How To Remove Rust From Tools
- 6 Easy To Make Mason Jars Craft Projects
Calling all crafting DIYhards, DIY Projects needs YOU! Click here if you want to write for us.
Don’t forget to stay connected with us on Facebook, Twitter, Pinterest, and Instagram!