

Unleash Your Inner Artisan: Crafting a Guitar String Ring That Wows!
In a world increasingly driven by mass-produced items, there’s a profound beauty and sentiment in giving or receiving something truly handmade. Whether it’s a delectable homemade recipe prepared with love or a meticulously crafted DIY project, gifts made with your own hands carry an unparalleled personal touch, solidifying relationships and creating lasting memories. For many, the idea of embarking on a DIY project, especially one that promises impressive results, can feel daunting. You might think it requires expert-level skills or an innate artistic talent. However, the truth is, with a dash of determination, a sprinkle of patience, and the right guidance, anyone can create something truly spectacular.
If you’re looking to dip your toes into the rewarding world of crafting or seeking a unique, heartfelt gift that truly stands out, look no further than the mesmerizing guitar string ring. This project, ingeniously shared by Instructables user MartyK1, is a perfect blend of simplicity and sophistication. It’s easy enough for absolute beginners to master, yet yields a stunning piece of wearable art that even seasoned DIY enthusiasts will admire. Beyond being an ideal gift for that special someone – perhaps a music lover, a minimalist fashion enthusiast, or simply someone who appreciates unique craftsmanship – it serves as a fantastic first step into the vibrant and supportive DIY community. Let’s transform discarded guitar strings into a statement piece, combining sustainability with style.
Mastering the Art: How to Craft Your Own Unique Guitar String Ring
Crafting a guitar string ring isn’t just about bending metal; it’s about giving new life to an object, celebrating music, and creating something deeply personal. This comprehensive guide will walk you through each step, ensuring you have all the knowledge and confidence to create a beautiful, durable ring. We’ll explore the materials, delve into the critical knot-tying technique, and provide tips for a flawless finish.
What You’ll Need for Your DIY Guitar String Ring Project:
Before diving into the creative process, gathering your materials is key. The beauty of this project lies in its simplicity and the accessibility of its components. Here’s a detailed look at what you’ll need and why each item is important:
- Guitar String: Specifically, a nickel wound type, with a gauge of .024 or .026 is highly recommended. Why these specifications? Nickel wound strings offer a beautiful luster and flexibility, making them easier to manipulate without kinking excessively. The chosen gauges (.024 or .026) strike a perfect balance, providing enough body for the ring to feel substantial without being overly thick or too delicate to hold its shape. You can use old strings from your own guitar, or purchase individual strings if you prefer a specific brand or look. Consider experimenting with different colored strings for unique visual effects once you’ve mastered the basic technique.
- A Rod, Pipe, or Dowel: This will serve as your ring mandrel. Its primary function is to give your ring its shape and size. It’s crucial that this item is as close to the desired finger size as possible. Common household items like a sturdy marker, a broom handle, a metal pipe, or a dedicated ring sizer tool can all work. The smoother the surface, the better, to prevent marking the string.
- Securing Material: Masking tape, electrical tape, strong wire, or durable rubber bands. This material is essential for firmly attaching the end of your guitar string to the dowel, ensuring a stable starting point for your knot. The goal is to prevent any slippage while you’re working, so choose a material that offers good grip and strength.
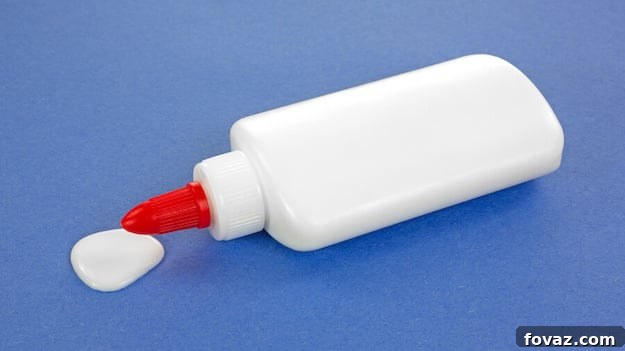
- Super Glue: A small amount of high-quality super glue is vital for securing the ends of your finished ring. This provides durability and prevents the knot from unraveling over time. Work in a well-ventilated area and use caution when handling super glue.
- Needle and Heavy Thread: These are used for a crucial reinforcement step, ensuring the overlapping ends of the string are tightly bound before gluing. A strong, non-stretchy thread like upholstery thread or dental floss works wonderfully.
- Wire Cutter: A sharp, reliable wire cutter is indispensable for cleanly snipping the excess guitar string without fraying or leaving sharp edges. Standard household scissors are unlikely to work on guitar strings, so invest in a proper wire cutter.
- Knife or Scissors: For trimming the securing tape/wire and the heavy thread after gluing.
Step 1: The Foundation – Learning the Spanish Ring Knot
Before you even touch a guitar string, the most critical skill to master for this project is tying the Spanish ring knot. This elegant and robust knot forms the very structure and aesthetic of your ring. While it might appear intricate at first glance, it’s not overly difficult to learn. Like any new skill, it simply requires a little practice and patience. The Spanish ring knot is a classic in macrame and knot-tying communities, valued for its symmetrical beauty and secure hold.
To guide you, we’ve integrated a fantastic video tutorial below from Paracord Guild, renowned for their clear and concise knot-tying instructions. This visual aid will walk you through each loop and tuck, making the learning process straightforward. For those who prefer a more static, detailed approach, you can also explore their comprehensive step-by-step photo tutorial. Take your time with this step; mastering the knot on a practice piece of string or cord before using your precious guitar string will save you frustration and ensure a beautifully crafted final product. Focus on consistent tension and smooth movements.
Practice tying the Spanish ring knot several times until you feel confident and the movements become fluid. Pay close attention to how the loops form and tighten. The goal is to achieve a uniform, tight knot that will look professional and hold its shape securely when transferred to the guitar string.
Step 2: Securing Your Guitar String – The Starting Point
With your knot-tying skills now honed, it’s time to begin the actual construction of your guitar string ring. The first crucial step is to securely attach the starting end of your guitar string to your chosen dowel or rod. The end of the guitar string typically has a small metal ring or ball end; this is the part you’ll be securing.
Position the metal ring end of the guitar string against the dowel at the point where you want your ring to begin. Then, using your chosen securing material – be it masking tape, electrical tape, a piece of strong wire, or sturdy rubber bands – firmly wrap it around both the string’s metal end and the dowel. The objective here is absolute immobility. The string should not slip or move while you are working. A secure anchor point is paramount for achieving a tight, even Spanish ring knot around the dowel. Ensure that the securing material doesn’t interfere with the area where you’ll be tying the knot, leaving enough clear space for your wraps. Imagine this as the anchor for your creative journey, setting the stage for precision. (Visual examples often show a piece of wire tightly twisted around the string and dowel, providing excellent stability.)
Step 3: Beginning the Spanish Tie Knot – Forming the Ring’s Body
Now, with your guitar string firmly secured, you can commence tying the Spanish ring knot directly onto the dowel. Begin by creating the first three wraps of the Spanish ring knot, just as demonstrated in the video tutorial from Step 1. These initial wraps are fundamental as they establish the pattern and tension for the entire ring.
As you form these first wraps, exercise extreme caution and precision. Carefully tighten the knot, making sure not to bend or kink the guitar string too much. Guitar strings, especially the wound type, can be prone to kinking if handled roughly, which will compromise the aesthetic and integrity of your ring. Apply steady, even pressure, allowing the string to naturally form the loops of the knot. The goal is a snug fit around the dowel, but not so tight that it deforms the string.
Continue this process, systematically adding wraps, following the Spanish ring knot pattern. You will essentially be creating a continuous series of knots that form the cylindrical body of your ring. Aim for consistency in tension and spacing between each wrap. The beauty of the Spanish ring knot lies in its intricate, woven appearance, and achieving this requires a steady hand and attention to detail.
Persist until you’ve completed a “doubled” Spanish ring knot – meaning the knot pattern has been repeated sufficiently to create a full, robust band that covers the desired width of your ring. The length of string you use will dictate the width of your final ring; more wraps mean a wider ring. As you progress, periodically check the fit against your finger (if it’s not already on a true ring sizer) to ensure the size is accurate and the shape remains round. This continuous wrapping creates a beautiful, textured surface that is unique to this type of ring.
Step 4: The Finishing Touches – Cutting & Gluing for Durability
Once your Spanish ring knot has formed a complete and beautifully crafted band around the dowel, and you’re satisfied with its width and tightness, it’s time for the crucial finishing steps. These steps ensure your ring is not only visually appealing but also durable and comfortable to wear.
Carefully remove the newly formed ring from the dowel. With your reliable wire cutters, precisely trim the long, excess ends of the guitar string. Make sure to cut them as close to the main body of the knot as possible, but leave just enough length for them to securely overlap inside the ring. The goal is for these cut ends to meet and overlap on the inside, rather than protruding outwards, which would make the ring uncomfortable or even scratchy. A neat cut is essential for a professional finish.
Now, pay close attention to the two cut ends of the string that are overlapping inside the ring. This is where the heavy thread and super glue come into play. Take your needle and heavy thread, and begin to tightly wrap the thread around both overlapping string ends. You’re essentially creating a very small, secure binding around the two ends where they meet. Wrap the thread multiple times, ensuring it’s as tight as possible, effectively binding the ends together and preventing them from moving or separating. This step provides mechanical strength and a surface for the glue to adhere to more effectively.
Once you’ve created a tight binding with the thread, generously drench the wrapped thread in super glue. The glue will seep into the threads and bond the guitar string ends together, creating an incredibly strong and almost invisible connection. Apply enough glue to saturate the thread completely, but avoid excessive drips. Allow the super glue to sit undisturbed for a sufficient amount of time, as per the manufacturer’s instructions, typically several minutes, to ensure it fully cures and creates a rock-solid bond.
After the glue has completely dried and hardened, carefully use your knife or scissors to remove any visible excess thread. You want a clean, smooth finish on the inside of the ring. This meticulous trimming ensures the ring is comfortable against the skin and that the glued joint is discreet. Your ring is now structurally sound and ready for display!
Your Finished Guitar String Ring – A Testament to Craftsmanship!
Congratulations! You’ve successfully transformed a simple guitar string into a unique piece of wearable art. Your finished guitar string ring, adorned with the intricate Spanish ring knot, is a testament to your patience, determination, and budding craftsmanship. Each curve and intertwine tells a story of creation and upcycling, making it more than just a piece of jewelry—it’s a conversation starter, a personal statement, and a symbol of your creativity.
Observe the intricate pattern of the Spanish ring knot. The way the light catches the nickel wound string, highlighting its subtle texture and sheen, makes this ring truly special. Imagine the joy of gifting this handmade treasure to a friend, family member, or significant other, knowing the effort and love poured into its creation. It’s a perfect gift for musicians, environmentally conscious individuals, or anyone who cherishes unique, handcrafted items.
This project demonstrates that impressive DIY creations don’t require expensive tools or advanced skills. It simply takes a willingness to learn and a desire to create. Wear your new ring with pride, knowing you made it yourself. This could be just the beginning of your journey into the vast and rewarding world of DIY jewelry making!
Did you find our comprehensive DIY Guitar String Ring Tutorial inspiring and easy to follow? We’d love to hear about your crafting experience and see your unique creations! Share your thoughts, questions, and successes in the comments section below!
Don’t forget to stay connected with the DIY community and get more creative project ideas by following us on Facebook, Twitter, Pinterestand Instagram! Join our growing community of makers and discover endless possibilities for crafting, upcycling, and transforming everyday items into extraordinary pieces.
Love crafting unique jewelry? Then you’ll absolutely adore these related projects:
If you enjoyed the detailed process of making a guitar string ring, you might be excited to explore other fascinating jewelry crafting techniques. Expand your skills and create more personalized accessories with these fantastic tutorials:
How to Make Coin Rings: Transform Currency into Wearable Art
Take your upcycling game to the next level by learning how to meticulously craft stunning rings from old coins. This project, while requiring a slightly different skill set, shares the spirit of transforming ordinary objects into extraordinary jewelry pieces. Discover the techniques for drilling, shaping, and polishing coins into unique, historical rings.
How To Make Teardrop Earrings | Master Wire Wrapping Techniques
Dive deeper into the world of wire artistry with this guide on creating elegant teardrop earrings. This tutorial will introduce you to essential wire-wrapping techniques, allowing you to manipulate metal into beautiful, intricate shapes. It’s a fantastic way to develop precision and creativity with different types of wire.
How to Make Trendy Tassel Earrings: Add a Pop of Color and Movement
For those who love vibrant accessories, learning how to make trendy tassel earrings is a must. This project focuses on combining different materials and colors to create playful and stylish earrings that can complement any outfit. It’s an excellent way to experiment with textiles and design, bringing movement and personality to your handmade jewelry collection.
Each of these projects builds upon the foundational skills you’ve developed with the guitar string ring, offering new challenges and creative outlets. Happy crafting!