
Master Your Home Makeover: Step-by-Step Curtain Sewing Tutorial
How to Sew Curtains: Crafting Beautiful Window Treatments for Your Home
Welcome to the next exciting step in our free home decorating course! After mastering the art of no-sew curtains and crafting custom pillows, it’s time to elevate your DIY skills with one of the most rewarding projects: learning how to sew curtains. Imagine transforming your living spaces with elegant, custom-made window treatments that perfectly complement your style and vision.
Sewing curtains might seem daunting at first glance, but we promise it’s one of the most straightforward sewing projects you can undertake. The core skill involves sewing in a straight line – a technique you’ll quickly master with our guidance. While the actual sewing is simple, the most critical part often comes before you even touch your machine: accurately measuring and preparing your fabric. We covered how to determine exactly how much fabric you’ll need in this essential tutorial. Once your fabric is perfectly sized and ready, you’ll be amazed at how quickly your vision comes to life.
This comprehensive guide will walk you through every step of the curtain-making process, from gathering your materials to adding those final, professional touches. Follow along with our detailed video instructions and expert tips to create beautiful, custom-sewn curtains that add warmth, privacy, and style to any room in your home.
Essential Supplies & Preparations for Your Curtain Project
Before you begin your sewing journey, gathering all necessary materials and understanding the initial preparation steps will set you up for success. Quality tools and careful planning are the hallmarks of any professional-looking DIY project.
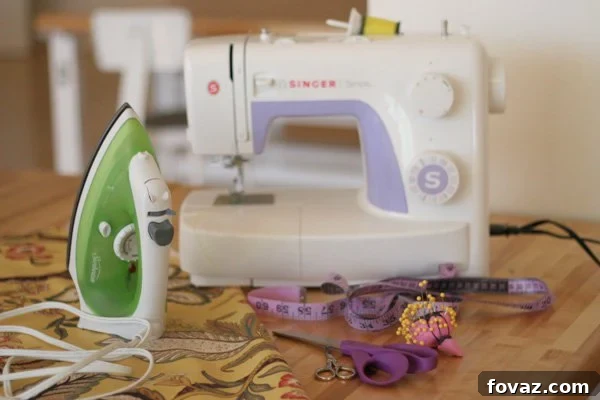
For this exciting curtain-making project, you will need:
- High-Quality Curtain Fabric: The heart of your project! Consider the room’s aesthetic, desired light control (sheer, blackout, medium-weight), and care instructions. Popular choices include cotton, linen, broadcloth, canvas, or even velvet for a luxurious touch.
- Matching All-Purpose Thread: Choose a thread color that either perfectly matches your fabric for a seamless look or a slightly contrasting shade if you desire a subtle design element.
- Basic Sewing Machine: Any standard sewing machine capable of a straight stitch will work perfectly.
- Measuring Tape or Yardstick: Crucial for accurate measurements of your window and fabric.
- Fabric Scissors: Sharp scissors are vital for clean, precise cuts.
- Sewing Pins: To hold fabric securely in place before sewing.
- Iron and Ironing Board: An absolute must for pressing seams and hems for a crisp, professional finish at every stage.
- Seam Ripper: Essential for correcting any mistakes without damaging your fabric.
- Optional: Fabric Marker or Tailor’s Chalk: For marking cutting lines or hem folds.
- Optional: Weights for Hems: Small weights can be sewn into the bottom hem to help curtains hang beautifully.
Still unsure about how much fabric to purchase for your specific window dimensions? We highly recommend revisiting this dedicated lesson for a quick and precise solution, ensuring you buy just the right amount and avoid costly errors.
Once you have your supplies, the next crucial step is fabric preparation. This often involves pre-washing and ironing your fabric, which helps prevent shrinking after your curtains are made and ensures a smooth, even surface for cutting and sewing.
Part 1: Preparing Your Fabric & Laying the Foundation for Perfect Curtains
The success of your curtains lies heavily in the initial preparation. This first segment focuses on getting your fabric ready for sewing and tackling the first set of crucial hems.
In this video, you will learn the fundamental steps of gathering your chosen supplies and meticulously preparing your fabric. This includes important actions like pre-washing your fabric (if applicable to prevent future shrinkage), pressing it thoroughly to remove any wrinkles, and making your initial, precise cuts based on your window measurements. We’ll then guide you through the process of creating and pressing your side hems, an often overlooked but critical step for a professional finish. Properly pressed hems are the secret to straight stitches and a polished final product, making your curtains look store-bought rather than handmade.
Part 2: Mastering the Side Seams for a Clean Finish
With your fabric prepared, it’s time to bring out your sewing machine and tackle the vertical side seams. This section is all about precision and developing a steady hand.
This video tutorial demonstrates the best practices for sewing the side hems with a neat top stitch. You’ll discover effective techniques for guiding your fabric through the machine to ensure perfectly straight lines – a key to professional-looking curtains. We also delve into the important decision of choosing the right thread color, whether you want an invisible stitch or a subtle decorative element. Learning to sew straight is a foundational skill that will serve you well in countless future sewing projects, and curtains offer the perfect canvas to practice and perfect this technique. Remember to iron your seams flat after stitching for an impeccably smooth finish.
Part 3: Crafting the Top Rod Pocket & Finishing the Bottom Hem
The final steps involve completing the top and bottom edges of your curtain panel. Since the side seams were expertly sewn first, these subsequent steps will lead to an incredibly clean and polished finished look, characteristic of high-quality window treatments.
Follow along with this detailed video to complete your curtain panel. We’ll guide you through creating a classic rod pocket at the top, ensuring your curtain will hang beautifully and evenly on any standard curtain rod. This involves careful folding, pressing, and stitching to create a secure casing for the rod. We’ll also cover the process for finishing the bottom hem, which is crucial for the curtain’s drape and overall aesthetic. Proper hemming here ensures your curtains hang straight and elegant, adding that perfect finishing touch to your simple, yet stunning, curtain panel that will enhance the ambiance of any home.
Encountering some hiccups with your sewing machine, or need a refresher on navigating its features? Don’t worry, we’ve got you covered! Please check out our comprehensive “how to use a sewing machine” tutorial here, which is also part of our popular dressmaking series. Getting comfortable with your machine is paramount to enjoying all sewing projects.
Beyond the Basics: Elevating Your Curtain Designs
Now that you’ve successfully learned how to sew a basic rod pocket curtain panel, a whole world of curtain variations and design possibilities opens up to you! This foundational skill empowers you to explore more intricate styles and personalize your home decor even further. In upcoming lessons within our series, we’ll delve into different header styles such as tab-top curtains, grommet curtains, and even pleated designs, allowing you to tailor your window treatments to any desired aesthetic.
Stick with us through this exciting journey of home transformation. Your ability to create custom pieces will not only save you money but also infuse your living spaces with a unique, handmade charm that off-the-shelf items simply can’t match. Thanks for watching and learning with us!
There are many more fantastic tutorials in our “How to Make Curtains Series” coming your way. To continue your learning, simply hit the “next” button, or easily navigate back to the comprehensive Table of Contents by clicking the links provided below.
CLICK HERE to See What’s Next in Our Curtain Series! >>
<< CLICK HERE to go back to the Table of Contents
Transform Your Home with DIY Projects: Join Our Creative Community!
This detailed tutorial on how to sew curtains is Project 2 of our popular “How to Make Curtains Online Course,” which is an integral part of our free Home Makeover Tutorials package! At DIY Projects, our passion is empowering you to fill your homes with incredible, personalized handmade crafts that you’ve sewn and created yourselves. Our deepest hope is that these accessible sewing patterns and creative ideas inspire you to embark on your own redecorating adventures, ultimately enabling you to design and create the dream home you’ve always envisioned.
Imagine walking into a living space that is not only stylish and functional but also deeply personal, decorated exactly to your liking with items crafted by your own hands. Come home happy, day after day, and savor the profound sense of accomplishment that comes from saying, “I made this.” Here at DIY Projects, we thrive on inspiring dreams, fostering creativity, and encouraging craftiness in all aspects of life – from intricate sewing projects to simple home improvements.
Don’t miss out on more inspiring content, tips, and community engagement! Be sure to subscribe to our social media channels to stay connected on all things handmade, creative, and DIY. Join our vibrant community on Facebook, discover endless inspiration on Pinterest, get daily doses of creativity on Instagram, and follow our latest updates on Twitter. Let’s create something beautiful together!