
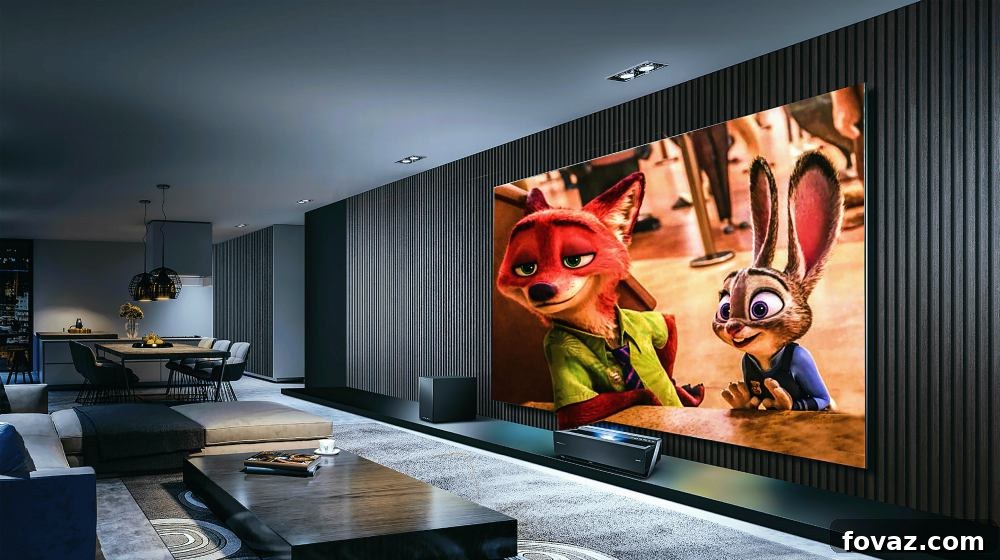
Transforming your home entertainment or studio space from merely functional to truly immersive requires attention to detail, and nothing quite impacts the audio experience like properly treated acoustics. While professional acoustic panels can be a significant investment, creating your own DIY acoustic panels offers a cost-effective, customizable, and deeply rewarding solution. These straightforward-to-make sound absorption panels don’t just enhance sound clarity and elevate listening quality; they also introduce a level of audio precision that can revolutionize everything from movie nights to music production. Forget the muddy bass and echoing dialogue; it’s time to build your way to crystal-clear sound.
Why DIY Acoustic Panels Are a Game Changer for Your Space
Understanding the Science of Sound in a Room
Before diving into construction, it’s essential to grasp why acoustic panels are so crucial. In any enclosed space, sound waves don’t simply travel directly from their source to your ears. They bounce off walls, ceilings, floors, and furniture, creating reflections. When these reflections return to your ears slightly delayed, they interfere with the original sound, causing phenomena like echoes and reverberation. This acoustic interference can lead to a host of problems: dialogue becomes hard to understand, music loses its crispness, and the overall soundscape feels “muddy” or “boomy.”
Acoustic panels, often referred to as sound absorption panels, are designed to mitigate these issues. Unlike soundproofing, which aims to prevent sound from entering or leaving a room, absorption panels improve the sound quality *within* a room. They work by converting sound energy into a tiny amount of heat, effectively reducing the amount of sound bouncing around. This results in a cleaner, more controlled, and enjoyable listening environment.
Benefits Beyond Just “Better Sound”
The advantages of installing DIY acoustic panels extend far beyond simply improving audio fidelity:
- Enhanced Clarity and Intelligibility: Dialogue in movies or vocals in music become remarkably clearer and easier to understand, even at lower volumes.
- Improved Stereo Imaging and Soundstage: For audiophiles and music creators, panels help pinpoint instruments and vocals more accurately within the stereo field, creating a wider and more defined soundstage.
- Reduced Listening Fatigue: A room with excessive echoes can be tiring to listen in. By taming reflections, acoustic panels create a more comfortable and less fatiguing auditory experience.
- Better Recording Quality: For home studios, these panels are indispensable. They eliminate unwanted room reflections from your recordings, resulting in professional-sounding tracks without the need for complex digital processing.
- Aesthetic Customization: By choosing your own fabric, you can ensure your acoustic panels seamlessly blend with or even enhance your room’s decor.
- Cost-Effectiveness: Building your own panels is significantly cheaper than purchasing pre-made professional panels, allowing you to treat a larger area for less.
Whether you’re setting up a dedicated home theater, a gaming sanctuary, a podcasting booth, or simply a quieter home office, DIY acoustic panels are an essential upgrade for anyone serious about sound.
Planning Your DIY Acoustic Panel Project
Step 1: Strategize Your Build – Dimensions, Thickness, and Placement
The success of your DIY acoustic panels hinges on careful planning. This involves understanding your room’s needs and making informed decisions about panel size, thickness, and, crucially, placement.
Panel Thickness and Frequency Absorption
Acoustic panels absorb sound across different frequencies. Thicker panels generally absorb a broader range of frequencies, including lower ones, more effectively. This is a vital consideration:
- 2-inch thick panels: Excellent for absorbing mid to high frequencies, ideal for reducing flutter echoes and improving general clarity in living rooms, home theaters, or offices. They offer a good balance of performance and practicality.
- 4-inch thick panels: Provide superior broadband absorption, meaning they’re more effective at taming lower-mid and even some bass frequencies in addition to highs. These are highly recommended for critical listening environments like home recording studios or dedicated audiophile setups where bass management is paramount.
While making panels too thick might seem beneficial, remember they can become bulky and protrude significantly from the wall. For most home theater or casual listening applications, 2-inch thick panels offer a substantial improvement. For those pursuing professional audio quality, 4-inch panels are often the preferred choice.
Determining Panel Dimensions and Coverage
Standard DIY acoustic panels typically measure 2’x4′. This size is practical for several reasons: it’s easy to handle, fits common insulation material dimensions, and offers a good surface area for absorption. However, you can modify these dimensions based on your specific room size and aesthetic preferences.
When planning coverage, consider these guidelines:
- Identify First Reflection Points: These are the most critical areas to treat. Use the “mirror trick”: sit in your primary listening position and have a friend move a mirror along the walls and ceiling. Anywhere you can see a speaker in the mirror is a first reflection point that needs a panel.
- Primary Listening Areas: Focus on the walls directly to the left and right of your main listening position, the wall directly behind your speakers, and the ceiling above your listening position (for a “cloud” panel).
- Room Corners: While standard panels help, bass frequencies tend to build up in corners. Dedicated bass traps (often thicker panels angled across corners) are ideal for these areas. Even standard 4-inch panels placed flat against a corner can offer some low-frequency benefit.
- Overall Coverage: THX-certified movie theaters often feature extensive sound-absorbing materials. For a home theater, aiming to cover 15-25% of your wall surface area is a good starting point for noticeable improvement. More critical spaces like recording studios may require 30-50% coverage or more.
Step 2: Decide on Your Core Sound Absorbing Material
The core of your acoustic panel is what truly does the work. Selecting the right material is paramount for effective sound absorption. Key properties to look for include a high Noise Reduction Coefficient (NRC), density, fire resistance, and ease of handling. Mineral wool and fiberglass insulation are the top choices for DIYers due to their excellent performance and relative affordability.
- Owens Corning 703/705 (Fiberglass):
- Pros: Widely considered an industry standard for acoustic treatment. Offers superior sound absorption across a broad frequency range, particularly effective due to its uniform density and semi-rigid nature. Available in different densities (703 at 3 lbs/ft³, 705 at 6 lbs/ft³) with higher density offering better low-frequency absorption.
- Cons: Can be pricier and sometimes harder for individual DIYers to source compared to general home insulation products. Requires careful handling with protective gear as fiberglass fibers can cause skin irritation and respiratory issues.
- Rockwool/Roxul Mineral Wool Insulation (e.g., Safe’n’Sound, Comfortbatt):
- Pros: An excellent, often more accessible, and budget-friendly alternative to Owens Corning. Mineral wool offers comparable or even superior sound absorption properties, especially for lower frequencies due to its higher density compared to standard fiberglass batt insulation. It’s also inherently fire-resistant. It’s easier to cut and handle than fiberglass for many DIYers.
- Cons: Still requires protective gear (gloves, mask, eye protection) during handling due to fine particles that can irritate skin and lungs.
When choosing, always opt for rigid or semi-rigid insulation boards rather than fluffy batt insulation, as the latter lacks the density and structural integrity required for effective, lasting panels. The greater the density (within a practical range for acoustic purposes), the better the sound absorption or Noise Reduction Coefficient (NRC).
Safety Note: Always wear gloves, a respirator or dust mask, and eye protection when handling any type of insulation material to prevent skin irritation and inhalation of fibers.
Step 3: Select the Perfect Fabric Cover for Your Panels
The fabric covering serves a dual purpose: it contains the insulation material and dictates the aesthetic appeal of your panels. Crucially, the fabric must be acoustically transparent, allowing sound waves to pass through to the absorbent core without reflecting them.
The “Breath Test” for Acoustic Transparency
A simple yet effective test: hold the fabric up to your face and try to breathe through it. If you can breathe through it with minimal resistance, it’s likely acoustically transparent enough. If you feel significant resistance, the fabric is too dense and will reflect sound, hindering your panels’ performance.
Recommended Fabric Types:
- Guilford of Maine Fabric: This is a premium choice, often used in professional acoustic products.
- Pros: Specifically designed for acoustic applications, ensuring excellent sound transparency. Available in a vast array of colors and textures, offers superior durability, and often comes with fire-retardant finishes.
- Cons: Can be significantly more expensive than other options.
- Burlap: A popular budget-friendly option for DIYers.
- Pros: Very acoustically transparent due to its loose weave, comes in natural earth tones, and is inexpensive.
- Cons: Can have a rough texture, may shed fibers initially, and its rustic look might not suit all decors.
- Linen or Thin Cotton Blends:
- Pros: Many lightweight linen or cotton fabrics with an open weave can be acoustically transparent. They offer a softer feel and a wider range of patterns and colors than burlap.
- Cons: Always perform the breath test, as not all linen or cotton fabrics will work. Avoid heavy, tightly woven upholstery fabrics.
- Speaker Grille Cloth:
- Pros: Specifically designed to be acoustically transparent, available in various colors.
- Cons: Can be more expensive than general fabrics, and color options might be limited.
Beyond acoustic properties, consider the durability of the fabric, how easily it stains, and, if fire safety is a concern, look for fire-rated options. Choose a color and texture that complements your room’s existing decor to integrate your panels seamlessly.
Essential Tools and Materials Checklist
For building two 2’x4′ DIY acoustic panels, gather the following materials and tools. Adjust quantities based on the number of panels you intend to make:
Tools:
- Saw: A miter saw or circular saw for precise wood cuts.
- Drill/Driver: For pre-drilling pilot holes and driving screws.
- Cross-head Screwdriver Bit: To match your wood screws.
- Small Drill Bit: For pilot holes (slightly smaller than your screw shank).
- Serrated Knife or Utility Knife: Essential for precisely cutting insulation material. A long blade works best.
- Staple Gun: Manual or electric, for attaching fabric to the frame.
- Staples: Appropriate size for your staple gun (e.g., 3/8″ or 1/2″).
- Tape Measure: For accurate measurements.
- Pencil or Marker: For marking cuts.
- Speed Square or Combination Square: For ensuring square cuts and frame assembly.
- Safety Gear: Gloves, dust mask/respirator, and safety glasses are crucial, especially when handling insulation.
Materials (for two 2’x4′ panels):
- Wooden Boards: Eight 4’x4”x1” wooden boards (commonly pine or furring strips).
- *Note:* This will yield enough wood to create two frames, each requiring two 4’ long pieces and two 2’ long pieces. The 4” width provides a good surface for stapling fabric.
- Sound Absorbing Material: Two 2’x4’x2” (or 4”) rigid insulation boards (e.g., Owens Corning 703/705 or Rockwool/Roxul).
- Fabric: Approximately 2-3 yards of acoustically transparent fabric (e.g., Guilford of Maine, burlap, or breathable linen).
- Wood Screws: Forty 1-5/8” #6 wood screws (or similar size appropriate for 1″ thick wood).
- Wood Glue: For reinforcing frame joints.
- Spray Adhesive (Optional): For securing insulation within the frame or excess fabric on the back.
Remember to multiply the material quantities by the total number of DIY acoustic panels you plan to construct.
Step-by-Step Construction Guide
Step 5: Precisely Cut the Wood for Your Frames
Accuracy here is key for sturdy, square panels. Take your eight 4’x4″x1″ wooden boards. For each panel frame, you will need two 4-foot pieces and two 2-foot pieces.
- Cut four boards in half: This will give you eight 2-foot pieces.
- You should now have four 4-foot pieces and eight 2-foot pieces.
Measure twice, cut once! If you’re not comfortable with cutting wood, many local hardware stores offer cutting services, often for free or a small fee, which can ensure perfectly straight cuts.
Step 6: Assemble the Outer Frames of Your Panels
RELATED: DIY Bedroom Home Recording Studio Design Without Breaking The Bank
Now it’s time to form the basic rectangular frame for your panels. For each panel:
- Lay out the pieces: Take two of your 4-foot pieces and two of your 2-foot pieces. Arrange them on a flat, level surface to form a rectangle.
- Inside vs. Outside: It’s crucial to place the 2-foot pieces *inside* the 4-foot pieces. This ensures the overall length of your panel remains exactly 4 feet, rather than extending to 4 feet, 2 inches (due to the thickness of the side pieces). The 4-foot pieces will overlap the ends of the 2-foot pieces.
- Apply Wood Glue: Before screwing, apply a generous bead of wood glue to the ends of the 2-foot pieces where they will meet the 4-foot pieces. This dramatically increases the strength and rigidity of the joint.
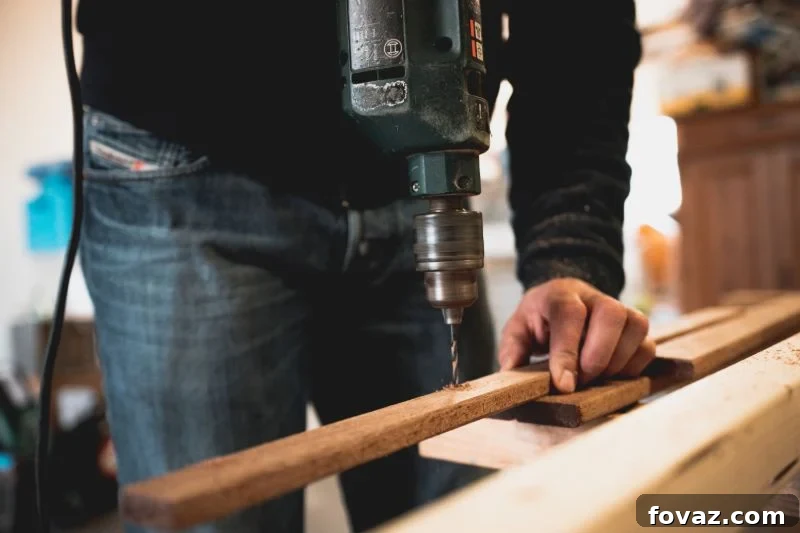
- Drill Pilot Holes: Using your small drill bit, drill two pilot holes at each corner joint (a total of four holes per 4-foot piece end). These holes should be centered horizontally on the 4-inch wide board and roughly half an inch from the top and bottom edges. Pilot holes prevent the wood from splitting when driving screws.
- Drive Screws: Using your drill with the cross-head screwdriver bit, carefully drive the 1-5/8″ wood screws into the pilot holes. Ensure the frame remains square as you tighten the screws. A speed square can help verify your corners are at perfect 90-degree angles.
Repeat this process for your second panel frame.
Step 7: Reinforce the Frames and Create an Insulation Shelf
This step adds structural integrity and provides a stable seating surface for your sound-absorbing material, preventing it from sagging over time. For each frame:
- Add a Middle Brace: Take one of the remaining 2-foot long pieces of wood (you should have four remaining after cutting). Place this piece in the middle of the frame, spanning the two longer 4-foot sides.
- Position the Brace for Insulation: This brace will serve as a shelf. The insulation will sit on this shelf. Position the brace so that it creates a slight recess for the insulation. If you’re using 2-inch thick insulation, the front edge of this brace should sit approximately 2 inches back from what will be the front edge of the panel frame. This allows the insulation to be flush with the front of the frame or slightly recessed. For 4-inch insulation, you might place the brace flush with the back, or create an air gap behind the insulation for slightly better low-frequency absorption.
- Secure the Brace: Apply wood glue to the ends of the brace where it meets the frame. Drill two pilot holes through the 4-foot frame piece into each end of the brace, and then drive in your wood screws.
- (Optional) Add Corner Pieces: For extra rigidity and a professional finish, you can cut small 45-degree triangles from scrap wood and place them into the inside corners of the frame. Level these with the middle brace you just installed. Apply wood glue and use smaller screws or nails to secure them. These corner pieces can help maintain the frame’s squareness over time.
Step 8: Trim and Install the Insulation as Precisely as Possible
This is where the magic of sound absorption comes in. Precision here ensures maximum effectiveness and a neat final product.
- Measure Carefully: Measure the exact inside dimensions of your finished frame where the insulation will sit. Even if your frame is nominally 2’x4′, minor variations can occur.
- Cut the Insulation: Place your sound-absorbing material (Owens Corning 703/705 or Rockwool) on a flat, protected surface. Using your serrated knife or a sharp utility knife and a straight edge, carefully trim the insulation to fit as tightly as possible within the frame. Aim for a snug fit – you want to avoid any gaps around the edges where sound could bypass the absorbent material.
- Tip for Cutting: For rigid insulation, a fresh, long utility blade or a serrated knife works best. Make several shallow passes rather than trying to cut through in one go, especially for thicker material. A large straight edge (like a piece of plywood or another board) will help keep your cuts perfectly straight.
- Install the Insulation: Carefully place the trimmed insulation into the frame, resting it on the middle brace you installed. It should fit snugly without buckling.
- Apply Adhesive (Optional but Recommended): For an even stronger connection and to prevent any future shifting or sagging, you can apply a bead of construction adhesive or spray adhesive to the edges of the frame before inserting the insulation. This creates a secure bond between the insulation and the wood frame.
Remember your safety gear! Insulation fibers can be irritating.
Step 9: Expertly Wrap Your Panels in Fabric
This step brings your panels to life aesthetically and keeps the insulation securely contained. A taut, wrinkle-free wrap is the goal.
- Lay Out Fabric: On a clean floor or large table, spread out your chosen acoustically transparent fabric. Ensure it’s smooth and wrinkle-free.
- Position the Panel: Carefully place your assembled frame (with insulation inserted, face down) onto the center of the fabric. Leave ample excess fabric on all sides – typically about 6 inches is ideal for easy wrapping and stapling. Trim the fabric to this size if necessary.
- Start Stapling (First Side): Pull one long side of the fabric taut over the back of the frame. Begin stapling from the middle of this side, working your way outwards towards the corners. Place staples approximately every 3 inches. Ensure the fabric is pulled straight and not at an angle.
- Staple Opposite Side: Now, pull the fabric from the *opposite* long side even tighter across the frame. Again, start stapling from the middle and work your way outwards, ensuring consistent tension. This tension is crucial for a smooth, flat front.
- Staple Remaining Sides: Repeat the process for the two shorter sides, pulling the fabric taut and stapling from the middle outwards.
- Neat Corners: This is often the trickiest part. Carefully fold the corners of the fabric as you would wrap a present, aiming for crisp, clean “hospital corners.” Pull the folded fabric tightly against the frame and secure it with several staples. You can trim off any excessive bulk from the corners before stapling for a cleaner look.
- Final Touches: Inspect the front of your panel for any wrinkles or unevenness. If needed, you can carefully remove staples, re-tension, and re-staple. Any excess fabric on the back can either be trimmed flush or neatly folded and secured with additional staples or spray adhesive.
The goal is a professional, smooth finish on the front of the panel with the fabric pulled uniformly tight.
Step 10: Mount Your DIY Acoustic Panels and Revel in Superior Sound
With your panels constructed, it’s time for the final, satisfying step: mounting them in your chosen location. Proper mounting ensures both safety and acoustic effectiveness.
- Choose Your Mounting Method: Several reliable methods exist, depending on the weight of your panels and your wall type:
- Picture Wire/Hooks: For lighter panels, you can install D-rings or eye screws into the top back of the frame and use picture wire to hang them on wall hooks.
- Z-Clips or French Cleats: These are excellent, secure options, especially for heavier panels. Z-clips provide a flush mount, while French cleats offer strong support and easy removal.
- Standoffs: For a more modern, floating look, you can use specialized standoff hardware that creates a gap between the panel and the wall. This can sometimes offer a slight acoustic benefit by increasing the effective depth of the panel.
- Wall Anchors/Toggle Bolts: If you cannot mount directly into wall studs, use appropriate heavy-duty drywall anchors or toggle bolts to ensure the panels are securely fastened. Always choose anchors rated for the weight of your panels.
- Locate Studs or Use Anchors: Before drilling, use a stud finder to locate wall studs for the strongest possible mount. If studs aren’t available at your desired placement, mark your drilling spots and install appropriate wall anchors.
- Level and Install: Use a level to ensure your panels are hung perfectly straight. Drill pilot holes for your chosen mounting hardware, then carefully install the panels.
- Final Placement Check: After mounting, do a listening test. You might find that slightly adjusting the placement of a panel by a few inches or even rotating it can yield subtle but noticeable acoustic improvements. Don’t be afraid to experiment with your panel arrangement over time.
Once your DIY acoustic panels are securely in place, grab your favorite beverage, crank up your home theater system, or listen to a track in your studio. You’ll immediately notice the difference: dialogue will be clearer, music will have more detail, and the overall sound experience will be significantly more immersive and enjoyable.
Beyond the Build: Maximizing Your Acoustic Treatment
While DIY acoustic panels are incredibly effective, they are just one component of comprehensive room treatment. For truly optimized acoustics, especially in critical listening environments like recording studios, you might also consider:
- Bass Traps: These are specialized, thicker acoustic absorbers designed to tame low-frequency build-up, often placed in corners.
- Diffusers: Unlike absorbers, diffusers scatter sound waves rather than absorbing them, helping to maintain a lively acoustic environment while preventing harsh echoes. They are typically used on rear walls or behind the listening position.
Start with absorption at your first reflection points, and then expand your treatment as your needs evolve. The goal is to create a balanced acoustic environment that sounds natural and pleasant, free from distracting reflections.
Aside from DIY acoustic panels, there are other ways to really make the most of your home theater system. That Home Theater Dude shows you how:
DIY acoustic panels are an absolute must-have if you’re serious about getting the most out of your home theater system, recording studio, or any audio-sensitive space. They’re not only incredibly cost-effective but also straightforward to build and deliver professional-level acoustic improvement. The satisfaction of crafting something that so profoundly enhances your audio experience is truly unparalleled.
Do you have questions or suggestions about building your own DIY acoustic panels? Share your thoughts with us in the comments section below!
UP NEXT:
- DIY Home Studio Setup For Creating Youtube Videos
- Make A DIY Vocal Booth and How To Start Your Own Podcast
- DIY Pipe Leg Table | Workbench Plans And Rustic Furniture Tutorial
Calling all crafting DIYhards, DIY Projects needs YOU! Click here if you want to contribute for us.
Don’t forget to stay connected with us on Facebook, Twitter,and Instagram!