
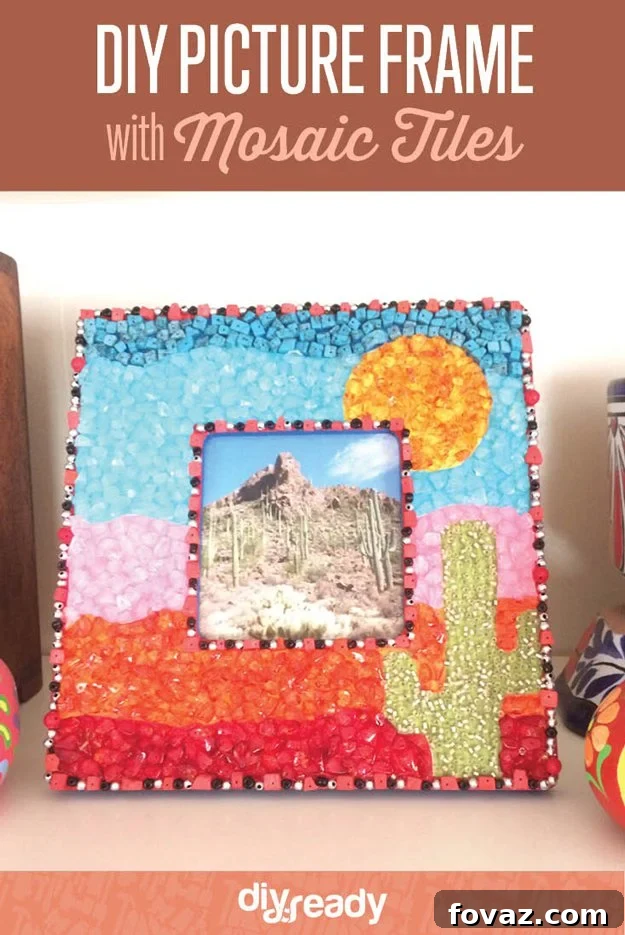
Transform your cherished photographs into captivating works of art with a stunning DIY mosaic picture frame. This engaging craft project allows you to infuse your personal style into home decor, creating a truly unique display for your memories. Whether you’re looking to revitalize an old frame or craft a thoughtful, personalized gift for family and friends, this guide will walk you through the process of making a beautiful, bead-embellished or mosaic-tiled frame.
Craft Your Own Masterpiece: DIY Mosaic Picture Frames with Beads or Tiles
Are you constantly seeking innovative ways to display your most treasured photographs? Photo frames are more than just functional holders; they are an integral part of home decor, reflecting personality and style. While store-bought frames offer convenience, nothing compares to the originality and sentimental value of a handmade frame. This DIY project offers a fantastic opportunity to create a custom picture frame, adorned with mosaic elements or beads, that truly complements the unique stories held within your photos. Get ready to embark on a fun, creative journey that results in a beautiful, bespoke piece of art.
Why Choose a DIY Mosaic Photo Frame?
The appeal of a DIY mosaic picture frame extends far beyond simple aesthetics. Opting to craft your own offers a myriad of benefits:
- Unmatched Personalization: Design a frame that perfectly matches your home’s aesthetic or the sentiment of the photo it will hold. From vibrant color schemes to intricate patterns, your creativity is the only limit.
- Cost-Effective Decor: Repurpose old frames or purchase inexpensive blank ones, saving money compared to buying high-end decorative frames.
- Therapeutic Crafting Experience: Engaging in a hands-on project like mosaic art can be incredibly relaxing and rewarding, offering a wonderful creative outlet.
- Unique Gift Idea: A handmade mosaic frame filled with a special photo makes an incredibly thoughtful and personal gift for birthdays, anniversaries, or housewarmings.
- Sustainable Upcycling: Give new life to forgotten frames or use salvaged materials like broken pottery shards, sea glass, or repurposed beads, contributing to a more sustainable lifestyle.
Essential Supplies for Your Mosaic Picture Frame Project
Before diving into the creative process, gather all your materials. Having everything ready will ensure a smooth and enjoyable crafting experience.
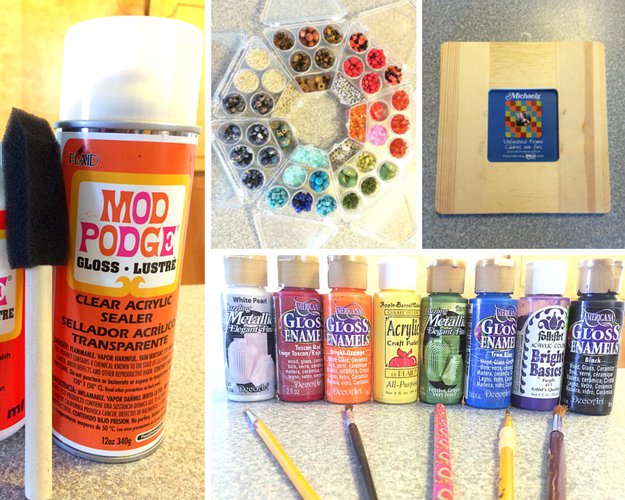
- A Blank Frame:
The foundation of your project! This can be any size or style. Consider repurposing an old, neglected frame from your attic, a charming find from a thrift shop, or even an unfinished wood frame from a craft store. Wood frames are excellent for beginners as they are easy to paint and glue onto. Ensure the surface is clean and smooth before you begin.
- Pencil, Paintbrushes, and Paints:
You’ll need a pencil for sketching your design. A selection of paintbrushes (various sizes for detail and larger areas) and acrylic paints will be essential for creating your background and adding depth to your design. Choose colors that complement your mosaic elements and overall vision.
- Your Go-To Craft Glue:
A strong adhesive is crucial for securing your mosaic elements. Craft glue designed for multi-surface use, such as Mod Podge (which also serves as a sealant), E6000, or a specific mosaic adhesive, will work well. Have an applicator on hand, like a sponge brush or a small stick, especially for glues that aren’t self-applicating.
- Mosaic Elements: Beads, Tiles, or Found Objects:
This is where your frame truly comes to life! Gather a collection of beads in various shapes, colors, and sizes. Don’t limit yourself – small ceramic tiles, glass tesserae, seashells, buttons, small pebbles, or even broken pieces of colorful dinnerware can be used. Think about the texture and visual interest you want to achieve. Experimentation is encouraged!
Step-by-Step Guide: Crafting Your Mosaic Picture Frame
Step 1: Conceptualizing and Sketching Your Design
Every great piece of art begins with a vision. Before you pick up your glue, take some time to conceptualize your design. What theme or pattern do you envision for your frame? Using your pencil, lightly sketch your ideas onto the frame. This preliminary drawing serves as your guide and can be easily erased or adjusted.
For example, you might opt for a natural motif like a saguaro cactus against a setting sun, or a geometric pattern with distinct borders. Consider adding inner and outer borders to frame your design beautifully. The possibilities are truly endless, limited only by your imagination!
When sketching, keep the size of your chosen mosaic elements in mind. If you plan to use larger beads or tiles, intricate, delicate details might get lost once the elements are applied. Simpler, bolder designs often work best with larger pieces, while smaller beads can accommodate more fine-tuned patterns. Starting with a slightly simpler sketch allows you the flexibility to add more intricate details with smaller elements later, should you choose to.
Step 2: Preparing Your Frame and Painting the Background
With your design sketched, it’s time to prepare the frame and lay down the foundational colors. This step adds depth and ensures that no plain frame material peeks through your mosaic elements.
You have a couple of artistic options here:
- Option 1 (Harmonious Blend): Paint the background areas in colors that are very similar to the mosaic elements you plan to use in those sections. This technique creates a rich, layered effect, allowing the background color to subtly enhance the beads or tiles, adding a beautiful sense of depth that wouldn’t be possible by simply gluing elements onto an unpainted surface. For instance, if you plan to use green beads for a cactus, paint the background green.
- Option 2 (Striking Contrast): Alternatively, you could paint the background in colors that deliberately contrast with your mosaic elements. This can create a truly dynamic and visually intriguing effect, making your beads or tiles pop even more. Imagine a vibrant blue background beneath warm orange beads, or a deep purple contrasting with bright yellow elements. This approach can be wonderfully experimental and yield unexpected, cool results.
Experimentation is key! You might even try a combination, perhaps covering one section with clear or translucent beads to allow the painted background to show through, as was done with the silvery seed beads over the green cactus in the original example. Allow each layer of paint to dry completely before proceeding to the next step.
Step 3: The Art of Applying Your Mosaic Elements
Now for the most exciting part: bringing your design to life with beads and mosaic pieces! This step requires patience and precision.
Begin by applying your craft glue to small sections of your frame. It’s crucial to work in manageable sections to prevent the glue from drying out before you can place your elements. For thin lines or intricate details, a fine paintbrush is excellent for applying a precise amount of glue like Mod Podge. For larger areas, a sponge applicator or a wider brush will be more efficient.
Once you’ve applied glue to a section, carefully place your beads, tiles, or other mosaic elements according to your sketched design. Take your time to arrange them neatly, pressing them gently into the glue to ensure good adhesion. If you’re working with a border, line it first, then move on to filling in larger areas. Continue this process, section by section, until your entire design is covered. Enjoy watching your creation take shape as each small piece contributes to the overall mosaic.
Step 4: Sealing Your Creation for Longevity
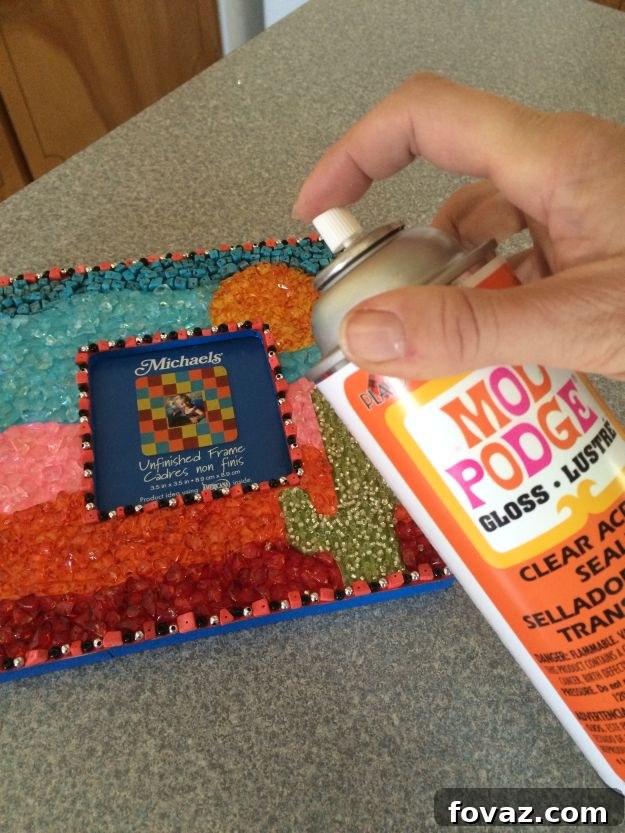
After all your mosaic elements are securely in place and the glue has dried thoroughly (refer to your glue’s instructions for drying times), it’s time for the final, crucial step: sealing your frame. Applying a clear acrylic sealant, such as Mod Podge clear acrylic sealant, creates a protective layer over your finished artwork.
While a sealant may not significantly alter the appearance of your finished product, it plays a vital role in its durability. This extra layer of protection helps to firmly secure all your beads and mosaic pieces to the frame, preventing them from dislodging over time. It also offers a degree of resistance against dust and moisture, making your frame easier to clean and ensuring it remains a beautiful display piece for years to come.
Apply the sealant evenly with a soft brush, ensuring all areas are covered. Allow it to dry completely according to the product’s instructions. Once dry, your handmade mosaic picture frame is ready to showcase your most cherished memories!
Tips for a Perfect Mosaic Frame
- Patience is Key: Don’t rush the process. Allow glue and paint to dry completely between steps.
- Test Your Glue: If using a new type of glue, test it on a scrap piece of your frame material and a few beads to ensure good adhesion and no adverse reactions.
- Ventilation: Work in a well-ventilated area, especially when using paints and sealants.
- Safety First: If you’re using broken pieces of glass or ceramics, handle them with care and consider wearing gloves to prevent cuts.
- Embrace Imperfection: Handcrafted items have character. Don’t strive for machine-like perfection; embrace the unique charm of your homemade frame.
- Clean as You Go: Keep a damp cloth handy to wipe away excess glue or paint before it dries.
Unleash More Creativity: Customization Ideas
This mosaic technique can be adapted to endless creative possibilities:
- Beyond Beads: Experiment with small sea glass pieces, tiny polished stones, coffee beans, pasta, buttons, or even small metal gears for a steampunk aesthetic.
- Mixed Media: Combine mosaic elements with painting, decoupage, or even small sculpted details for a truly mixed-media piece.
- Themed Frames: Create frames with specific themes like beach scenes (using shells and sand), garden motifs (with small dried flowers preserved under resin), or abstract designs.
- Color Schemes: Play with monochromatic schemes for subtle elegance or bold, contrasting colors for a statement piece.
Caring for Your Handmade Mosaic Frame
To ensure your mosaic frame remains beautiful, dust it regularly with a soft, dry cloth. If it requires deeper cleaning, gently wipe it with a slightly damp cloth, being careful not to soak the mosaic elements or the frame itself. Avoid harsh chemicals or abrasive cleaners, which can damage the sealant and the mosaic pieces.
Hang it up, display it proudly, or present it to a friend or loved one, so everyone can admire and enjoy your handmade memories!
We hope you thoroughly enjoyed crafting this mosaic-tiled frame. We’d love to hear about your experience! Share your thoughts on making your own photo frames in the comments section below. Do you have any other brilliant craft ideas you’re eager to share? Please let us know; we’re always excited to try new DIY projects, whether they’re craft projects, home decor transformations, clever upcycling ideas, delicious recipes, or helpful tutorials. Our mission is to inspire creativity and empower everyone to discover the joy of making things themselves. Join our thriving community of DIY enthusiasts, where your next project is just a click away! Stay connected with us for daily inspiration and amazing project ideas on Facebook, Twitter, Pinterest, and Instagram!
Explore More Creative DIY Projects
Looking for more exciting DIY ideas to spark your creativity? Check out some of our other popular posts:
DIY Polaroid Frame Project: Instant Memories, Custom Style
More DIY Photo Frames to Keep Memories Near and Dear
12 Easy DIY String Art Ideas to Enhance Your Home Decor
For a photography project that delves into the art of visual storytelling, visit Rohan Potdar.